Introduction

| At a Glance | |
|---|---|
| Product | ZyXEL IPC-4605N [Website] |
| Summary | Cloud-enabled day/night IP cam with local SD recording |
| Pros | • Packed with features • Good night vision • Nice picture quality |
| Cons | • Cloud settings will overwrite local settings • Interface settings aren’t very self-explanatory, keep a manual handy • Design isn’t very inconspicuous |
ZyXEL had announced its entry in to the IP camera market at CES 2012 with two offerings, the IPC-3605N and IPC-4605N that I am reviewing today. Both are 802.11n Wi-Fi cameras capable of 720p/H.264HD video and night vision of up to 10m. The IPC-4605N adds PTZ (Pan-Tilt-Zoom) functions to its repertoire.
When Tim mentioned he was going to be sending one of the new ZyXEL IP cameras my way for review, I was pretty excited. The pre-release sneak peeks of the camera looked more like something you would see in a science fiction movie than your typical IP camera and I couldn’t wait to put it through its paces.
Setup
Like every IP camera I’ve tested so far, setup of the IPC-4605N was very easy. ZyXEL broke it down into two steps in its Quick Start Guide. The first step conisted of connecting the Ethernet cable and the power adapter. The second step was inserting the setup disk and following the prompts. The Quick Start Guide notes that even if you are planning on using the wireless, you need to connect by Ethernet to complete the setup.
So I pulled the rest of the materials from the box and got to work. In addition to the Quick Start Guide, setup disk, camera and 12V/2A power adapter, there was an Ethernet cable, ZyXEL USB wireless adapter, mounting plate, and mounting screws. Yes, ZyXEL includes a USB wireless adapter in the box, which I used for most of my testing of the camera. I also used the camera with an Ethernet connection and both connection methods performed equally well.
I followed the Quick Start Guide, inserting the setup disk once I’d connected Ethernet and power. There is one interesting thing I should note here. Even though the camera is plugged into Ethernet, it won’t pick up an IP address via DHCP until you confirm that option in setup. If you’re a “toss the setup disk and just go straight to the web interface” type of person like I sometimes am, this could throw you for a loop.
Setup will bring you to setting up an account with iSecurity+, which is ZyXEL’s cloud solution for the camera. Setup of the iSecurity+ account went seamlessly and I was ready to go.
Inside
Interestingly, I could not find the FCC ID anywhere on the camera, not to say it wasn’t there, I just couldn’t find it. So I pulled out the screwdriver and took it apart. On the first level I found the Grain Media GM8125EL-QC SoC, two MXIC MX25L12845E 16 MB flash chips (32 MB total) and a MIRA P3R1GE4EGF 8 MB DRAM chip. That was about it for the first level.

Figure 1: ZyXEL IPC-4605N first level board
I then went to the second level. Here I found a backup battery, the PTZ motor and its connector, the IR connector and some unused connectors for ZOOM and IRIS. I debated disassembling it further from here, but decided not to push my luck with possible calibration of the PTZ motor and with how delicate the pin connectors seemed. The deep inner workings of the camera remained a mystery to me, with only a glimpse provided through the center hole of the circuit board.

Figure 2: ZyXEL IPC-4605N second level board
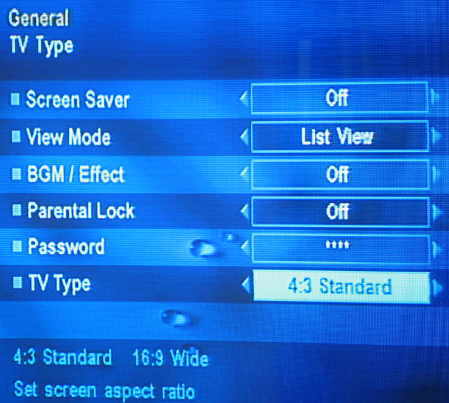
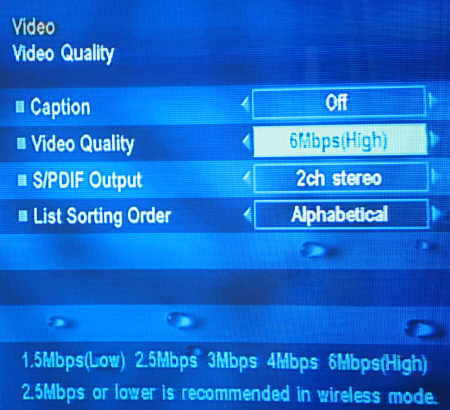
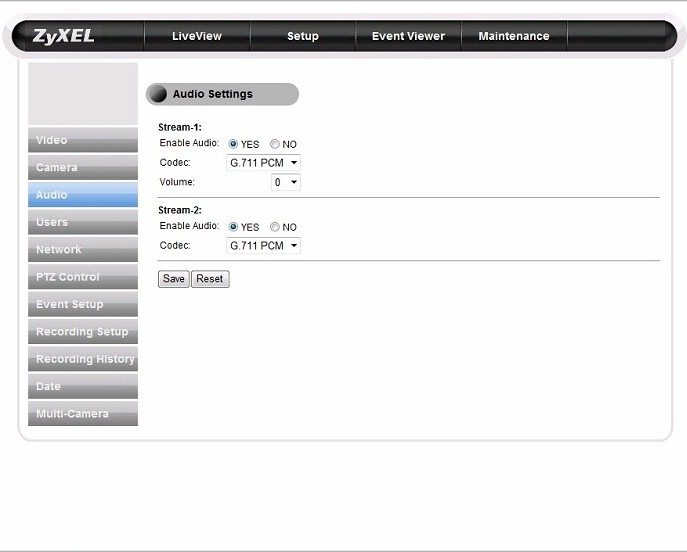
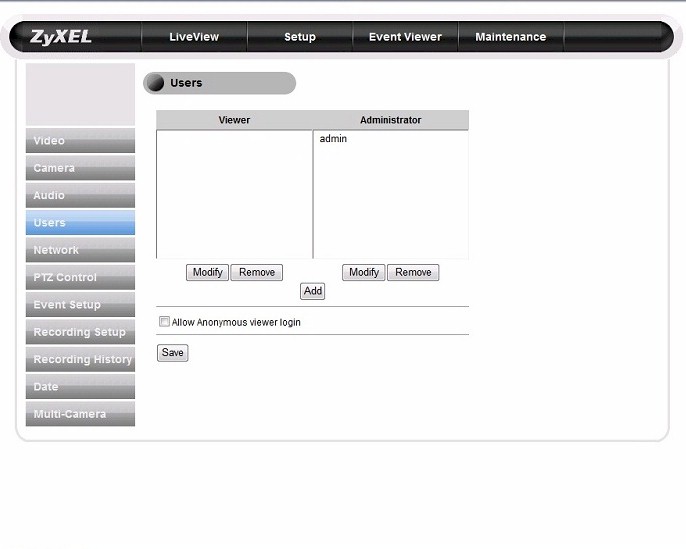
Features
The IPC-4605N has two admin interfaces, local and cloud-based. The local interface has a wealth of settings-—enough that I thought I had broken the camera a few times! I managed to mess with the settings enough in some cases to mess up and even kill the video.
I’ve included all of the settings shots in the gallery later on, but here is a quick summary of all you can set in the local interface:
• Various video quality settings of both video streams
• Lots of camera tweaks such as white balance, backlight compensation, exposure control, low light behavior
• LED indicator on/off
• IR Light control Auto/On/Off/Scheduled
• Flip mode for different mounting options
• Audio settings for the two video streams
• User accounts
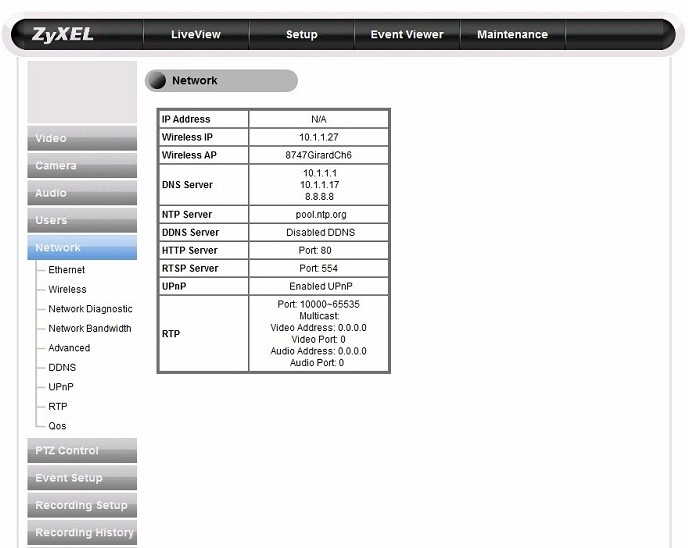
• Various network settings
• PTZ presets and Patrol parameters
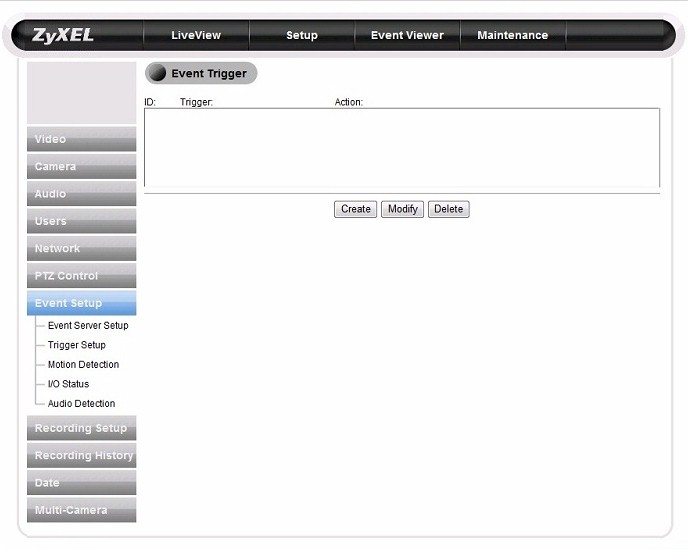
• Various Event Server Setup
• Trigger Setup by Schedule, Motion Detection, Audio Detection, or I/O Ports
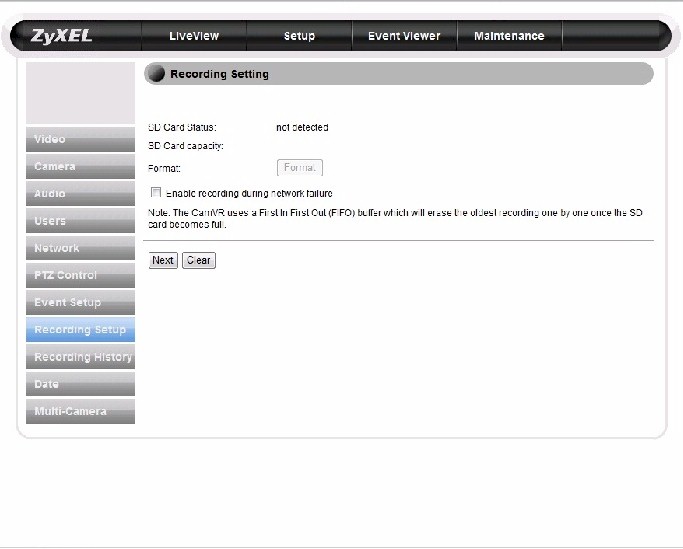
• SD card recording
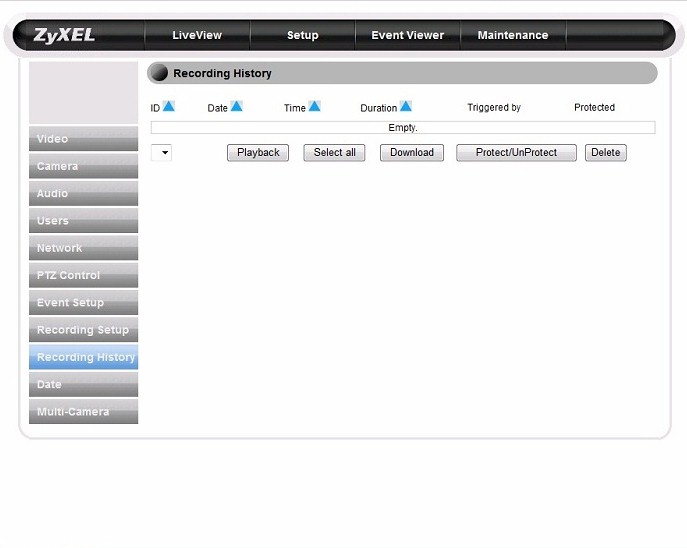
• Recording History
• Date settings
• Multi-camera configuration
Completing the steps in the Quick Start Guide bring you to iSecurity+, which is the cloud interface for the camera. iSecurity+ is essentially a skinned version of seedonk‘s video monitoring system.You can even use your iSecurity+ login credentials to log into seedonk’s site.
iSecurity+ provides a list of all cameras you’ve registered and gives you a live view of your camera. This initial picture below is just of my backyard before I moved the camera to its proper testing location.

Figure 3: iSecurity+ Live Video View
In addition to moving the camera via PTZ functions, the only other things that can be modified via iSecurity+ are the video settings for the two camera streams, the rotation (if you change the camera mounting position), and turning the audio and infrared lights on and off. No snapshots or live video can be taken from the browser window, even stored locally, which I found strange.
iSecurity+ is also available via Android and iOS apps (iPhone, not iPad) with additional functionality when compared to the iSecurity+ browser interface, including live viewing, event viewing, snapshot and video recording. Recording of video and snapshots via the Android and iOS apps gets stored locally vs. on the cloud, however. I did find the event viewing portion of the mobile app very useful for just doing a quick check of motion detection every now and then. Overall it was very easy to look at motion detection events from anywhere with this camera.

Figure 4: iSecurity+ Android/iOS app
If you don’t have your own onsite recording solution, ZyXEL offers online storage with iSecurity+ Snapshots for $5.99 a month. The comparison chart below shows you everything you get, with the paid version adding Motion Detection and Event Capture, Mobile Notification, and 14 days of online storage over the free version.

Figure 5: ZyXEL IPC-4605N Cloud Features comparison
I tested the Motion Detection portion of the paid version quite extensively and found it pretty slick. Any motion from the camera sends an email with a link to the event captured. You click the link, login and see the motion. Simple.
$6 a month for 14 days of storage is fairly reasonable and a better deal than Dropcam‘s $10 for 7 days of recording. So is the free 30 day trial of iSecurity+ Snapshots that comes with the camera purchase vs. no trial for Dropcam’s recording service.
I should note that I joined the 30 day free trial using my phone. But my Events tab never showed up in the ZyXEL skin of iSecurity+; I had to log into seedonk.com and use its interface.
There is no recording interface to speak of on iSecurity+. Videos are updated via triggers such as motion detection, audio detection, schedules and digital inputs. The camera has an SD card backup feature that will record video locally should the camera lose connection to the network. But there is no option to record to a local networked share. You would have to use a third-party application, once support for the camera is added.

Figure 6: iSecurity+ Events tab
Contrast that to Dropcam’s recording interface from Tim’s SmallCloudBuilder Dropcam review a few weeks ago. Overall I can’t say one or the other looks better, they’re just different.

Figure 7: Dropcam motion events
In Use
When I logged into ZyXEL’s iSecurity+, I noticed it was only HTTP. Thinking that wasn’t good for security when you have a live video stream, I fired up WireShark and Fiddler to do some analysis. During login it appears that a backend tunnel is indeed opened to seedonk.com, which was good, and my login stream appeared to be encrypted.
I then went and changed personal information, such as my phone number and password. I was a little alarmed to see that information was getting passed in clear text back to the Joomla server at seedonk.com by a simple HTTP post shown in Figure 8. I’ve raised this issue to ZyXEL and will update this when I receive a response. In the meantime, be aware of this security flaw.

Figure 8: iSecurity+ clear text HTTP post of password change
The interface at iSecurity+ is very simple, although it does allow you to use PTZ functions. 10x digital zoom is available with the camera’s local interface, but there is no "Z" available via iSecurity+. I noticed considerable delay using the site, with camera position adjustments somemtimes taking as long as 5 seconds. The adjustments themselves seemed to be instantaneous, but the delay would be in the picture catching up.
Like many IP cloud-enabled cameras, you can also manage and view the camera from both local and cloud interfaces. On the local interface, you can also modify the video quality settings just like in iSecurity+. But the iSecurity+ settings will take precedence over the local interface settings. If video quality settings are increased locally, they will simply be reset to iSecurity+ settings upon logging back in or the camera synching.
This could be pretty frustrating if you have a NAS Surveillance Station or Blue Iris video server onsite and are capturing higher resolution video locally as well as wanting the option to view it over the internet via iSecurity+. I attempted to set video to a high quality and was warned that my 25 Mbps down/5 Mbps up connection was too slow for the video quality (Figure 9). With two streams available from the camera, it would be nice if one could be for local video only to get around this. As it stands, the only way to use the higher resolution settings would be to unregister the camera from iSecurity+ by resetting back to defaults.

Figure 9: ZyXEL IPC-4605N bandwidth warning
The overwriting issue aside, the more I used the camera, the easier I found it to be. That’s not to say there weren’t bumps in the road, however. My first run through the local interface was without the manual and I did not find many of the settings intuitive at all. But after downloading the manual, things all made sense and were pretty easy.
A good example of this is the motion detection screen in Figure 10. You can see it simply says “Select Region” and gives you the option of 3 regions. My first time through I simply said, “I don’t know, I guess I’ll pick Region 1?” Consulting the manual provided clearer instructions on region selection, i.e. click-and-dragging a box on the live view picture.

Figure 10: ZyXEL IPC-4605N Motion Detection Region example
There were many more examples like this throughout the interface. I found myself often wishing that there was just a short pop-up blurb, or even a sidebar like many routers have with online help. The manual is definitely your friend with the interface as it stands for now.
Video settings
Camera settings
Audio settings
Set different camera users
Network configuration options

Set Patrol mode setpoints, etc
Network configuration options
Set up motion detection, audio detecion, etc
Configure an SD card for backup in case of network failure
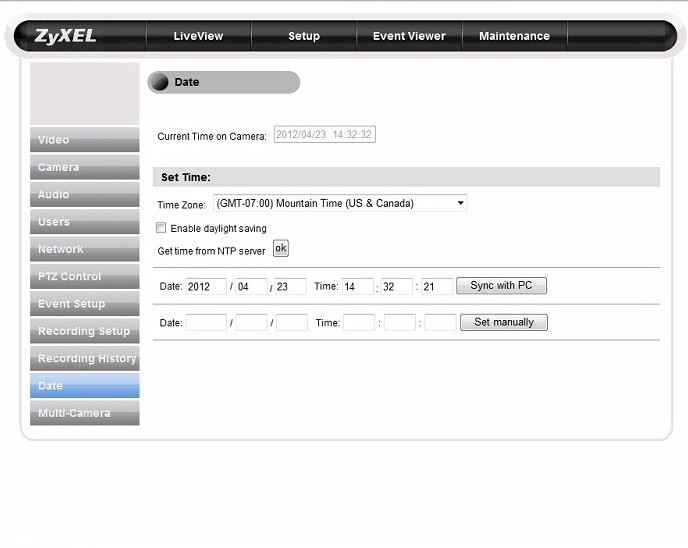
Set date and time configurations
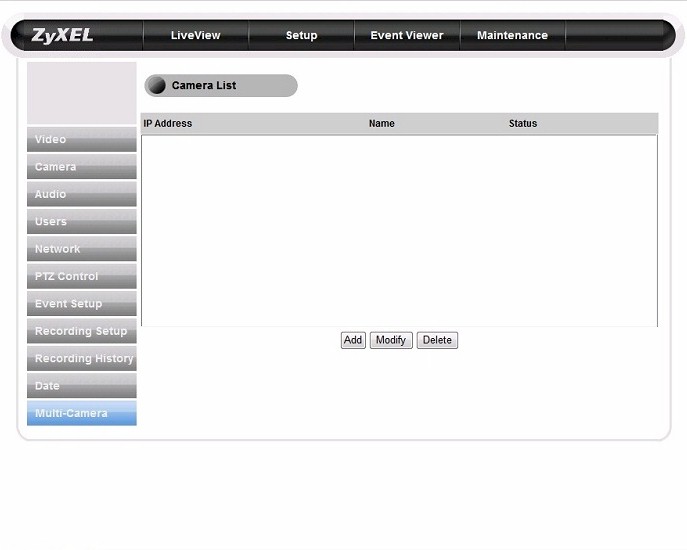
Add additional iSecurity+ cameras

Event history information

Shows current camera settings and allows firmware flashing
Image Quality
For the picture quality comparison, I used the same setup used in the D-Link DCS-942L review. This consists of a control daylight image in our junk room with a Nikon D5000 DSLR and a $84 Foscam FI8918W IP camera comparison. A vacuum is placed 15 feet from the camera with a sign attached indicating that 15 foot distance.
Figure 11 is the Nikon D5000 DSLR.

Figure 11: Control image taken with Nikon D5000 DSLR
Figure 12 is the ZyXEL IPC-4605N.

Figure 12: ZyXEL IPC-4605N daylight image
Figure 13 is the Foscam FI8918W.

Figure 13: Control image taken with Foscam FI8918W
When comparing all of these pictures, look beyond the vacuum. The DSLR image shows detail beyond the vacuum, obviously due to its flash. But notice the Foscam provides some visibility into the dark room behind the vacuum. That is not seen as much with the ZyXEL. Overall though, the clarity of the daylight picture with the ZyXEL is very good.
The night vision of the IPC-4605N was where the camera really shined, no doubt due largely to its 12 LEDs. Since the IPC-4605N’s 12 LEDs are said to be good for 10m, it should see well past the vacuum. As a refresher, let’s look at what the D-Link DCS- 942L looked like a few weeks ago.

Figure 14: D-Link DCS-942L night mode image from DCS-942L review
Now let’s look at the ZyXEL IPC-4605N. There is quite a bit more detail in the ZyXEL night vision picture, with definite visibility into the distant room. Objects are quite a bit sharper than the D-Link and the ZyXEL appears to also have a slightly wider viewing angle.

Figure 15: ZyXEL IPC-4605N night vision image
Finally, let’s look at the Foscam FI8918W. The Foscam has eleven IR LEDs to the ZyXEL IPC-4605N’s twelve.

Figure 16: Control night image taken with Foscam FI8918W
Night illumination between the ZyXEL and the Foscam are comparable. But the ZyXEL clearly has a much sharper image, due to its 720p HD resolution.
One thing I’ve done in other IP camera reviews is to load the camera into Blue Iris to see if the measured framerate is comparable to the advertised framerate. But because this camera is so new, it isn’t officially supported in most camera software yet. While poking around, I did see some mention that this camera may be a Compro camera. And, in fact, it is very similar to the Compro IP540.
I was able to load it as a Compro camera in one application and access all PTZ functions, but it was a no-go in Blue Iris. So officially, I can’t make any claims regarding its framerates with my standard testing methods.
Closing Thoughts
The ZyXEL IPC-4605N has good night vision, good picture quality and lots of customization features. Without a manual, some of the interface settings aren’t very intuitive and will leave you scratching your head or doing a lot of trial and error. With the manual, things start to make more sense.
The motion detection features of the camera with storage in the cloud work very well and make viewing motion detection events a snap. $5.99 a month for 14 days of storage seems very reasonable and is the nicest of the cloud-enabled cameras I’ve seen so far.
The main downside is the security hole that I referred to earlier, which ZyXEL or seedonk should take quick action to close.
So if you want a cloud-enabled camera with good motion detection and night vision for under $200, the ZyXEL IPC-4605N definitely may serve you well.