| At a glance | |
|---|---|
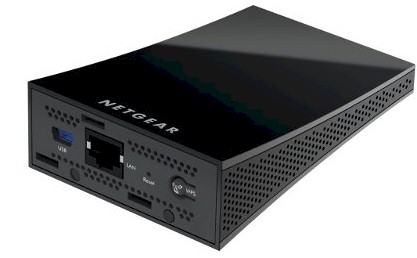
| Product | NETGEAR Universal N600 WiFi Adapter (WNCE3001) [Website] |
| Summary | USB-powered N600 class bridge |
| Pros | • Easy setup from any device |
| Cons | • USB powered |
Typical Price: $93 Buy From Amazon

| At a glance | |
|---|---|
| Product | Edimax N600 Universal Dual-Band Wi-Fi Entertainment Bridge (CV-7438nDM) [Website] |
| Summary | Oddly shaped dual-band N600 bridge with AirPlay support |
| Pros | • 10/100 & 10/100/1000 ports • Audio out jack for AirPlay support • Can be installed from wired or wireless devices • USB powered |
| Cons | • Uplink throughput falls off very quickly |
Typical Price: $0 Buy From Amazon
Introduction
Edimax has been bugging me to look at its CV-7438nDM N600 Universal Dual-Band Wi-Fi Entertainment Bridge. Since I didn’t have any other N600 bridges in the Charts, I decided to also call in NETGEAR’s WNCE3001 Universal N600 WiFi Adapter so that we would have something to compare against.
To kick things off, how about a comparison of key features?![]()
| Feature | Edimax CV-7438nDM | NETGEAR WNCE3001 |
|---|---|---|
| Ethernet | 10/100 (x1) 10/100/1000 (x1) |
10/100 (x1) |
| Power | USB (micro connector) | USB (mini connector) |
| WPS Button | Yes | Yes |
| Power Switch | Yes | No |
| Other | Airplay audio support | None |
N600 bridge comparison
The Edimax has a few features that the NETGEAR doesn’t, namely Airplay support via an audio out jack to connect powered speakers and two switched ports. It’s odd that one is 10/100 Mbps and the other Gigabit, but that’s what they are. The NETGEAR doesn’t do any tricks other than be a wireless bridge and it has only one 10/100 Mbps Ethernet port.
Neither device can function as an access point or wireless repeater / extender.
The Edimax’ control features are shown in the callout diagram below. There’s a lone status LED on the front of cone that communicates via color and blinking.

Edimax CV-7438nDM callouts
The NETGEAR takes a similar approach to communicating status via its lone LED.

NETGEAR WNCE3001 callouts
I have to comment on the odd format of both these products. The Edimax’ design leads you to believe that there is some special Wi-Fi signal gathering being done by its reflector-dish style front. But there are only two normal patch antennas behind it, which you’ll see when we look inside. At least, however, the design intuitively guides you to orient the antennas properly by pointing the "reflector dish" toward the router you are connecting to.
In contrast, the NETGEAR’s design was initially a head-scratcher, since its connectors are on the surface it would stand on. But my confusion was cleared once I realized that NETGEAR includes both a wall-mount sticky pad and desk-mount stand.

NETGEAR WNCE3001 installation advice
Inside
These two bridges are similar in design in that both use Realtek SoCs for their processors and radios. The table has the rundown of the key components. Not shown is the Realtek ALC5629 I2S/PCM Audio DAC that the Edimax uses to drive its audio-out jack for its AirPlay support.
| Edimax CV-7438nDM | NETGEAR WNCE3001 | |
|---|---|---|
| CPU | Realtek RTL8197D | Realtek RTL8196C |
| Switch / Ethernet | 10/100: in CPU Gigabit: Realtek RTL8211e |
In CPU |
| RAM | 64 MB | 16 MB |
| Flash | ? MB | ? MB |
| Radio | Realtek RTL8192DR | Realtek RTL8192DR |
Component summary
We’ve seen the RTL8197D processor in D-Link’s DIR-850L router and more recently in its DNR-202L Network Video Recorder. Edimax also uses the RTL8192DR dual-band radio in its EW-7238RPD repeater.
Here’s a shot of the Edimax’ board with its RF shields removed.

Edimax CV-7438nDM board
Remember that I mentioned its antenna positioning? Here’s a look at the inside with yellow arrows pointing to the two patch-style antennas. This picture has the device sitting as it would in normal use.

Edimax CV-7438nDM antenna detail
The WNCE3001’s board has its two dual-band antennas integrated into the board. This is why you want to stand it up and point its wide side toward the router you are connecting to.

NETGEAR WNCE3001 board
In Use
Compared to past bridges like Linksys’ now-discontinued WES610N, both of these bridges were very easy to set up. There are screen-by-screen setup walkthroughs for each product in the galleries below. But the gist is you set up by pointing a web browser at a URL printed right on each product (Edimax: edimaxcv.setup; NETGEAR: mywifiext.net). Just make sure your device is set to receive its IP address via DHCP or the URLs won’t work.
The Edimax’ setup wizard start screen is shown below, which can be reached by either wired or wireless connection. I thought the latter option was odd, until I realized that many households now don’t have computers with Ethernet ports, but still have other devices that might require a wireless bridge (Blu-ray players, game consoles, etc.).

Edimax Setup Wizard start
If you are setting up via wireless, you first connect to the bridge’s SSID (EdimaxCV.setup), then hit the URL. I actually saw two setup SSIDs—EdimaxCV.setup 98 and EdimaxCV.setup 99—one for each band.
After you get set up, you can access the bridge’s admin page using the same URL used to set up, but only from a device directly connected to the bridge. From anywhere else, you’ll need to use the bridge’s assigned IP, which you can get from your router’s DHCP client list.
Logging in brings you to the Home page shown below. Note that you get signal strength of the connection, but link rate isn’t found in any of the screens.

Edimax Setup Wizard start
I’ve put screenshots of the other setup and admin screens for the Edimax in the gallery below.
Landing page for the setup wizard
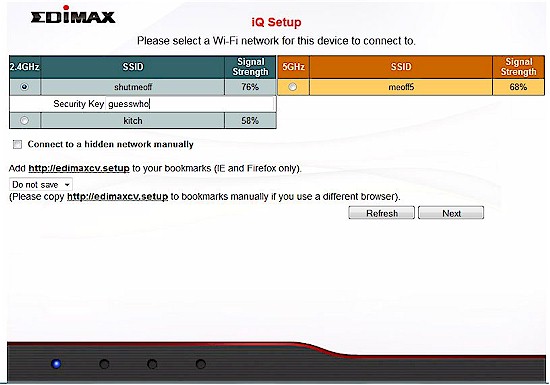
Site survey result. You conveniently enter the selected network’s WPA password on this screen instead of having to click to a separate screen.
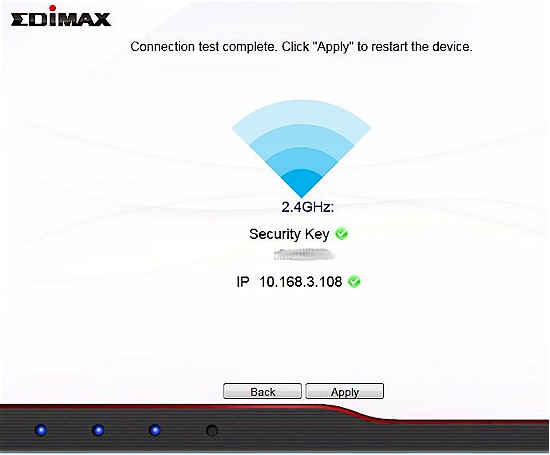
Connection complete
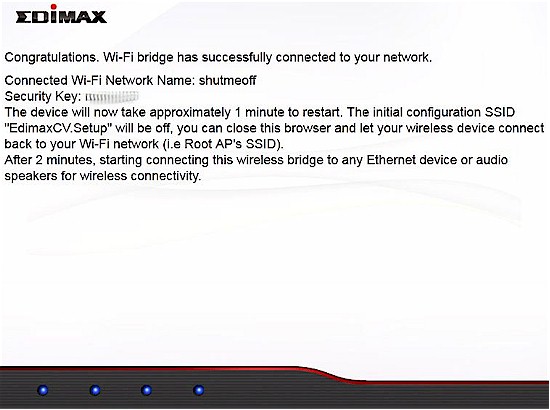
A few more instructions before you are done
Landing screen when logging into the admin pages after setup
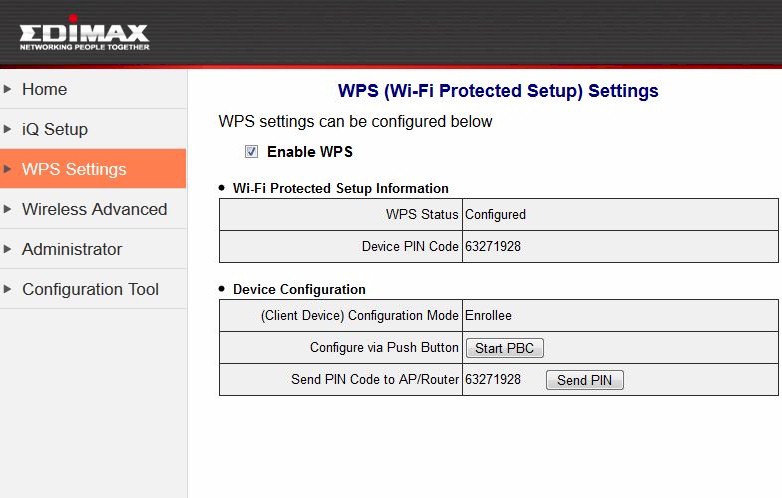
WPS can be disabled or you can use PIN or pushbutton methods.
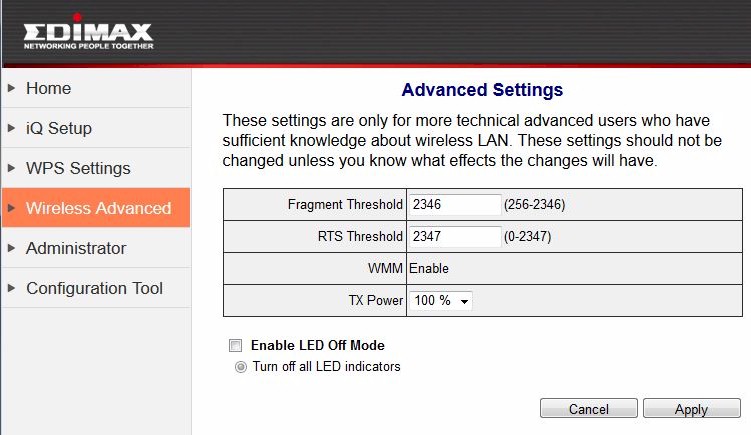
It’s surprising to see the transmit power adjust
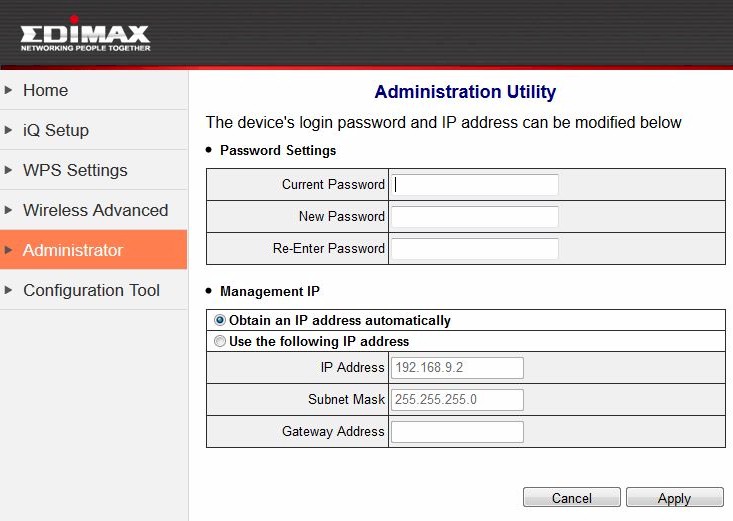
Change password and set IP here
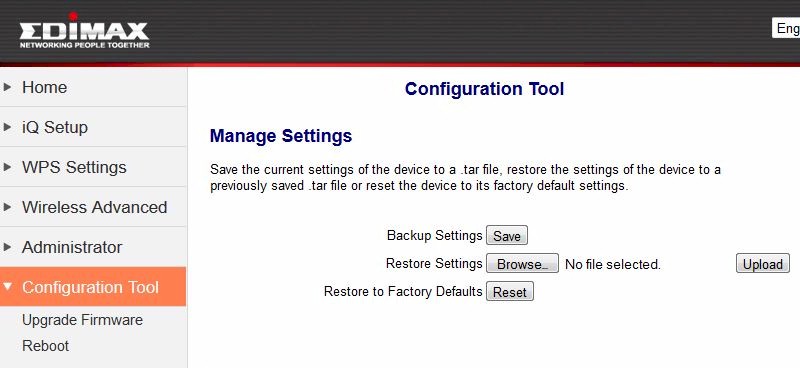
Other housekeeping functions
For the NETGEAR, you must plug a computer into the Ethernet port to get set up. When you connect, you’ll see the screen below to start the wizard.

NETGEAR Setup Wizard start
Like the Edimax, the NETGEAR provides access to its admin page via the setup URL only from a directly-connected device. When you log in, you land at a status page that’s shown below. Like its N900 class sibling, the WNCE3001 shows only link rate in the Status screen. And like the 4004, the 3001 shows signal strength only during the setup process.

NETGEAR WNCE3001 Status screen
Note the different transmit (Tx) and receive (Rx) link rates. I recently learned that 802.11n and ac allow these rates to be completely independent. The gallery below has all the 3001’s setup wizard screens and its key admin pages.
Landing page for the setup wizard
Site survey result. You conveniently enter the selected network’s WPA password on this screen instead of having to click to a separate screen.
Connection complete
A few more instructions before you are done
Landing screen when logging into the admin pages after setup
WPS can be disabled or you can use PIN or pushbutton methods.
It’s surprising to see the transmit power adjust
Change password and set IP here
Other housekeeping functions
Both products also have the option to connect to your router via WPS pushbutton. I tried this on both products and it worked. But if you’re going to use this method, read the setup sheets that come with each product. You’ll need to understand the LED flashes and colors to properly determine what’s going on.
By the way, I didn’t try the Edimax’ AirPlay support. I seldom use iTunes and when I went to fire it up, it required a new version. I’ve been down that rathole before, so I’ll have to leave exploration of this feature to someone else.
Performance
I used our new test process, also used for testing wireless adapters, to test both bridges. I checked for new firmware for both devices and didn’t find any. So I used the V1.0.0.44_1.0.32 version that came loaded on the WNCE3001 and v1.13 loaded on the CV-7438nDM.
The NETGEAR was placed on its side with one of the wide surfaces facing the test chamber antennas, which were 8″ away. The Edimax’ "reflector dish" front was pointed toward the chamber antennas, also 8" away.
The ASUS RT-AC66U reference router was set to Channel 153 and Auto 20/40/80 MHz bandwidth mode for 5 GHz tests and Channel 6 and 20 MHz bandwidth mode for the 2.4 GHz band run.
Since the throughput vs. attenuation plots are the most informative, let’s jump right to ’em. The 2.4 GHz downlink plot shows both adapters starting out around 90 Mbps, but the NETGEAR quickly starting a steeper drop until it recovers at around 39 dB of attenuation.

2.4 GHz downlink throughput vs. attenuation
On 2.4 GHz uplink, the Edimax starts out looking pretty good, until it hits a wall at 30 dB of attenuation. Looks like some serious link rate algorithm problems there. Note that in both cases, the NETGEAR disconnects at 54 dB while the Edimax stays connected until the end of the test run.

2.4 GHz uplink throughput vs. attenuation
The Edimax has a similar story for 5 GHz downlink, starting out strong, but rapidly declining sooner than it should. The NETGEAR looks like it starts at a lower link rate and stays there.

5 GHz downlink throughput vs. attenuation
Finally, the 5 GHz uplink results show the Edimax again hitting a throughput wall way too early and the NETGEAR never attaining equivalent top throughput levels. I’d have to say that the NETGEAR has the better 5 GHz performance of the two, although it doesn’t hit the same top throughput of the Edimax.

5 GHz uplink throughput vs. attenuation
Since both bridges are N and the reference router is AC, it’s possible there are some incompatibilities at play here. Or it could just as well be subtle differences in the way Broadcom and Realtek devices play together.
Closing Thoughts
Neither the NETGEAR WNCE3001 nor the Edimax CV-7438nDM is a clear winner in this matchup, even though the Wireless Adapter / Bridge Ranker put the Edimax on top. The Ranker performance detail for both products below shows a mix of first and second place ranks that tended to cancel each other out when the sub-rank scores were totaled.

Ranker performance detail comparison
There’s something just plain odd going on with the Edimax’ uplink performance, which could possibly be due to some incompatility with the ASUS RT-AC66U reference router. Or the Edimax’ uplink performace could just be, uh, odd. It definitely turns in higher throughput with strong signals than the NETGEAR on both bands, however.
If I had to buy one of these, I honestly don’t know which one I would choose, since each has key strengths, which are offset by equally strong weaknesses. For the $80 that the Edimax wants, I’d probably buy the ASUS EA-N66 and use something else as an AirPlay client.
Buy Universal N600 WiFi Adapter from Amazon
Buy N600 Universal Dual-Band Wi-Fi Entertainment Bridge from Amazon