| At a glance | |
|---|---|
| Product | Securifi Almond (ALM-BLK-US) [Website] |
| Summary | User-friendly but relatively expensive 2.4 GHz N300 router with touch screen for setup and management |
| Pros | • Can be initially set up via touchscreen • AP, Bridge, Repeater modes (no WDS needed) |
| Cons | • Only 2 LAN ports • No instruction manual • Supports only basic features • Not Wi-Fi certified |
Typical Price: $83 Buy From Amazon
Introduction
When it comes to long product names, I think that Securifi may take the prize. Their first product, commonly known as the Almond, has an official name: Almond – World’s 1st Touch Screen Wireless N Router + Range Extender. Now that we’ve gotten the official name into the review, hereafter, I’ll just refer to it as the Almond.
The Almond’s unique selling proposition is its 2.8” 320 X 240 px touch screen. Using the touch screen, you can completely configure the basic setup as well as most, but not all of the router’s features. There is also a browser-based interface for configuring the router, which many customers will never use. Interestingly, there are some features that can only be configured in the web UI and some features that are only configurable using the touch screen interface.
Product Tour
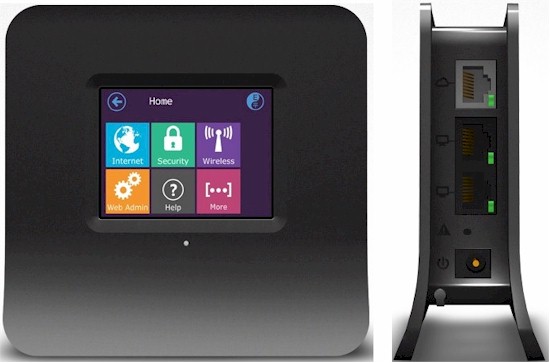
The Almond is enclosed in a high gloss (fingerprint magnet) black plastic case that measures 3.84″W X 3.75″H X 1.30″D (at the top). The bottom of the unit gently flares out to a 2.00″ depth to provide additional stability. There are ventilation holes on both the top and the bottom sides of the unit.
On the rear of the product, shown below, you’ll find a couple of surprises. First, rather than the traditional four LAN ports that you find on virtually all routers, the Almond only has two. Both ports, like the gray color-coded WAN port are 10/100 Mbps.
For each port, there’s a single green LED that indicates link and activity. Those of you with big fingers will appreciate that the Almond includes a stylus. It’s conveniently stored in a small hole near the bottom of the router. Its location is called out on the touch screen as one of the steps in the first-run wizard.

Securifi Almond Rear Panel
Inside
The Almond is based on the Ralink RT3052F wireless SoC and uses two RF Axis RFX2402 2.4 GHz WLAN Front Ends. 64 MB of RAM and 16 MB of flash complete the design.

Securifi Almond PCB Top and Bottom
Setup
Ease of configuration is the Almond’s claim to fame. The front of the package proudly proclaims that you can “Configure in Seconds, No PC/Mac or CD Needed”. And you can. Documentation for the Almond is very, uh, sparse. In fact, there is no instruction manual. However, the quick Start Guide gives you the four steps for success:
- Unplug/reset your cable/DSL modem and remove the Ethernet cable attached to your computer or existing router
- Wait one minute and plug in the modem
- Wait one minute and plug in the Almond
- Follow the instructions on the Almond’s touch screen.
The on-screen instructions are clear and succinct. They guide you through language selection, finding the stylus, selection the mode of operation (router or range extender), and connecting your WAN Ethernet cable. When the wizard completes, it shows that you have an internet connection, and summarizes your wireless network settings.
I like that the Almond automatically configures your wireless network with wireless security enabled. If you purchased the Almond to use as a range extender, this wizard will also let you set up that mode on initial startup.

The first setup step is to select the language
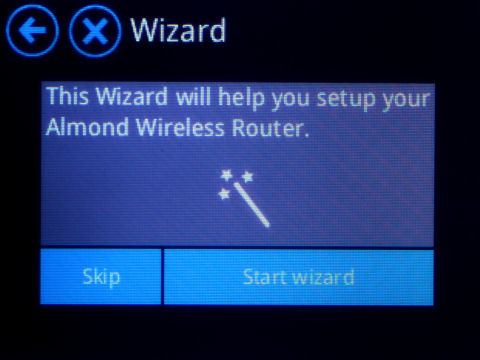
Select "Start wizard" to continue
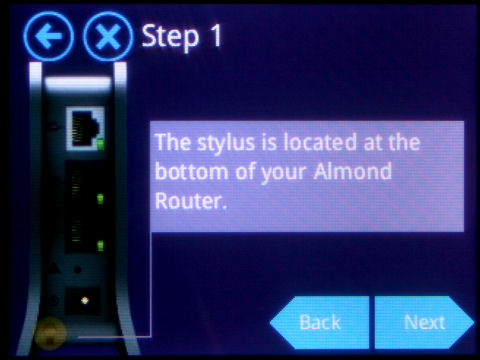
the stylus is conveniently stored in a hole on the back of the router.

Choose Router or Range Extender
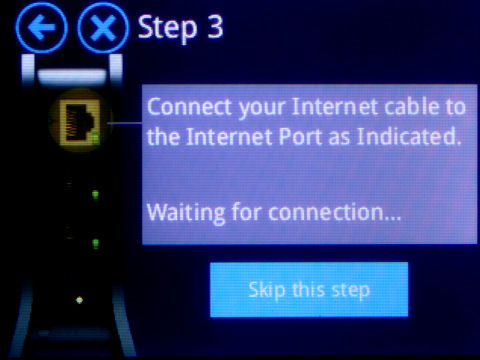
Connect the Ethernet cable from your modem to the WAN (gray) port on the router.
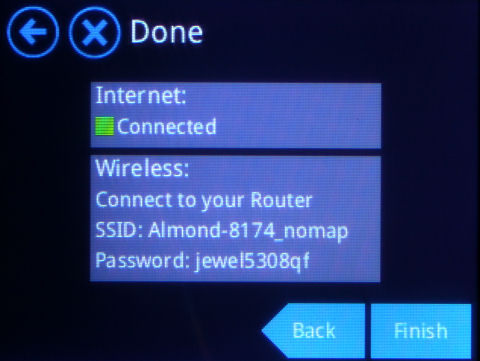
The final step confirms your internet connection and shows your wireless settings.
Hands On
There are two ways to manage the Almond: via the touch screen; and via the web browser interface. Interestingly, some features, such as port forwarding and firewall settings, are available only in the web UI. Conversely, other settings such as enabling the guest network, setting the screen lock Pin, enabling the screen lock, and setting the AP mode are only available via the touch screen. Of course, there is quite a bit of overlap as some features are configurable in both UIs. While I can understand that perhaps only a subset of configuration options would be available via the touch screen, I had expected that all configurable features would have been available in the web UI.
In the next two sections, I’ll take a look at both the touch screen UI as well as the web UI.
Touch Screen Interface
When you touch “Done” on the last screen of the setup wizard, you land at the Home page. The Home page contains five icons for sub menus/functions along with a sixth icon for “More”.
Immediately below the Home title bar, there’s a navigation bar that shows you which of the five menu pages you are currently viewing. In addition, there’s a back arrow to navigate to the previous page, as well as a language selection icon in the right hand corner. Clicking the house icon takes you back to the first page.
The two images below show the first four screens. The fifth screen has a single icon for turning the router into an AP (access point) along with an “about” icon.

Home Pages 1 & 2
I’ll briefly describe each of the functions:
Internet settings – choose from DHCP, DSL Dialup or Manual (static) IP
Security – Change WPA key and security type (WPA, WPA2, WEP, etc.), admin password, screen lock enable and PIN, and show passwords.
Wireless – Change SSID, WPA PSK, operating channel, enable/disable guest network, change guest network name and password.
Range Extender – starts wizard to configure the Almond as a repeater/bridge. This is not found in the Web UI.
Status – Shows top level status for the device (see image below)

Securifi Almond On-screen status display
Add Device – Shows SSID/WPA password, and has an icon for starting WPS negotiation. Note: During testing, WPS did not function properly.
Wizard – launches the setup wizard.
Screen Settings – Set screen timeout in seconds, enable/disable screen lock, set screen lock PIN
Web Administrator – Shows IP address of the Almond and admin name/password for logging into the web UI.
Software update – Checks to see if your software is up-to-date. If you have a fairly recent firmware version, you can also update the firmware from the touch screen, if necessary.

Securifi Almond Home Pages 3 & 4
Connection – Shows the status of your internet connection
System Log – Shows one screen of the system log
Statistics – Shows sent/received packets and bytes
Support – Displays email support address and US-based support phone number
Help – Shows single screen Wi-Fi connection help for both Windows and Macs.
Filter – Lets you set up keyword or URL blocking along with options to enable/disable
Users – You can block (or unblock) hosts based on IP or MAC address
Weather – shows current location and temperature with high and low prediction for the day
Time – Shows current time, day of week and date. You can also force an NTP update from a sub menu.
DMZ – enable/disable DMZ and specify IP address
Web UI
The Web Administrator icon found on the second screen provides all of the information you need to log into the Almond’s web UI.

The Web Administrator icon provides web UI login info
When you log into the web UI, you land at a page that has a very Windows 8 "Metro" look. Tasks are divided between “Basic” and “Advance” (sic). The Basic settings approximate the first two home pages of the touch screen interface. On some pages, you get a few additional options not found in the touch screen interface. I’ll comment on the differences as we go.

Almond’s web UI has a Windows 8 Metro look
Internet – you have the added connection options of PPPoE, L2TP and PPTP; You can also add a Hostname and enable MAC Clone
Wireless – you can also choose to hide SSID broadcast; Connected wireless users are shown here. This page lacks the Guest mode functions found in the touch screen UI.
Security – Web UI lacks the screen lock and PIN assignment found in the touch screen UI.
Network – You can specify DHCP starting and ending address as well as the DHCP lease time. In addition, you can specify the primary and secondary DNS servers and up to three statically assigned IP addresses based on MAC addresses.
Update software – you can use this page to update the Almond’s firmware. Unlike the touch screen UI, It doesn’t check for new firmware.
Add Device – this only shows you the wireless connection info. It directs you to the LCD display if you want to use WPS.
For some reason, the designers choose to use a black and white palette for the Advanced settings. These settings are similar to pages 3-5 of the touch screen UI.

Almond’s web UI Advance Settings
Firewall – this isn’t in the touch screen UI. This menu has the following functions: Remote management; Ping from WAN; Block port scan; Block SYN Flood, SPI firewall. All are disabled by default.
Filtering – this isn’t in the touch screen UI. This allows you to create up to 32 MAC/IP/Port filtering rules
Forwarding – this isn’t in the touch screen UI. Here, you can forward ports or ranges of ports from the WAN to hosts on your local network. You can choose TCP, UDP or both protocols for forwarding. There are no pre-defined services such as HTTP (port 80). You can have up to 32 rules.
DMZ – also found in the touch screen UI – In addition to enable/disable and defining the DMZ address, you can choose an exception for TCP port 80.
Content Filtering – You have a bit more granular control of filtering than in the touch screen UI. You can filter Java, ActiveX and Proxy. You can also filter web sites by URL and keyword.
Routing – this isn’t in the web UI. You can view the existing routing table and add routing rules.
System Log – essentially the same as in the touch screen UI only you get a full screen listing.
System Command – you have very basic command line access. The following commands are available:
break; cd; chdir; continue; eval; exec; exit; export; false; hash; help; local; pwd; read; readonly; return; set; shift; source; times; trap; true; type; ulimit; umask; unset; wait
Support – the touch screen UI also has a US phone number for support – the web UI only has the email address.
Even though it is under the "Advanced" menu, the inclusion of a command line option is very odd, given the Almond’s target buyer.
Range Extender
In addition to being a traditional router, the Almond can also function as a Range Extender. In fact, judging from the Amazon reviews, many people purchase the Almond for this purpose alone.
In this mode, the Almond connects wirelessly to
another wireless router/AP and then repeats the signal, thus extending your
wireless network. You select the Range Extender from the first
home screen on the touch UI. In fact, you have to use the touch
screen UI to change to the range extender mode – it doesn’t appear in the web UI.
If an Ethernet cable is plugged in, you are prompted to remove
it. The Almond then searches for nearby wireless networks and
displays a list. Each available network’s signal strength
is shown with one, two or three bars. You select the network that
you want to extend. Next, you enter the password (WPA PSK) for
the selected network. The Almond then saves the settings,
attaches to the selected network and obtains an IP address. After
connecting, a status screen appears that shows that the device has
internet connectivity, and lists the credentials needed to log in.
In my test, I selected an AP named "Puffin" that’s located in the
lower level of my condo. When the Range Extender setup completed,
the status screen showed that the SSID of the Almond was
"Puffin_almond". The WPA password was the same one used for
Puffin. The main status screen also reflected that the Almond was
in Range Extension mode, had internet connectivity, and displayed
Puffin_almond and the password. You couldn’t have asked for an easier setup.
The other nice feature is that the extended network is also protected by WPA2/AES encryption. When you use WDS-based repeating, you can’t get the different SSID and seldom get a connection secured by WPA2/AES.
For a quick functional check, I went to the lower level of my condo and positioned myself between Puffin and Puffin_almond. Using my iPad, I attached to Puffin_almond, and successfully streamed a Netflix TV episode. I connected an Ethernet cable between a notebook and one of the LAN ports
to see if the Almond also worked as a bridge in the Range Extender
mode. My notebook got an IP address from my network through the Almond, so I confirmed it works as a bridge.
I then ran a quick performance test. I
positioned the Almond in the lower level of my condo – about halfway
between Puffin and my office on the second floor. I
then measured the signal strength of both Puffin and Puffin_almond (the
range extender) using inSSIDer.
The results are shown below. Notice that Puffin, the AP,
had a signal strength of -79dBm and Puffin_almond, the range extender,
had a signal strength of -51dBm. The range extender had a
significantly (28 dB) stronger signal at my test location than the distant AP. (Each 3 dB represents a doubling of signal power.)

Wireless Site Survey for Range Extender Test
We’re all conditioned to think that a stronger signal means that
you’ll get better performance. That’s often the case, but
remember that if you’re connected to a range extender, your throughput starts out reduced by half. This is because a single radio is receiving, then retransmitting the data.
To test the relative performance, I used Totusoft’s LAN Speed Test to measure network throughput. (You can read more about LAN Speed Test here.)
First, I associated my computer to the range extender (Puffin_almond)
and ran the read/write tests. Note that my computer was reporting
the maximum number of bars and excellent signal strength. The image below shows the read/write performance using the range extender.

Lan Speed performance connected to the Almond configured as a range extender
Next, while in the same location, I connected my computer directly to Puffin – the AP which the
Almond used to extend. Recall that Puffin had a 28 dBm weaker
signal than Puffin_almond. The image below shows the read/write performance results when connected directly to the weak AP.

Lan Speed performance connected to the weak AP named Puffin
I had expected fairly poor throughput when connected directly to the weak AP. But I was surprised that the throughput connected to the range extender wasn’t much better. The lesson here is that an extender might let you connect to your wireless network where you couldn’t before. But it is never going to provide higher throughput because you always start out with a 50% throughput reduction.
AP Mode
It’s an unadvertised feature, but the Almond can also act as an access point (AP). Buried on the last home screen on the touch screen UI, you’ll find the AP icon. AP setup isn’t quite as smooth as the Range Extender’s. For one thing, it doesn’t tell you which port (WAN or LAN) port to connect to your network.
When you select AP mode, the device reboots. Initially, I had plugged one of the LAN ports on the Almond into my network – it didn’t work. So I tried the WAN port, which worked. However, the status screen still indicated that the Almond was in Router mode, not AP. The SSID and password were displayed and it correctly showed the IP address received from my network.
Interestingly, it used the same SSID and password that it stored from my previous Range Extender test. Using the address on the status screen (on my network’s subnet), I was able to log into the Almond’s web UI. I also connected my notebook to one of the LAN ports and confirmed that the LAN ports were live and bridged in the AP mode.
Hidden Menus
During email exchanges with Securifi’s Founder and CEO, Ram Malasani, we learned that there are many additional configuration options available via hidden menus. Securifi gave us permission to share that information with our readers, so here it is.
To get to the additional features, type http://[ip address]/treeapp.asp (where [ip address] is the address of your router.) For default installations, that would be http://10.10.10.254/treeapp.asp.
Other links you might want to try are:
http://10.10.10.254.wireless/basic.asp
http://10.10.10.254.wireless/advanced.asp
Here’s what the treeapp.asp link looks like:

Settings in treeapp.asp
Here is what what advanced.asp looks like:

Advanced wireless settings through treeapp.asp
Routing Performance
Testing done by Tim Higgins
Routing performance for the Almond, loaded with AL1-R194-L224-W28 firmware and using our standard test method, is summarized in the table below. The routing performance is essentially 100 Mbps wire-speed, so will satisfy the needs of enough consumers. The 110 Mbps total simultaneous throughput shows that the processor is fairly well matched to its LAN and WAN connections.
The 33,573 simultaneous connections is more than enough for gaming and P2P use and hit our test limit. While this number is higher than the maxed-out limit we have been seeing lately, that doesn’t indicate anything other than the limits of our test process.

Securifi Almond Routing Performance
The IxChariot plot for the routing tests shows very steady throughput in the unidirectional tests. The simultaneous up/downlink tests show some variation typical of what we see in these tests.

Securifi Almond Routing Throughput shows good consistency
Wireless Performance
Testing done by Tim Higgins
All testing was performed with Almond’s AL1-R194-L224-W28 firmware using our standard test process, which uses Channel 1 for 2.4 GHz tests. The test client was our standard Intel Centrino Ultimate-N 6300 with Win7 13.5.0.6 driver.
The Almond is not Wi-Fi Certified. It defaults to channel 7 and auto 20/40Mhz mode on startup. It has a unique SSID of Almond_xxxx_nomap (where xxxx is a four digit number.) The number doesn’t seem related to the unit’s MAC address.
There is no WPS setup button on the Almond, but you can access WPS through the touch screen interface. The web UI does not support WPS or PIN authentication. In our tests, the standard Win 7 wireless client did not detect the Almond as being ready to initiate a WPS connection.
The 40 MHz Coexistence and Fat channel intolerant tests showed mixed results. In the Fat Channel Intolerant test, the Almond immediately fell back to 20 MHz mode and switched back to 40 Mhz mode immediately when the bit was reset. In the 40 MHz coexistence test, the Almond switched very quickly in some cases, but sometimes in other cases, did not switch at all.
Each wireless entry in the Benchmark Summary below shows the average of throughput measurements made in all test locations. These results caused the Almond to rank quite well when the Router Charts were set to show on 2.4 GHz routers. But there is more to the story.

Securifi Almond Benchmark Summary
To judge the Almond’s wireless performance competitively, we chose the Buffalo WZR-300HP and Linksys E1200 for comparison. While the Almond is unique in the marketplace with a touch screen interface, the models chosen for comparison, like the Almond, are both also N300 routers.
This chart shows that the Securifi Almond isn’t really a stellar performer, with no overall wins for any of the four benchmarks. Interestingly, the least expensive router of the group, the Linksys E1200, won the majority of locations for 20MHz throughput tests.

Wireless Performance comparison
The Almond’s real weakness, however, is revealed by the sub-1 Mbps Location F results in 20 MHz and no results in 40 MHz bandwidth mode. Location F is the weakest signal test location and always separates the strong and weak performers for range.
In our testing, the client was able to maintain a steady connection and run the one minute tests in Location F in 20 MHz mode. But when the tests were repeated with the Almond connected in 40 MHz bandwidth mode, the connection was not stable enough to run the tests and even disconnected during the test.
For the 20 MHz downlink test in the IxChariot chart below, you’ll see that for locations “A” and “D”, the throughput remained fairly steady. At location “C”, performance becomes much more erratic, with huge throughput swings. This variation caused Location C’s average throughput to be lower than Location D, which has a lower signal level.
The purple line at the bottom is for Location “F”, and as expected, there’s very poor throughput with an average just slightly below 1 Mbps. Assuming that your connection doesn’t drop, that would probably be OK for polling email in the background. But video, and possibly streaming audio might be challenged at that location.

Secirifi Almond IxChariot plot – 2.4 GHz, 20 MHz, downlink
For the 20 MHz Uplink test, there’s a similar, but slightly different story. Again, locations A and D showed the most consistent throughput with location “C” again exhibiting the largest throughput variation. Locations A and C (the closest clients) had higher uplink throughput than the corresponding locations had on the downlink test. Location D had lower average uplink performance, but was statistically more consistent than on the downlink test.

Secirifi Almond IxChariot plot – 2.4 GHz, 20 MHz, uplink
Final Thoughts
The only place you can buy the Securifi Almond is Amazon, so I thought I’d drop over there and see what owners of the device have reported. Of the 508 reviews, 393 rated it 5 stars. In reading through the customer reviews, the majority of them focused on the ease of setup. Many customers also said they bought the device strictly to use as a range extender.
My own experience confirmed what customers are raving about. The Almond is quite simple to set up without using a computer or anything else. And you can change modes between router, range extender and AP without ever touching a PC, too. All of that is made possible by the touch screen.
But the touch screen comes at a cost. It is probably one of the most expensive components on the device’s bill of materials. So, in order to achieve a price point and focus on ease of use, there are some sacrifices when it comes to functionality and performance.
The Almond is priced at $79.99 – pretty much the top end for an N300 router these days. But the Almond lacks some features found on less-expensive traditional routers that don’t have a touch screen. For example, most routers have four LAN ports and many routers have built-in QoS to prioritize traffic. Some even have USB ports that allow you to plug in a storage device to create your “own personal cloud”. The Almond only has two 10/100 Mbps LAN ports, no QoS and no USB ports.
The other N300 routers that I used in my performance comparisons are both less expensive than the Almond. The Linksys E1200 is priced at around $45, or if you’re willing to take a factory refurb, $25.00. For the same $80, you could purchase a Linksys E2500 simultaneous Dual-band router. Alternatively, if Gigabit LAN ports are important to you, you could purchase the Buffalo WZR-300HP, which has four Gigabit ports, for a bit less than $60.
Over the years that I have reviewed wireless products, router setup has come a long way. In fact, for cable customers, all you have to do is plug your cable modem into the WAN port and most likely you’ll be connected to the internet. Of course, wireless security and other setup procedures vary by manufacturer, so depending on the brand you purchase, you may or may not end up with a secured wireless network.
But many manufacturers have gone with setup wizards that intercept your first web address request and redirect you to a first run wizard that walks you through a setup that’s very similar to the Almond’s setup. And, of course, once you’ve completed your setup – either via the touch screen interface on the Almond or via a web browser on all other routers, chances are that you won’t be making changes very often.
For me, I’d opt for a router with gigabit ports, and, if possible at that price point, dual band. But I understand the attraction of an extremely simple to set up router. For my non-technical friends and family who look to me for tech support, I would consider recommending the Almond. If you’re technically adept, you can get more bang for your buck with a traditional router.