Introduction
| At a Glance | |
|---|---|
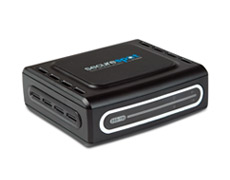
| Product | D-Link SecureSpot Internet Security Adapter (DSD-150) |
| Summary | “All-in-one” Internet security solution providing anti-virus, spyware and identity protection and parental controls |
| Pros | • 1 year license for up to 4 clients included • Good reporting and access scheduling |
| Cons | • Difficult installation • Too many features are buggy |
If you have memories of TV commercials from the 1960s, you perhaps remember the commercial for a combination clock, radio, and reading light. In the commercial an actor “invents” the combination product by taping together a clock, a radio and a reading lamp into a single unit.
D-Link’s Securespot DSD-150 is kind of like that, only it combines a firewall, subscription-based virus and spyware protection, spam and popup blocking, parental controls and more into a 3.5″x3.5″x1.125″ box. It will take you awhile to absorb all the functions that this product promises (I know it did for me).
The DSD-150 has so many functions packed into such a compressed package, that it is hard to describe, hard to get working, and easy to misunderstand. The promise of the DSD-150 is to bring enterprise-style functionality to protecting your home LAN. The reality, unfortunately, doesn’t deliver on this promise.
The Approach
The DSD-150 has three components:
- The DSD-150 hardware. This black box is a 1 port hybrid router/proxy that becomes the master of your LAN.
- The back end that is implemented by partner Bsecure.com. When you log in to configure your DSD-150, you are really logging into bsecure.com.
- The thin client manager and applications. This is software downloaded through the DSD-150 that implements authentication, anti-virus and other functions at each LAN client. Thin client software is available for the latest versions of Windows (SP1 and SP2) and Mac OS X.
The DSD-150 is designed to connect between a broadband modem and router (Figure 1). If you have a different setup, including the common case of a combination modem and router, you might have problems getting the DSD-150 working since it doesn’t seem to like to be behind a firewall.

Figure 1: Connecting the DSD-150
Once the DSD-150 is installed, you go to your PCs and fire up a web browser. When the browser tries to connect to the Internet, the DSD-150 redirects it to a captive portal page that allows the user to register the DSD-150 with D-Link’s back end. Once registration is complete, the DSD-150 downloads the “thin client” to each Windows or Mac OS X machine that connects. The product comes with 1 year subscriptions for up to four clients, which you need to use most of the DSD-150’s features.
I’m not going to cover DSD-150’s installation in detail because it has a good manual (the file is in zipped format), helpful graphics, as well as a step-by-step software “wizard” for Windows. If these don’t get you up and running, D-Link has a support phone line.
That said, I have a word of warning. The installation can be difficult, because orchestrating the back-end, hardware, and clients in authenticating, downloading, updating, and getting up and running is difficult and time-consuming. Your install will not work perfectly if you are going for more than minimum functionality.
Human instinct in this situation is to blame the product – at least that was my instinct. However, to have a happy installation of the DSD-150 you need a large helping of patience and can’t be in a hurry. You also can’t panic when things don’t work. Give the DSD-150 time to talk to your clients and to the D-Link back end. Let the auto-retry time outs happen. Go do something else in the meantime. Because I found that when you tamper with it by forcing re-authentication or by power cycling (about the only two things you can do), you end up slowing down your install and postponing the time when you will be able to access the Internet again.
Thin is In
It is tempting to think of the DSD-150 as a hardware replacement for anti-virus, anti-spyware, anti-popup software. But those functions are handled on each protected computer by the thin client.
Figure 2 shows the thin client download prompt screen that greets each LAN user on the first Internet connection attempt after the DSD-150’s installation. Note that the thin client (1.1 MB on XP and 1.9 MB on Mac OS X) requires manual installation after download and a reboot on both Windows and Mac OS X.

Figure 2: Thin Client download prompt (click to enlarge)
With a 1.9 MB download, it seemed like my Mac gained anti-virus, intrusion detection, and firewall functionality. That’s a lot of functionality for a 1.9 MB! But as I learned while getting to know the DSD-150, the real anti-virus protection is provided by a 10 MB SophosAV antivirus update downloaded in the background (i.e., whenever the client authenticates with the DSD-150). The same thing happens, i.e. large background downloads, for the other “thin client” functions in the DSD-150 (Identity Protection, Popup Blocker, and AntiVirus/Spyware) So the thin client is really mostly an authentication and download agent.
Once I realized this “hidden” background behavior, I understood why my Windows machine became slow and seemed to freeze up after I installed the thin client. This unexplained, but not unnoticeable, behavior is the key reason for my advice to be patient when getting the DSD-150 up and running. And it also explains why rebooting and power-cycling does nothing to help the process along.
I think D-Link would be wise to warn users when these downloads happen and to set expectations in advance. Expectations for a slow system in the short run, and for speed to return once the thin client has configured itself on their PC. Or, like other applications, D-Link could set downloads to happen when nothing else is happening. I think that after the thin client gets all its software components downloaded and updated, that you will notice the loss of system response less often – at least that was my experience.
On XP, the thin client resides in the system tray (top of Figure 3) and on the Mac the thin client resides in the menu bar (bottom of Figure 3). These icons are critical to understand because they are the main lifelines you have in getting your DSD-150 installation up and running. The integration of the DSD-150 hardware and the thin client is subtle because you can’t see what is going on by default.

Figure 3: Thin Client Icons
Figures 4 and 5 show the menus that pop up from the thin client icons in each operating system. Note that the menus are just similar enough that you might think they are the same. They are not. In fact, the DSD-150 provides features (ex., Intrusion Detection, Identity Protection) in different ways to Windows PCs and Macs.

Figure 4: Win XP Thin Client Menu

Figure 5: Mac OS X Thin Client Menu
Thin is In – more
The key choice in both menus is the “Settings” dialog (Figures 6 and 7) because settings is the one place in the thin client user interface where you can see what is going on with your DSD-150 installation. The other choices in both menus take you to the DSD-150’s menus (discussed below) or to the thin client popup windows (also discussed below).
There are two critically important buttons on the Settings dialog: “Re-authenticate” and “Service Log”. “Re-authenticate” establishes a connection between the client PC and the DSD-150 on your LAN. You need to re-authenticate a client after you power cycle the DSD-150 or if you’ve unplugged your PC or if you’ve changed the settings in the DSD-150 menus.
On XP I repeatedly ran into trouble that I eventually traced back to my computer not being able to authenticate to the DSD-150. Without the service log, you have no visible indicator of problems like authentication being the source of an Internet outage.

Figure 6: Win XP DSD-150 Settings window (Click to enlarge)

Figure 7: Mac OS X DSD-150 Settings window
But after the thin client installed on my Windows XP computer, I was not able to get out to the Internet. Instead, the DSD-150 again showed me Figure 2 and prompted me to download the thin client. I tried again and rebooted. I opened a web browser and was redirected to Figure 2 again. I was able to log in to the DSD-150’s administrative web server (see Figure 8) as well as go to D-Link’s website and look around the tech support web pages. But, I could not see anything else on the Internet.

Figure 8: DSD-150 Account Summary screen
The “Chat Live” icon in the lower right-hand corner of Figure 8 seemed to promise that help was at hand, but when I tried it, I got stuck in a loop because my PC needed to authenticate before being able to download the chat client. Fortunately, I was able to phone D-Link support, who quickly traced the problem to XP’s software firewall. Once I disabled it, clicked “Reauthenticate” and waited for the thin client to download and do its thing, I was finally granted web access. Life is good!
In summary, the thin client software for the DSD-150 is big, silent, unseen, and hard to diagnose. Your computer will be slower while the DSD-150 back end is pushing software to your client. But, once your client has ingested its software, things return to normal.
DSD-150 Feature Tour
The DSD-150’s functions are accessed through its web admin. interface. As previously noted, some of the functions are provided by Bsecure and its applications residing on your LAN clients. Other functions are provided by the DSD-150 hardware itself.
To access the DSD-150’s menus, you can double click a shortcut left by the installer on your desktop, or you can point your web browser to a blocked web page. I do the latter since I don’t like shortcuts on my desktop. When you go to a blocked web site, you get an intercept screen from the DSD-150 where you can click on the “My Account” menu bar item and to be taken to the login screen.
Once you enter your username and password, you are taken to the home DSD-150 Account Info screen (Figure 9).

Figure 9: Account Info screen (click to enlarge)
The Account Summary (Figure 9) is an important screen because its Registered Systems section shows you what the D-Link security back end is seeing on your LAN. If you have no clients registered, you need to wait for the back end to catch up, lower your security level so you can use the Internet productively (I’ll get to this shortly) or call D-Link technical support to figure out why your client computers are not registered. The remaining sub-menus are housekeeping information (contact info, billing info, and password set and resetting).
The DSD-150 has eight top-level menus, with approximately 73 specific menu item choices that branch from them. Four of these menus: Parental Control, Firewall, Reporting, and Spam Blocker have global toggles. That is, when you click on the menu for any of these, you can turn off all functionality for that function.
Three menus (Identity Protection, Popup Blocker, and AntiVirus/Spyware) don’t run on the DSD-150 at all. These functions run on each client individually, in the thin client software suite. When you click on these menu items, the thin client software suite starts running. Note that Macs that view the top level menu don’t even see identity protection or popup blocking menus (Figure 10).

Figure 10: Account Info Screen seen by Mac OS Client (click to enlarge)
One last tip and I’ll get off the subject of my installation woes. The most important menu choice to help get the DSD-150 up and running is the Client Security option shown in Figure 10 (bottom left). Click on the double chevrons in the Client Security bar and you will see Figure 11.
The Client Security menu is helpful because you can use it to turn off the thin client software functions that might be complicating your installation. When you switch from high to low security, client PCs no longer need to have thin client software installed. Of course, the DSD-150 can actually be removed at this security setting without any complaint by any properly-installed thin clients. But nonetheless, the low-security setting is very helpful if your thin clients get corrupted or if they are downloading very slowly and bringing your work to a halt.

Figure 11: Client Security screen (click to enlarge)
Parental Control
The Parental Control top level menu (Figure 12) has five sub menus and a global on/off toggle. The first sub-menu that I started playing with was Categories (Figure 13). Just for fun, I set the DSD-150 to block comics and instant messaging, clicked “Save” and then tested these changes by going to web browsers on my two test systems.

Figure 12: Parental Control screen (click to enlarge)
To test for comic blocking, I chose www.dilbert.com. But to my surprise, Dilbert came right up! So I power cycled the DSD-150 to see if that made a difference. And then disaster struck…my XP system went back to being unable to access the Internet. (Everything was fine and Dilbert was properly blocked on my Mac OS system.)

Figure 13: Parental Control Categories screen (click to enlarge)
After checking the usual suspects, I called D-Link support who stepped me through resetting the DSD-150’s configuration to factory defaults. To do this, point your web browser to the DSD-150’s IP address, log in as “admin” with no password and click on the Admin left-hand menu selection to get to the web page shown in Figure 14.

Figure 14: DSD-150 Admin screen (click to enlarge)
The D-Link tech support person had me click “Reset Configuration” and then in XP, click on the task bar thin client and “Reauthenticate”. That returned access to the Internet from the XP machine after a few minutes, this time with Dilbert properly blocked. The lesson I learned from this exercise was that if you’ve made a change, but it doesn’t appear to be in effect at a client, then re-authenticate! Don’t power cycle the DSD-150.
Parental Control – more
The Parental Control Options menu (Figure 15) allows you to toggle three settings on and off. First, separate filtering for each profile (I’ll get to Profiles shortly). If you are ambitious and want a “grown up” profile that allows things that another “kids” profile does not allow, you can enable that here. Once you have profiles enabled, you will be prompted for who you are (i.e., which profile should be used for your session on that computer) every time you boot up or log in.

Figure 15: Parental Control Options screen (click to enlarge)
The second setting enables/disables password override on a blocked site. Checking to enable password override also adds the feature of adding overridden pages to the “allowed” list. The third setting on the Options menu is very clever: an “X blocked out of the last 16 web sites” lock-out function. X can be set between 2 and 14 and when that number of sites out of 16 consecutive attempts is blocked, the “blockee” will be locked out of the Internet until his or her computer is rebooted. This feature might work great, or it might not, depending on who is using your clients and how.
The Profile menu lets you add profiles to you LAN based on users or computers. For user-level profiles to work, you need to have user log-ins established on your PCs, and a willingness to go through some trial and error in getting the right properties to instantiate on the correct entities. I did not test the profiles beyond creating one profile because on my LAN, we do without profiles and everyone is subject to the same filtering standard. Website Lists is a very simple menu used to add sites to white and black lists.
The final Parental Control menu is Scheduling (Figure 16). Note in the upper right hand corner I’ve dropped down the “Apply To” menu. If you had multiple profiles, you can apply the access scheduling you set up on Figure 16 to one specific profile.

Figure 16: Parental Control Scheduling screen (click to enlarge)
But despite all these wonderful Parental Contols, I found its image blocking abilities to be hit and miss. When I was filtering on the “Comics” category, I found that spiderman.com was in, superman.com and dilbert.com were blocked. Hulk.com was in, thehulk.com was in, as was familycircus.com. But a bigger problem was that if I went to images.google.com and searched on superman and dilbert (both supposedly blocked) the image results came through!
Testing for porn filtering produced similar odd results. If I went to Altavista’s image search engine and turned off family filtering or set images.google.com’s preferences to “No filtering” and typed in an (in)appropriate search word, an almost unlimited number of thumbnails of naked people filled my screen. (The things I do in the name of networking product testing!)
But the maddening thing with the DSD-150 is that if I clicked on one of those thumbnails to open the linked page, the DSD-150 would block the page! This is a problem common to products that use off-the-shelf filters without integrating web blocking with proxy filtering. So, for porn, the DSD-150 is as hit or miss as it is with comics.
Firewall
Figure 17 displays the top level Firewall menu. Like Parental Control, there is a global enable/disable the firewall menu. Security settings produces a simple interface similar to those seen in consumer routers that allows you to select TCP and UDP ports to block coming in and going out. This is one of those functions that most people do not benefit from because they don’t know what ports are or why they are important.

Figure 17: Firewall screen (click to enlarge)
So, while this user interface to allow and block ports may be fun for the networking-savvy, true geeks won’t use a graphical interface and the rest of us don’t know what we should be doing with this. This is one of those features that is in the DSD-150 because it is in competitive products, not because people use the functionality. The more useful settings in the Firewall menu for less networking-savvy folks are in “Software Selections.”
Figure 18 displays the block/unblock check boxes of this sub-menu that controls Internet access for a large variety of Internet applications. Although AOL Instant Messaging is one of the selections, I found that blocking all of an IM client’s features is more than the DSD-150 is capable of.

Figure 18: Firewall Software Selections screen (click to enlarge)
It seems like every new transport to the Internet opens a new infinity. The infinity of instant messaging began with one-to-one text chat, then added many-to-many text chat, file swapping, gaming, voice, shared file spaces, etc. As mentioned above, this long list of features appears to be too much for the DSD-150 to handle. It also doesn’t help that there are IM blocking controls both here and in the Parental Controls Categories menu.
When I set out to test IM blocking, I checked the box in the Parental Controls Categories (Figure 13) but didn’t see any blocking. It wasn’t until I started exploring the Firewall Software Selections screen that I found out why. My “Aha!” came when I looked and saw that AOL IM is unblocked by default! So, even though I checked “Instant Messaging” in Parental Control Categories, I wasn’t blocking instant messaging because it is enabled in the Firewall. D’oh!
Hey D-Link, how about merging the Parental Controls Categories and Firewall Software Selections menus or at least include a pop-up that directs the user to the related controls of the other? Actually, this is another great example – along with my nude thumbnails – of changes needed in the next generation of filtering devices. Simple blocking needs to be integrated with proxy filtering so things like nude thumbnails leading to blocked web sites don’t get through.
By the way, even once I had all the checkboxes checked, I was unsuccessful in getting IM blocking to entirely work.
Intrusion Detection, Identity Protection
The Firewall Intrusion Detection menu controls a thin client function. When you click on this menu, a popup menu appears that asks if it is OK to kick off its thin client suite application. The Intrusion Detection app. simply watches outgoing programs and prompts (by default) you to allow them or not allow them access to the Internet. This isn’t really as much “Intrusion Detection” as it is a software firewall like Win XP SP2’s built-in one that caused many of my installation hassles.
It was entertaining to monitor how many programs reach out and touch the Internet… until about the 10th program. Figure 19 shows you the dialog to add or remove programs and to set permissions (allow or block) on those programs.

Figure 19: Firewall Intrusion Detection window
When you click on the Identity Protection menu you get an immediate prompt to start the thin client on the computer you are using. Figure 20 shows what the main screen and popup look like.

Figure 20: Identity Protection screen (click to enlarge)
After you enter the correct password, the Identity Protection settings window opens up. On the left side of Figure 21, you add files and folders of private data, while on the right side, you add web sites that can access the private data. It appears that there is only one degree of privacy (private or not private).

Figure 21: Identity Protection Settings (click to enlarge)
This feature is kind of odd, since a good deal of identify theft comes from phishing and pharming exploits rather than remote sites reaching out and sucking data off of users’ computers. Like many other of the DSD-150’s features, this one needs further work to really be worthy of its name.
Reporting
Like the Parental Control and Firewall menus, the Reporting Menu (Figure 22) has a global enable/disable. The reporting is very boiled down, but I think a lot of tbe DSD-150’s target buyers will like the feature.

Figure 22: Reporting screen (click to enlarge)
Days that have blocked content attempts are highlighted in red while those without blocked content attempts are in green. Click on a day, the counters at right will display that day’s “Child”, “Youth” and “Adult hits. The “View Report” button opens a report stored at bsecure.com, that can’t be tampered with (famous last words).
The thought here is that even if your DSD-150 were hacked, you can use this report to look at say, the five days you left the teenagers by themselves, and see what sites this client went to. Of course, if you leave your client security settings at low (remember my debugging tip?) then the DSD-150 can be removed from the LAN while you are out, and the reports will not include the web browsing that happened while the DSD-150 was removed.
Comparing the reporting web page seen with the latest firmware (1.0.3) with the reporting web page in the manual (Figure 23) it appears that D-Link has pulled some functionality. The Reporting page in the manual (gotta love “Logged In: Joe Tester”) has three sub-menus that I was unable to find a way to reproduce with the evaluation unit.

Figure 23: Reporting screen from the DSD-150 manual (click to enlarge)
From the manual, it appears that the DSD-150 has/had the ability to have log files e-mailed, some kind of device log (would be great if this showed when the DSD-150 was disconnected and reconnected), and an “accountability partner” option. I’ve heard people set up accountability partners to keep themselves from straying, but this is the first I’ve seen of a filtering device supporting such an arrangement.
Popup Blocker, Anti-Virus, SpyWare Detection
Popup blocking (Figure 24) is implemented in the DSD-150 as a thin client function. The advanced options in the popup “Settings” menu are check boxes to enable a beep when blocking a popup, and notifying with a tray balloon when blocking a popup.
The allow list lets web pages where you need to allow popups to have them without the inconvenience of toggling popup blocking in your browser. But since most browsers already have these functions built-in, this feature really doesn’t bring anything new to the party.

Figure 24: Pop-up Blocking screen (click to enlarge)
AntiVirus/Spyware management is also handled by a thin client application. So when you click this menu you get the popup window shown in Figure 25. The popup on the Mac is exactly the same functionality as in Windows, but I was unable to get the anti-virus engine to start on my Mac.

Figure 25: Anti-virus / Spyware screen (click to enlarge)
I attempted to get help from D-Link’s customer support chat function, which worked on Windows but not on the Mac. But after providing some basic information showing I had latest firmware and thin clients, the connection went strangely silent.
Anti-virus scanning appeared to work on my PC, but I had a difficult time seeing whether the Spyware detection function really worked. I installed Lavasoft’s Ad Aware and cleaned my PC before installing the DSD-150. I then planned to get infected by surfing to known problem sites and then scanning with both AdAware and the DSD-150 to see if there was a difference in coverage. But the DSD-150 was so difficult to work with, I wasn’t able to complete the experiment.
I was also unable to test the Spam blocker because I don’t have POP3 e-mail which is the only species of mail supported by the DSD-150. From reading the menus it does not appear to be a spam blocker, but instead, a spam marker. The only aspect of spam blocking that you can set up is the spam tag (i.e., text that will be inserted into the subject line of suspected spam). Your email program has to do the heavy lifting of making sure that tagged mail gets deleted or moved to the appropriate folder.
Conclusions
The DSD-150 has grand ambitions, but the reality is that the product needs a lot of work before Moms and Pops (or small biz owners) will be able to trust it to keep their computers safe from Internet-borne harm. If my installation experience is typical, many would-be users will have the product packed up and on its way back to the store before spending even half the time that I did trying to get it working.
D-Link needs to do much more in both its documentation and in on-screen status / progress messages before the installation experience approaches anything near user-friendly. But even if the installation went perfectly, there are too many misses and inconsistencies in its functions for users to get the “warm comfies” that this category of product needs to impart to the user from day one. All this product has to sell is security, and when it fails to deliver – even just a little – the seeds of doubt are planted.