This article is sponsored by EnGenius.

EnGenius Long Range Wireless Video
Let’s say you want to install video surveillance in a remote location without an Internet connection, a viable means to run data cables and where typical Wi-Fi cameras don’t have the desired range. Turns out it’s pretty easy, using EnGenius’ EDS8012 Wireless 2.4 GHz IP Surveillance System or EDS8015 Wireless 5 GHz Surveillance System.
Each kit contains one EnStation2 or EnStation 5 Outdoor Wireless Client Bridge and EDS5110 IP66-rated weatherproof outdoor HD bullet camera. Paired with a second wireless bridge, this solution can cover large properties such as RV campgrounds, parking lots, parks and even large warehouses, with distances up to 5 miles between the camera and base station!
I set up the 5 GHz kit in a parking lot, in the rain, using temporary wooden posts. The distance in my setup was approximately 100 yards…a far cry from the 5 mile maximum range the product can handle, but farther than a garden-variety Wi-Fi camera could cover. The gallery below shows positions of the base bridge and camera and a still of the video produced.

EnGenius Long Range Wireless Video camera set up
There’s also an image showing latency across this connection was just 2 ms!
Notice the camera in top center of the image.
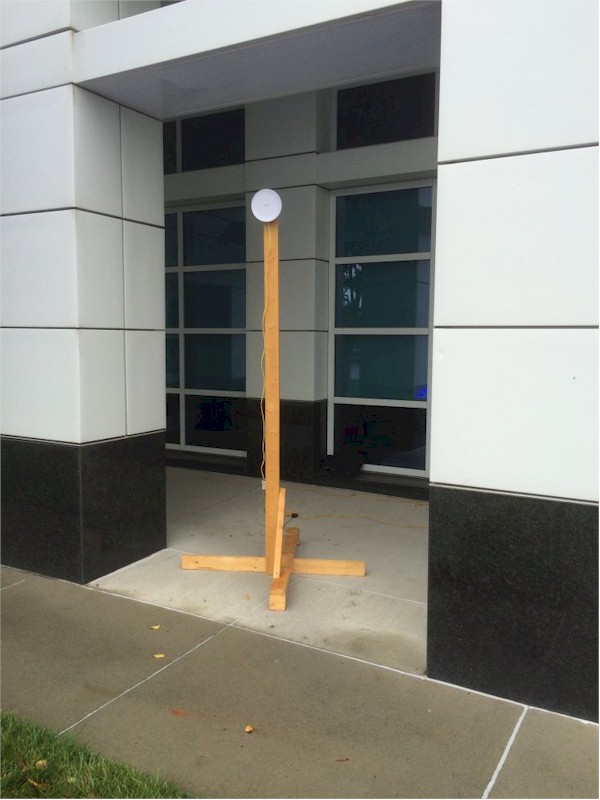
Bridge on temporary mount near buidling.
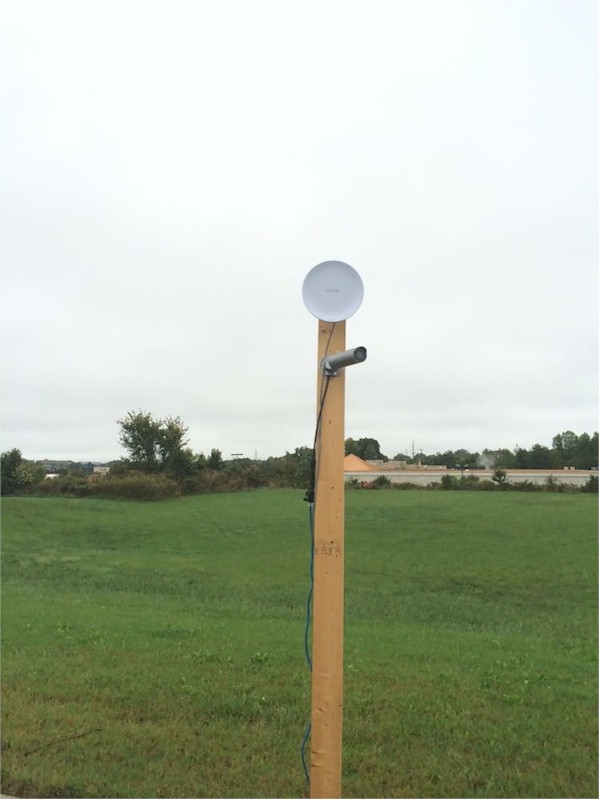
Bridge and camera on temporary mount at far end of parking lot.

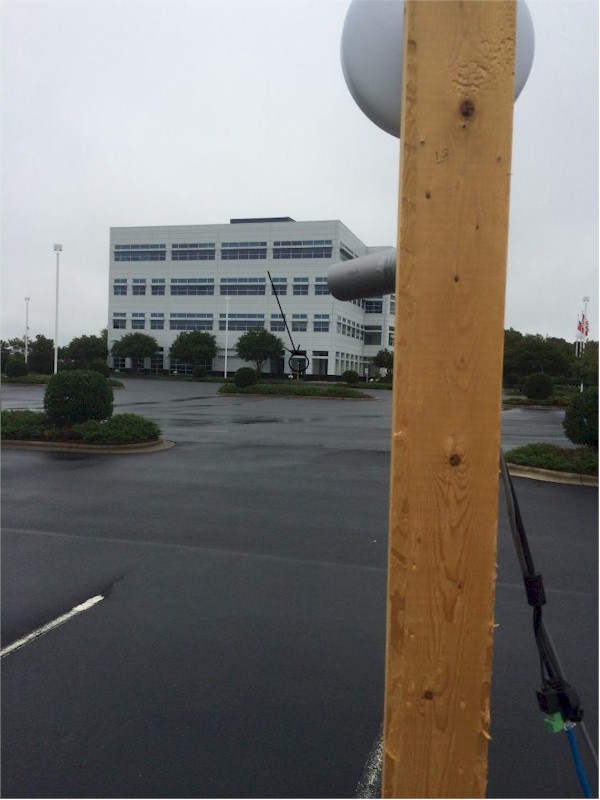
View from building to bridge and camera across parking lot.
View from bridge and camera back to the building.

Ping times from building to far end.
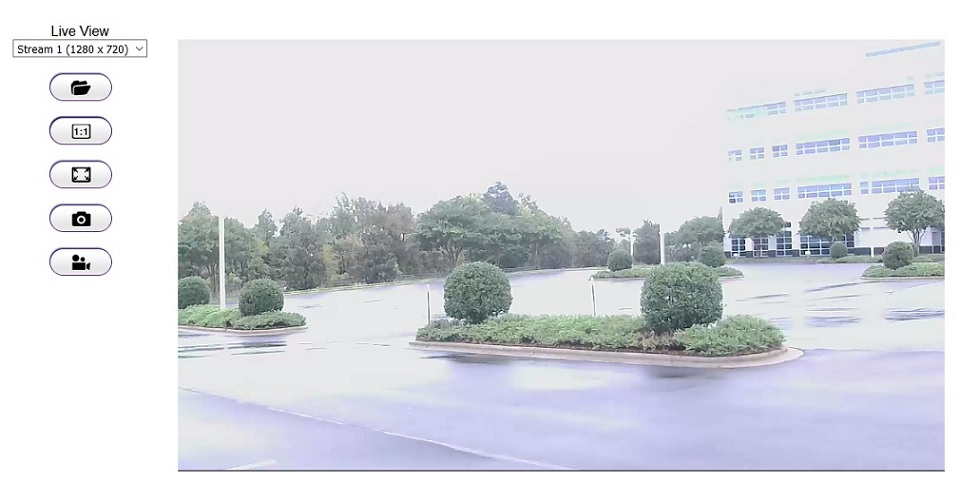
Live video from far end of parking lot streamed to building.
The bridges and camera can be wall or pole mounted with the included hardware. The bridge mounting hardware pivots, allowing for easy directional adjustments. The camera also has a bracket that can be rotated nearly 360 degrees and the camera itself can be pointed to the left and right and rotated.
Once the hardware is mounted, there is a bit of cabling required. The base bridge needs only an Ethernet LAN connection and the far-end wireless bridge and camera also need to connect via an Ethernet cable. Everything is powered via Power over Ethernet, courtesy of supplied proprietary PoE injectors.

EnGenius PoE Injector
The bridges have two Ethernet ports, shown below. Just plug an Ethernet cable into the bridge port marked "PoE" and connect the other end to the PoE port on the injector. The camera has only one Ethernet port, just plug an Ethernet cable into the camera’s Ethernet port and into the PoE port on the injector. For my temporary setup, I powered the far end bridge and camera via an inverter plugged into my car. For a permanent installation, power could have been obtained from one of the parking lot lights

EnGenius bridge Ethernet ports
Configuration consists of connecting a laptop via Ethernet and setting the bridges to WDS bridge mode with AES encryption, entering the MAC address of the companion bridge and giving each bridge a static IP on your network. Apply these settings, remove the laptop and restore the normal Ethernet connections. Your link should now be up and the camera should get its IP address information via DHCP.
Notice the camera in top center of the image.
Bridge on temporary mount near buidling.
Bridge and camera on temporary mount at far end of parking lot.
View from building to bridge and camera across parking lot.
View from bridge and camera back to the building.
Ping times from building to far end.
Live video from far end of parking lot streamed to building.
By the way, I was able to eyeball aiming the bridges to connect across a distance of 100 yards. Longer range deployments will take more precise aiming and tuning to maximize throughput. In either case the WLAN signal LEDs on the side of the EnStation help with aiming without the need to log into the admin interface.

EnGenius bridge Ethernet ports
With my laptop connected to my network, I downloaded and installed the EnGenius Enviewer Finder application that locates the camera on the network. Use Enviewer Finder to configure a static IP on the camera, system time and device password, enable the cloud service, and tweak video settings. Click finish to apply the configurations.![]()
Notice the camera in top center of the image.
Bridge on temporary mount near buidling.
Bridge and camera on temporary mount at far end of parking lot.
View from building to bridge and camera across parking lot.
View from bridge and camera back to the building.
Ping times from building to far end.
Live video from far end of parking lot streamed to building.
From this point, you manage the camera via web browser. Browse to the IP address assigned to the camera and install the WebCMS plugin. I found the plugin didn’t work on Microsoft Edge, yet worked with Firefox. The camera’s browser menu allows you to view video from the camera, record video and take snapshots, as well as optimize configurations. Camera configuration menus are shown below.

EnGenius Camera Menus
Once mounted, powered and configured, video from the remote camera is remotely viewable in a browser via the long range Wi-Fi network.
For more information, check the pages for EnGenius’ EDS8012 Wireless 2.4 GHz IP Surveillance System or EDS8015 Wireless 5 GHz Surveillance System. ![]()