Introduction
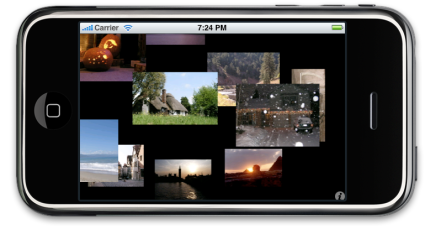
Christmas 2008 – For the first time in several years I was going to be off from work for two straight weeks and my family had no plans go anywhere. Two weeks just hanging around the house. What was I going to do with myself?
I suppose I could have tackled some long neglected household repair, or I could have just kicked back and overdosed on Christmas movies and bowl games like I usually do this time of year. But instead, after lounging around for a day or so, a light bulb went off over my head. An iPhone application! I was going to try my hand at developing an iPhone application.
I’ve been an Apple user for several years, but I had absolutely no experience developing applications under OS X. I had never written a line of Objective C, I’d never used Apple’s XCode Integrated Development Environment (IDE) and I’d never written a line of OpenGL. And did I mention that I didn’t own an iPhone? Sound like a recipe for success?
There were two things I did have though. I had an iPod Touch and on the first day hanging around the house, I came up with an idea. So could a neophyte iPhone developer go from start-to-finish with an iPhone application in just two-weeks?
In this article, I’ll walk through my two-week process and show you what I did. I don’t have room to give you a complete tutorial, but I’ll map out the basic process that I went through and provide some pointers to external resources to help you follow along. Did I succeed? Read on to find out, (But just don’t tell my brother who works for Google building the competing Android cell-phone platform!)
Getting Started
So, where to start? In my case, the first stop was Amazon.com where I quickly zeroed in on a highly-rated book entitled Beginning iPhone Development. I couldn’t wait for Amazon, so I braved the Christmas shopping crowds and found the book in stock at a local tech-bookstore. They only had two copies left and the proprietor said it was selling well, so maybe I wasn’t the only one with this idea.
When I got home, I headed off to Apple’s developer web site to sign up and download the development kit. If you want to use it yourself, you’ll need a relatively recent X86-based Mac. The free kit includes a complete fully-functional iPhone simulator (Figure 1) where you can try your application out.
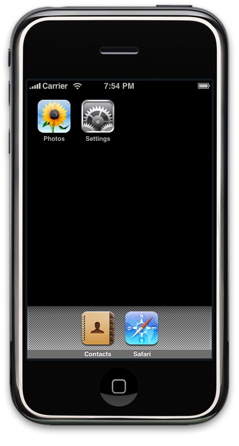
Figure 1: iPhone Simulator
To actually install your project on an iPod or an iPhone, you’ll need to take the next step up the developer program ladder and pay $100. This will get you additional documentation, technical support, tutorials, encryption keys, and most importantly the ability to sell your application in the iTunes Application store. For myself, I wasn’t sure how far I’d get. So to save my money, I initially made do with the simulator.
The main part of the development kit that you’ll be interacting with is the Xcode IDE. That’s where you’ll to do all of your editing, compilation, profiling, user interface work, etc. Figure 2 shows the layout of a basic iPhone application inside the IDE.
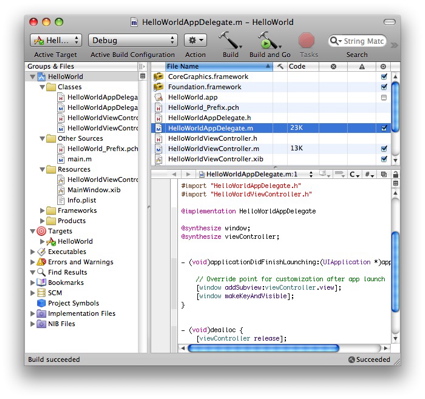
Figure 2: Xcode IDE
In this window, you can see a list of the various files and directories in the project, along with the editing window where you’ll spend a lot of time. I had never used Xcode, so it was a bit of a learning-curve to figure it all out. But the book and included project templates enabled me to get up and going quickly with a little “hello-world” application running inside the simulator.
In fact, you can get a basic iPhone application running with buttons, labels, images, etc. without writing a single line of code. Apple includes project templates for a number of different application types and given my short timeframe, my strategy was to start with an OpenGL-based template and modify it for my needs.
When setting up menus, buttons, forms, etc. for your application, you’ll use Apple’s Interface Builder (IB). Figure 3 shows the widget library from IB.
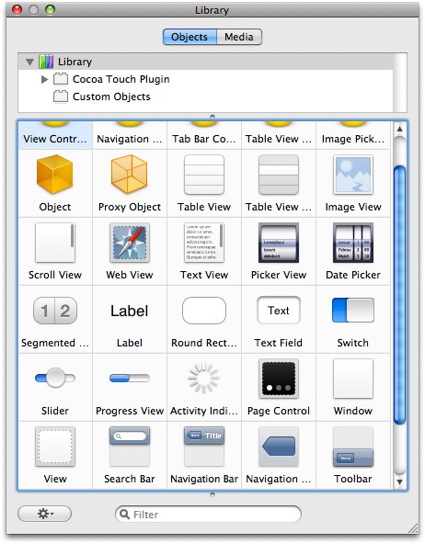
Figure 3: Interface Builder Widget Library
The basic idea is that you drag items from the library onto your application’s window where you can arrange, group and customize then them as needed. Once you get everything set up, you’ll use IB to link actions such press, scroll, etc. to your own code.
And speaking of code, all of the code in the template files is written in Objective C, and as mentioned earlier, I had never written a line of Objective C. Fortunately, Objective C is a superset of C. So in the interest of time, I intended to write most of my own code in C and only use Objective C where I needed to do user interaction.
Initially I didn’t need much user interaction. I just wanted to set up a blank OpenGL canvas that would open when my application started. And the Open GL template provided by Apple took care of this for me. So with little work, I had my own application that I could start up on the simulator with a basic OpenGL canvas for me to draw to. Now would be he hard part. Creating the code to bring my idea to life.
iMesmerize
So what was my idea? You might remember that I checked out the AppleTV a while back and one of the features that I really liked was the photo screen-saver. It’s a bit hard to describe in print or even in a still picture (Figure 4).

Figure 4: AppleTV Screensaver
But basically, the screen saver slowly scrolls 3D planes of your pictures up the screen and then occasionally does a complex 3D twirl, spinning and then bringing the photos back to their original location.
When hanging around the house, I tend to fire up some music, and turn the screensaver loose on my collection of family pictures where it does its thing for hours. I’ve seen visitors to the house just sit and stare, almost mesmerized, listening to the music and watching the pictures twirl by. So as much as I use this feature, what if I could do the same type of display on the iPhone? Would anyone else find it a useful capability? I thought so. And given the effect on people, I decided on a name: iMesmerize.
I had a basic OpenGL application running. But I still had some concerns that I’d even be able to access any pictures that were outside of the iMesmerize directory structure. Applications running on the iPhone are advertised to be “sandboxed” in that they can’t access files from other applications. If I couldn’t get to photos from elsewhere, I’d have a pretty boring application.
But since I could write some code in ordinary C, I could utilize standard Unix library routines to see just how far I could go. The Xcode IDE has a nice debugger built in. But for quick-and-dirty debugging you can also just use the old standby, “printf” to a console as seen in Figure 5.
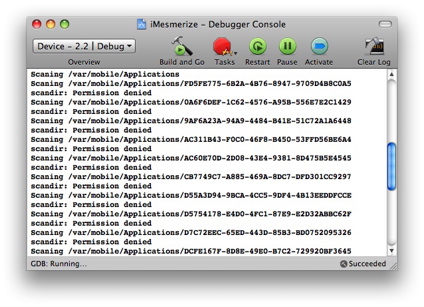
Figure 5: Xcode console
In this screen, you can see an attempt to look for photos in the directories of other applications. And you can see that I was turned away. Eventually I found that I could see the photos in the directory that the iPhone camera used, and also where images were saved from email or web browsing. I would also have liked to get to photos from the Photo application itself. But at this time, the only interface available let me get to only one photo at a time, which doesn’t really do the trick for my application. While working through these issues, however, I decided iMesmerize was feasible. So I bit the bullet and spent the $100 to allow my application to be installed on my iPod itself.
Installation
All the code running on your iPhone or iPod touch has to be signed (hacks notwithstanding). So as part of the process of signing up, you’ll be instructed how to generate public and private keys for signing your application. I won’t attempt to duplicate Apple’s long instructions in this article, because this process is very sensitive to mistakes. I’ll just say that you really, really need to read carefully and follow the instructions precisely, Because if you don’t, you’ll get something wrong (like I did) and you’ll end up with cryptic errors and code that won’t install (Figure 6).

Figure 6: Error installing to my iPod
For me, figuring out where I went wrong meant lots of documentation re-reading and Googling for information. From my searches, it appears as if this is a common problem. But I eventually found a good site that gave me the answer.
I had generated my keys properly, but had neglected to set up the “bundle identifier” in my Xcode environment so that it matched the information I filled out to get my keys. So be careful in this area, and if you run into trouble, check the site above and make sure your “bundle identifier”, found in the info.plist property file, matches what you entered when you set up your account with Apple.
Once I was set up, I was able to load my own generic image-displaying OpenGL code into either the simulator or onto my iPod itself. And I had shown that I could scan the file system looking for images that my code could display. At this point, it seemed like there were no roadblocks if I could pull it off in the time allotted.
So now I was about four days into my two weeks, but these were long days spent picking up some Objective C, learning how to effectively use Xcode, working through my digital signature issues and picking back up on my rusty C. At the time, I was able to display a single photograph using OpenGL calls, but there was obviously a lot more to do.
So the next few days were spent working on the basic algorithms such as collecting a set of images from the filesystem, resizing images that were too big, handling corrupt images, rotating the display through the available images, adding randomization, handling the case where too many or no images at all were found, etc. All the corner cases had to be handled gracefully.
And of course, there was the math behind the basic image rotation. At first glance, the animation seemed simple, but there was really more to it. During the rotation, the center viewpoint needed to glide in and out. The rotation also varied in speed, getting faster around the 180 degree point.
Luckily for me my son, Mr. Perfect Math ACT, was home from college and whipped up some formulas that made the animation silky-smooth. As a bonus, he had just finished a course on OpenGL, so he was able to optimize my rendering code and generally help out with coding tasks. Now, around ten days in, iMesmerize was getting fairly functional as seen in Figure 7.
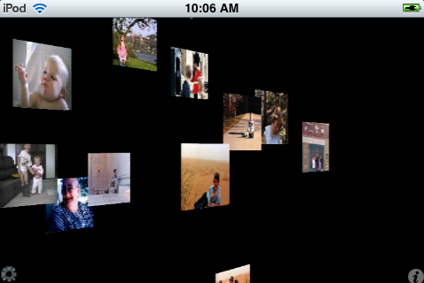
Figure 7: iMesmerize
You can see in the screenshot that I also had display rotation working by this point. When the user rotates the display, the animation flips and keeps right on going. So things were coming along nicely, but there was still a lot to do to polish everything up. So over the next few days, I started in on the final features.
Since this is a touch-screen device, I had to add some touch features. I put in code so that a slow movement of the finger would be interpreted as pan and a quick move, as the initiation of a rotation. I also added code to set the rotation direction right, left, up or down based on the direction of the quick swipe. Users also expect zoom capabilities so I had to code pinch gestures to zoom in and out.
If you’re going to add touch support to your application, the standard development environment has nice support for detecting the various touches and swipes. But the coder is still responsible for determining what constitutes a specified action and what should be done when an action is detected. Luckily there are many code examples to be found around the Internet that you can use as starting points.
To finally get iMesmerize ready for sale, I wrapped up a few more bugs, added a initial “Loading Images” screen, created a write-up for the iTunes store and got configured with Apple for new signing keys. This last step was, once again, a bit of a pain.
Submission
The process of signing an application for final distribution is detailed and susceptible to error if you don’t follow the directions exactly. But this time, it went smoothly. Two weeks after I started, iMesmerize was written, debugged, digitally signed and submitted for approval to Apple. It was Sunday night after my two weeks off work and I was exhausted.
Two weeks start-to-finish. But of course, that’s not all there is to it. I had heard that Apple could take up to six weeks to approve an application for sale, so I settled in for a wait. And the following week, I found and fixed a bug so I updated a new image. And when the weekend came, I just couldn’t leave well enough alone, so I added a preference pane as seen in Figure 8.
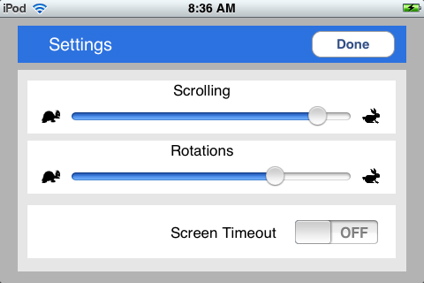
Figure 8: iMesmerize Preference pane
After only one week, I was surprised to get an email from Apple: Rejected. iMesmerize was rejected after it crashed during testing at Apple. Sigh. Apple sent me a log of the crash, but initially I was unable to duplicate it. But after going through my code line-by-line once again, I finally turned up a couple of bugs that might have been causing the problem.
First, I found an off-by-one memory allocation error (my bad) and then an area where, depending on how images were located, I could run off the end of an array. These errors were both due to my rusty C coding skills. When using C, you’re fully capable of shooting yourself in the foot and I had done it.
So I fixed these errors and tested and re-tested. Then I tested some more. Big images, small images, lots of images, no images. And then I re-submitted and waited again. And then, less than a week later, iMesmerize was in. Even though I was in, I was a bit disappointed to find that iMesmerize didn’t make the “New Apps” section in the store. Its first appearance in the store was several pages back in the Entertainment category, because it was listed using the date I submitted it rather than the date it was approved.
Closing Thoughts
So, looking back what had I learned? First even though I did it, two weeks was really too short. This was a relatively simple little program and it was still a large effort with many long days taken to get it out. Now that I have a little more experience, I could do it a bit faster (I already have a new idea!). But I really should have allocated more time.
My code is a pretty ugly mix of C and Objective C that should have been better arranged. And where I did use IB to build my menu, I didn’t do it correcttly with the right components. I also have non-internationalized strings embedded in my code and I didn’t use the right layout for my Settings menu. And of course there are additional features I could add, such as fetching images from somewhere like Flickr, loading images in the background so it starts up faster, etc.
But still, it was a fun, but exhausting effort that I’m glad I took on. And will iMesmerize succeed on the Store and make me the next iPhone Zillionare? There’s little chance of that. But I know that if you have an idea and don’t even try, you’ll have no chance at all.


