Introduction
 Note: The procedure described in this article will void the product warranty.
Last weekend, I was at Fry’s. They had the Promise NS4300N [reviewed] at $300, and 1T WD "green" drives for $220. For $960 before tax, I could do a 3 TB RAID 0, or a 1.8 TB RAID5 box. (The drives were one per customer, but the sales guy helped me out and I was with a friend, so I was able to get a total of three at the price.)
I brought it home and assembled it. I’m not a big fan of the proprietry plastic rails and proprietary screws, but I shouldn’t be reassembling it often.
Then I powered the unit on. As reviewers have said, the stock unit is seriously noisy. It was easily the loudest of the pieces of equipment I ordinarily have on. I was—I thought — prepared: I had picked up a replacement 80mm fan for the unit. Changing the case fan was going to make me all better, right?
I had not yet read the various helpful blog and forum posts from others who did this – in fact, I didn’t read them until after I’d written most of this piece! Before you go the route I went, you might want to read some of those posts as well, googling for "smarstor fan replacement" will start you off.
First challenge: the bits are not straight Torx bits, they’re Torx security bits, with a raised nipple in the center of the hex. If you have a small flathead screwdriver and are gentle, you can use the nipple to brace the blade of the screwdriver into the hex and turn it. It’s worth buying a set of Torx security bits for this project, though. There are quite a few Torxen in your way. This is a plastic case; the rear is not too hard to slip off, but be gentle.
Popping the rear of the case shows you the gig E port, the SATA card, the USB ports and the power supply, mounted below the hard drive enclosure. (Figure 1) (Sorry about the photo quality…all I had handy was a camera phone!)
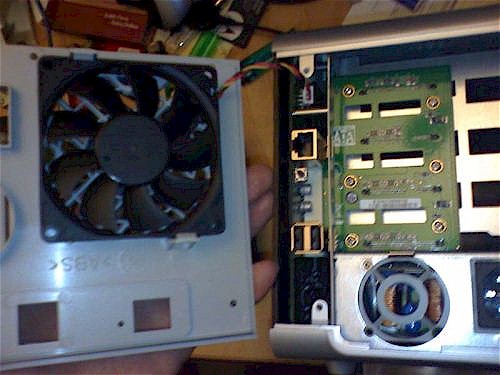
Figure 1: View with rear open
The case fan power lead is a three pin lead with nonstandard outputs. I gently pulled the white lead base off of the NAS to better expose the leads. I tried various configurations until I sounded out where I needed voltage and ground to land. Then I reseated the the leads so that I could get the RPM lead fitted back into the headshell.
A small flat-blade eyeglasses screwdriver for will depress the backs of the fan power leads in the plastic shell enough that you can gently free the leads from the shell and reseat them in any order. Antec and Silenx both make quiet 80mm fans; Silenx has a 5/8" thick 80mm fan that fits the retaining clips in the Promise box perfectly. It spins at 1100 rpm and has a 14 db sound output. I had a variable speed fan that I was trying, but it was flaking – often refusing to spin at all; once I sounded out the power leads, I went for the fan which could, at least, spin.
Figure 1 above shows the stock fan clipped in place. It’s a YS Tech FD128015EB and moves 45 cubic feet per minute at 37.5 db. Overengineered, or cheap? Probably both. But a good argument for going for the WD green drives; they’re relatively cool running. The stock fan is rated at 4800 RPM, and the firmware thinks the fan’s normal speed ought to be 2400 rpm, though—a much lower airflow. (The YS Tech fans that spin at 2600 rpm are rated at 26db and 24 CFM airflow.)
So, all good, right? Button up with the new fan and no more noise?
No. Button up, power on and hear the howling power supply fan. I couldn’t find information on the power supply fan online, and have discarded the fan. It was at least as loud as the drive exhaust fan, though, a 1 and 5/8" unit which would fit better in a 1U rack server than in a living room.
What to do? Return the unit, keep the drives, and drop hundreds more? After doing some reading, I saw too many reviews of other NASes saying "this is too loud" to justify returning this unit and bringing in a more expensive one – and risk needing to modify that one, too.
The power supply is mounted below the drives, so I decided that if I were going to modify airflow, I was going to wind up placing the NAS upside down to let the warm power supply heat the room instead of the drives. I decided to cut the fan out and risk the powe supply not starting, working on the assumption that I could hack in a replacement.
I looked at the bottom of the case for a bit and saw that all the screws are accessible. (None hidden inside the case feet, for instance.) It was now worth owning a set of Torx security bits. I went all out and bought a $25 kit that included a lot of security bits, not just Torx, and a second 80mm case fan. My thinking was that maybe, just maybe, I could sneak the case fan inside the case above the power supply. If not, then I would fasten it to the top.
If you want to do the full fan replacement, start with removing all your hard drives. Make a note of where they were. A labeler will help. The case is plastic, and you do need to be careful, but it’s possible to get the bottom and sides off the case. Unfasten the rear as above, then all the bottom screws, then slide the black side panel gently forward. You’ve just exposed the mainboard, so you want to be careful now.
Getting Rid of the Power Supply Fan
With the side and rear off, you can gently remove the bottom. There are three plastic latches and two posts that fit through female fittings holding it on. Gently depress the latches and gently tug the posts out of the fittings to remove the bottom. In Figure 2 below, you can see the post-and-latch arrangement. The latches are visible closest to you, as are the posts; the female fittings are resting close to the work surface.
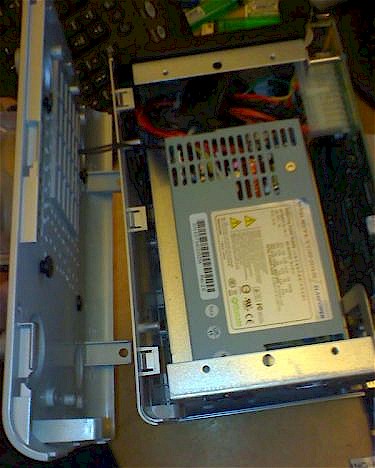
Figure 2: Bottom Cover Posts and Latches
Next, unfasten the power connector from the power supply to the motherboard. Unfasten all the screws on the motherboard, and gently disconnect it from the RAID daughterboard. This gives you access to a screw that holds the power supply in place, at the front of the unit, facing the motherboard. There are two screws at the rear of the unit (or was it three?) which hold the power supply in at the back. Unscrew them, and gently tease out the supply.
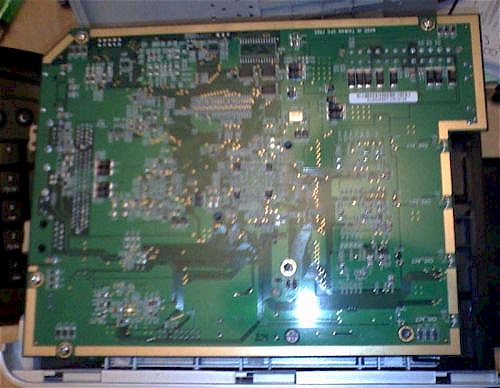
Figure 3: Motherboard exposed
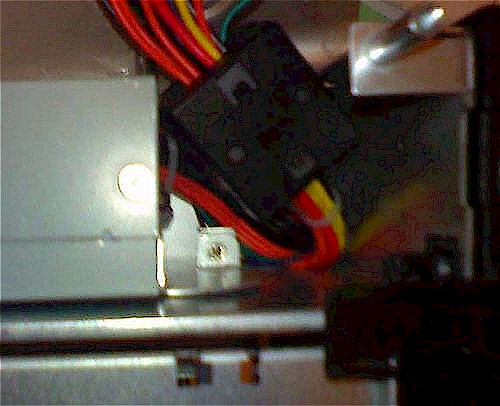
Figure 4: Removing the motherboard provides access to this screw
There are multiple screws holding the power supply cover on. One is under a label voiding the warranty, one is under the product identifier label. You have now irretrievably voided your warranty. The others are all visible, but it took me a little while to find the one under product label. Gently pry open the power supply. Cut the power leads to the fan as close to it as you can, and tease them backwards. They can be threaded out with the power yoke and redirected up through the grille to power an outboard fan.
As long as you’re there, you might as well pull out the fan unit itself. Definitely pull the clear plastic shielding out of the power supply. It’s on the inside, over the ventilation grill that sits above the heatsink. With the unit mounted heatsink-up, that will be the heat exhaust surface. Note that there is no room for a fan inside the chassis above the power supply.
Reassembly
Refasten the lid onto the power supply. Screw it back in place, gently refasten the motherboard to the power supply and RAID card and then screw it back down on its posts. Don’t refasten the bottom of the case yet.
I don’t know that you really need it, but I feel better being able to exhaust air from the power supply. So I placed a fan on the new top of the case and marked the corners. Then I spent a few minutes drilling holes in the top of the case – four large ones for the fan mounts, and many more as an "exhaust grille". I mounted the fan just behind the front feet on the case, so it’s directly over the heatsink.
The Silenx fans come with very nice silicone fan mounts. You don’t need them, but they’re easy to use up top. After you’ve drilled your mount points, tug the fan mounts through from the inside and you can easily fasten your top fan.
I threaded the power up through the ventilation slots to avoid fouling the fan. The trick for taking the leads out of a power connector comes in handy here, too. You can free the fan leads, carefully keeping the leads separated, and apply power to the unit. Power it on and figure out which ones are which. Power down, and you can either solder or slip the fan leads back into their sleeve with the power leads tightly wrapped.
Fit the second fan to the back panel, confirm that it is also seeing power, and you’re ready to button up. One thing which I’ve found makes a significant difference: in my mod, I’m exhausing heat out of the top, so I want to use the rear fan as an intake fan. When I used both as exhaust fans, the drives and CPU warmed up significantly.
Most of the case screws are going into plastic fittings, so don’t overtighten. Find yourself a few rubber feet for the new botttom of your case if you like.
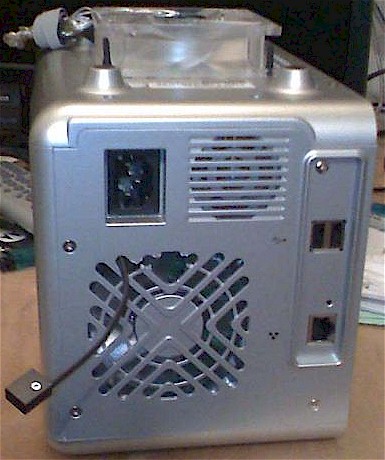
Figure 5: Reassembled case with external "power supply" fan
I’ve fitted variable speed fans to both the top and rear since I started, and modified the rear grille to thread out a cable for the speed regulator that you can see in Figure 5. I am finding that the Antec 80mm fans are quiet, but are either not true to speed or not accurately reporting speed. This is annoying because I have a warning in the system logs and an amber light on the front panel that is staying lit. I have to run that rear fan flat out to clear the light, and so I’m still looking for a perfect 80mm fan.
Wrapping Up
Once the unit is mounted, it looks okay—you’re not seeing much of the mods.
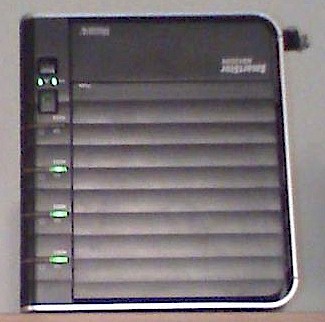
Figure 6: Finished mod in its new orientation
This modified NAS is now the quietest device I have in the living room and the CPU idles around 40 degrees. An additional modification I feel better about is adding ventilation to the front panel. The panel is black, the interior is unlit, so since this photo was taken, I’ve drilled a series of holes through the door. It helps with the temps of the drives themselves (for which there are no sensors that I’ve found.)
The modified NAS runs cooler than the stock product. The new fans add about 30 bucks to the cost of the unit, or $60 if you don’t already have a security bitset.
I’ve spent some time looking at the motherboard, obviously, and also looking at the embedded Linux. In the photo (blurry, apologies) below, the 14 pin connector up top is a JTAG connector. The CPU is an MPC8343VRAGD and it looks to me as if it could potentially be detached and replaced with a more capable CPU if there is one. (I know nothing about the Freescale chips.)
At the bottom of the board in line with the JTAG is a white connector; it is a four-pin connector, CN-9, which is also labeled COM. The OS looks to live on a Spansion S29GL flash unit.
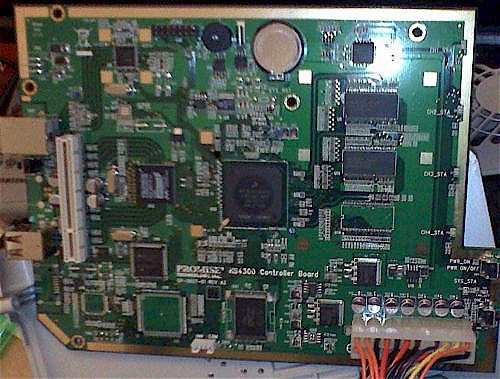
Figure 7: Motherboard closeup
I used the root password reset trick from the original review to explore a bit, and found an account on the system called engmode which I’ve accidentally discovered:
a) is always available
b) has the password test
I’d reset the password to test, then rebooted. I’d forgotten about the reboot; I couldn’t get back into root, but I could get back into engmode, which I had happened to set the password for earlier as test. Another is vpd-vpd, which cannot be logged into without test equipment attached.
For persistent access to the system, I really like uploading the hack to replace the DLNA stuff. I don’t use this as a media server, and I like being able to enable telnet and sudo without needing to redo my proxy configuration.
One thing to be aware of: if you use the NFS mode, you need to use jumbo frames. The NFS on this box is a UDP-only NFS, and it can corrupt data silently over gigabit links. UDP does a lot less accounting than TCP does, and can lose track of what byte was tied to what packet if you do a heavy sustained write.
The workaround for this is to use jumbo frames – I don’t think adjusting the time window on the NFS client alone will fix it, and I wouldn’t want to change the window on the Smartstor until I learn to make persistent changes in the filesystem. Or you can use SMB for both your Linux and Windows mounts of the system.
If you tell the Smarstor that it is the backup server, it opens an rsync port at 873. This rsync implementation does not have any modules defined; it is expecting a userid of Promise. So far, I’ve not been able to use it, but it seems the most promising avenue for using this box as a Linux backup destination.
I don’t particularly like static SMB mounts in Linux and NFS is easy but risky, both security-wise and from a data integrity standpoint. The one advantage to doing a persistent SMB mount is that you can then use rsync to that mount for backup. With jumbo frames on you can, in theory, also do an NFS mount and rsync, but the data corruption issue is a real concern. I’d rather do a pure rsync but am not yet there.
If there is a way to pry the CPU off and replace it with a better one, this system is crying out for it. At rest, the OS reports a load of 1. When the system is being used (say, when writing a large file or a backup) the load on the OS spikes to 7 as reported by top. The commandline is notably pokier at that point, and this is probably the biggest bottleneck on the system.
