Introduction

So Verizon has this whole pitch, bringing fiber to the home. Well, we are going to one-up that, by doing fiber in the home. Taking advantage of the economy, demand for SAN hardware has slowed at the same time that less expensive PCIe components have made obsolete a whole swath of perfectly good hardware. Combine that with marketplaces like EBay, forcing what were local equipment liquidators to compete globally on price and we can score data center gear for less than a tenth of its original cost.
In Part 1, we built Old Shuck, an inexpensive twelve drive, twenty bay NAS for less than $700. A beast that was able to pretty much hold its own against equipment that costs twice as much and holds less. This time, we are going to blow the top off that, converting our NAS to a 4 Gbps fibre channel SAN, connecting to a DAS server running Windows and out to the network from there (Figure 1).

Figure 1: Block diagram of the Fibre Channel SAN/DAS/NAS
We need to purchase the needed components, Fiber HBAs and the cable to connect them, then install the boards and configure them. We will then reconfigure our Old Shuck NAS array to support SCSI and Fibre Connect – Old Shuck will morph into a shining SAN. Once we get it up and running, we will do benchmarking, just to see how hardcore the performance really is.
Inevitably with these sorts of articles, someone will point out that you just don’t need this kind of equipment, performance or capacity in your home. While that may be true, I’d argue that, quoting an old Richard Pryor joke, the same folks would never drop acid and try to watch The Exorcist, just to see what it is like. There is a thrill to accomplishing something like this from the ground up, it is a cool bit of kit, the geek’s version of the old quote – “You can never be too thin or too rich” – you can never have too much storage or too much performance. Double that if you can do it on the cheap.
Brief Fibre Channel Intro
Fibre Channel (FC) has been around since the early nineties, as a replacement for the awkward supercomputer based HIPPI protocol, and has become the de facto standard for connecting high speed storage arrays to host servers.
Fibre channel (which does not require an actual fiber cable, it can use copper), accepts SCSI block commands allowing direct read/write access to served storage. Each node requires a FC Host Bus Adapter (HBA), and can be connected to each other in three different topologies: looped like token ring, switched like modern Ethernet, and point to point. We are going to be focused on the least expensive, point to point, which requires no switch or multiport cards, hence less dollars.
Each HBA has a unique identifier (like an Ethernet’s MAC address) called a WWN (World-Wide Number) and come in speeds ranging from 1 Gbps to 20 Gbps. We are going to be focused on 4 Gbps (800MB/s), which offers the best bang for the buck, and high compatibility – the current sweet spot.
In the terminology, which iSCSI adopted, the array is the target node, and the DAS server is the initiator. Since there is no inherent routing, like with TCP/IP (and less overhead), each node needs to be configured separately.
The Parts
As we said, to accomplish a fiber connected SAN, we need two fibre channel HBAs, one for our SAN node, the other for our DAS server. And we’ll need a cable to connect the two. Our budget for these pieces is $300, two hundred for the PCIe card, and $75 for the PCI-X card, and leaving $25 for the cable. A tight fit.
Linux best supports QLogic 2xxx cards right now, so our SAN node needs a 4 Gbps QLogic 2xxx PCI-X card (not 2xx since the popular 220 cards have issues). Our DAS node, running Windows 7, doesn’t have the same vendor restrictions. For probably superstitious compatibility reasons, it would be ideal to get the same card for our DAS. But with a PCIe interface, the PCIe card nervously promises to be our most expensive item, and most likely to push us over budget.
Hitting eBay, we immediately found a QLogic QLE2460 4Gb PCI-X HBA within our budget. Score! Now we need to find a QLE2460 PCIe card. All of the “Buy it Now” 2460’s are outside our budget, so we join several auctions only to get sniped at a little over the $200 mark (Arrgh!).The second time around we get lucky with a price that falls just under our limit, if you include shipping.
The cable is easy, we need a LC/LC (the newer type of fiber cable connector) patch cable, say 6 feet and searching we find a 3 meter cable for less than we thought we could.
What we got:
| QLogic QLE2460 4Gb PCI-X HBA | $54, EBay Buy it Now |
| QLogic QLE2460 4Gb PCIe HBA | $197, EBay Auction |
| Fiber Optic Patch Cable Cord 50/125 LC-LC 10M 33FT | $10, FiberCables.com |
| Total | $261 |
|---|
Table 1: Fibre Channel components
Great, we end up about $100 under budget, $56 under from the NAS parts, and $39 from here. Now I can sit back and wait for the sweet sound of the UPS van’s horn.
With the parts I have, I start building our NAS array, everything goes great until I get to the performance and stress testing phase. I’m seeing an odd message, something like “CPU #2 Now running within proper temperature range.” No previous indication that it wasn’t in range, but it appears as though we’re running hot. Darn.
Turns out that under stress our Norco case can be a little less than adequate at cooling, especially with passive cooling on the CPUs. This might be real trouble, isn’t like there’s a high demand for S604 CPU coolers. But lo, the builder’s favorite vendor, NewEgg, has active coolers for Nocona CPUs which will work fine on my 3.8 Ghz Irwindales. For what they are, they’re not cheap, $72 for two and a stall in performance testing.
| QLogic QLE2460 4Gb PCI-X HBA | $54, EBay Buy it Now |
| QLogic QLE2460 4Gb PCIe HBA | $197, EBay Auction |
| Fiber Optic Patch Cable Cord 50/125 LC-LC 10M 33FT | $10, FiberCables.com |
| Previous Total | $261 |
|---|---|
| Dynatron H6HG 60mm 2 Ball CPU Cooler (X2) | $72, NewEgg |
| Total | $333 |
Table 2: Fibre Channel components, revised
Over budget on Part 2 by $33. But we now have all the components we need – done with the shopping.
Putting it All Together
We now have our FC HBAs, one for each end of the connection, and the cable to connect them. Bringing up the SAN is straightforward, but will require working at the shell level, and familiarity with a Unix editor.
We have four main steps needed to complete our big conversion:
- Install – Install our two HBAs, one under Windows, the other under Openfiler.
- Configure – Configure Openfiler to run as a SAN FC Target
- Convert – Change over our RAID array to run as SCSI array.
- Start-up – Connect Windows DAS server as an FC Initiator
Installing Fibre Connect HBA on DAS Server
We are going to start with the easiest part, configuring the PCIe QLogic FC HBA in our DAS server. We are starting here because we are going to need the Port Name / WWN of the adapter to configure Openfiler as a SAN. We’ll then install our second HBA in Old Shuck.
Remember these cards are used, you have no guarantee that the settings are in a known state, it’s probably a good idea to reset both them to their factory settings. You can do this at boot-up, once you see the banner for the QLogic card hit Control–Q, there you’ll find a BIOS menu selection for restoring the card to the default factory settings.
There are no real hard requirements for the DAS server, dedicating a machine is not necessary. But it goes without saying that the more capable the box, the better a gateway it’ll make performance-wise. Gigabit network and at least 2 GB of memory with a multicore processor would be a good start.
We are using BlackDog, our mainline Windows desktop, a homebrew AMD Phenom II Black X3 720 with the fourth core unlocked and overclocked to the point that it emits a small subsonic tortured whine that every electric company loves. Effectively an X4 965, with 8 GB of memory and a SSD for paging, running Windows 7 x64.
You will need to get QLogic’s SANSurfer from their site. Select your model HBA to get a list of downloads – don’t worry about the driver, since Windows will automatically install them for you, all you need is the FC Manager. If, like us, you are on Windows 7, there isn’t a version for it, just grab the version for Vista, it’ll do the job.
Before installing the software, go ahead and shut down, then gently insert the HBA into your PCIe bus.
After bringing your server back up, Windows should recognize the card and install the driver. You now need to install SANSurfer, choose the manager GUI and Windows Agent (Figure 2).

Figure 2: SANSurfer Install
The Windows Agent acts as the initiator, and the manager allows us to configure the card. Once installed, go ahead and run it.
First, you’ll need to connect to the HBA. From the toolbar, hit Connect, you’ll get a pop-up offering to connect to localhost (figure 3). Check the auto-connect box and hit Connect.

Figure 3: SANSurfer connect
You should now see your HBA listed in the left hand pane (Figure 4), with everything marked Good. If not Good, drop to the QLogic BIOS, available at boot-up, and reset everything to factory settings, then try again.

Figure 4: HBA Status
From the manager GUI, select “Port 1” and from the top bar select Wizards -> General Configuration Wizard (figure 5).

Figure 5: HBA Configuration Wizard
Write down the Port Name field value, we are going to need it when we configure Old Shuck. Select the HBA and hit Next, skip past the informational page, and go to the connection settings page.
On this page set Connection Option to 1-Point to Point Only and the Data Rate to 4Gbps on the associated pull-downs (figure 6).

Figure 6: Connection Settings Pulldown
Now, skip to the end by clicking Next, and confirm the configuration by clicking Finish on the last window. You’ll be prompted to save the configuration – this requires a password, the default password is config.
You should now see the status screen with all the details of your card (Figure 7).

Figure 7: Completed Configuration
Leave this up and connected for now, we’ll be coming back to it.
Installing Fibre Connect HBA On Old Shuck
I next powered down Old Shuck and installed the HBA in a free slot. Comparative benchmarking showed that the best performance can be had with the HBA in Slot #3, the 133 Mhz slot. This indicates that the HBA is a bottleneck, not our 3Ware card.
Installing the 3Ware card in the faster slot, as we mentioned, does require disabling the onboard SCSI, otherwise you’ll see a resource conflict. What was surprising is not the problem, but Supermicro’s excellent support. We contacted them by email with a problem on a five year old motherboard, and within two hours they had responded with the correct solution. How many other vendors support even their current products so well? In comparison, on previous builds, real problems with both AMD and Asus saw no resolution, or more often no response at all. Impressive, and kudos to Supermicro!
After installing the card, boot the machine with one hand on the keyboard, when the QLogic BIOS banner appears, hit Ctrl-Q to enter its BIOS. We need to verify the Adapter Settings (Figure 8), since we want our two cards agreeing on settings. These three settings are:
Frame Size: 2048 (default)
Connection Option: 1 (Point to Point)
Data Rate: 3 (4Gps)

Figure 8: QLogic BIOS, Adapter Settings
If there are odd values, or you have problems later, the QLogic card can be reset to factory defaults from the main BIOS screen. Once the values are set, go ahead and complete the boot up of the SAN server.
Take a moment now, once the card is in, to make the cable run between the DAS server and the SAN server. The cable has a nice snap to it, doesn’t it?
The QLogic card is now ready to be paired with our initiator. We just have to configure Openfiler, first for our SAN storage, and then associate that storage with our new HBA.
Undoing The Previous NAS settings
We need to reconfigure our NAS array as a SAN array. Remember, NASes share filesystem based storage, whereas a SAN shares direct block storage. To setup SAN storage, we need to reformat our array, ripping up the XFS filesystem, and making it iSCSI.
We are going to delete our NAS volume group and create a new SAN volume group, which requires unwinding our shares and volume configuration from the bottom up.
In the Web GUI, from the Shares tab, delete the Shares entry that you created in Part 1. Then from the Volumes tab (Figure 9), delete the netarray volume, then finally delete NAS volume group using the Volume Groups right hand menu selection. I’ve seen Openfiler silently have issues with removing a volume group. So if the NAS group doesn’t disappear, you’ll need to zap it from the command line. To do this, log in as root, and at the command line execute the vgremove command:
vgremove nas
We are now back to a blank slate. Following the same procedures in Part 1 for creating a volume group, create one called san, using the same physical volume that the NAS volume group used.

Figure 9: Openfiler Create Volume Group
Once added our SAN volume group, we need an iSCSI volume. Under the right hand menu, select Add Volume (Figure 10) and create an iSCSI volume called FiberArray. Pushing that slider over to 14 TB is so cool.

Figure 10: Create Volume
Done. Now to the more difficult part, configuring and bringing up the SAN services on Old Shuck.
Configuring Openfiler as FC SAN
Openfiler uses the open-source Linux SCSI target subsystem (SCST), which handles iSCSI and our QLogic HBA. To make our array available by fiber, we need to tell SCST three things:
- That we have an FC HBA.
- The volume it should serve.
- Who’s going to be asking for our hunk of storage.
Configuring these details is straightforward, but regretfully Openfiler doesn’t provide a GUI to do so. We have to do it by hand, at the shell level.
You can work from the console, or probably more conveniently, install either Putty or Cygwin and connect via ssh (secure shell). Both will let you conveniently cut and paste. By default ssh is enabled under Openfiler. Either way, log in as root.
Initially, we have some groundwork to do; we have to change when SCST will start, and enable it to run.
First, change the run level to ensure volumes are mounted and required services are up before sharing. You’ll find, the commands towards the top of SCST initialization script, in /etc/init.d, a chkconfig directive. Doing a grep chkconfig /etc/init.d/scst should bring you to where you need to be. It should look something like this:
[root@OldShuck ~]# grep chkconfig /etc/init.d/scst #chkconfig: — 14 87
Using your favorite editor, change the first number, in this case 14, to 99. This will move the startup of the scst service to the end of the line, ensuring everything it needs has already been started. If you grep the file again, it should now read:
#chkconfig: — 99 87
We can now tell Old Shuck that it needs to start the scst service at boot-up, and we’ll go ahead and start the service now so it can be configured.
This should look like:
[root@OldShuck ~]# chkconfig scst on
[root@OldShuck ~]# service scst start
Loading and configuring the mid-level SCSI target SCST. [root@OldShuck ~]#
One last thing, we need the name of the demon if we are to summon him. In this case, that name is the unique identifier for your HBA. The WWN is in a file called port_name, in a directory assigned by the system. To get it:
cat /sys/class/fc_host/host*/port_name
Navigating directories, it looks like this:
[root@OldShuck ~]# cd /sys/class/fc_host
[root@OldShuck ~]# ls
host5
[root@OldShuck ~]# cd host5
[root@OldShuck ~]# cat port_name 0x210000e08b9d63ae
When working with your WWN it is parsed like a MAC address, by hex byte, so Old Shuck’s WWN is 21:00:00:e0:8b:9d:63:ae
We have everything set up and are now ready to start configuring SCST. SCST is configured through the scstadmin command, we will use scstadmin to set scst parameters, then write the configuration to /etc/scst.conf so it persists across reboots.
First, to enable FC HBA as a target host, you’ll need the WWN from above, i.e. scstadmin -enable <your wwn>
[root@OldShuck ~]# scstadmin –enable 21:00:00:e0:8b:9d:63:ae
Collecting current configuration: done.
—> Enabling target mode for SCST host '0x210000e08b9d63ae'.
All done. [root@OldShuck ~]#
Now add the array to SCST. We’ll assign the array a device name, tell it to use the virtual disk handler, provide the device path to the volume we set up above, and, for now, use the WRITE_THROUGH cache policy, i.e. scstadmin –adddev <your device name> -handler vdisk -path /dev/<volume group>/<volume> -option WRITE_THROUGH
[root@OldShuck ~]# ls /dev/san
fiberarray
[root@OldShuck ~]# scstadmin —adddev SAN_LUN0 —handler vdisk —path
/dev/san/fiberarray —options WRITE_THROUGH
Collecting current configuration: done.
—> Opening virtual device 'SAN_LUNO' at path '/dev/san/fiberarray' using handier 'vdisk'.. All done
The WRITE_THROUGH option means that we acknowledge the write once it is flushed from the cache to the disk. We could use WRITE_BACK policy option, which acks the write before it is flushed, problem is, if the power fails or something else goes wrong you could lose data. The tradeoff is speed, it takes time to flush the cache.
We now assign our device to the default group and give it a LUN. SCST provides for groups to ease administration of who can access what. SCST comes with a Default group (note the capital D) which is just that. We’ll assign our device to that group and give it unique logical number (LUN), in our case, zero, i.e. scstadmin –assigndev <your device name> -group Default –lun 0
[root@OldShuck ~]# scstadmin –assigndev SAN_LUN0 —group Default —lun 0
Collecting current configuration: done.
—> Assign virtual device 'SAN_LUNO' to group 'Default' at LUN '0'..
All done. [root@OldShuck ~]#
If you were to have multiple volumes, you’d increment the LUN for each subsequent volume.
Openfiler SAN Configuration – more
We want our DAS server to access all the storage in the default group. In the terminology of SCST, the DAS server’s HBA, identified by its WWN, is a user (Figure 11). You’ll need the port name (the WWN) that we wrote down when we configured Windows box using SanSurfer above.
Add DAS server HBA to default group:
scstadmin –adduser <DAS WWN> -group Default

Figure 11: Add DAS HBA as a User
The configuration is almost complete, we have to write our configuration out to the config file /etc/scst.conf, so SCST can use it whenever we restart our SAN.
scstadmin –writeconfig /etc/scst.conf
By default, our HBA is disabled in the SCST configuration file, we need to enable it by moving the host entry, our SAN HBA, to the list of enabled targets. Do this by editing the /etc/scst.conf and cutting and pasting the entry (Figure 12).

Figure 12: Enabling HBA as Target
We are done configuring SCST. Your scst.conf file should look like the listing below.
# Automatically generated by SCST Configurator v1.0.11.
# NOTE: Options are pipe (|) seperated.
[OPTIONS]
#OPTION <1|0|YES|NO|TRUE|FALSE|VALUE>
# Copy configuration options during a -writeconfig
KEEP_CONFIG FALSE
# For FC targets, issue a LIP after every assignment change
ISSUE_LIP FALSE
[HANDLER vdisk]
#DEVICE <vdisk name>,<device path>,<options>,<block size>,<t10 device id>
DEVICE SAN_LUN0,/dev/san/fiberarray,WRITE_THROUGH,512,SAN_LUN0 df0abcfc
[HANDLER vcdrom]
#DEVICE <vdisk name>,<device path>
[GROUP Default]
#USER <user wwn>
USER 21:00:00:1B:32:0E:5D:91
[ASSIGNMENT Default]
#DEVICE <device name>,<lun>,<options>
DEVICE SAN_LUN0,0
[TARGETS enable]
#HOST <wwn identifier>
HOST 21:00:00:e0:8b:9d:63:ae
[TARGETS disable] #HOST <wwn identifier>
We have one last change to make before we are done. We have to change the QLogic default driver kernel module, qla2xxx, so that of the QLogic target driver module, qla2x00tgt, is loaded instead.
To do this you need to edit the module configuration file, modprobe.conf in the etc directory, changing qla2xxx to qla2x00tgt. When you are done editing, the file should look like the listing below.
alias eth0 e1000
alias eth1 e1000
alias scsi_hostadapter1 3w-9xxx
alias scsi_hostadapter2 ata_piix
alias usb-controller uhci-hcd
alias usb-controller1 ehci-hcd alias scsi_hostadapter3 qla2x00tgt
That’s it, all done. We are ready to fire up our Old Shuck for the first time. Go ahead and reboot your SAN server, once it is back up, your SAN server should be visible to your Windows DAS box.
After the reboot, SANSurfer should be able to see the disks – take a look in the left hand pane, select LUN 0. It should look like Figure 15.

Figure 15: SANSurfer LUN 0
If you cannot see your disk as LUN 0, go back through your configuration, verify both scst.conf and modprobe.conf, especially the WWNs, which are easy to mistype.
Configuring The SAN On The DAS Server
We can now configure our disk. Highlight ‘Port 1’ in the left pane of SANSurfer; in the left pane you should see a tab called Target Persistent Binding (Figure 16), select it, and check the Bind All box and click Save. We are done with SANSurfer now, so quit.

Figure 16: Target Persistent Binding Tab
The rest of the configuration is standard Windows, and your SAN is just a very large disk. Under Control Panel -> System and Security -> Administrative Tools bring up the Disk Management tool (Figure 17).

Figure 17: Windows Disk Management Tool
Go ahead and initialize and format the disk. You can then change to properties to share the disk to your network, making your DAS server a logical NAS.
See Figure 18, Cool, right?
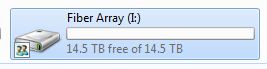
Figure 18: Shared SAN Disk
With everything set, let’s buckle in and take a look at performance.
SAN Performance
We are looking for Old Shuck’s SAN node performance figures, that is the speed over our 4Gb fiber link to BlackDog, our DAS node. These numbers should be much better than those of a comparable native drive, let alone our initial NAS speeds. Figure 19 shows our test topology.

Figure 19: DAS to SAN Test Topology
When initially started testing our SAN performance using Intel’s NASPT test suite, we got some outrageous numbers, like 2010 MB/s for the ‘File Copy from NAS’ test, and 1633 MB/s for ‘4x HD playback’. These indicated something was wrong or that we had inadvertently overclocked our PCIe x4 slot by a factor of two. Since there wasn’t any smoke pouring out of BlackDog, we guessed something was wrong.
After some brief research, we realized that we were boneheads, NASPT recommends a maximum of 2 GB of memory, being a Java application it uses the JVM for memory management. At 8 GB, caching was giving us speeds that were not in the realm of possibility (as much as we wanted to believe them…)
When we stripped back BlackDog down to 2 GB and retested, results emerged that made more sense (Figure 20).

Figure 20: Old Shuck SAN Performance
Very sweet numbers, with two exceptions, the Content Creation figure of 13.7 MB/s, which was most likely due to our stripe size, and the File Copy to Old Shuck, at 65.4 MB/s, still mysteriously low. Hopefully our planned tuning of BlackDog/Old Shuck as a logical NAS, in the next part, would give us a clue why this number was so much lower than our commercial competitors. It has us scratching our heads…
In Figure 21, we can see how we measure up against the SNB top performers. In all but the anomalous File Copy to NAS category, we trounce ‘em. But that is not a surprise, we’ve unfettered the traffic from the constraints of our Gigabit network.

Figure 21: Performance Comparison
Interestingly, if we compare the test figures of our SAN against those of the same kind of hard disk (compressed) connected on BlackDog’s SATA bus, Old Shuck still shines – putting CPU and fiber muscle behind the same model of disk makes a big difference (figure 22).

Figure 22: Hard Drive plus Standings
Wrap Up
Though the conversion / configuration process is a bit complex, it is straightforward and took about 30 minutes, the most difficult part is making sure the scst configuration file is correct.
And as you can see by the benchmarks, the performance is outstanding.
Let’s say you make your HTPC the DAS server, running a long fiber cable from your living room (the WAF factor for the Norco case is right up there with the dogs playing poker painting), converting the NAS you built to a SAN for less than $300. Now you are able to stream the densest Blu-Ray resolution known to man directly to your TV without a hitch, dramatically reduce the time it takes to rip that same Blu-Ray disk – and store, if fully loaded, about fifty more terabytes beyond that. Do backups and update music and pictures from any machine in the house via that shared drive.
You won’t have to worry about performance or storage for quite some time (or until 2015, when storage guru Tom Coughlin comes knocking at your door with his Petabyte.)
In figuring out how to convert our NAS to a SAN, I’d be remiss in not thanking the sources used in solving a problem of configuring fibre channel, a problem that has no official documentation. First there is Snick’s thread in the Openfiler forums. The other source we used was Brian’s How To. Without their generosity I’d probably be bald, and launching expensive equipment through windows (the kind you see through walls with).