| At a glance | |
|---|---|
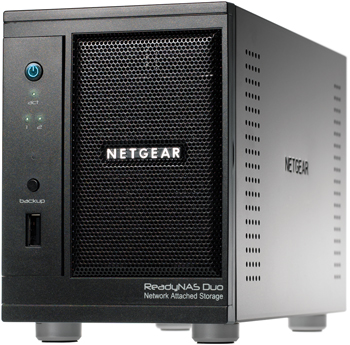
| Product | NETGEAR ReadyNAS Duo (RND2150) [Website] |
| Summary | 2-bay NAS based on Infrant’s X-RAID technology with flexible media serving. |
| Pros | • Excellent performance • High quality look and feel • Multimedia streaming and functionality |
| Cons | • Can’t configure to JBOD • Backup to external NAS problems |
Typical Price: $400 Buy From Amazon
Update 4/15/2009: Can be configured for RAID 0
Introduction
An article entitled “Digital Focus” in the St. Louis Post-Dispatch on June 1, 2008 led off with the headline “As consumers grapple with how to store and preserve digital photos, an entire generation of family memories is at risk.”. The article goes on to cite statistics that “the average online adult owns nearly 1,800 digital files…, yet 52% make no effort to back up these critical these files!” Closer to home, just this week one of my neighbors contacted me looking for help on their family PC which holds all their pictures yet will no longer boot.
In this review, we’re going to look at Netgear’s ReadyNAS Duo, a dual drive NAS with a wide array of media storage and sharing features, providing a solution for the 52% of us needing to secure our family memories before we lose them.
With their acquisition of Infrant Technologies and its ReadyNAS products in early 2007, Netgear has a suite of Network Attached Storage products to meet the needs of Home, Small Business and Enterprise level customers. The Duo is the member of this product line targeted at the Home user, and it is certainly a step up from Netgear’s earlier NAS offering, the SC101.
Physically, the Duo is a solid, yet compact device in an all black metal case, measuring 5.6”x3.98”x8.7” (h/w/d). By comparison, it’s not quite as tall as a Buffalo Link Station, but a little deeper. The front panel is magnetized so it stays closed easily and closes itself when left open at less than 45 degrees. The front of the device has a single USB port, with two more USB ports on the back. There is also a Kensington style security hole in the back for physically locking the device in place.
The power supply is an external brick that plugs into the back of the device. The exhaust fan is also in the back and is pretty quiet. There is a nice electric blue illuminated On button on the front of the Duo to fire it up. As the Duo boots, the internal cooling fan spins up to full speed and is relatively loud, but drops to a very tolerable hum within 30 seconds.
Internally, the Duo has 256MB RAM and 64MB Flash memory, providing responsive computing horsepower for configurations and support for multimedia network services including SlimServer, iTunes, UPnP AV, a “Home Media Streaming Server” and standalone BitTorrent functionality. The slideshow which has some good shots of the front, back and internal workings of the Duo.
Installation and Configuration
With the drives pre-installed, installing the Duo on my LAN involved plugging it in to power and to my network. I connected the Duo to a Gigabit Ethernet switch, and was pleased to see the interface negotiate to Gigabit network speed.
Included with the Duo is Netgear’s RAIDar software which is used to find the device on a LAN. It is a simple little application that presents a radar dish icon (Figure 1) while it scans your network for the Netgear Duo.
In less than 10 seconds, RAIDar discovered the Duo on my LAN and provided an output showing information about the device including the Duo’s IP address and Host Name. The RAIDar software also has Setup and Browse buttons which provide direct links to the Duo’s Admin configuration and to the pre-configured Backup and Media shares.

Figure 1: RAIDar at work
Configuration of the Duo is web based, using a secure HTTPS connection. I was able to configure the Duo using IE7, Firefox and Safari. There are nine different menu choices along the left that, once selected, bring up additional configuration options accessible via a drop down list on the left or tabs across the top. Table 1 below is a matrix of the Duo’s configurations options.
| Menu Item | Menu Options | |||||||
|---|---|---|---|---|---|---|---|---|
| Network | Interfaces | Global | ||||||
|
Security |
Passwd | User/Grps | ||||||
| Services | Protocols | Streaming | Discovery | Add Ons | ||||
|
Volume |
Settings | USB | ||||||
|
Shares |
Listing | Add New | ||||||
|
Backup |
Jobs | Add New | ||||||
|
Printers |
Queue | |||||||
|
System |
Clock | Alerts | Perf | Lang | Update | Confg BU | Power | Shutdown |
|
Status |
Health | Logs | ||||||
Table 1: Admin menu summary
Storage Modes
The ReadyNAS Duo comes in three flavors; 500GB, 750GB and 1000GB storage capacities. I’m testing the ReadyNAS Duo RND2150, which came with a pair of Seagate Barracuda 7200.10 SATA 3.0Gb/s 500-GB hard drives that Windows detected as having a capacity of 461 GB.
Netgear ships the Duo with a single SATA hard drive already installed in drive bay 1, thus it isn’t a BYOD NAS. Users can add a second drive to their Duo (Netgear provided the second drive for our testing purposes), which will automatically be detected and configured as a redundant drive using Netgear’s XRAID technology, or Expandable RAID technology. XRAID is similar to RAID 1, allowing for data redundancy over two disks, but providing no additional capacity.
For the second disk, you don’t have to add the same make and model of the existing disk, but it is recommended. Netgear has a hard drive compatibility listing, as well as other supported hardware, located here. Upon adding the second drive, XRAID will automatically make a duplicate of all the data on drive 1 and run that second drive in redundancy mode.
The nice thing about XRAID is that it is automatic and requires no configuration on the end user’s part. The bad thing about XRAID is there are no options to use other disk array types. A second drive can’t be configured in a RAID 0, RAID 1 or JBOD array. For a home user who doesn’t want to mess with these options, this makes the Duo more user friendly.
Update 4/15/2009: Can be configured for RAID 0
Due to user requests, NETGEAR added the ability to use the RAIDar utility to switch the Duo to Flex-RAID mode. In that mode, two drives can be configured for RAID 1 or RAID 0. The latter mode allows using a second drive for capacity expansion. But if you lose a drive all your data will be gone. JBOD or spanning mode is not supported.
Drive Fail Test
The Duo disk drives are hot-swappable, which I tested by removing the second drive while logged into the Admin screens. Upon removing the second disk drive, I received notification of a disk event that the disk had been removed from bay 2 (Figure 2).

Figure 2: Disk fail alert
Even with the second disk removed, the system continued to function. I was able to access data on the Duo’s network shares with the disk removed. The status screens did reflect the fact that a disk was missing, however.
Removing and installing the disks was solid. Pushing a button and lifting the lever allows for sliding the hard disk tray smoothly out of the Duo’s chassis as shown in Figure 3. Sliding the disk back into the chassis also was easy, giving the impression of quality construction.

Figure 3: Removing a drive
Upon sliding the second disk back into the chassis, the Duo quickly recognized and automatically started a resynchronization process. Although I hadn’t changed any files on disk 1, it looks like any physical disk activity will trigger the synchronization process. It took nearly 3 hours for the synchronization process to complete, but the Duo was fully functional during this time.
I repeated this entire exercise, this time removing the first disk drive from the Duo. The performance was identical, with the Duo generating notification of a disk event, but remaining fully functional without the first disk and during the subsequent resynchronization. It took another 3 hours to resynchronize, but again the system remained functional.
Security Setup
The first thing you’ll do to enhance security of the Duo is to change the Admin password to something other than the default value of netgear1. You’ll also want to configure the password recovery feature. Second, you’ll want to configure SMTP settings for password recovery and alerting capability. Finally, you’ll create users, groups, and folder share permissions.
Changing the Admin password is under the Security > Admin Password menu as shown in Figure 4. Here, you can change the Admin password and set up Netgear’s handy password recovery feature. In many small network devices, losing the password means resetting the device to factory defaults. Netgear has included a nice feature to recover the admin password without re-entering all your configurations.
In the event the Admin password is then lost or forgotten, logging into https://DuoIP/password_recovery will prompt for the configured email address and the answer to your password recovery question. I tested this feature and it worked as advertised, sending me an email with the new admin password.

Figure 4: Password recovery
The Duo can be configured to send notifications via email if given an SMTP account. As shown in Figure 5, enabling this functionality is a matter of entering an SMTP server address, port, user name and password. Once configured, an email address can be entered in the Contacts tab, and the configuration can be tested with a handy “Send Test Message” button. I used this function and received a confirmation email with text stating “If you receive this message, the email alert notification is working properly.”

Figure 5: SMTP configuration
A security hole in the Duo is that there is no idle logout for the administration menus. Once logged into the Web utility, the web session will stay logged in until the user logs out or closes the browser window. This is a security flaw as an authorized user could leave a session logged in and walk away, allowing an unauthorized party to access the device.
File security on the Duo includes the ability to define individual Users and associate them to Groups, allowing for efficient user management. I found it easiest to create Groups first, then create Users and assign them to Groups. Once Users are created and associated with Groups, permissions to various shares on the Duo can be configured for individual Users or Group access.
From a physical security standpoint, the Duo has a Kensington type security hole, commonly found on laptops to allow for locking the device with a short cable to some immovable object. I have a Kensington security cable I regularly use with my Dell laptop, so I tried it on the Duo. Unfortunately, I was disappointed to find that my cable, which works fine with my laptop, would not lock to the Duo. I think the problem might be that the security port on the back of the Duo is more recessed than the one on my laptop.
Share Setup
Out of the box, the Duo comes configured with two directories, or shares, called Backup and Media. Protocol access to network shares is configurable with CIFS (Common Internet File Sharing which uses the System Message Block Protocol(SMB)), AFP (Apple File Protocol), NFS, FTP and HTTP/S. I had no problem connecting Windows XP Home, XP Pro, and Vista machines, as well as a Linux PC to both share directories via CIFS.
Instead of creating a new folder, I used the existing Media share and copied all our family photos and videos to the Pictures folder in this directory. To control Read/Write access to the Media share, I selected Default Access to be Read Only. I then entered one of my Groups, called control, to have Write access to the share. Finally, I left the Allow guest access box checked. Figure 6 shows my selections.

Figure 6: Share access configuration
Specifying a User name when mapping a network drive in Windows is done by using the Connect using a different user name option under My Computer > Tools > Map Network Drive, as circled in Figure 7. For my wife and kids’ PCs, I mapped the Duo’s Media share without using this option, so they will have Read-only guest access.

Figure 7: Network drive mapping
On my PC, I mapped the Media share using the Connect option with a user name that belongs to the control group I created earlier. With this configuration, I can add and update our family photos to the Media share from my PC and allow my wife and kids access to the the Media share from their PCs without worrying about them accidentally deleting files.
I double-checked my configurations by having my son try to delete a file from the Media share from his PC, and was pleased to see him get an “Access denied” message. He still had access to view the files, but couldn’t add, change, or delete any of the files.
Additional shares can be created through the Add Shares menu by entering a share name and description then selecting or de-selecting Public Access. De-selecting Public Access in the Add Shares menu forces authentication to a newly created share. Once created, access to those shares can be further controlled by setting Default Access to Read/Write, Read-only, or Disabled.
With the Default Access option set, defining which users or groups will have Read/Write or Read-only access is a matter of checking the appropriate box and entering the user or group. To further enhance security, specific Host IP Addresses can be entered to limit file access to specific computers.
Media Services
The Duo is designed to centrally and securely store your multimedia files and deliver them over a network to various different players. Toward that end, there are multiple streaming functions which have to be individually enabled on the Duo via the Services > Streaming Services menu option, as shown in Figure 8.

Figure 8: Streaming Services
The SlimServer delivers music streaming to Squeezebox music players and there is an iTunes Streaming Server to enable streaming media files to Apple’s popular iTunes software.
With several iPod users in my house, I made copies of all our music and movies to the default media share on the Duo, which is a valuable operation by itself. Those files cost money on the iTunes Store, so having them backed up to the Duo is a wise move. I tested playing the audio and video files over our network and found both audio and video playback over a gigabit wired network to be smooth and flawless.
Video playback over my wireless network was choppy, however. Netgear’s documentation indicates wired networks will provide optimal performance for media streaming, which matches my experience.
In addition to SlimServer and iTunes support, the Duo supports Universal Plug and Play Audio-Visual (UPnP AV) detection and Home Media Streaming services, meaning Digital Living Network Alliance (DLNA) compliant network home media adapters as well as various network enabled DVD players will recognize the Duo’s media share and be able to access and play media files directly over your network.
Finally there is a USB Print server that supports printer sharing over CIFS/SMB and IPP over HTTP (IETF standard Internet Printing Protocol).
Photo Sharing
Additional multimedia services include ReadyNAS Photo software for sharing pictures and a standalone BitTorrent client for downloading files over the Internet independent of your PC. I didn’t give the Torrent download feature a workout, but I checked out the Photo feature. The Photo software allows for sharing pictures stored on the Duo with family and friends over the Internet.
ReadyNAS Photos is an AddOn function that can be installed on any ReadyNAS running 4.x firmware. But getting it running required some fumbling and using it requires a machine running Windows, Mac OS or Linux.
Clicking the Install ReadyNAS Photos button shown in Figure 9 takes you to a readynas.com page with download links for the application that installs onto your PC.

Figure 9: ReadyNAS Photo enable
But after downloading and installing the Windows version on an XP SP2 machine, the application was unable to connect to the Duo, even when the IP address was provided. Some searching around on ReadyNAS.com led to this forum thread that provided the clue to the problem; I had not downloaded the AddOn itself from here and installed it using the System > Update > Local function. Once I did that, a restart of the ReadyNAS Photo application found the Duo right away.
Photo uses a combination of a Java-based web service that you install onto a computer, a ReadyNAS and a readynasphotos.com website. All three (plus a working Internet connection, naturally) are required for full functionality. The application installs a System Tray application (in Windows), which, when clicked launches your default web browser, that is used for Album creation and viewing.
Photo also requires access to the Media > Pictures directory, which is one of the Duo’s default directories. But it doesn’t automatically create albums from folders and pictures that are already located there. Instead, you must use the Import Albums feature. In Figure 10, I’m importing a folder that is already sitting in the Duo’s Media > Pictures folder.

Figure 10: Importing a folder into Photo
The import automatically creates thumbnails and an album index (Figure 11). Once you’ve created an Album, you can share the entire album or selected pictures by generating an email invitation what contains a link to the album.

Figure 11: Photo Album Index
You can also share with other ReadyNAS photo members via a messaging system built into Photo and accessed from the Tray application. I had no problem viewing a shared album by using the email invitation link as long as I provided the proper account login information (which was not provided in the email). There’s a good overview of Photo on the ReadyNAS.com website if you would like to see more screenshots of the interface.
I did some poking around to see what makes Photo tick and to find where it stores the photos. I found a directory in Media > Pictures named with my ReadyNAS photo username, but it was empty, even after I created an album. I couldn’t find any other photo related directories on the Duo.
I also tried both turning off the Duo and quitting the ReadyNAS photo Tray app while viewing a shared album on readynasphoto.com. It looked like the Tray application wasn’t required, but the Duo definitely had to be available. The mechanism seems similar to the Buffalo’s Web Access feature, which provides a web portal through which any files stored on a Buffalo NAS are remotely available.
Note that you must have the Photo application running on a computer to view the albums locally; all functions run through the web service installed on the computer, not on the ReadyNAS.
USB
There are three USB ports on the Duo, one in the front and two in the back. USB drives, digital cameras, printers and UPS connections can be connected to the USB ports. I connected a 2 GB thumb drive, which was quickly recognized (Figure 12). With a USB drive plugged in, the Duo supports copy operations to and from the attached device. In addition, USB drives can be gracefully removed by selecting the Disconnect option.

Figure 12: USB drive recognized
UPS Support and Power Saving
The Duo also detects and supports UPS devices. I connected my APC UPS to a USB port on the Duo, and the make and model was accurately recognized and displayed in the status menu. Once a UPS is detected, menu choices for graceful shutdown of the Duo are available as shown in Figure 13.

Figure 13: UPS menu
Also in the Power menu, the Duo can be configured to conserve electricity and turn itself on and off on a user customizable schedule.
Backup
There are two types of backups with the Duo. The first type, which is a typical use for a NAS, is for making backups of files and data from your PC to the NAS. Netgear includes a version of NTI’s Shadow (Figure 14) software for running backups on a Windows PC to the Duo.
I installed the NTI software to my XP Pro PC and configured it to run a one time backup of a folder with about 13 GB of data to the Duo, which ran without incident.

Figure 14: NTI Shadow backup
The NTI software supports not only one time and scheduled backups, but can be configured to perform continuous backups. Continuous backups have an advantage over scheduled backups, as file changes are immediately saved instead of waiting until some future scheduled backup time.
The second type of backup is to back up data on the NAS itself. Although the Duo can have dual disk drives with XRAID redundancy, making a backup of the contents of the Duo provides physical redundancy in case the Duo is stolen or destroyed.
The Duo has a built in backup utility that will allow it to run backups of its data to another network storage device. Alternatively, this same tool can be configured to run backups of data from another network storage device to the Duo.
As shown in Figure 15, Supported network files storage devices include Windows style shares, HTTP, FTP, NFS, and USB drives connected to any of the three USB ports on the Duo.

Figure 15: Built-in backup
I created a scheduled backup job to copy all my media files on the Duo to another NAS on my LAN, and a second scheduled backup job to make a copy of a different directory on another NAS on my LAN to the Duo. I scheduled both to run in the middle of the night. Unfortunately, the next day the log indicated both had failed.
Attempts to manually force the backups from the Duo Backup menu continued to fail. I tried the Connection Test feature in the Duo Backup menu that indicated the connection from the Duo to my other NAS was OK. Yet, despite multiple attempts, the backup operation always failed.
We checked into this with Netgear, apparently there is an incompatibility with the new CIFS/timestamp backup setup in the Version 4.X firmware and the way some NASes provide guest / public access. And the Connection Test function for CIFS uses a different mechanism than the backup process itself, which is why the Connection Test feature works, but the backup doesn’t.
The recommended workaround, which we were able to test successfully, is to change the public share on the target NAS to a controlled-access (password protected) share. Netgear is investigating this issue further, but there is no promised / scheduled fix right now.
Performance Tweaks
With a gigabit network interface, jumbo frame support, high speed SATA drives and a healthy amount of system memory, the Duo has the hardware to read and write data over a high speed network quickly. Jumbo frames are disabled by default, but can be enabled via a check box in the Network menu, then a system reboot.
Netgear’s menu (Figure 16) cautions that selecting the Jumbo Frame option requires an Ethernet switch and clients that support Jumbo Frames. This is important, as enabling Jumbo Frames on a network without end to end Jumbo Frame capability isn’t beneficial. For general networking details on Jumbo Frames, take a look here.

Figure 16: Jumbo frame enable
The Netgear manual states that the Duo supports jumbo frames up to 7936 bytes (8K). I tested this with the jumbo frames option enabled on a Linksys SRW2008 switch and a client PC running XP Pro with an Intel NIC configured to support 9014 byte jumbo frames.
A ping test from my XP Pro PC with the -f and -l options, shown in Figure 17, shows the Duo (192.168.3.170) responding to echo frames up to 7926 bytes.

Figure 17: Jumbo frame ping test
Enabling jumbo frames doesn’t always translate to improved performance, however. For example, I copied a folder with 4 GB of digital pictures from the Duo to the PC (i.e. reading) with jumbo frames enabled on Duo, NIC and switch and it took about 15 minutes. Interestingly, running the same copy operation with Jumbo frames disabled was slightly faster, taking only 13.5 minutes.
But copying a single large file—a 3.5GB Linux Image— showed improvement with jumbo frames enabled. In this case, the file copy took just 2:50 minutes with jumbo frames enabled and 3:25 minutes with jumbo frames disabled. To net it out, the ReadyNAS Duo definitely supports jumbo frames transmissions, which can be beneficial for some data transfers.
In addition to enabling jumbo frames as applicable, Netgear has some performance guidelines for the Duo on their ReadyNAS product site. Netgear recommends disabling the “journaling option…to boost write performance by about 25%,” but only if a UPS is connected to the Duo. The journaling option is used to ensure data parity in a RAID configuration. Without a UPS and journaling disabled, you run the risk of data corruption in the event of power failure.
Additional Duo performance tweaks are available under the System > Performance menu. Choices include Optimizing for OS X, Enable fast CIFS writes, and Enable fast USB disk writes as shown in Figure 18. Some of these tweaks may be applicable to your network.

Figure 18: Performance options
Performance
Even with its default settings, the Duo’s performance puts it near the top of our NAS Charts for dual drive NAS devices. I compared the Duo to a few other dual drive NAS boxes the: Thecus Yes 2100, Buffalo Link Station Pro and Synology DS207+.
As you can see in in Figures 19 and 20, the Duo’s throughput performance for disk Write Performance with file sizes from 32 MB to 1 GB on both 100 Mbps and 1000 Mbps LANs is excellent, with the Duo coming in second only to the Synology DS207+.

Figure 19: Write Performance comparison – 100 Mbps LAN

Figure 20: Write Performance comparison – 1000 Mbps LAN
Figures 21 and 22 show the Duo is at the top of the charts for throughput performance for disk Read Performance with smaller file sizes of 32 MB to 128 MB on 100 Mbps and 1000 Mbps LANs. With larger file sizes of 256 MB to 1 GB, however, the Duo’s Read performance drops below the Buffalo Link Station Pro’s.

Figure 21: Read Performance comparison – 100 Mbps LAN

Figure 22: Read Performance comparison – 1000 Mbps LAN
Run your own comparisons using the NAS Charts.
Pricing
The Buffalo, Thecus, Synology and Netgear products compared in the Performance section and in Table 2 below are have dual SATA drives and gigabit Ethernet with jumbo frame LAN interaces, but have different features and performance.
The Duo comes in as the most expensive of the three, but only $12 more expensive than the Synology and with similar performance. But keep in mind that the Duo includes a disk drive while the Synology is a BYOD device. The Buffalo is the bargain of the group with dual drives included, but its performance is also at the bottom.
| NAS | Price | Disks Included | Media Server |
|---|---|---|---|
| Netgear ReadyNAS Duo | $352 | 1 | Y |
| Synology DS207+ | $340 | 0 | Y |
| Buffalo LinkStation Pro | $282 | 2 | N |
| Thecus Yes 2100 | $280 | 0 | Y |
Table 2: Price comparison
Closing Thoughts
Overall, I came away with a positive impression of the ReadyNAS Duo. I rebooted, reconfigured, ran copy operations, re-synchronized and tested its features repeatedly without it hanging or crashing. The menus are logical and easy to work with, performance is solid, and I had no problem mapping five different PCs to one or more shares on the Duo.
Even though it adds to the total cost, I recommend if you’re going to put all your digital files on a Duo, get the second drive right away to ensure you have the redundancy of the XRAID functionality.
But there are some negatives, including the internal backup utility bug, security cable problem and lack of admin screen timeout. The Photo Sharing application also seems unnecessarily complicated, especially when compared to other NAS photo sharing features that don’t require a web service running on a computer.
With a redundant XRAID ReadyNAS Duo on your network, you’ll have the peace of mind that you’re no longer among the 52% of this country who are just a hard drive failure away from losing valuable iTunes files and thousands of digital pictures. My experience with the Duo certainly gave me the impression I could trust the Duo with my digital family memories!