Introduction
In Part 1, "The Alternatives," I shared my experiences and thoughts on options I’ve explored for Internet access away from the office. At the end of Part 1, I described my switch to Verizon Wireless‘ broadband wireless service and related how the Palm Treo 700p raised my hopes from using only pre-paid Wi-Fi remote access at Barnes & Noble to convenient Internet access everywhere.
In this Part 2, I’ll step you through a setup for Internet access that connects the Treo 700p and a Mac laptop via Bluetooth. Using Bluetooth to connect the laptop to the Treo 700p enables you to have a truly wireless experience since you’ll be able to access the Internet when your Treo 700p is in its belt clip holster, charger or briefcase. Internet access is via Verizon’s BroadbandAccess EVDO service.
Now, since we know what’s in store, let’s get started.
Step 0: Background material
To find out more about the EVDO services, explore EVDOinfo.com, EVDOforums.com, and Booster-Antenna.com. EVDOinfo and EVDOforums have a similar look, and may even be the same site, since both provide pseudo-news coverage of Verizon and Sprint EVDO.
Information is posted on these sites, and as I said before, we can all benefit from sharing notes. For example, users on EVDOinfo.com and EVDOForums.com shared stories on how they were able to subscribe to the BBA CONNECT UNL Service (which I’ll deal with later in Step 2).
Step 1: Get a Treo 700p
The "rectangular-hockey-puck" Treo 700p combines Palm Organizer, a mediocre camera (1.3 megapixel), an awkward-to-use MP3 player (because of the step-up adapter required to plug in headphones) and a phone that’s well integrated with Palm’s software organizer. The Treo 700p may sound like a "train-wreck on the function express," but I’m realizing as I use it, that it’s an awesome value with some great features in addition to its ability to get online anywhere.
The 700p is based on Palm software, and in the 5 years since I last used a Palm device, Palm has worked out a lot of bugs. Today, Palm’s improved synchronization works without duplicating the contacts and appointments every time. A 5-way button and a keyboard merged with the Palm interface makes the 700p simple and familiar to interact with.
Because I could use either the touchscreen or key commands, I often find that I take my stylus out, but don’t use it—a flashback to the simpler days of Lotus 1-2-3 when user interfaces were 100% keyboard driven, and my fingertips"knew" the software.
For those who listen to Audible books, the 700p integrates beautifully with Audible’s Palm software. When I’m listening to a book and the phone rings, the 700p pauses the book, and lets me answer the phone without my having to fumble to shut off the Audible player first. Though the feature seems simple, my previous generation Toshiba 2032SP Pocket PC phone did not link the Audible and telephone functions.
Step 2: Get Verizon Wireless’ EVDO and Tethering Service for Your Treo 700p
Although they are unlikely to let you walk out their doors with the 700p without the EVDO access turned on, your challenge is in getting Verizon Wireless (or Sprint) to turn on the Tethered Modem BroadbandAccess Connect option. In Verizon Wireless’ "It’s the Network for business" brochure, the service is listed on page 9, row 7 as being available as an option; so, when you’re in the store, ask the salesperson to sign you up for this $15/month package.
Why? Because the extra $15/month enables you to authenticate your account so you can get your laptop on the Verizon EVDO network using a 700p. Without this service package, you can try to dial in, but you will not be able to authenticate and get on the network.
If you are reading this paragraph and are already out of the store, you can still login to Verizon Wireless and send an email to technical support, asking them to sign you up for the BBA CONNECT UNL Service for tethered broadband access. This approach worked for me.
Others at EVDOinfo.com and EVDOForums.com reported success in subscribing to the service as well; they called customer support for the phone at Verizon Wireless and carefully read the BBA CONNECT UNL Service description to the service agent. When the agent looked up the description, he or she found it, and were able to supply the answer, "Oh, yes, that’s what you want."
Step 3: Get a Laptop
For this project, I decided to use my MacBook even though the Mac isn’t supported by Verizon Wireless. As crazy as it sounds, the Mac platform not being supported by a big slow-moving bureaucracy isn’t a handicap. For example, I was able to connect my MacBook without any company-provided software.
A Small Wireless Networking Rant: Big companies are "supporting" us by providing software packages that do the same things as Microsoft, only in a slightly different way, and unfortunately, none of their utilities are actually easier to use than Microsoft’s wireless user interface. Gateway, HP, Dell, Broadcom, and other companies, which provide 802.11x software to help us, are complicating our setup, since we’ll have to learn a new user interface every time we set up wireless on a laptop, instead of just having to learn the one (Microsoft’s). Consequently, 802.11x wireless setup on Windows has become a "Tragedy of the Commons." Quoting Aristotle, "That which is common to the greatest number" [Microsoft’s 802.11x user interface] "has the least care bestowed upon it."
Fortunately, Mac users are ahead in the game since they don’t rely on the big companies that support only the dominant computing platform. Instead, Mac users have tinkered, tricked, experimented, and tried, and come up with procedures to get Powerbooks, MacBooks, iBooks, and MacBook Pros on the Internet using the Treo 700p. Then, the tips, tricks, and traps have been shared on the Internet.
Lately, some big companies are beginning to recognize the Mac as a growing platform. Palm.com provides instructions similar to the step-by-step that follows. Palm’s instructions are generalized across carriers, but the instructions are excellent, and if my step-by-step does not get your connection working, try theirs.
Step 4: Enable 700p Bluetooth
Avoid my mistake, and use the minimum number of Bluetooth connections to get the job done. The minimum number of Bluetooth connections to get your laptop connected to the Internet is one: the connection between the laptop and the 700p.
When setting up my 700p, I made the mistake of connecting to too many Bluetooth-enabled devices. The first connection was between my laptop and the 700p, and with one Bluetooth connection, I had no problems getting a connection to the Internet. When I had four Bluetooth connections, my 700p started chiming when I tried to connect to the Internet, and then the connection stopped working.
I called the Verizon Wireless Technical Support Line, and the first words the technician said were, "How many Bluetooth connections does your Treo 700p have?" When I reduced the number of connections from four back to two (laptop and hands-free headset), my laptop was able to connect to the Internet again.
Since the connection setup needs the laptop to discover the 700p, and the 700p does not broadcast its existence by default, the first task you will need to perform is turning on its Visibility option so that the laptop can discover it.
Get your 700p and turn it on by pressing the red Power button located on the right side (shown in Figure 1); next, turn off the keyguard feature by pressing the Selector button in the center of the 5-Way Navigator; and then, press the Phone Handset button (bottom left).
Figure 1 shows the front of the 700p with a view of its phone screen, Send and Power buttons, 5-Way Navigator, and quick buttons.
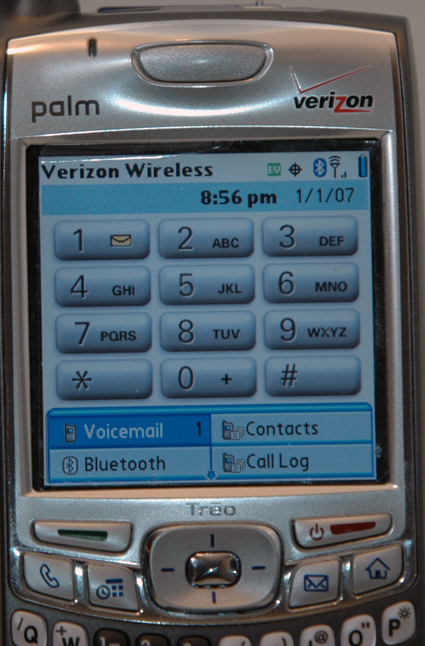
Figure 1: The 700p Phone Screen, Send and On Buttons, 5-Way Navigator, and Quick Buttons
Next, access the Bluetooth Setup screen on your 700p by clicking the Bluetooth icon (upper right corner of the screen). From Bluetooth Setup (shown in Figure 2), set the Bluetooth option to On, enter a Device Name for the 700p that is descriptive and helpful enough to distinguish it from other available Bluetooth devices when your computer looks for it, and set the Visibility option to Visible.
The phone is now visible to all Bluetooth devices, enabling your 802.11x base station to broadcast its name.
Note: After your computer pairs with the 700p, you can turn off the Visibility option if this worries you.
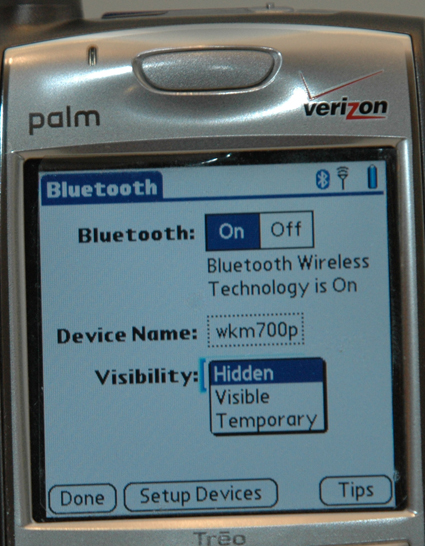
Figure 2: 700p Bluetooth Setup Screen
When your 700p is broadcasting its existence, you can put the 700p down and move on to your laptop setup.
Step 5: Connect 700p and Laptop
On your MacBook, click the Apple icon in the upper left corner; then, select System Preferences (fourth row). When the System Preferences screen appears, look for the Bluetooth icon (the second row of icons on the left side), and left-click it one time. Then, choose the Set Up New Device option in the lower right corner.
If your Bluetooth hardware is turned off, you will be prompted to turn it on. If it is on already, the Bluetooth Setup Assistant Startup screen appears (shown in Figure 3), and you can click Continue to proceed.
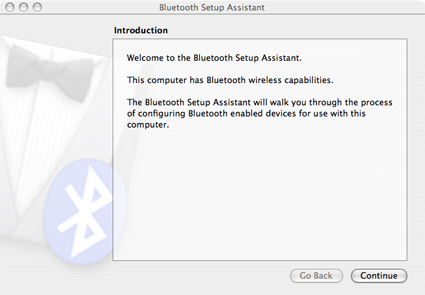
Figure 3: Startup of Bluetooth Setup Assistant
Next, the Select Device Type screen prompts you to choose the species of Bluetooth device the Mac laptop should look for. Choose Mobile Phone, the third option (shown in Figure 4).
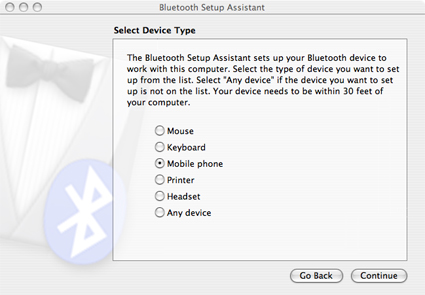
Figure 4: Bluetooth Device Type Screen
The Mac laptop will then search for the 700p. During the discovery and pairing process, you should consider moving to a quiet place that is away from heavy business traffic; though even in a quiet place, you’ll still have to wait for the laptop to find the 700p. When I first tried to make the connection to pair the laptop with the 700p, I was at the Denver Airport, and there were so many Bluetooth devices in this environment that the laptop couldn’t discover the 700p.
Click Continue after the 700p is discovered. Figure 5 below shows a Bluetooth Mobile Phone Set Up screen listing the name, wkm700p, I gave my 700p.
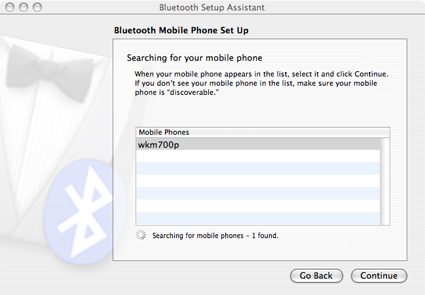
Figure 5: Nearby Devices
The Bluetooth Mobile Phone Set Up screen (shown in Figure 6) that appears next is purely informational, telling you that the laptop is gathering information about your 700p. Click Continue to dismiss the screen.
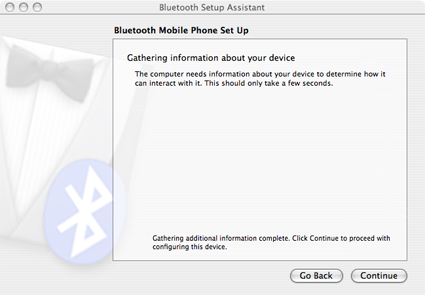
Figure 6: Authentication Key Screen
Next, an authentication screen (shown in Figure 7) appears with an authentication code for the Bluetooth connection between your 700p and your laptop and instructions on how to complete the pairing process.
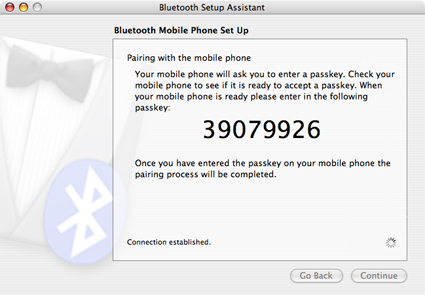
Figure 7: Bluetooth Authentication Screen: Laptop Side
After the authentication code (shown in Figure 7) appears on your laptop, an authentication dialog (shown in Figure 8) will automatically appear on your 700p. To connect the laptop to the 700p, read the code from the laptop’s authentication screen (shown in Figure 7), and type it in the passkey field in the 700p dialog using the numeric keypad. Then, click OK. Your laptop and the 700p are now connected via Bluetooth.
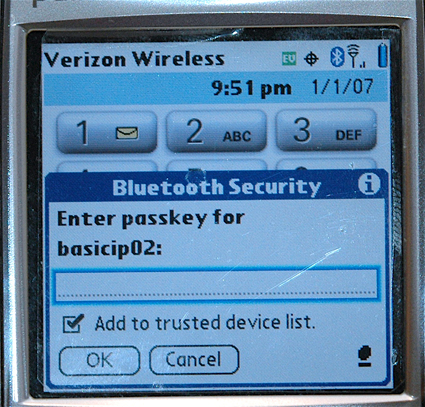
Figure 8: Bluetooth Authentication Screen: 700p Side
Step 6: 700p Internet access setup
After entering the data in the passkey field, you will be prompted to use your 700p as an Internet data connection (shown in Figure 9). The Access the Internet with your phone’s data connection option is selected by default; if not, select it, and then, click Continue.
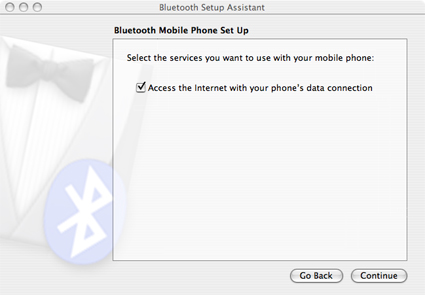
Figure 9: Want Internet? Screen
We’re getting close now! For the Dial-In and Modem Script screen (shown in Figure 10), two pieces of data will be needed. First, the phone number, which is #777, and second, a modem script you select by clicking Modem Script and scrolling down to Verizon Support (PC 5220) option. If you have a recent vintage Mac, the script will be available. If you don’t have it available, you can get it from Apple’s download area for Verizon BroadbandAccess Support.
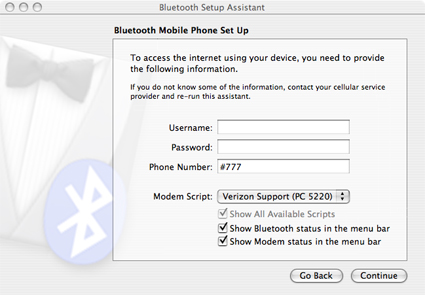
Figure 10: Dial-In and Modem Script Screen
When you have finished the setup, the Conclusion screen will appear (shown in Figure 11).
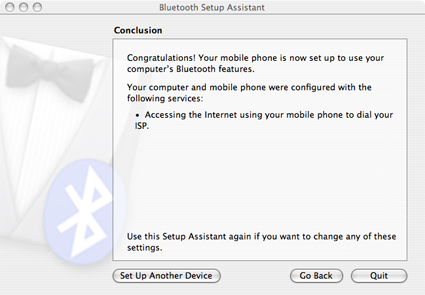
Figure 11: Last Bluetooth Screen
Now that we’ve finished setting up, we are almost ready to connect to the Internet through our 700p. First, we need to set up the features to dial in using the phone.
Open Internet Connect, which is located in the Applications folder. When Internet Connect opens, click the Bluetooth icon, and you should see the Internet Connect Dial screen (shown in Figure 12).
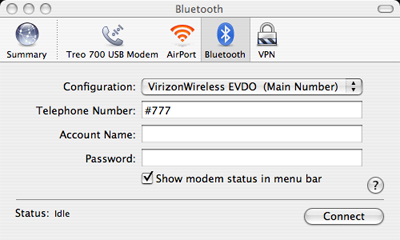
Figure 12: Internet Connect Dial Screen
If you select the Show modem status in menu bar option (shown in Figure 12), you won’t need to add Internet Connect to your dock or as a shortcut to your desktop in order to access your 700p for quick dial in.
Step 7: Connecting
Look for the Status Bar at the top right side of the Mac’s display. The modem option is in your Status Bar‘s drop-down menu, and you can dial in by selecting it (shown in Figure 13).
Figure 13 shows two connection options: a Bluetooth connection to the 700p, and a USB connection to the 700p. To login using Bluetooth, I select the VirizonWireless EVDO option, and click Connect. Be careful when you set up your Bluetooth modem because if you type the name incorrectly like I did—VirizonWireless—you can’t edit it later!
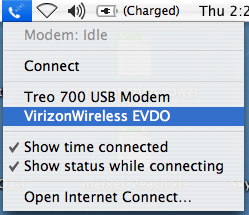
Figure 13: Status Bar Dialing
The Treo 700p takes about 5 seconds to establish a connection. Figure 14 shows the Status Bar scrolling the word "Connecting" from right to left as the connection is being established.
![]()
Figure 14: Status Bar Connecting Message Seen When 700p Logs In
Figure 15 shows the digital "stopwatch" timer appears on the Status Bar once the connection is made.
![]()
Figure 15: Status Bar Connected Stopwatch Icon
To disconnect, click the Status Bar‘s stopwatch timer and choose the Disconnect option from the drop-down menu (shown in Figure 16).
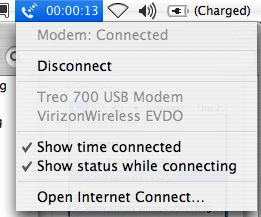
Figure 16: Status Bar Disconnect Dialog
Troubleshooting
If you follow the procedure I’ve taken you through, and your connection did not work, you may want to troubleshoot. First, check to see that you have the correct Internet plan. Palmone’s instructions for checking your requirements are as follows:
- If you have Cingular, you need Dataconnect or LaptopConnect for Tethered Devices
- If you have Sprint, you need Phone as Modem (PAM)
- If you have Verizon Wireless, you need BroadbandAccess Connect
- If you have other providers, try all of the above, and if these key words don’t work, try explaining what you are doing.
My one problem connecting to Verizon Wireless was not having the BroadbandAccess Connect service (BBA CONNECT UNL).
If you still can’t access the Internet through your 700p, check how many Bluetooth devices you have and cut down the number of devices to at most two.
So now you should be on the air. Next time in Part 3, I’ll compare speed data taken under a variety of conditions—Bluetooth EVDO access (laptop connects to 700p using Bluetooth), USB EVDO access (laptop connects to the 700p using USB), and 802.11 access (laptop uses 802.11a/g to connect to the Internet, instead of using EVDO)—to wrap up the article. See you then!
