This article is sponsored by Thecus.
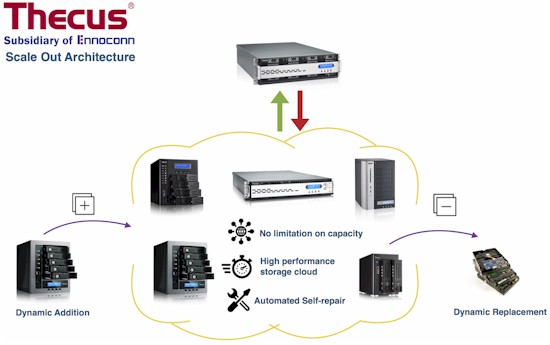
Thecus recently introduced a new feature in ThecusOS 7.0 called “Scale-Out Architecture” that dynamically distributes data redundantly across multiple NASes. You can use as little as one disk on two different NASes, or multiple disks on multiple NASes to create a storage pool. The Scale-Out feature copies the data across NASes, providing RAID level redundancy. All that’s required for optimal Scale-Out redundancy is to have each Thecus NAS connected to the same LAN.
Here’s a brief walk-through of setting up a Thecus Scale-Out cluster with screenshots from a Thecus N2810 (NAS 1) and N12910SAS (NAS 2).
First, on NAS 1, verify working RAID or JBOD and the IP address. As you can see below, NAS 1 has a two disk JBOD volume and IP 172.16.65.143.

Create Scale-Out with JBOD

Verify IP on NAS
Second, on NAS 1 in the Storage menu, select the Scale-Out menu, shown below.
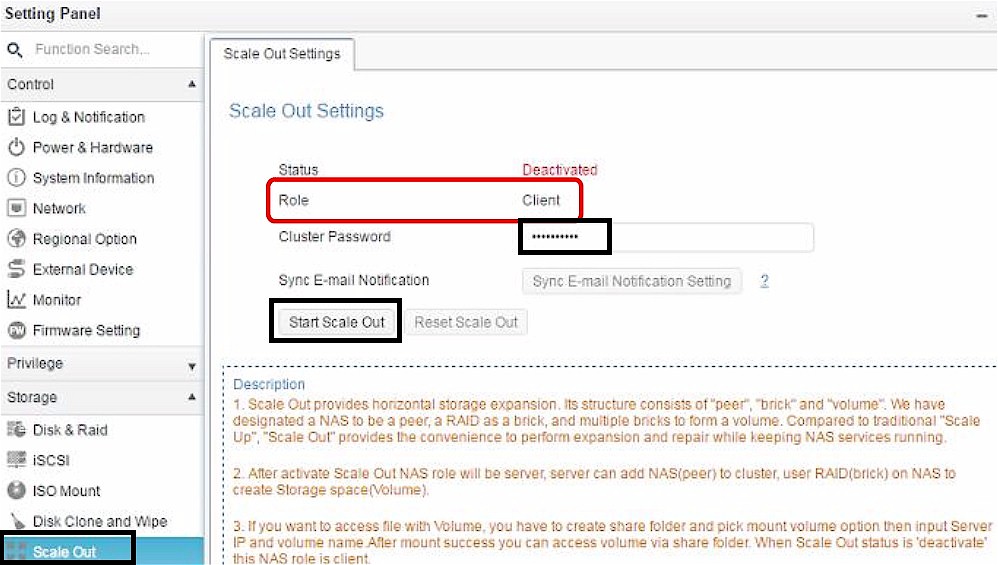
Scale-Out Menu
You’ll see NAS 1 has the default role of Client for Scale-Out. Simply enter a cluster password and click Start Scale-Out. NAS 1 will automatically log you out. Log back in and you’ll notice that NAS 1 is now a Scale-Out server, shown below.
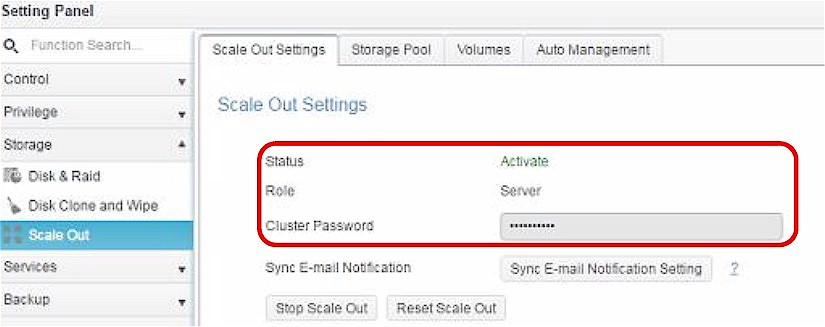
Enable Scale-Out Server
Third, in the Scale-Out menu on NAS 1, select the Storage Pool tab and click Add Peer.

Add Peer NAS
Still on NAS 1, select NAS 2, and click Next. NAS 2 has IP 172.16.64.137 in this example. (NAS 2 has a four disk JBOD, which will be shown shortly.)
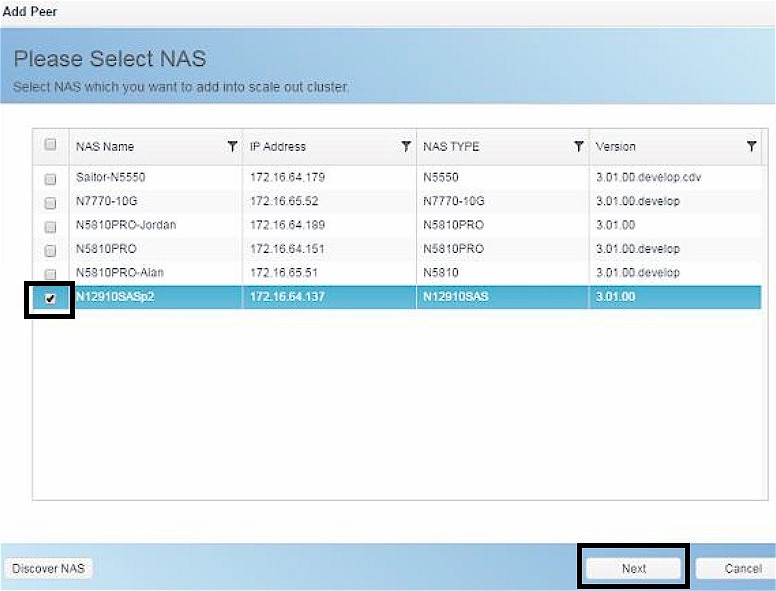
Add NAS 2 to Scale-Out
Then enter the admin password of NAS 2 and click Add.
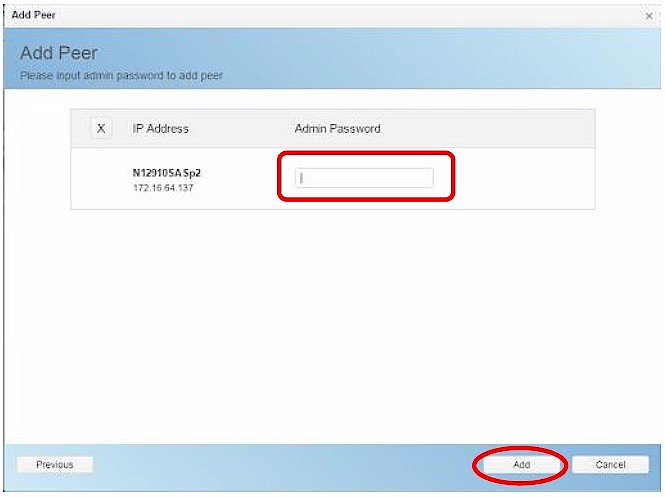
Enter NAS 2 Admin Pwd
Wait for a pop-up message to indicate the Scale-Out communication has completed.

Scale-Out Peer Added
The Storage Pool menu on both NASes will now show a two disk volume on NAS 1 and a four disk volume on NAS 2
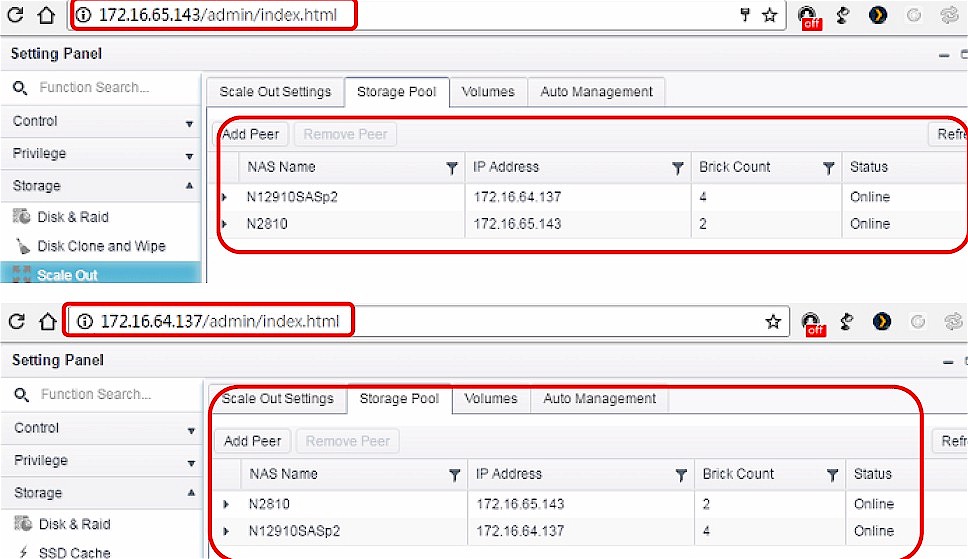
Scale-Out Storage Pool
Finally, create a Scale-Out volume from the newly created Storage Pool. On NAS 1 in the Scale-Out menu Volumes tab, click Add.

Add Scale-Out Volume
Enter a Volume Name, we entered “firstSCvolume”. Adjust the Replica, Cache, Write Behind Cache Size, and IO Thread Count values as desired. We left them at the default settings. Then click Apply.
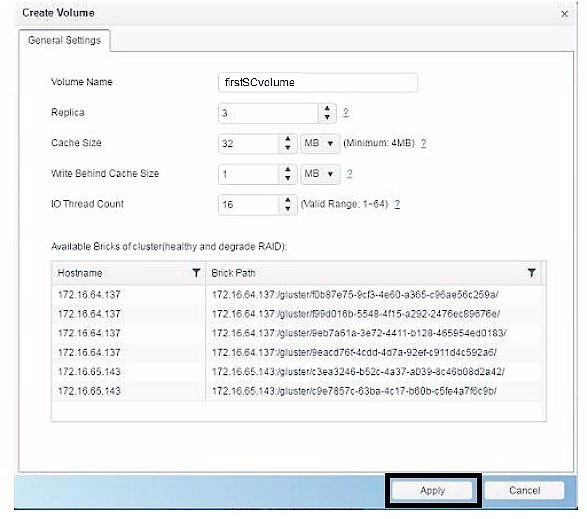
Create Scale-Out Volume
Once complete, you’ll see your new volume. Our new volume has two groups with three data copies, shown below.
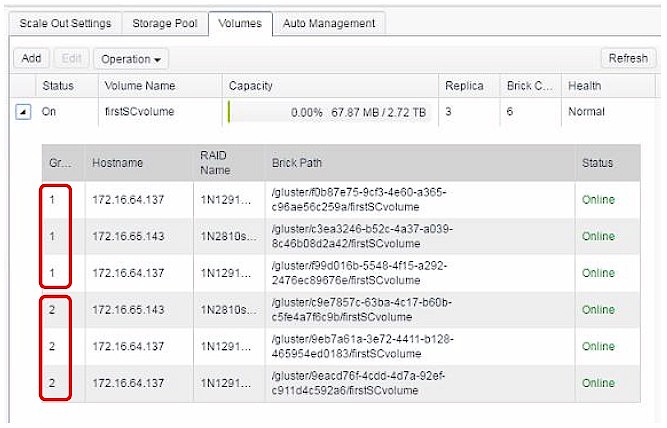
Complete Scale-Out Volume
With the Scale-Out volume created, all that’s left is to create a Scale-Out shared folder. This is done by checking the Mount Scale-Out Volume box when you create a shared folder.
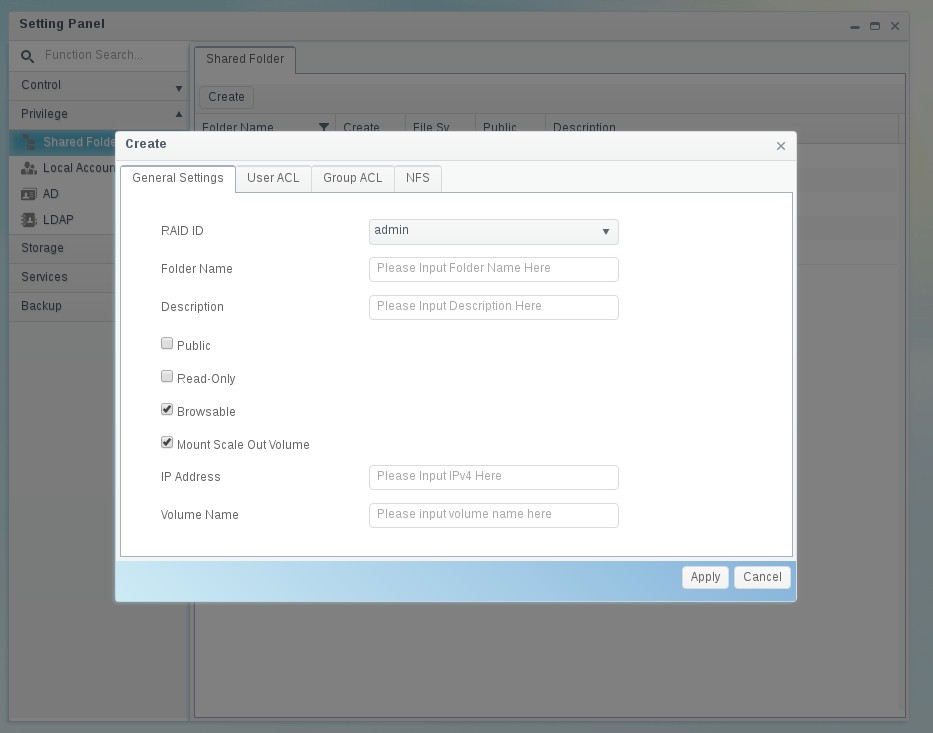
Mount Scale-Out Volume
Finally, two features available on your Thecus Scale-Out volume are dynamic expansion and automatic repair. Dynamic expansion provides a one click option to add an available disk to a Scale-Out volume. Automatic repair is a two step process to automatically replace a failed disk and rebuild a Scale-Out volume.
Visit Thecus to learn more about its affordable, scalable storage solutions.

 Read more about Thecus.