
Introduction
The first article in this series stepped through configuring the OpenVPN server on ASUS routers and presented performance test results. This time, we’ll be doing the same thing for the OpenVPN implementation on NETGEAR routers.
Setup
The test setup used Win 7 and Win 8.1 computers.
- Windows 7: Lenovo X220i (Intel Core i3-2310M @ 2.1 GHz, 2 GB RAM) running Win 7 Home Premium SP1 64 bit
- Windows 8.1: Acer AspireS7 (Intel Core i5-4200U @ 2.3 GHz, 8 GB RAM) running Win 8.1 64 bit
To eliminate internet connection variation, I used the test setup shown below. Note that the two computers are on different private subnets.
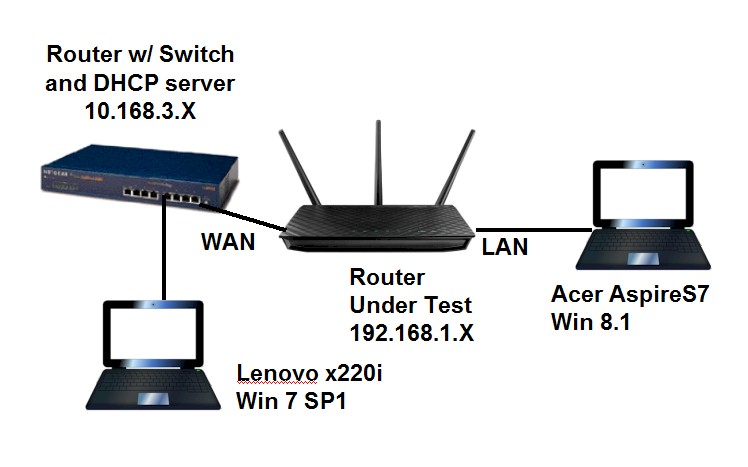
OpenVPN test setup
Steps
1) Check your shares
Before you start messing with VPN, you first need to check that your OS sharing permissions are properly set so that shares can be reached among LAN machines on both networks. This sometimes is tricky when mixing Win 7 and 8 devices.
I don’t use Windows Homegroups, don’t use password protected sharing and don’t use Guest accounts. So in Win 8, disabling password protected sharing (Network and Sharing Center > Advanced Sharing Settings > All Networks) and adding access for Everyone in the share’s security properties usually does the trick.
2) Configure your firewall
OS and anti-virus suite application firewalls are another thing that can mess you up. If you run one, you’ve probably already figured out the settings to not block file sharing traffic. Buf if you have any problems pinging a share across the VPN tunnel, temporarily disable the firewall to see if that’s the problem.
3) Enable the VPN Service
Navigate to Advanced Setup > VPN Service page. You’ll first check the Enable VPN Service box on and apply the settings. You’ll then get the popup window below.
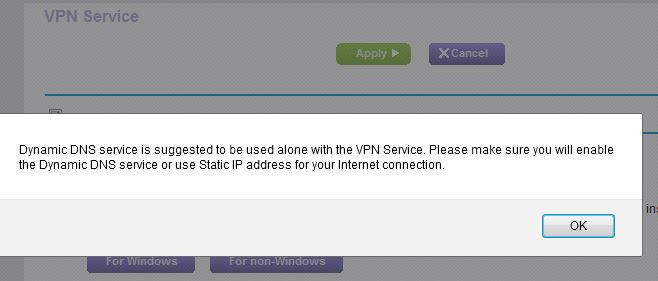
NETGEAR VPN warning
This message is a reminder that if you don’t use a dynamic DNS (DDNS) service, you won’t be able to connect to your router if the WAN IP address changes. If you’re going to use DDNS, go to Advanced Setup > Dynamic DNS and set it up before you go on.
4) Install the OpenVPN client
NETGEAR routers provide only a single link to the OpenVPN community download area that has only Windows clients. But the ASUS version of this article provides links for MacOS, Android and iOS apps, which you should be able to get working if you copy settings from the Windows .opvn config file.
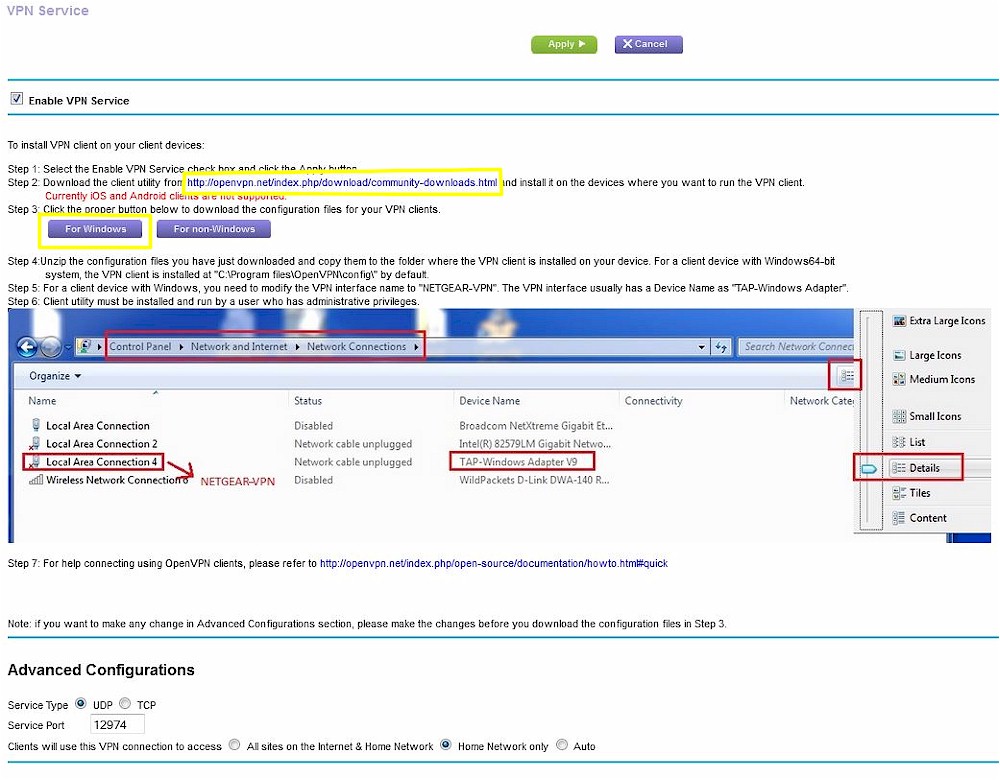
NETGEAR VPN Service tab
This OpenVPN FAQ provides a pretty accurate description of the Windows installation process. Don’t bother to launch the app after you install it. It won’t do much until you install an OpenVPN config file.
5) Generate the OpenVPN config file
OpenVPN clients won’t do anything without a config file. You can find sample files in the "[program files path]\OpenVPN\sample-config folder on the system you installed the client on, where [program files path] is the path to the Program Files or Program Files (x86) folders for 64 bit and 32 bit apps, respectively.
The sample client.opvn and sample.ovpn files are well commented and useful for advanced users. But it’s much easier to click the For Windows button on the VPN Service page to generate and save a config that should get you up and running quickly.
Before you click the button, scroll down and check the Advanced Configurations section of the page shown below. There isn’t a lot to choose from compared to the settings ASUS routers provide.

Advanced Configuration
NETGEAR’s default configuration uses a TAP vs. TUN connection type. This means that it sets up a bridged, not a routed connection between the VPN server and client. This can cause problems when setting up a tunnel between two routers that each have their own DHCP server. NETGEAR’s choice of TAP indicates they don’t really support router-to-router OpenVPN at this point.
The defaults work and, due to the TAP connection, enable you to reach the router’s shared storage and shares on devices connected to the router LAN. They even allow network browsing from the remote client and internet access through the OpenVPN tunnel.
Note that NETGEAR’s OpenVPN implementation doesn’t provide user level authentication. So there are no user accounts to set up.
With all that done, click the For Windows button to generate the config file and you’ll get one more nag if you are not using dynamic DNS.
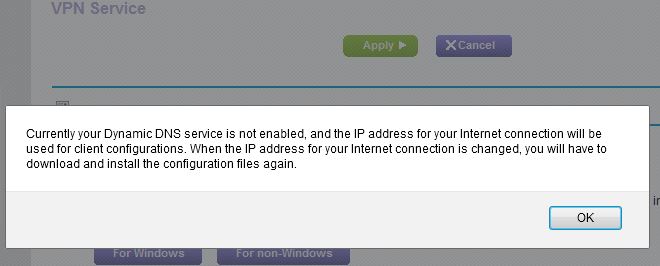
NETGEAR VPN warning
Clicking past this downloads a windows.zip file. Save or move it to the system where you installed the OpenVPN client.
6) Install the config file
Unzip the windows.zip file generated in Step 5 and you’ll find the four files shown below.
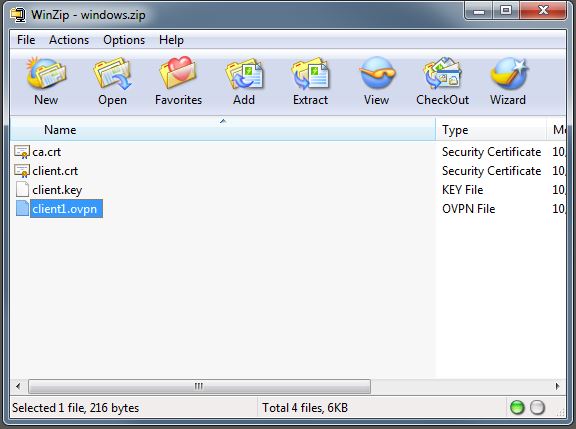
NETGEAR OpenVPN config files
Unlike ASUS, NETGEAR’s config stores the certificates and keys in separate files and references them vs. putting them right in the .ovpn config file.
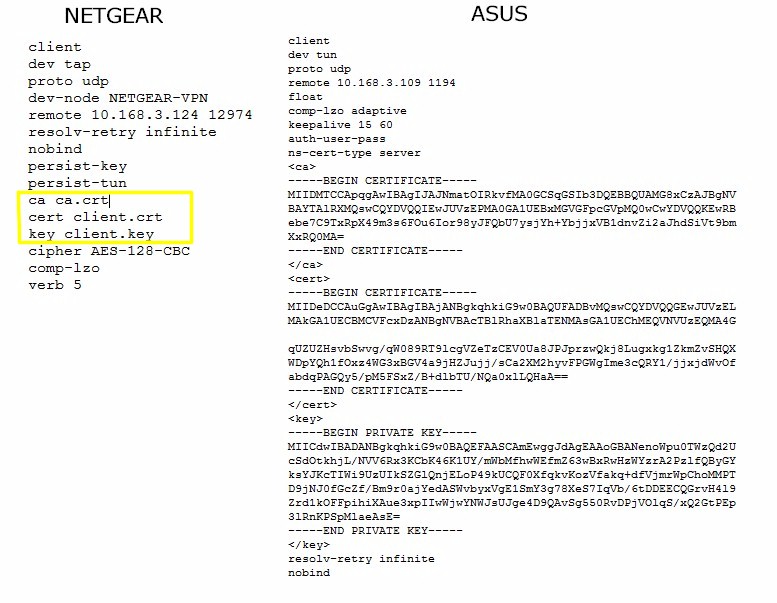
NETGEAR and ASUS.opvn files compared
Copy / move the four files to the "[program files path]\OpenVPN\config folder, where [program file path] is the path to the Program Files or Program Files (x86) folders for 64 bit and 32 bit apps, respectively.
If your client needs to connect to more than one VPN server, you’ll need to generate a config file for each one and give them different names. This can be tricky with the NETGEAR method of storing the certificates and keys in separate files. But you can rename the files for each configuration and edit the .ovpn file to point to the renamed files for the ca, cert and key entries.
7) Start the OpenVPN client
Before you start the OpenVPN client, you need to rename the connection name of the TAP network device. This is illustrated by a screenshot included in the VPN Service configuration page. If you need a step-by-step for this, start at Step 17 in this NETGEAR How do I use the VPN service on my Nighthawk router with my Windows client? knowledgebase article.

Rename Connection
Now find the OpenVPN client shortcut created by the installer. Right click on it and select Run as administrator. At this point, this How to connect to a VPN Server with the Desktop Client FAQ screwed me up for awhile. I kept expecting to see the window below shown in the FAQ.
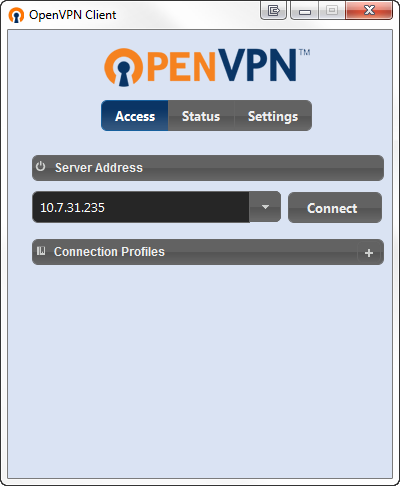
OpenVPN client window you won’t see
The only thing you should see is the OpenVPN client icon in the System Notification Area (tray).
![]()
OpenVPN client running
8) Connect
Right-clicking on the OpenVPN icon pops up the submenu shown below. Select Connect.

OpenVPN client right-clicked
The connection window will pop up so that you can see the connection log.
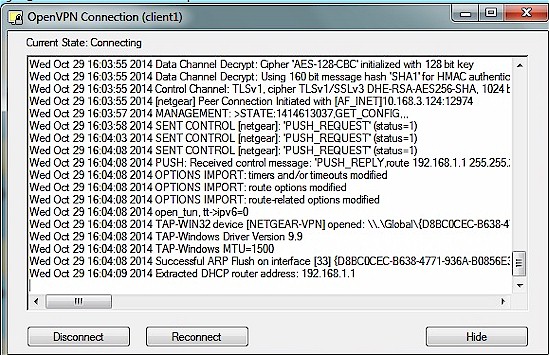
OpenVPN client – connecting
When the connection is complete, the Connection window will close and the OpenVPN tray icon will turn green. Unlike the ASUS TUN connection, you won’t get a balloon notification when the connection is complete.
9) Test the tunnel
We’ll use ping to check that everything is working. First, try pinging the OpenVPN router LAN IP address (the default is 192.168.1.1). It should respond. Next try to ping the IP address of a LAN machine. In my test case, the Win 8.1 LAN computer was at 192.168.1.149. The screenshot below shows a successful ping, indicating that the OpenVPN configuration provided connection to LAN clients.
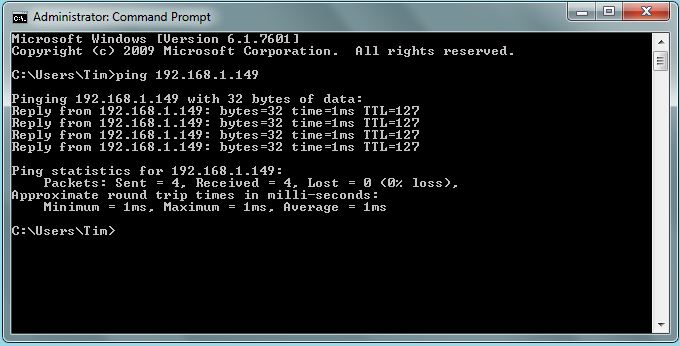
OpenVPN tunnel test passed
10) Use the tunnel
At this point, you are up and running! Since this is a TAP connection, you should be able to see and browse machines on the OpenVPN router’s LAN side.
Performance
I had three NETGEAR routers handy for testing. My go-to IxChariot performance test tool would not work through the OpenVPN tunnel. So I had to resort to drag-and-dropping a >1 GB Windows backup .bkf file for testing. Drag-and-drops were initiated from the remote (WAN side) machine to ensure that traffic flowed through the tunnel.
| Router | CPU | Firmware | Remote > Server | Server > Remote |
|---|---|---|---|---|
| NETGEAR R7000 | Broadcom BCM4709 dual core, 1 GHz |
v1.0.3.80_1.1.38 | 5.4 | 5.4 |
| NETGEAR R7500 | QCA IPQ8064 dual-core @ 1.4 GHz | v1.0.0.52 | 5.2 | 5.2 |
| NETGEAR R8000 | Broadcom BCM4709 dual core, 1 GHz |
v1.0.0.102_1.0.45 | 5.2 | 5.2 |
Table 1: File copy throughput – OpenVPN tunnel (MBytes/sec)
All three products use dual-core processors, so the results are very similar. The R7000 and R8000 results using a Broadcom BCM4709 processor are essentially the same as obtained with the ASUS RT-AC87U, which uses the same main CPU.
I wouldn’t assign any significance to the slightly higher results for the R7000 because I was relying on the numbers provided in the Windows filecopy window.
Closing Thoughts
I hope the step-by-step helps you get up and running quickly with NETGEAR routers supporting OpenVPN. If you find an error, please let me know so that I can correct it.
