| At a glance | |
|---|---|
| Product | TP-LINK Google OnHub Router (TGR1900) [Website] |
| Summary | Extremely dumbed-down AC1900 class router built by TP-LINK and powered by a Google OS. |
| Pros | • Dedicated dual-band monitor radio |
| Cons | • Extremely limited feature set • Must be logged into a Google account to administrate |
Typical Price: $48 Buy From Amazon
Introduction
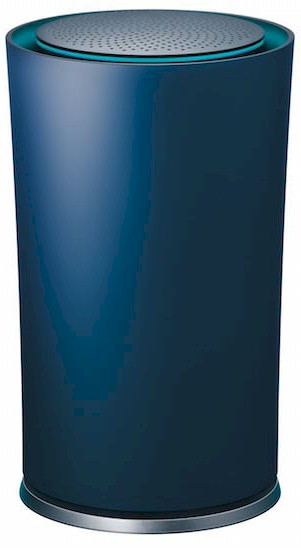
By now, I’m sure you’ve read many reviews of Google’s first OnHub device manufactured by TP-LINK. In case you’ve been in a coma for the past few weeks, OnHub is an AC1900 class Wi-Fi router running a Google OS based in part on Gentoo Linux. In addition to its 3×3 2.4 and 5 GHz radios, there’s a dual-band 1×1 radio dedicated to monitoring Wi-Fi activity.
Also inside are Bluetooth 4.0 and 802.15.4 / ZigBee radios that will be turned on sometime in the future. The presence of these radios and the mention of future support for the Thread networking protocol and Brillo OS and Weave IoT protocol lead many observers to regard OnHub as a work-in-progress smart home hub.

Google OnHub blending in
Among OnHub’s other hardware features are its single Gigabit Ethernet LAN port, into which many buyers will need to plug a switch to connect more wired devices
and a USB 3.0 port
that, like the Bluetooth and ZigBee radios, currently isn’t enabled.
There is also a speaker, whose only purpose at the moment is to aid setup using the Google On Android app. The speaker emits a series of tones that the Android device receives to complete the link between them. Although the OnHub and Amazon Echo have similar cylindrical form-factors, the OnHub has no microphone.

Google OnHub ports
The top of the OnHub has a light ring used to communicate status. The ring also contains an ambient light sensor. The use of colors and flash patterns to communicate status is pretty old-school and puzzling, considering the focus on user-friendliness Google put into the Google On app used to control OnHub. Why not use the speaker to just tell the user what’s up?

Google OnHub light decoder
Inside
The OnHub was a difficult critter to take apart. Removing the outer shell was the easy part, once I figured out that it had to be turned counter-clockwise to release it. (Note to Google: please make this critical piece of information more prominent in the setup instructions.). After much trial and error and some snap-crackle-and-pop while removing the inner plastic housing, I was finally able to get to the goodies.
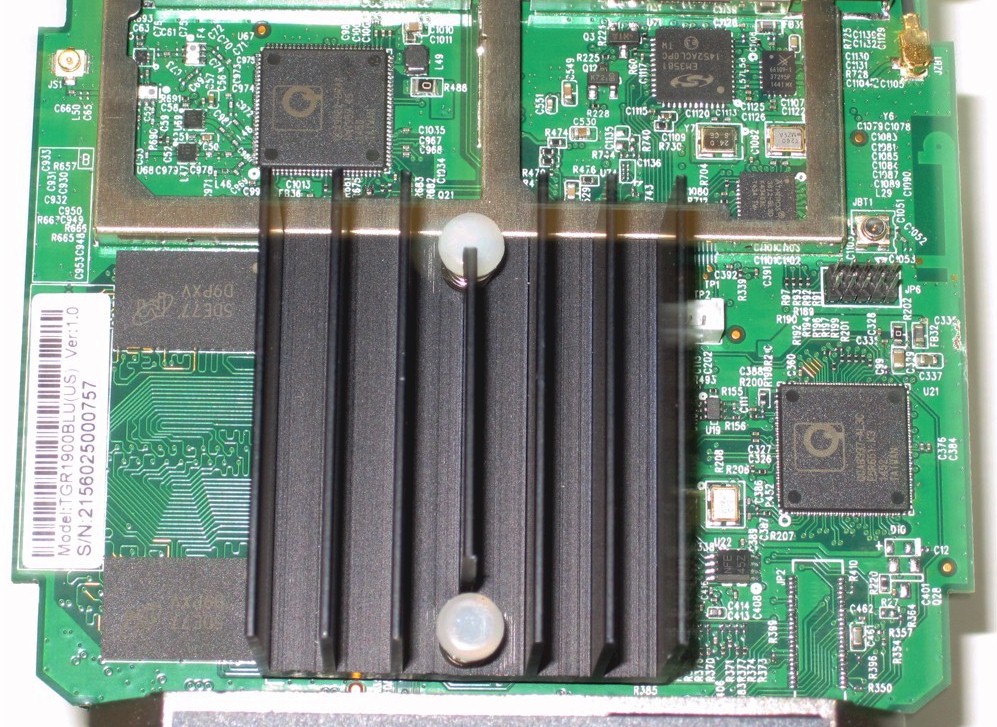
It’s no secret that the OnHub is powered by a 1.4 GHz dual-core Qualcomm Atheros IPQ8064 internet processor, under the heatsink at photo right. OnHub’s specs also disclose 1 GB of DDR3 RAM and 4 GB and 8 MB of flash memory. The processor is also found in the Linksys EA8500 and Amped Wireless RTA2600 QCA-powered second generation 4×4 AC2600 class routers.
The photo below has the RF can top removed. The two QCA9880 3×3 802.11ac radio SoCs are thermally coupled to the can lid via pads.

OnHub board
The massive heatsink you may have seen in the Verge’s OnHub coverage actually covers the bottom of the main board. It’s coupled to board areas under the IPQ8064 processor and QCA9880 radio SoCs to provide additional heatsinking. The whole board assembly is bolted to the aluminum base for even more thermal mass.

OnHub heatsink and 2.4 GHz reflector
The OnHub does indeed have 13 antennas for Wi-Fi. Eleven of them are found on six boards evenly spaced around the OnHub’s top. The twelfth is a large 7 dBi sheet metal antenna attached to the inside of the OnHub front cover. This is the 2.4 GHz antenna that OnHub’s specs describe as having a "specialized reflector…that acts like a satellite dish". The reflector is actually the flat part of the heatsink shown above. The thirteenth antenna is a dual-band positioned over the speaker that serves the dual-band QCA9882 1×1 802.11ac monitor radio.
Each board has two antennas, one each for transmit and receive. The rear-facing 2.4 GHz antenna is a bit different; one of its antennas connects to one of the three 2.4 GHz radio chains, while the other connects to the ZigBee radio. Finally, the Bluetooth 4.0 radio’s antenna is etched directly onto the main board.

OnHub antennas
A helpful reader tipped me to component information contained in the FCCID test report. The table below summarizes the antenna complement and gains.

OnHub antennas
The gallery below has more construction pictures, along with commentary.
View with covers removed, showing the massive heatsink. This is actually on the back side of the main board, thermally coupled to the board under the processor and two radio SoCs. The flat area is the reflector for the 2.4 GHz 7dBi antenna.
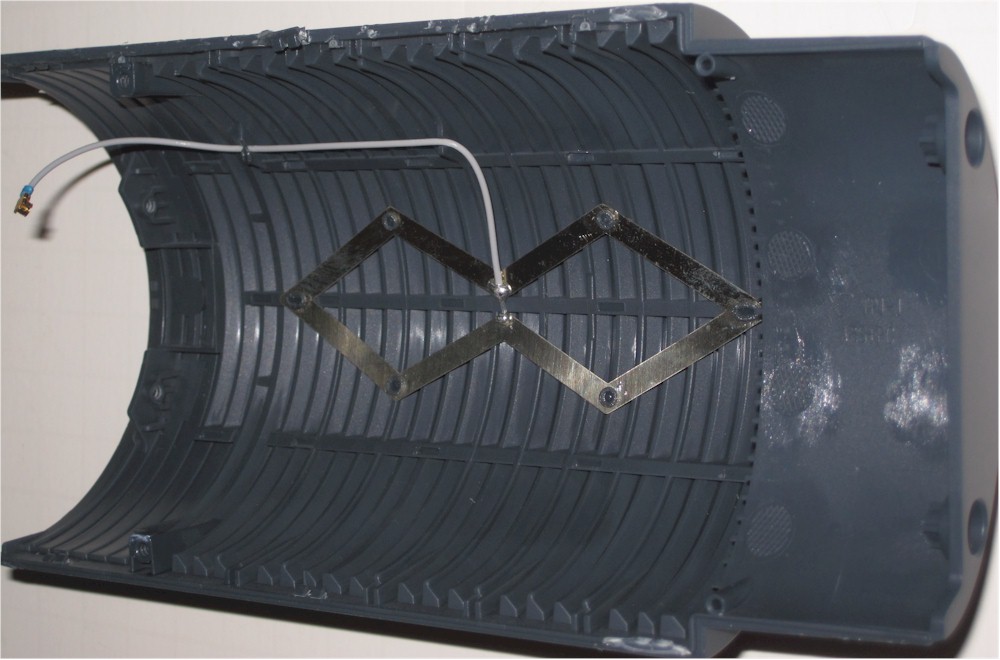
Here’s the 7dBi 2.4 GHz antenna. It is positioned at the front of the OnHub.
Closeup of the monitor radio (left), Bluetooth and ZigBee radios. The Bluetooth antenna is etched into the board right edge. The mini RF connector near it is for testing purposes.
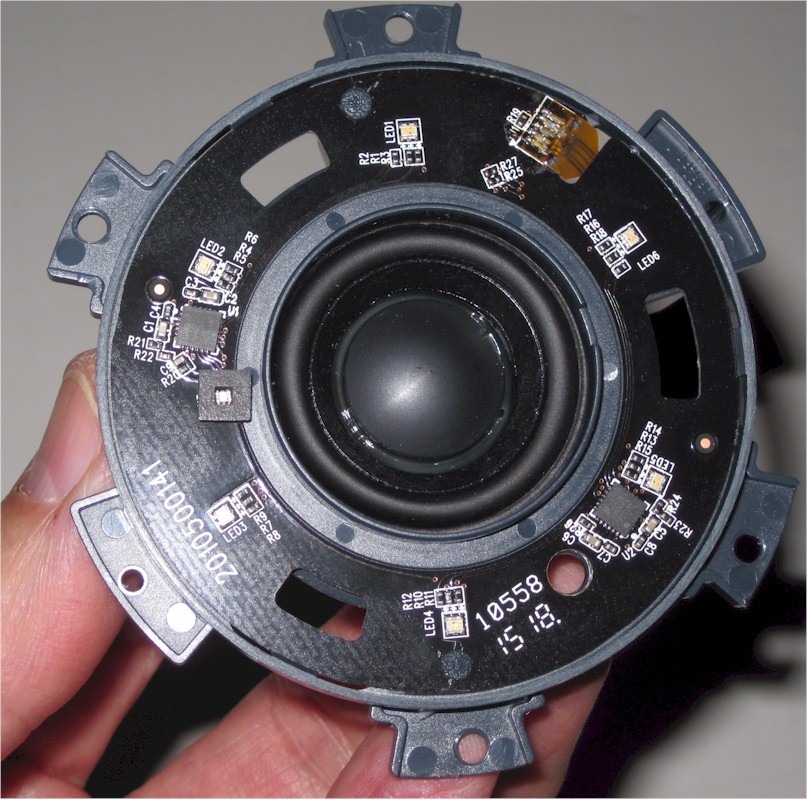
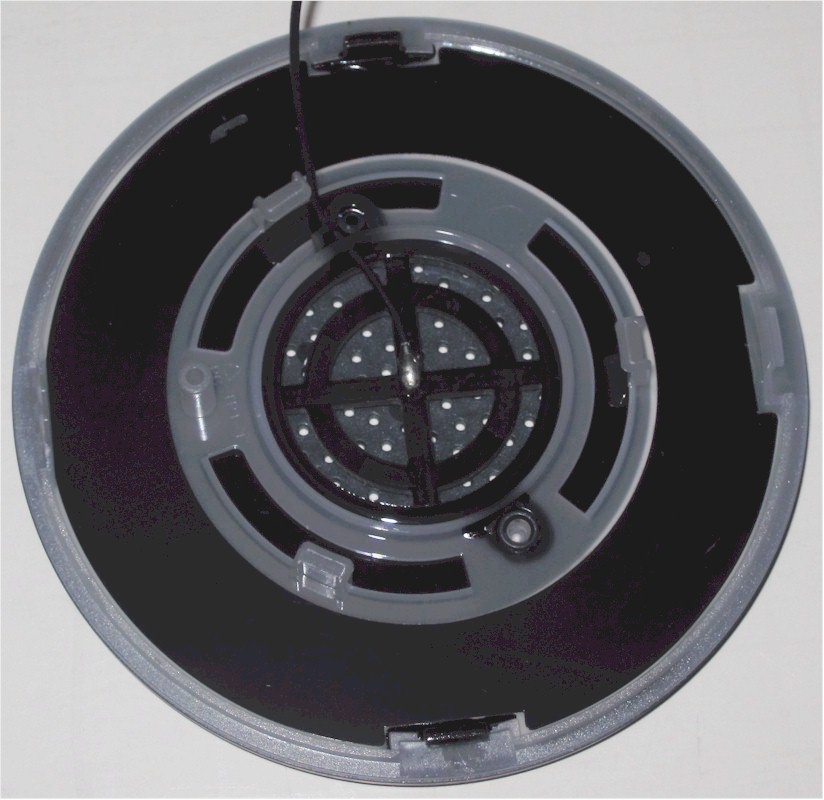
The speaker and LED assembly. The ambient light sensor is photo left, surrounded by a square light baffle.
The dual-band monitor antenna sits right below the top speaker grille.
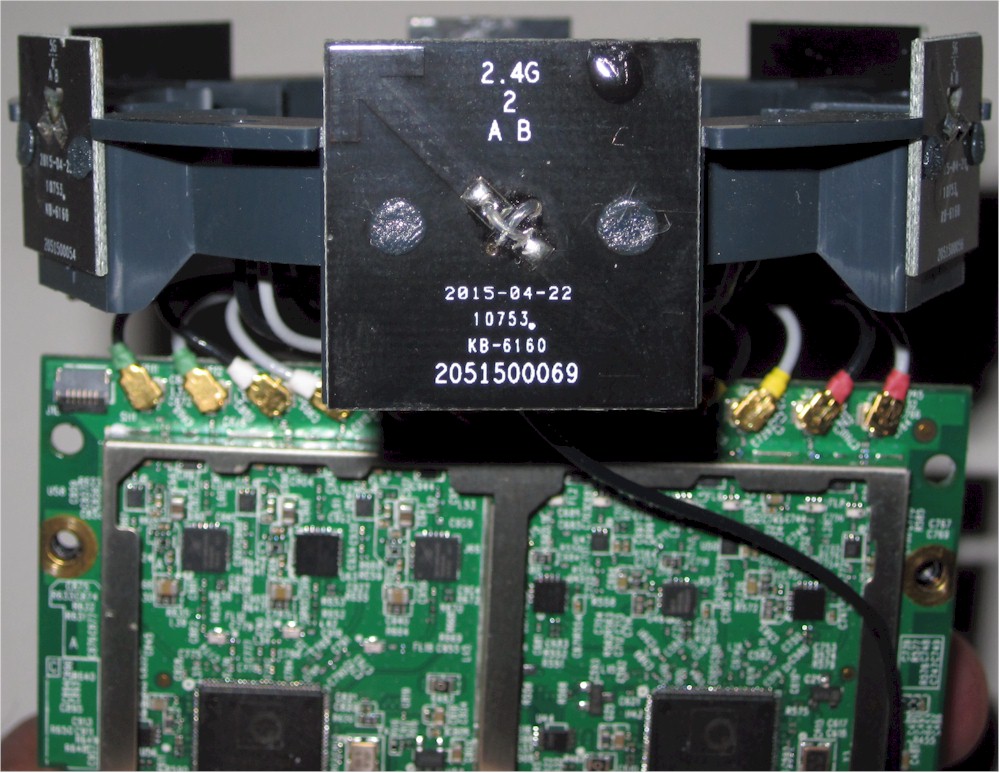
2.4 GHz antenna facing router rear. Connects to 2.4 GHz Chain 0 and ZigBee radio
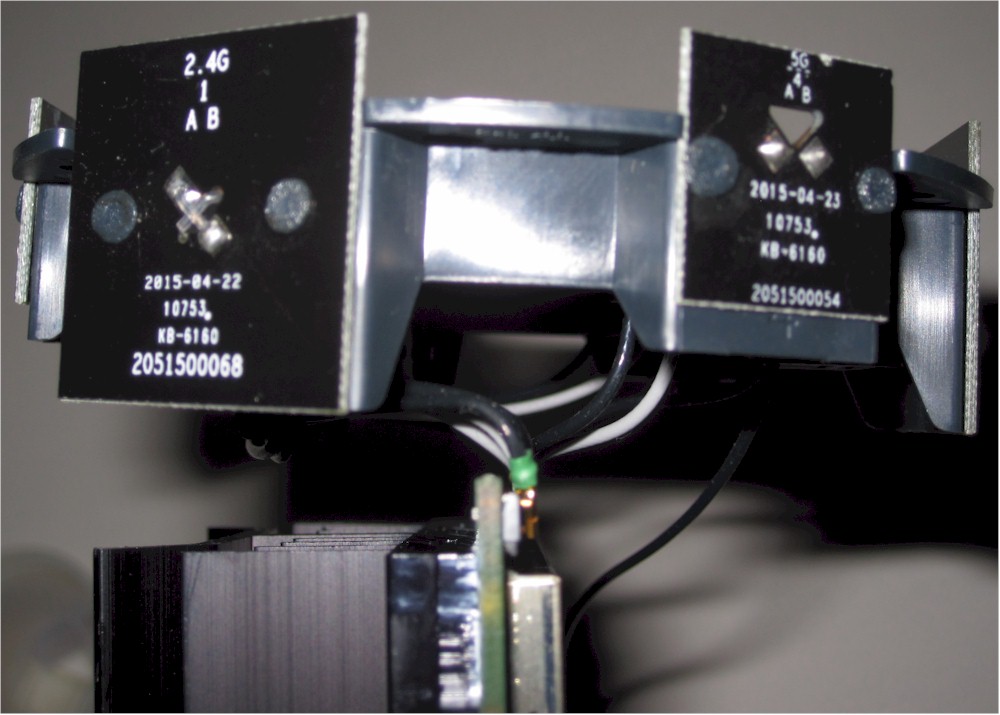
Moving clockwise, showing 2.4 GHz Chain 1 (left) and 5 GHz Chain 2 (right).
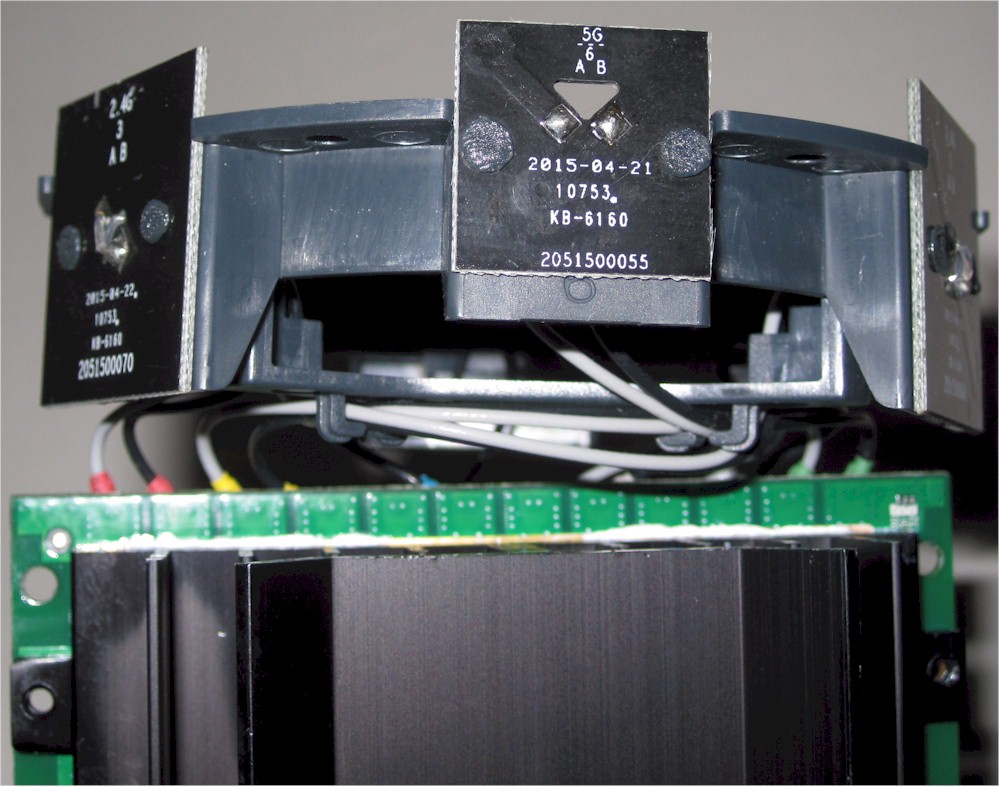
Again clockwise, showing 5 GHz Chain 0 (center) and 2.4 GHz Chain 2 (left).
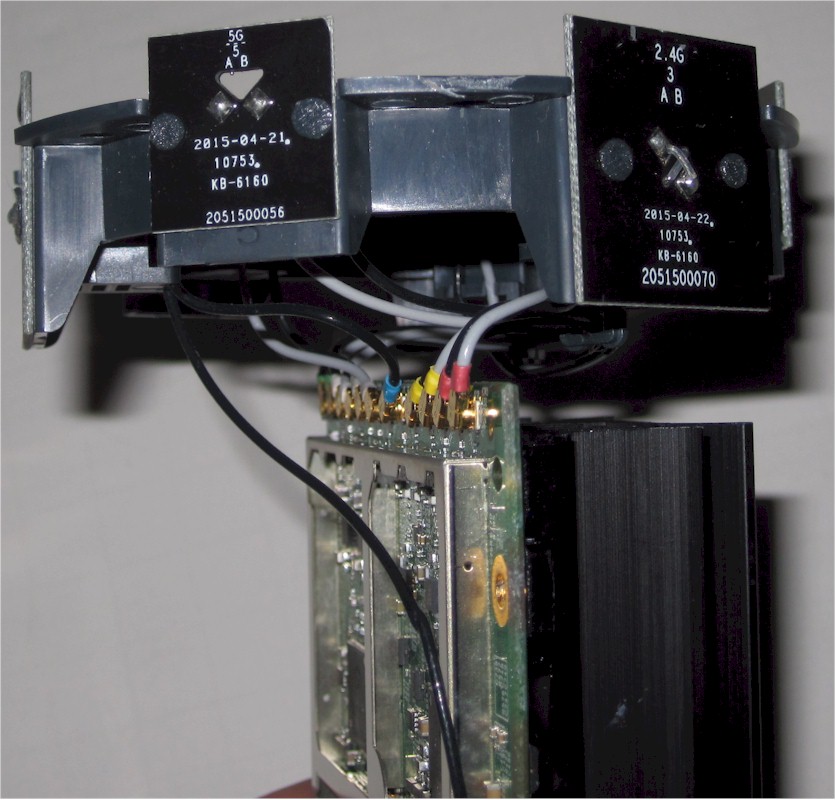
Last pair, 5 GHz Chain 2 (left), 5 GHz Chain 1 (right).
Top view of Wi-Fi antenna array.
View of key components.
Antenna list from FCC ID test report.
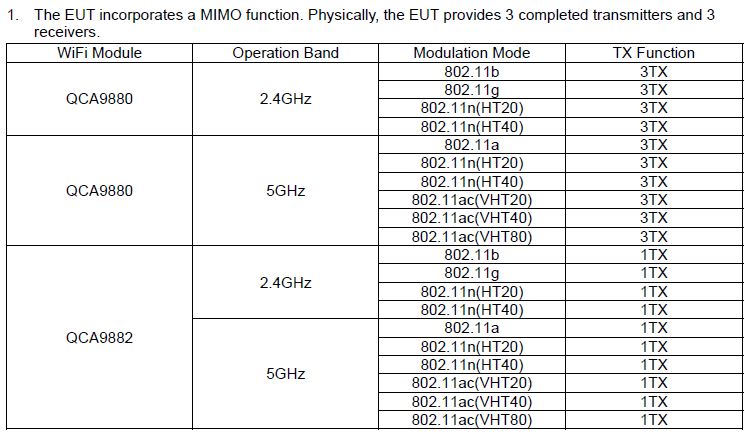
WiFi radio component list from FCC ID test report.
The table below summarizes the major components for the OnHub and two other popular AC1900 class routers, NETGEAR’s Broadcom-powered R7000 Nighthawk and Linksys’ Marvell-based WRT1900AC.
| OnHub | NETGEAR R7000 (Nighthawk) | Linksys WRT1900AC | |
|---|---|---|---|
| CPU | Qualcomm Atheros IPQ8064 @ 1.4 GHz | Broadcom BCM4709A @ 1 GHz | Marvell MV78230 Armada XP @ 1.2 GHz (ARMv7) |
| Switch | QCA8337 | in BCM4709A | Marvell 88E6172 |
| RAM | 1 GB DDR3 | 256 MB | 256 MB |
| Flash | 4 GB + 8 MB | 128 MB | 128 MB |
| 2.4 GHz Radio | – QCA9880 3×3 802.11ac – Skyworks SE2623L 2.4 GHz power amp (x3) – Skyworks SKY65971-11 2 GHz 256 QAM LNA (x3) – Skyworks unidentified switch ("S81") (x3) |
– Broadcom BCM4360 – Skyworks SE2623L 2.4 GHz Power Amp (x3) |
Marvell 88W8864 – Skyworks SE2623L 2.4 GHz Power Amp (x4) |
| 5 GHz radio | – QCA9880 3×3 802.11ac – Skyworks SKY85405 5 GHz power amp (x3) – Skyworks SKY13438 6 GHz DPDT switch (x3) – Skyworks SKY65981-11 5 GHz 802.11ac LNA (x3) |
– Broadcom BCM4360 – Skyworks SE5003L1 5 GHz Power Amp (x3) |
Marvell 88W8864 – Skyworks SKY85402 5 GHz Power Amp (x4) |
| Monitor | QCA9882 1×1 802.11ac | N/A | N/A |
| ZigBee | – Silicon Labs EM3581 ZigBee / Thread SoC – Skyworks SKY66109-11 2.4 GHz ZigBee front end |
N/A | N/A |
| Bluetooth | Atheros AR3012 Bluetooth 4.0 SoC | N/A | N/A |
Table 1: Component summary
Setup
I’m not going to go into detail on setup; it’s been described thoroughly in other reviews. I used the Android app with a Dell Venue 7 tablet and it worked uneventfully, including the audio-based portion where OnHub plays an sequence that is received by the Android device. The tone connects the Android device and OnHub directly for final configuration.
The Android app scaled fine to the larger tablet screen. It also worked well on a Moto X phone. I didn’t try the iOS app.
Features
The OnHub is designed for folks who don’t want to know nothin’ about what makes their Wi-Fi go. So there are precious few settings. WAN connection types are limited to commonly found DHCP, Static and PPPoE types. There is no support for PPTP or L2TP connections and no settings whatsoever for IPv6. You can put the router into bridge mode to use as an AP, but that’s about it.
To get a better sense of what OnHub will and won’t do, I’ve taken a feature list typical of many current AC1900 class routers and edited it.
Routing
- Static and Dynamic IP, PPPoE ,
PPTP and L2TPWAN connections IPv6 WAN connectionsMAC address cloningMTU AdjustmentDHCP Server, range setting, lease time setting, and default domain- DHCP Client list
- DHCP reservation (by setting LAN Static IPs)
- Bridge mode (bypass NAT router)
- Port forwarding for single or multiple ports with TCP, UDP or both forwarded. Enable/disable for each entry.
Port filtering – can set individual or range of incoming ports. Allows you to enable or disable TCP and UDP ports on network devices.Four level priority-based download QoS control. Bandwidth rules list based on IP or MAC address, port range and protocolDMZ Host- UPnP enable/disable
- Can set "priority" device that receives more bandwidth for a settable time period
- Total and per device bandwidth monitor, real-time, last hour, last 7 days, and last 30 days
- Internet up and downlink speed test
DDNS support for Dyndns (www.dyndns.org)NAT enable/disableRIP 1/2 dynamic routingStatic routes
Security
VPN Passthrough enable/disable for PPTP and IPsecDoS (denial of service) enable/disableEnable UDP Flood filtering (with settable threshold)Enable TCP-SYN Flood attack filtering (with settable threshold)Ignore Ping Packet from WAN port- Secure remote management via iOS and Android apps
- Ability to control multiple OnHubs
Block all network access by MAC and IP addressURL filtering (applies to all users, HTTPS not blocked)Internet access control – Rule based access control for host (domain name or IP address)IPv6 firewall
Wireless features
WEP,WPA / WPA2 Personaland Enterprise (RADIUS) support- One SSID for both radios
4 guest wireless networks per bandWi-Fi Protected Setup (WPS) support, pushbutton and PINAuto and manual channel setSSID broadcast enable/disableEnable/disable wirelessBeacon interval, RTS threshold, Fragmentation Threshold adjustmentsWireless MAC address filtering (allow or deny based on MAC address)WMM disableShort GI disableWireless access schedules5 GHz Wireless modes: a, a+n, a+n+ac (default)2.4 GHz Wireless modes: b, b+g, b+g+n (default)5 GHz channel width 20MHz/40MHz/80MHz2.4 GHz channel width 20MHz/40MHz5 GHz channels: 36, 40, 44, 48, 149, 153, 157, 1612.4 GHz channels: 1-11Transmit power adjust, 15%, 35%, 50%, 70% and 100%- Wireless network bandwidth use per client
Storage features
SMB file sharing (no user accounts)FTP server. Can set port and control anonymous FTP and anonymous write protection. No secure FTPDLNA media server
All admin is via Android and iOS apps. If you hit the OnHub’s 192.168.86.1 IP, you’ll just get the screen below.

OnHub browser admin interface
The gallery will walk you through most of the app and settings you can make. You’ll note from the list above that the only control you have over Wi-Fi is to set the SSID, which will be applied to both radios and the WPA/WPA2 key. You can’t control channel, mode, bandwidth mode or even shut off a radio. The Google On app provides no information about which band a device is connected to and doesn’t allow you to block a device from connecting. Wi-Fi Protected Setup (WPS) isn’t supported either.
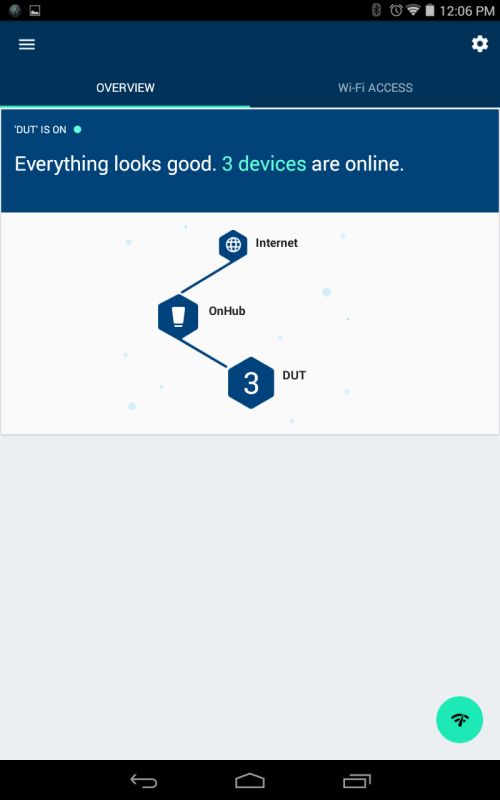
The simple Overview page does just that.

The Network view shows devices and bandwidth use.
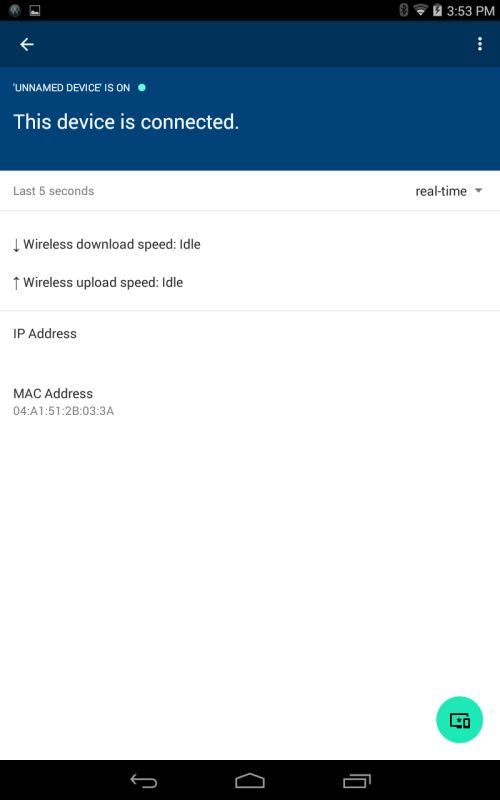
Clicking on a device often didn’t reveal much information
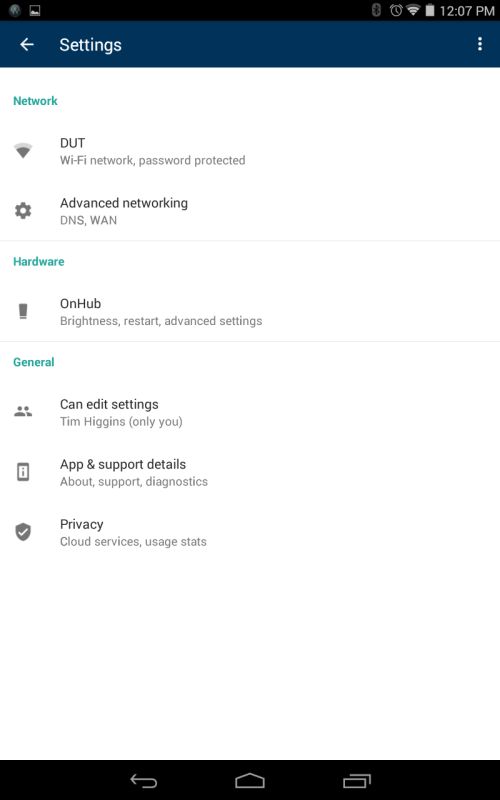
Behold the handful of settings. All you can set for Wi-Fi is SSID (applied to both bands) and WPA/WPA2 key.
You can change DNS from Google’s servers, select WAN connection type and forward ports, set static LAN IPs and disable UPnP
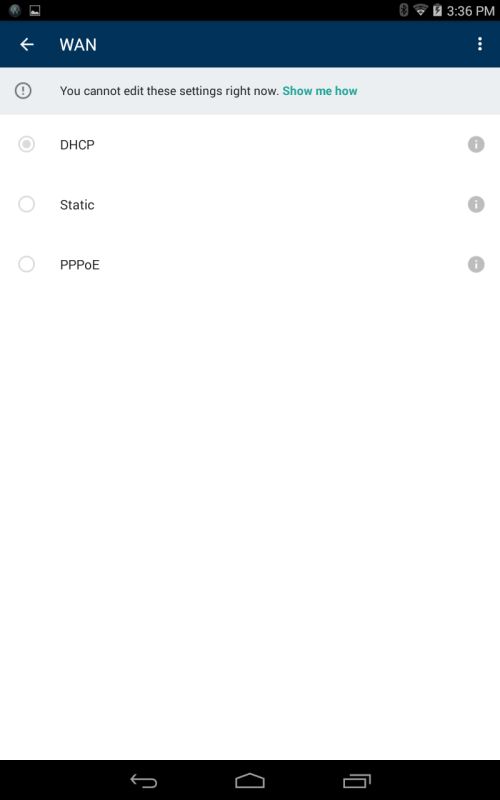
To change WAN types, you have to disconnect OnHub from the internet
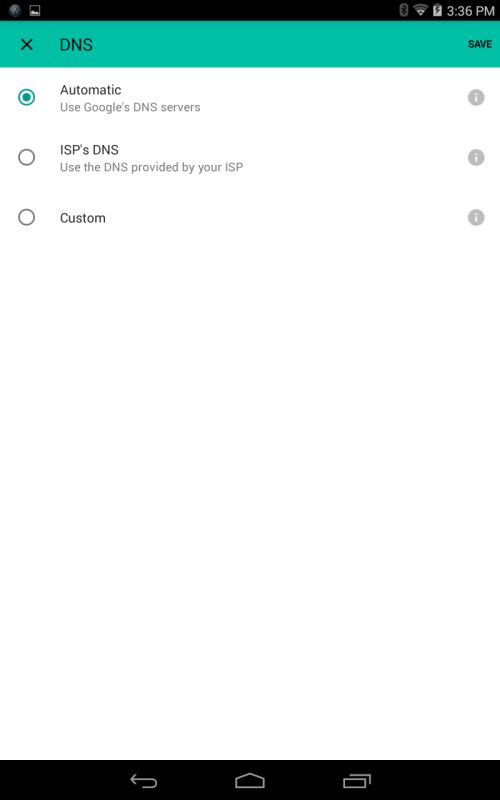
DNS options
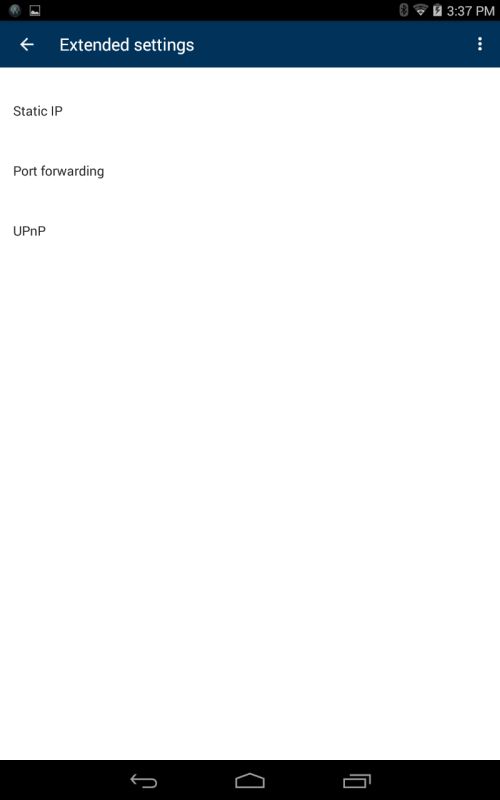
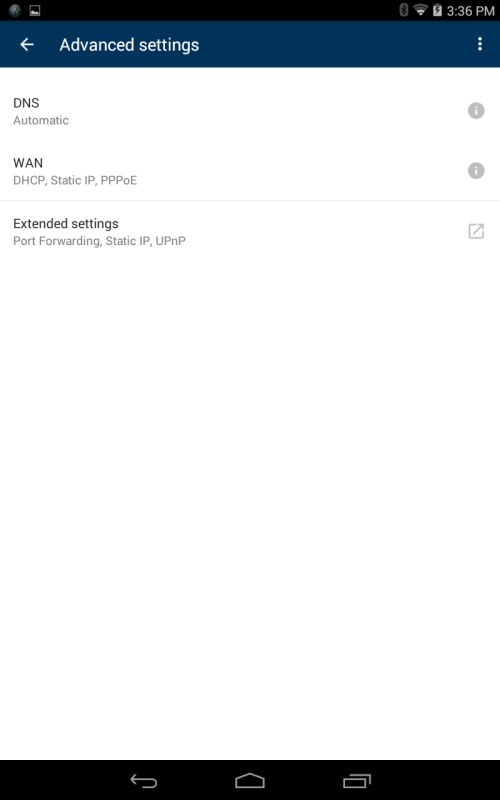
The ‘extended settings’ are pretty limited.
You can forward single ports or ranges. But you need to assign a static IP first to the device you are forwarding ports to before you can choose it from a pick list.
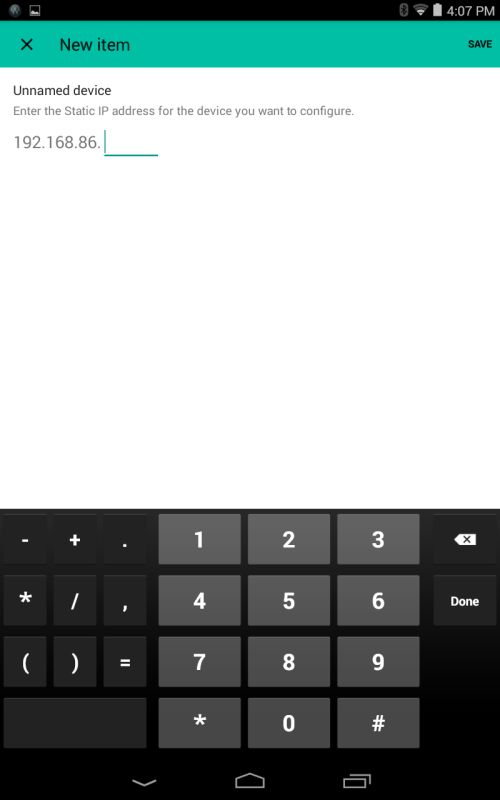
Assigning a static IP.
My overall experience with administering OnHub wasn’t positive. I’m not saying that because I couldn’t control things that I’m accustomed to controlling. You have to accept that with OnHub. But the overall experience seemed shaky.
For most of my time with OnHub, I connected one device. Yet the Overview showed me at least two devices, one of which had no IP address. The Android app and / or OnHub also briefly disconnected from time to time for no apparent reason. The OnHub also appeared to disconnect (reboot?) when saving a port forwarding rule (more on this shortly), but provided no indication that it was doing so. The app seems to require checking in with Google’s cloud to accomplish configuration changes. But to change WAN connection type, you must first disconnect from the internet.
I also tried running the "Network check", which appears to be an upload / download speed test. It took me three tries to get the result screen shown below. For the first two attempts, the check seemed to run ok, but then no results were presented.

OnHub Network check result
Maybe the flakiness was due to testing the OnHub behind my network’s router. But that’s how I test all routers. If OnHub is going to depend on Google’s cloud to operate reliably, it better learn to deal with other routers between it and the internet. Most every DSL or cable "modem" today includes at least a basic NAT router that in many cases can’t be bridged.
Routing Performance
Configuring the router for our standard router test suite was a battle, which I lost. The only wired routing test I could run was LAN to WAN, which turned in a respectable 817 Mbps, as shown in the IxChariot plot below. I was also able to run the Maximum connections test, which at 37,037 easily exceeded the 30,000 connection mark after which we consider all products equal.

Uplink routing throughput
The WAN to LAN and simultaneous up and downlink tests require putting the LAN client in DMZ or opening a wide range of ports. Since OnHub doesn’t support the former, I tried the latter.
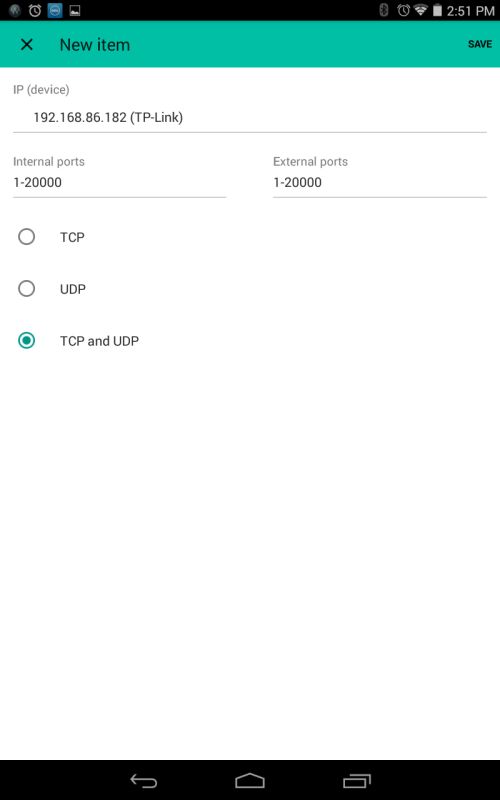
I first had to assign a static IP to the LAN-side client, which seemed to go ok. I then tried to create a forwarded port as shown below. The first time I tried, I got a message about my request being queued and applied shortly. But the saved port forwarding never appeared. I then tried to recreate the mapping, but was first told that the rule was conflicting with an existing one. When I tried again, I was told the rule was saved, but it then never appeared on the port forwarding screen. Note the OnHub appeared to go briefly offline without warning when saving a port forwarding rule.
Port forwarding rule
Wireless Performance
The OnHub was tested using our V8 Wireless test process with 7077.122.4 firmware. Since OnHub doesn’t allow setting channels or bandwidth modes, I had to take what I got. Using a Wi-Fi scanner, I determined the OnHub chose Channel 1 in 2.4 GHz and Channel 36 in 5 GHz. Link rates indicated the 2.4 GHz band was using 20 MHz bandwidth mode.
As usual, I tested with a WPA2/AES secured connection. I was able to manually steer the test client to the desired band because that’s the way it works anyway. Here’s what OnHub looked like in the test chamber.

OnHub in test chamber
The Benchmark Summary below shows the average of throughput calculations.

Google OnHub Benchmark Summary
To put these results into better perspective, I filtered the Router charts for AC1900 products and ran average profile plots for both bands and directions. The OnHub was at or near the bottom for all four benchmarks.

Average Throughput comparison – AC1900 routers
For the throughput vs. attenuation plots, I pulled in three top-ranked AC1900 routers: NETGEAR R7000; ASUS RT-AC68U; and Linksys WRT1900AC.
The 2.4 GHz downlink plot shows the OnHub (TP-LINK TGR1900) starting lower and staying there throughout the tested range. The only good news is that it didn’t disconnect early; this indicates it should have decent range.

2.4 GHz Downlink throughput vs. attenuation comparison
2.4 GHz uplink shows the OnHub starting closer to the rest of the pack, but falling off more quickly than the NETGEAR and crossing below it at 18 dB attenuation onward.

2.4 GHz Uplink throughput vs. attenuation comparison
5 GHz downlink show a similar start-low-stay-low pattern seen in the 2.4 GHz downlink test. Disconnect is again not super early, but not as good as the ASUS.

5 GHz Downlink throughput vs. attenuation comparison
5 GHz uplink shows the OnHub once again with the lowest maximum throughput, but duking it out with the Linksys WRT1900AC for bottom slot at the higher attenuations.

5 GHz Uplink throughput vs. attenuation comparison
Closing Thoughts
With disappointing wireless performance and only one of the three wired routing benchmarks measurable, it’s no wonder the OnHub ranks #10 out of 10 AC1900 class routers in our current Router Ranker. Please keep in mind that these results were obtained with band-edge channels 1 for 2.4 GHz and 36 for 5 GHz instead of our normal center-band channels 6 and 153. Band-edge channels often have slightly lower power to meet certain FCC limits, so that could have skewed the results. The bottom line here is, despite other reviewers’ reports to the contrary, the OnHub is unlikely to knock your Wi-Fi socks off.
Much OnHub coverage has touched upon concerns about letting Google be at the heart of your network. It’s also a favorite topic for reader comment and forum conspiracy rants. Google is trying to address the concern directly via this help topic that describes the data collected and how to opt out. If you’re among those of us who like to trust, but verify, just wait awhile. I’m sure hackers are already sniffing OnHub traffic to see if Google is really walking the talk and will scream bloody murder if they find anything untoward.
I’m not worried about OnHub sniffing network traffic. Google’s AdSense beacons and cookies already know plenty about our internet travels and its ubiquitous search box adds even more to our online profiles. OnHub is more interested in learning about your Wi-Fi environment, most likely to improve its Location Services. But you can opt-out of that too, by appending _nomap to your Wi-Fi network name (SSID).
In the end, Google’s OnHub is a pretty-to-look-at AC1900 router with disappointing wireless performance that takes an appliance approach to handling your network. You just plug it in, set a network name and security key and let it worry about how to connect all your wireless gadgets and keep them running smoothly.
If you are a router geek, don’t even bother. You’re going to hate OnHub. For those who regard wireless routers as a necessary evil and just want them to work, only time will tell if Google has the keys to that kingdom.