| At a glance | |
|---|---|
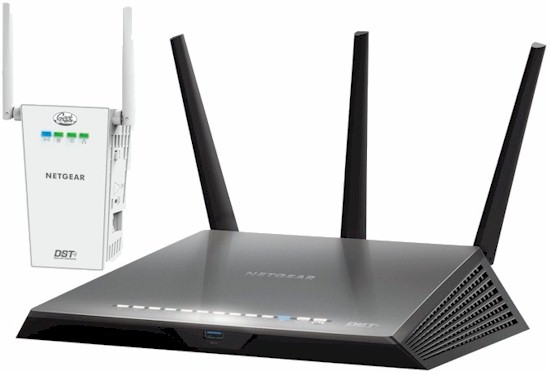
| Product | NETGEAR Nighthawk DST Router & DST Adapter (R7300DST) [Website] |
| Summary | Broadcom-based AC1900 class router with USB 2.0 & 3.0 storage & printer sharing, bundled with HomePlug AV2 connected access point |
| Pros | • Easy Setup • USB 3.0 storage & printer sharing • May work where wireless extenders won’t • Comes with 1 yr of Geek Squad support |
| Cons | • Powerline isn’t perfect. May need to experiment with DST location • Relatively expensive • Geek Squad support is only for setup, not general network help |
Typical Price: $35 Buy From Amazon
Introduction
As a frequent reviewer of Wi-Fi routers, I’m often asked, “How do I get rid of dead spots in my Wi-Fi coverage?” The best way is to add an Ethernet-connected access point. But often, running an Ethernet cable from your Wi-Fi router to the AP isn’t feasible.
Best Buy and NETGEAR have partnered to address this problem with the NETGEAR R7300DST Nighthawk DST Router & DST Adapter. The router is basically a NETGEAR R7000 Nighthawk with a built-in HomePlug AV2 adapter. The DST Adapter (DST stands for “Dead Spot Terminator”) is a HomePlug AV2-connected simultaneous dual-band 802.11ac access point. The DST does not function as a wireless-connected extender.
According to the published specifications, the R7300 Nighthawk is an AC1900 class router (600 Mbps @2.4GHz with 256 QAM support + 1300 Mbps @ 5GHz 11ac). NETGEAR’s specs for the DST adapter say it is "HomePlug AV2 compliant" and has an 802.11ac AC650 (2.4 GHz: 300 Mbps + 5 GHz: 350 Mbps) radio.
Don’t go rushing out to Amazon.com to find this product, however. The Nighthawk DST AC1900 Router and DST Adapter was developed by NETGEAR for Best Buy and is exclusively sold and supported by Best Buy. Additional DST Adapters have their own model number—DST6501—and sell for $70.

NETGEAR Nighthawk DST AC1900 Router & DST Adapter
The R7300DST’s body is the same width, but a 1/4" taller and 2" deeper than the original R7000. (Add 5.5" height and 1.5" depth for the antennas.) Callouts for both router are shown below. There are no slots on the bottom for wall / ceiling mounting. The top cover is solid, but all other surfaces are composed of open plastic grid for convection cooling since there is no fan. The top cover of the R7300DST does get warm to the touch.

R7300DST callouts
Note the Geek Squad button on the top panel. Pushing it allows Geek Squad techs to access the router settings. You must first access the Geek Squad via chat or phone and give them a coupon code found in the User Manual and Geek Squad Support ID found on the router serial number label. Geek Squad support is limited to setting up the R7300DST and DST6501 adapter, not general network support and is good for one year from purchase. We did not exercise the Geek Squad as part of this review. But let us know if you do via a forum post.
The DST6501’s callouts are shown below. The Gigabit Ethernet port can be used to connect Ethernet devices, but can’t be used to connect the DST’s access point via Ethernet instead of HomePlug.

DST6501 callouts
Inside – Router
The router has a pretty clean layout with all key circuits encased in RF cans. Because the R7300DST has a built-in powerline interface, it has a built-in power supply (photo right) and connects via an AC line cord.

NETGEAR R7300DST PCB assembly with heat sinks in place
Removing the board reveals a large heatsink plate that couples to the bottom of the router via thermal pads.

NETGEAR R7300DST base plate
Here’s the main board with RF can tops removed. The 2.4 and 5GHz radios are on the left. The lone component in the right side RF can is a BCM54612E Gigabit Ethernet transceiver used to connect the powerline module.

NETGEAR R7300DST PCB top
The board bottom view reveals the Broadcom BCM4709A processor with built-in Gigabit Ethernet switch, RAM and flash.

NETGEAR R7300DST PCB bottom
Table 1 below summarizes the key components of the NETGEAR R7300DST and components of the other two products that we’ll be using for comparison in the performance section of the review, i.e. the original R7000 Nighthawk and Linksys WRT1900ACS. Both NETGEAR routers use the same components. The Linksys router is Marvell-based.
| NETGEAR R7300DST | NETGEAR R7000 | Linksys WRT1900ACS | |
|---|---|---|---|
| CPU | Broadcom BCM4709A | Broadcom BCM4709A | Marvell Armada 38X dual-core @ 1.6 GHz (88F6820-A0 C160) (ARMv7) |
| Switch | – in BCM4709A – BCM54612E Gigabit Ethernet Transceiver (for PLC module connect) |
in BCM4709A | Marvell 88E6172 |
| RAM | 256 MB Samsung K4B2G1646Q | 256 MB | 512 MB |
| Flash | 128 MB Spansion S34ML01G200TFI000 | 128 MB | 128 MB |
| 2.4 GHz Radio | – Broadcom BCM4360 – Skyworks SE2623L 2.4 GHz Power Amp (x3) |
– Broadcom BCM4360 – Skyworks SE2623L 2.4 GHz Power Amp (x3) |
Marvell 88W8864 – Skyworks SE2623L 2.4 GHz power amplifier (x4) – Unidentified switch and LNA (x4) |
| 5 GHz radio | Broadcom BCM4709A – Skyworks SE5003L1 5GHz Power amp (x3) |
Broadcom BCM4709A – Skyworks SE5003L1 5GHz Power amp (x3) |
Marvell 88W8864 – RFMD RFPA5522 5 GHz power amplifier (x4) – Skyworks SKY85601 5 GHz LNA + switch (x4) |
Table 1: Key Component Summary
For comparison, here’s a photo of the top of the NETGEAR R7000’s board, which the R7300DST’s board takes many design cues from.

NETGEAR R7000 main PCB top
Finally, the image below shows a closeup of the powerline module that appears on the right side of router chassis in the first two inside photos above. We didn’t disassemble it to identify the powerline controller. But it’s a good guess it’s the same one used in the DST, which we’ll look at next.

NETGEAR R7300DST PLC router module
Inside – Dead Spot Terminator Adapter
Analysis by Tim Higgins
The DST6501 DST adapter got its own teardown. Removing the back doesn’t reveal much.

NETGEAR Dead Spot Terminator Adapter inside
Once you pop the assembly out of the case, it can be separated into two pieces. The power board is photo left.

DST boards separated
Removing the heatsink plate and RF can top exposes the components.

DST boards naked
The DST6501’s specs say it is "HomePlug AV2 compliant" and has an 802.11ac AC650 (2.4 GHz: 300 Mbps + 5 GHz: 350 Mbps) radio. The components reveal a bit more. The SoC doing most of the heavy lifting is a Broadcom BCM47189A1. It’s described as "2×2/1+1 5G WiFi SoC with CPU, FE switch and USB". The "2×2" part lines up with the two antennas, implying a 2×2 design. But the 1+1 part seems a puzzle. More on this when we review DST performance.
The powerline device is a BCM60335. This appears to be a variant of the BCM60333, which is a "750 Mbps"HomePlug AV2 SISO device and found in Broadcom-based AV2 adapters like the ZyXEL PLA5206. I couldn’t find a Broadcom listing for the BCM60335, but found it referenced in GigaFast’s PS958-EB62 HomePlug AV2 750Mbps Ethernet Bridge spec. I also couldn’t find any references to the B50212E. 128 MB of RAM and 8 MB of flash are listed with the other components in Table 2.
| NETGEAR DST6501 | |
|---|---|
| CPU | Broadcom BCM47189A1 2×2/1+1 5G WiFi SoC with CPU, FE switch and USB |
| HomePlug | – Broadcom BCM60335 HomePlug AV2 SISO 750 Mbps PHY rate – Broadcom B50212E |
| RAM | 128 MB Winbond W631GG6KB-15 |
| Flash | 8 MB Winbond W25Q64CV |
Table 2: NETGEAR DST6501 Key Component Summary
Features
Like all recent NETGEAR routers, the R7300DST uses the NETGEAR genie OS. The user interface is virtually identical to what we saw in the most recently reviewed R7500v2. Here’s the genie landing page.

NETGEAR R7300DST basic mode landing page
The only difference is the Remote DST Management menu, which provides some basic information and a link to the DST adapter(s) web management.

NETGEAR R7300DST basic mode landing page
The DST adapter module also runs genie. The image below shows the main status page, which includes LAN and wireless, but not powerline information.

NETGEAR DST Adapter status
The gallery below contains additional images of the DST’s admin screens with commentary.

Each radio is configured here.
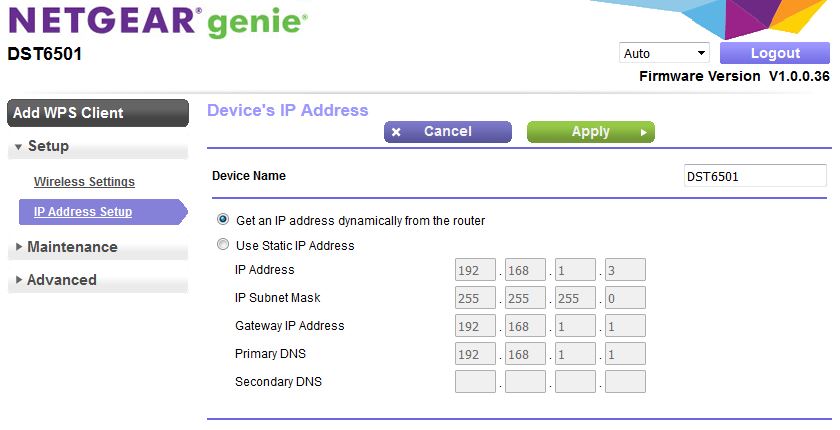
You can set a static IP for the adapter here
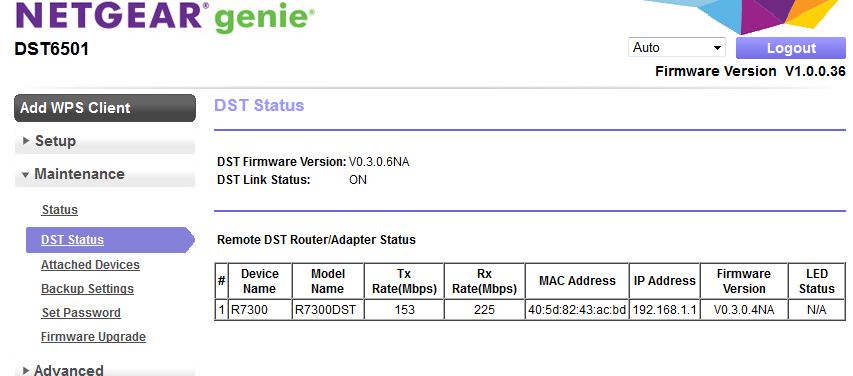
DST powerline status
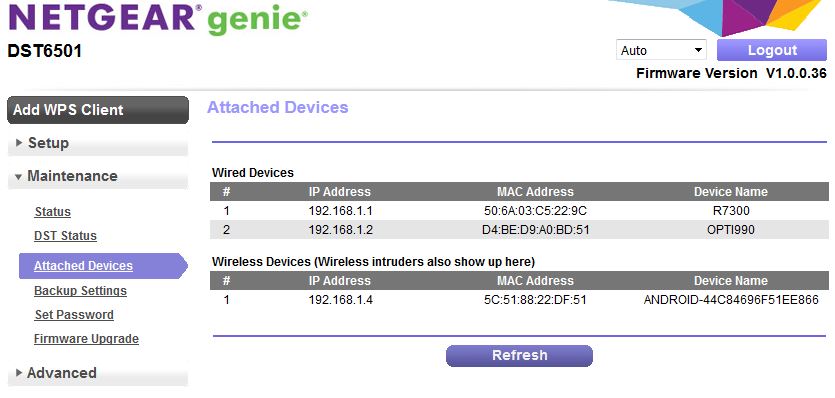
Listing of attached devices
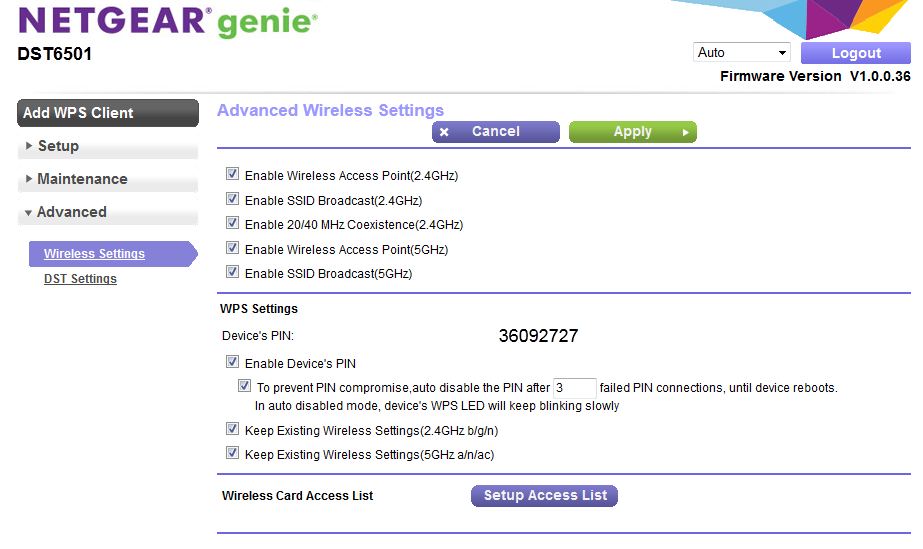
Advanced wireless and WPS PIN enable/disable are set here
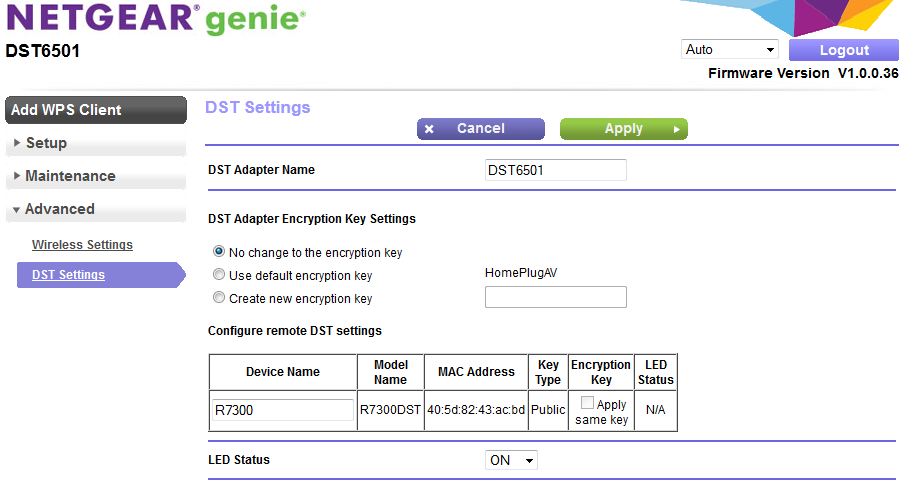
DST powerline settings are set here. Not much to do
Storage Performance
The summary graphic below from the Router Charts shows all AC1900-class routers we’ve tested with our standard procedure using a USB 3.0 connection with the disk formatted for NTFS. For both NTFS Write and Read, the Linksys WRT1900ACS topped the charts by a significant margin. Ranked at #4 for both Write and Read, the R7300DST edged out its R7000 sibling which ranked #5 on both tests.

Storage Performance Comparison – USB 3.0 / NTFS
Routing Performance
Routing throughput was measured using our standard router test process with the NETGEAR R7300DST router loaded with v1.0.0.28 firmware. Table 3 summarizes the results and compares them to the same other two routers in the key component summary above.
The R7300DST had the lowest scores on all four tests. However, in terms of real-world performance, you probably wouldn’t notice any difference in routing performance between any of these routers. All routers supported over 30,000 connections. We consider anything over 30,000 connections equal for ranking purposes.
| Test Description | NETGEAR R7300DST | NETGEAR R7000 | Linksys WRT1900ACS |
|---|---|---|---|
| WAN-LAN (Mbps) | 703 | 931 | 746 |
| LAN-WAN (Mbps) | 803 | 942 | 872 |
| Total Simultaneous (Mbps) | 1306 | 1378 | 1546 |
| Maximum Simultaneous Connections | 31784 | 38793 | 35482 |
| Firmware Version | v1.0.0.28 | V1.0.1.22_1.0.15 | 1.0.0.168229 |
Table 3: Comparative routing performance (Mbps)
For the unidirectional tests the IxChariot chart below shows steady throughput but with the LAN-WAN (Uplink) having slightly better throughput than the WAN-LAN (downlink). As noted in previous reviews, higher uplink throughput is frequently observed in this test and is a quirk of the test process, not a reflection of router performance.

NETGEAR R7300DST routing throughput unidirectional summary
As with the previous uplink and downlink tests, in the bidirectional tests, both uplink and downlink test pairs showed fairly steady throughput. We’re not sure what’s causing the rapid oscillation in the uplink plot.

NETGEAR R7300DST routing throughput bidirectional summary
Wireless Performance
The R7300DST was tested using our Version 8 Wireless test process with v1.0.0.28 firmware loaded. Our standard practice is to center the router under the test antennas on the turntable, both front-to-back and side-to-side in the chamber. This method is intended to keep maximum distance between the router under test and chamber antennas as the router rotates during test. The photo below shows the Nighthawk R7300DST in position in the octoScope test chamber.

NETGEAR R7300DST in test chamber
Let’s first look at average throughput for all 2.4 GHz band measurements made for all AC1900 class routers. All three routers (R7300DST, R7000 and Linksys WRT1900ACS) rank in the lower third of the chart for downlink. The two NETGEARs do much better for uplink, while the Linksys is third from the bottom.

2.4 GHz average throughput – AC1900 class routers
The same comparison for 5 GHz shows the R7000 and Linksys WRT1900ACS in the #2 and #1 spots respectively with the R7300DST significantly lower for downlink. The DST does much better for uplink, with the other two routers maintaining their same positions.

5 GHz average throughput – AC1900 class routers
Moving along to throughput vs. attenuation plots for a more detailed look, for 2.4 GHz downlink, the NETGEAR R7300DST had highest throughput up to 12 dB of attenuation. It then maintained position between the R7000 (fastest) and the Linksys WRT1900ACS (slowest) throughout the balance of the test range. The Linksys lost its connection at 63 dB, but the other two NETGEAR routers finished the test.
For 2.4 GHz uplink again, the R7300DST again started out highest, then moved between the other two products at 27 dB and above. All three routers lost connection at 63 dB of attenuation.

2.4 GHz Downlink and Uplink Throughput vs. Attenuation
For 5 GHz downlink, the NETGEAR R7300DST tracked below the other two products, moving slightly above the WRT1900ACS from 33 dB on. For 5 GHz uplink, all three products tracked closely at lower attenuations (higher signal) and moved slightly apart from 18 dB onward.

5 GHz Downlink and Uplink Throughput vs. Attenuation
In all, there isn’t a big difference in wireless performance for these three routers.
Dead Spot Terminator Performance
Testing and analysis by Tim Higgins
The DST is a powerline-connected access point, so end-to-end performance can be broken into two parts: the powerline "backhaul" and AP-to-STA (client) connection. I started by measuring powerling throughput with the DST in the same Locations A, C and E used for powerline adapter testing. You can learn all about the locations in How We Test Powerline Products.
An Acer Aspire S7 Running Windows 8 was plugged into an R7300DST LAN port to form one end of the IxChariot pair. My trusty Lenovo x220i running Windows 7 traveled among test locations as the other IxChariot endpoint and ran the console.
The DST adapter’s WiFi settings were Channel 6 for 2.4 GHz and Up to 65 Mbps Wireless mode (20 MHz bandwidth). Channel 153 and Up to 433 Mbps mode (80 MHz bandwidth) was set for 5 GHz. The R7300DST router’s WiFi settings were Channel 6 for 2.4 GHz and Up to 289 Mbps Wireless mode (20 MHz bandwidth). Channel 153 and Up to 1300 Mbps mode (80 MHz bandwidth) was set for 5 GHz.
The IxChariot plot below summarizes powerline downlink (router to DST) throughput for the three locations. As we typically see, throughput falls off quickly as distance increases between adapters.

Powerline throughput – downlink
This next plot shows powerline uplink, with a sharp decrease in Location A throughput. Thinking the problem might be signal overload from the two adapters plugged into the same outlet, I tried moving one adapter to an outlet on the other side of the wall dividing two rooms with no significant change in results. So there is something wonky about powerline uplink, at least by my measurements. Note these results represent maximum wireless throughput available from the access point at each of the three test locations.

Powerline throughput – uplink
Location E also represents a wireless dead zone in my home. I can get a barely usable 2.4 GHz there and no 5 GHz signal at all when a router under test is sitting on my test bench. However for these tests, the R7300DST had to be moved to a spot closer to my office door, so its AC line cord could be plugged into the powerline test Location A hallway outlet outside my office. This outlet avoids the powerline throughput-killing AFCI breaker that protects my office. I was suprised to find I could get usable 2.4 and 5 GHz throughput in Location E when connected directly to the R7300DST with this new router location. Just proves once again the value of good router location.
I then ran two sets of tests for each band, with the R7300DST directly connected to the test laptop (the Lenovo x220i with NETGEAR A6200 AC1200 class USB adapter) and with the test laptop connected to the DST adapter.
The chart below shows results with the DST in Location E. Location E direct is throughput with the test laptop associated directly with the R7300DST. Location E powerline is throughput via powerline connection between the R7300DST and DST adapter, with the test laptop connected via Gigabit Ethernet (and wireless shut off). Location E DST is throughput with the test laptop associated with the DST adapter. When the test laptop was connected to the DST, it was located within 6 ft.
The DST connection provides higher throughput than being connected directly back to the R7300DST in all four benchmarks. At 40 Mbps, 2.4 GHz downlink isn’t being limited by the powerline connection, but it appears that uplink might be. For both 5 GHz up and downlink, the powerline and DST results are so close, it’s a good bet the powerline connection is the limiting factor.

Wireless throughput – DST Location E
This is probably a good time to talk about what class the DST radios really are. NETGEAR specs them as AC650 (2.4 GHz: 300 Mbps + 5 GHz: 350 Mbps). The 2.4 GHz part is easy; it looks like a 2×2 configuration. To suss the 5 GHz radio, I had to look at the MCS table. The closest rate I found for 80 MHz bandwidth was 351 Mbps for a 1×1 configuration.
But the DST’s Wireless Mode selections and actual link rates experienced during testing tell the real story. When parking the test laptop within 6 ft. of the DST, the best link rate I got for 2.4 GHz was 72 Mbps. That’s the maximum link rate for a 1×1 11n device using Short Guard Interval with 20 MHz bandwidth. Best link for 5 GHz was 433 Mbps, which we all know as best case for a 1×1 11ac adapter, again using Short Guard Interval with 80 MHz bandwidth. My guess is the radios are 2×2 for receive only.
Since Location C powerline throughput was much better than Location E, I ran a second set of tests. The DST adapter was plugged in at Location C, but the test laptop was in Location E, since that’s the dead spot I was trying to light up. The plot below more clearly shows the 2.4 GHz radio as the limiting factor in what you’ll get from the DST. The plot also shows what the 5 GHz radio can do when the powerline connection isn’t capping throughput.

Wireless throughput – DST Location C
Closing Thoughts
By Tim Higgins
Despite their focus on selling us expensive big honkin’ routers, consumer wireless makers know the days are numbered for this approach. Beamforming, active antennas and other Wi-Fi wizardry are no match for the physics of 5 GHz signal propagation. In the end, the only way to cover large areas with decent throughput in 5 GHz is to add more access points and make multi-AP networks easy to set up and manage.
There are actually already multi-AP networks in many homes today, built with wireless extenders. Today’s dual-band 11ac extenders are a far cry from the bandwidth-starved single-band N150 extenders we had to settle for only a few years back. With 802.11ac radios, simultaneous extension of both bands, smart backhaul management and much easier setup, it’s no wonder router makers are selling a pantload of them.
But using powerline to connect a wall-plugged AP certainly has its advantages, especially when airwaves are crowded and both bands are heavily used. Moving backhaul traffic off the air can lower the load and make Wi-Fi users happier, if powerline doesn’t cause more problems than it solves.
And there’s the rub. Lke all Ethernet alternatives, powerline networking has its own foibles, something our testing showed. It’s sensitive to noise, especially from ubiquitous USB and other wall-wart power supplies. Some brands of AFCI breakers that have been required in U.S. homes for years now can seriously knock down throughput, too. There’s also the matter of just finding a place to plug them directly into the wall, especially in areas they’re most likely to be used, such as the family media room.
In the end, you’ll need to experiment with DST placement, just as you do with wireless extenders. Unfortunately, the tri-color LED signal quality method HomePlug AV has adopted isn’t much help. I’ve yet to see that light any color than green even though measured throughput changes more than 10X! But at least you don’t need to mess with getting the DST and router to talk to each other; that was very reliable and quick in my testing.
All said, it’s not likely the R7300DST and DST adapter bundle will make a huge dent in wireless extender sales or set the Wi-Fi world on fire. After all, it’s available only from Best Buy (currently for $300) and it hasn’t been widely promoted or even reviewed. But if you’re not happy with the results you’ve gotten from trying wireless extenders, and you’re looking to trade up to an AC router, you should give the NETGEAR R7300DST a shot.