| At a glance | |
|---|---|
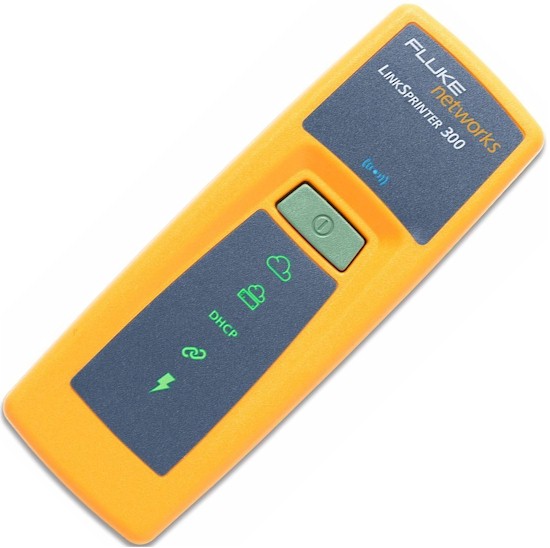
| Product | Fluke Networks LinkSprinter 300 (LSPRNTR-300) [Website] |
| Summary |
Handheld pocket-sized Ethernet network test tool w/ cable fault distance feature. |
| Pros | • Small, convenient, easy to use • Communicates via Wi-Fi with phone / tablet without existing network • Distance to cable fault feature |
| Cons | • Confusing labeling on cable fault feature • VLAN testing limited to native port; no 802.1q support • Pricey for hobbyist use |
Typical Price: $406 Buy From Amazon
Introduction
Fluke Networks introduced the LinkSprinter 100 and 200 network test tools last year, winning awards from InfoWorld and Electrical Construction & Maintenance, among others. I reviewed the LinkSprinter 200 last year and was quite impressed with its utility and simplicity.
Since then, I have had the opportunity to work with network engineers and technicians at various locations and observed them carrying a LinkSprinter. I’ve asked them how they liked the device and the common response was they found it handy and easy to use. I’ve used the LinkSprinter at my regular job and found it handy for quickly identifying key information such as the presence of PoE, a DHCP server and corresponding subnet information, as well as the native VLAN ID on a port.
In March, Fluke Networks launched the LinkSprinter 300, which further enhances the LinkSprinter product. This review will focus on the new features in the LinkSprinter 300. The below list shows the features in the LinkSprinter 100, 200, and 300.

LinkSprinter 100
- Hand held, battery and PoE powered network test tool
- Single button operation
- Diagnose and test Power over Ethernet (PoE), Link to the switch, DHCP, Gateway, and Internet connection
- Get VLAN ID, switch name, and port information via CDP/LLDP/EDP
- Color graded LEDs simplify troubleshooting
- All test results are sent to the Link-Live Cloud Service
- Test results sent to email
LinkSprinter 200 adds:
- Test results available on a smart phone or PC browser using the built-in Wi-Fi access point
LinkSprinter 300 adds:
- Test for cable faults, display distance to open/short
- Cause the switch/hub/router port to blink
In Use
Activating a LinkSprinter device involves setting up a free account on LinkSprinter’s cloud Link-Live website. If you already have an account and other LinkSprinter devices, as I did from testing the LinkSprinter 200 last year, all you have to do is add the last 6 digits of the MAC of the new device to include the new device’s configurations and output on the website. As you can see below, my LinkSprinter account now has both a LinkSprinter 200 and 300.

LinkSprinter Devices
With multiple devices on your account, you can configure them via the cloud to all use the same settings, or you can configure each one differently. You can also configure the device locally. Configuration options include power saving options for testing 1 Gbps and AutoOff, enabling the Cloud Service, setting cable unit of measurement to feet or meters, using DHCP or static IP addresses, defining the website and port used for testing Internet connectivity, specifying the SSID and channel used for the Wi-Fi radio, and selecting a language preference.
Physically, the LinkSprinter 200 and 300 are identical with the exception that one says “200” and the other says “300,” as you can see in the image below.

LinkSprinter 200 and 300
I found the LinkSprinter 300 to function exactly the same as the 200 I tested last year. Both devices have a single button. The button turns the device on, enables Wi-Fi, repeats a test, and shuts the device down with successive button pushes.
The difference is the LinkSprinter 300 adds two new features over the 200. The two new features are a cable tester tool and a tool that will cause the link light(s) on the far end of a cable to blink.
You’ll notice on the main results page on the 300 a tool icon on the bottom right that doesn’t exist on the 200, shown below. (Note, my images below are screenshots from an iPhone 5s connected to the LinkSprinter’s Wi-Fi radio.)

LinkSprinter 300 Tools
When you click the tool icon, you’re presented with a simple menu with an option labeled “Cable” and an option labeled “Flash Port,” as shown below.

LinkSprinter 300 Tool Menu
Selecting Cable on a working Ethernet cable simply shows a green link icon and the cable speed. As you can see in the below icon, it shows a green link icon on the left and the number “1000” in bold, indicating a good cable on a port running at 1Gbps. In the below test, I used a factory made 6′ Ethernet cable.

LinkSprinter 300 Good Cable Readout
Cable Fault
To test the Cable feature, I then cut the white/orange wire on my 6′ Ethernet cable at about 3′ and re-ran theCable test. As you can see in the below image, this time I got a different result.

LinkSprinter 300 Fault at 1m
As you can see, the above image shows “Good <1m” next to wires 1 and 2. Wires 3-8 all show “Terminated ?m.” Knowing there was a fault at 1m, it appears the “Good <1m” means wires 1-2 are good to 1m, or more importantly, there is a fault at about 1m. Note, the last two characters of the “Terminated ?m” display is hard to read as the “ed” of “Terminated” and “?m” are overwritten.
It’s easy enough to figure out what the display means, but it could be better labeled. I would have labeled the bad wires with “Fault <1m” and the good wires with “Good ?m.”
I repeated my test with a known good factory made 25′ Ethernet cable. This time, I cut the white/orange wire at about 18′. As you can see in the below image, the LinkSprinter 300 measured the fault at 5.6m (18.4 ft.). Note, the LinkSprinter is measuring the cable fault distance from the LinkSprinter, not the network switch. As mentioned earlier, you can select the measurement units in either meters or feet in the device’s configuration menu.

LinkSprinter 300 Fault at 6m
I flipped my 25′ cable around, putting the fault about 7′ from the LinkSprinter. This time, as you can see below, the LinkSprinter measured the fault at 2.4m (7.9 ft.)

LinkSprinter 300 Fault at 7ft
Flash Port
The Flash Port menu is also useful. This tool appears to enable and disable the Ethernet port on the LinkSprinter 300, which causes the link LEDs on your network switch/router/hub to slowly blink on and off. This can be helpful when trying to figure out which port on your network device is connected to a specific Ethernet cable in a bundle of wires, such as in the image below.

LinkSprinter 300 Port Flash Tool
I made a short video showing off this feature.![]() I started with the LinkSprinter 300 connected to a Cisco SG200-26 switch’s port 10. Notice the LED on the switch’s port 10 flickering like an active switch port. Then I enabled the Flash Port option on the LinkSprinter300 and you can see the LED on switch port 10 goes on and off. If I had a mass of wires, such as in the above picture, this simple feature would have made it quick and easy to trace the cable to the switch port.
I started with the LinkSprinter 300 connected to a Cisco SG200-26 switch’s port 10. Notice the LED on the switch’s port 10 flickering like an active switch port. Then I enabled the Flash Port option on the LinkSprinter300 and you can see the LED on switch port 10 goes on and off. If I had a mass of wires, such as in the above picture, this simple feature would have made it quick and easy to trace the cable to the switch port.
Closing Thoughts
Based on my simple tests, the Cable feature was pretty accurate in identifying the location of a fault. To make this feature better, it would be good if the Cable menu provided an approximate length of a good cable. Obviously, the labeling could also be better with more intuitive labels and correcting the overwritten characters.
Also, I noticed the results from a failed Cable test are only available via the Wi-Fi connection to the LinkSprinter and aren’t emailed or uploaded the Link-Live cloud. Obviously, when connected to a bad cable, the LinkSprinter can’t send the results to the cloud. However, it would be nice if the device had the ability to store a couple previous results and upload them once connected.
I also like the Flash Port tool. It does a nice job of visually identifying a switch port. I can see this tool saving a lot of time if you’re trying to trace cables.
Pricing for the LinkSprinter 100 is $199, the 200 is $299, and the LinkSprinter 300 as reviewed here is $399. When Fluke launched the product, there was additional costs for use of the cloud service, which fortunately Fluke has dropped.
In my experience, a tool that makes a job easier leads to more accurate and quicker results. Fluke’s LinkSprinters make cable troubleshooting tasks easier and quicker and will likely pay for themselves with increased accuracy and shorter times to task completion.
Certainly, the LinkSprinter beats lugging a laptop around just to test cables. As I mentioned in my review of the LinkSprinter 200, the Wi-Fi feature makes the LinkSprinter 200 a lot more useful than the LinkSprinter 100. Similarly, the Cable and Flash Port features on the LinkSprinter 300 make it worth the additional $100 over the LinkSprinter 200 for networking pros. All but the LinkSprinter 100, however, are likely too pricey for hobbyists.