
Introduction
Thecus is the latest NAS manufacturer to join the ranks of those who have recently upgraded their NAS operating systems. QNAP’s QTS 4.0 operating system added a number of multimedia “Stations” to make their NAS products more competitive with those from Synology. NETGEAR’s ReadyNAS OS6 rolled out a new cloud-based setup system and introduced the SOHO NAS market to the BTFRS EXT4-based file system. Buffalo, on the other hand, didn’t add too many features and used their NAS OS update to polish up their interface.
Thecus’ OS upgrade, named Thecus OS™6, like Buffalo’s NAS OS update, doesn’t add many new features, but rather focuses on a user interface overhaul. It also includes a free DDNS service (thecuslink.com) and improved online instant updates for installed server apps.
Admittedly, this is the first Thecus product that I’ve reviewed, so I don’t have the historical perspective I have with other NAS brands. However, if you’re interested in comparing the previous version of the Thecus’ OS with the latest version, Tim included a slide show gallery in his review of the Thecus N4800 last year.
For this review, Thecus supplied the N2560 – a two bay BYOD NAS that Scott Deleeuw recently reviewed. As pointed out in Scott’s review, the two-bay SOHO-focused 2560 does not include some of the features you’d expect to find in devices with additional bays or targeted at business use. Here are some of the features that you’ll find in higher end Thecus products, but are missing on the 2560:
- AD support
- iSCSI support
- NAS Stacking
- NFS Share
- LDAP support
- TFTP server
Thecus advised that ThecusOS6 will initially be available on the N2560 and the N4560 which will be available beginning in October. Thecus’ plan is to roll out ThecusOS6 to the rest of their NAS products with fewer than 7 bays. Thecus hopes to have the rollout completed by the end of the year, but since the OS for other models is still in development, that’s not a firm date. If you’d like to try out the new UI, Thecus has provided a read-only Live Demo.
Setup
Having worked on documentation projects in the past, I understand the challenges of writing a concise, but useful quick start guide. Thecus boiled down the installation to three steps:
- Insert the drive
- Connect the cables
- Go online and download installation software.
When you go online, you have the option to download a Windows, MacOS or Linux Intelligent NAS utility. You need to run this installation program on a local computer to initialize your NAS. So Thecus gets credit for eliminating the need for a CD-ROM drive. But households that have only tablets and/or smartphones will need to skip ThecusOS 6.
There’s a QR Code at the bottom of the quick start guide that takes you to the Thecus Online Resource Center. This link is well worth a bookmark. There you’ll find a wealth of information including Getting Started information, Video Tutorials, How To guides, User Manuals, and FAQs. For those of you who don’t like to read manuals, spend a few minutes viewing the two videos that cover installation of the disks, initializing the NAS and creating your own free Thecus Link account for DDNS. The videos might save you some time.
While the quick start guide points you to online installation, the included CD contains the same installation programs for Windows and MacOS. It also includes a getting started guide, the user manual and one of the videos that you’ll find in the online resource center. Though it’s not mentioned in the user manual, Thecus includes a licensed version of Acronis PE which you can install from the CD’s autorun installation program.

Thecus OS6 CD installation
The installation software, detailed in the gallery below, identifies the IP address of your Thecus NAS, initializes, and, if necessary reformats your disks, and helps you set up your ThecusLink DDNS account.
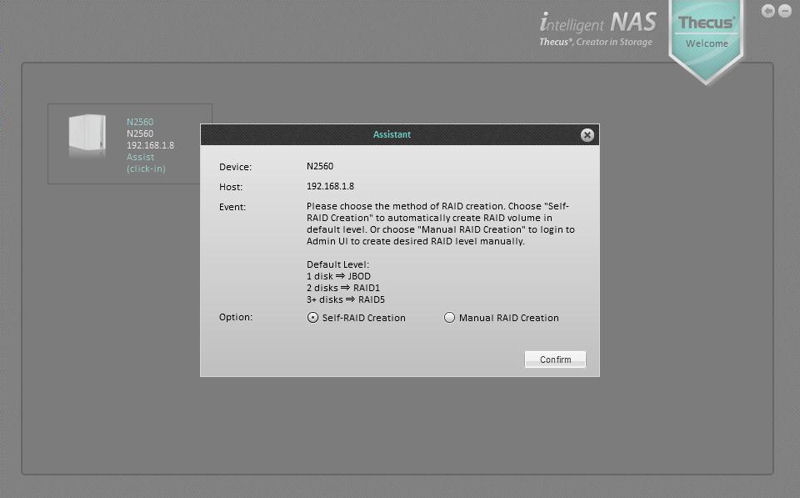
The intelligent NAS utility discovers your NAS on the local network and lets you choose the RAID creation method

If the NAS utility detects data on your drive, you have the option to re-initialize it (erasing all data) or to shutdown the NAS.
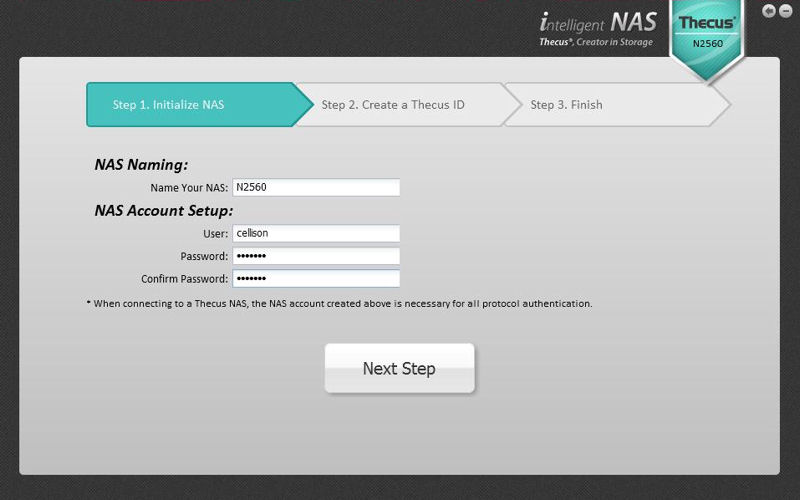
Create a name for your NAS and set up the initial user
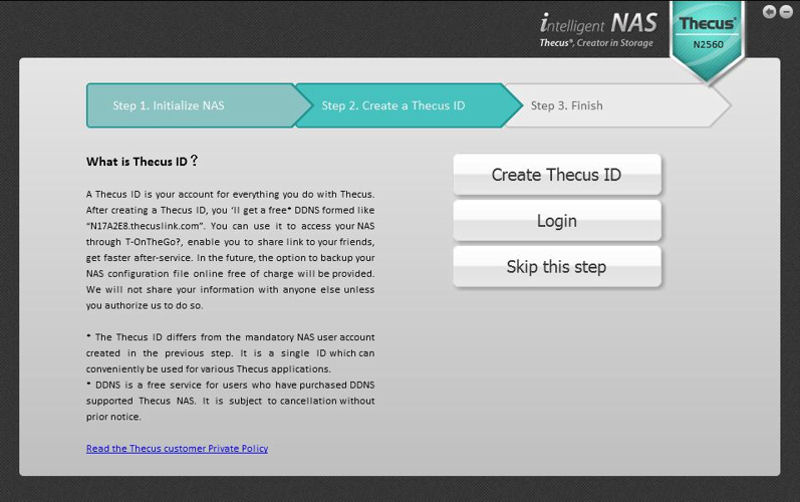
If you don’t have a Thecus account, you can create one here. Otherwise, login.
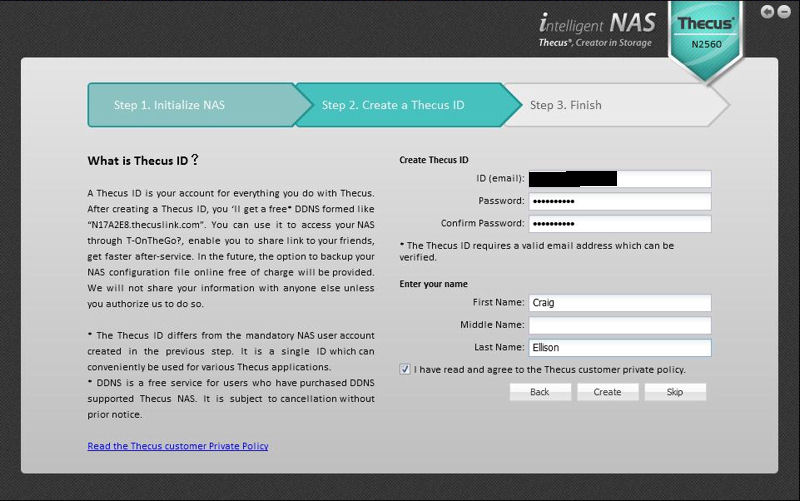
Here you enter in an email and password to be used for your Thecus account.
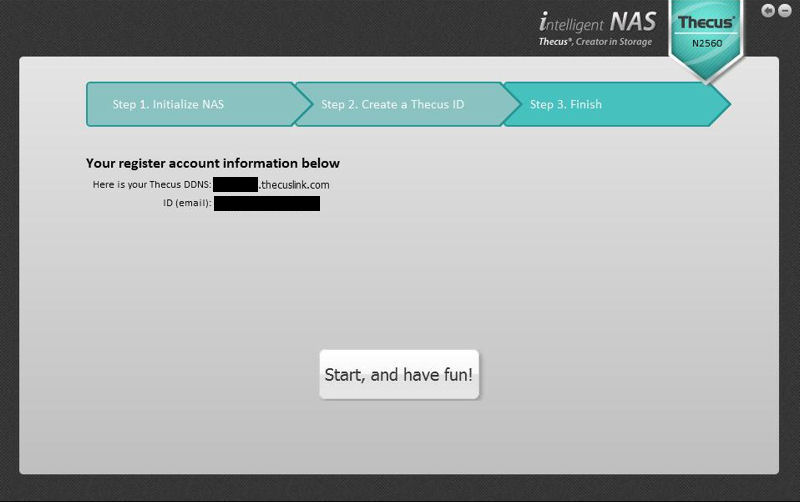
Your email address and the assigned host name (subdomain) for thecuslink are displayed on this page. For my NAS, the host name was "N" followed by the last six digits of the MAC address of the NAS.
User Interface Overview
Since the bulk of the ThecusOS6 is about the user interface, let’s jump in and take a quick tour. After logging in, you land at the page shown below.

Thecus OS6 Home Page
Unlike many of the competitors’ landing pages, the default landing page of Thecus OS6 is fairly stark and is only populated with icons for Shared Folder and RAID management. My personal preference is to have a landing page that provides a complete status of the NAS when I log in. Of the NAS OS updates that I’ve reviewed, NETGEAR’s ReadyNAS OS6 has what I consider to be a good landing page.

NETGEAR ReadyNAS OS6 home page
User Interface Overview – more
Starting at the upper left corner of Thecus’ home screen, the icon above the shared folder is the control panel icon. If you click on that, the complete control panel appears as shown in the image at the top of the review. The icon with the ! takes you directly to the system log. The ? icon takes you to context-sensitive help as shown below.

Thecus OS6 has context sensitive help
The Admin dropdown box lets you change the admin password, change the language for the UI, or logout. It also shows the current build. Moving to the lower right corner of the screen, the icon with three screens takes you to the network control panel. The disk icon takes you to the disk information page to view details on installed drives. The stacked platter icon is a direct link to the RAID Management page which is also a one of the default home page icons. Finally, the power icon in the lower left corner gives you the option to reboot or shutdown the NAS.
The Thecus OS6 UI has a flat menu architecture. This is somewhat of a departure not only from the UIs you find on competitors’ products, it’s also a departure from Thecus’ previous UI.
QNAP, for example has a desktop of icons, but you can click on an icon in the upper left corner to get a categorized list of top level menus along the left edge of the screen. Similarly, Buffalo has a top level menu along the left side of the screen. NETGEAR also has top level menus, though their tabs are run horizontally across the top of the screen.
Within the Thecus OS6 Control Panel, icons are categorized. The categories are:
- System Management
- File Sharing/Priviledge (sic)
- Network Service
- Application Server
- Backup
- External Devices
But the Control Panel box is a fixed size, and you have to scroll up and down to see the categories and individual icons. You can’t drag the Control Panel icons to the home page or to the shortcut bar at the bottom of the screen. You can, however, create home page shortcuts for any of the Control Panel icons by right clicking on the icon and selecting Add Shortcut. Once a shortcut is on the home page, you can drag and drop icons to rearrange the home screen to your liking.
Tour
If you’re already familiar with Thecus, you’ll see that many of the icons in Thecus OS6 are unchanged. Here’s a screenshot of the old UI so that you can compare it to the new one. Since many of the menus most likely haven’t changed too much, I’m not going to comment extensively unless they deserve special mention.

Previous UI on Thecus N4800
System Management
- General – only shows manufacturer, Product number, firmware version and uptime
- Status – shows running services, CPU and memory utilization and LAN activity
- Syslog Management – Unlike most NAS products, the Thecus OS has both a syslog Daemon and Syslog service. You can use your Thecus NAS as a syslog target for other devices that have syslog capabilities. You can also log syslog entries to a local folder or to a remote syslog on another syslog server
- File System Check – you can force a file system check on the next NAS reboot
- Wake on LAN – the Thecus supports WOL, but it’s disabled by default.
- Networking – This menu lets you set IPv4 and IPv6 settings, set a static address or DHCP (default) and change the Jumbo frame size.
- System Monitor – four individually configurable monitors let you monitor CPU, Memory Network, Samba, AFP and FTP. Only 2 of the four windows will display graphically. The screen shot below shows a CPU, Memory activity and network interface activity during a large file copy.

Thecus OS6 System Monitor
- Disk Information – This shows information for each installed disk. A built-in utility will test and report SMART statistics if the disk supports it. You can also scan for bad blocks. This menu includes Disk Power Management which will let you select none, 30, 60, 90, or 120 minute disk spin down.
The screenshot below shows the second page of Control Panel categories and icons.

Thecus OS6 – Second page of control panel icons
File Sharing/Priviledge
There’s really not much to comment on for this category. Here you set up and manger users and groups, manage folders and folder access and set user quotas. You can also back up user and group settings to restore later.
Network Service
- Samba/CIFS – In this menu, you Enable/disable the Samba service. You can also enable/disable anonymous login authentication, and Samba Native Mode. The Samba recycle bin feature is configured in this menu, as well.
- AFP – Enable/disable AFP. You can also enable/disable Time Machine support and designate a target folder for Time Machine backups.
- FTP – Enable/disable FTP and secure FTP. Configure internal/external FTP ports as well as passive port range. Allow/disallow anonymous FTP. Configure upload and download bandwidth.
- Web Service – Enable/disable http and https as well as set operating ports. SSL certificate management is also on the menu.
- UPnP – Enable/disable UPnP Service
- Bonjour – Enable/disable Bonjour
- SSH – Enable/disable SSH and specify SSH port. SFTP is also enabled/disabled on this menu.
- DDNS – Even though Thecus guides you through setting up DDNS on Thecus Link during setup, there are additional DDNS options for DynDNS, zoneedit.com and no-ip.com.
- UPnP Port Management – Thecus depends on UPnP to open ports on your router’s firewall. Thus, as is the case with many other NAS manufacturers, you’ll undoubtedly run into configuration problems if you either have disabled UPnP support on your router, or if you are in a double NAT environment. (ie, a second router behind a primary router.) The screen shot below shows a partial listing (due to scrolling) of the ports that the Thecus will open by default. For testing purposes, I enabled UPnP on my router and confirmed that the ports listed in the Thecus UPnP Port Management page were opened on my router. This menu also lets you add or delete additional rules.
- WebDAV – Enable/disable WebDAV and WebDAV SSL and configure ports. Also you can enable/disable Browser View.
- Auto-Thumbnail – when enabled, auto-thumbnail will automatically create thumbnails when photos are copied onto the NAS. This improves browsing performance for user accessing the NAS remotely using the T-OnTheGo Andorid/iOS applications.

Thecus OS6 UPnP Port Management
The next screenshot shows the final three categories of the Control Panel and will serve as a guide as we finish our tour of the Thecus OS6 user interface.

Thecus OS6 final three control panel categories
Application Server
- iTunes Server – Enable/disable the iTunes Server. You can set the iTunes server name and optionally a password. You can also set the rescan interval. You can’t however, change the default directory for the iTunes server scan. It only scans in the _Nas_Media folders. Initially, I had problems with my iTunes client “seeing” the iTunes server on the N2560. I stopped and restarted the iTunes server and that seemed to fix the problem. Tracks played as expected in iTunes.
- App Installation – allows you to install downloaded apps
- NAS Application – this is one area where Thecus noted improvements. In this menu, you can install additional applications that run on your Thecus NAS. When I first went to this menu, I noticed that the System Files were pending an update. It took just a single click to update the firmware to the latest version. I also installed the Dashboard, XBMC and McAfee VirusScan.

Thecus OS6 Nas Application
- Piczza – This is a photo sharing application. Thecus advised that you can find the documentation here. Here’s an example of an album that I set up.

Piczza Photo Sharing Application running on the N2560
- Transmission kit – this app lets you control configuration for your BitTorrent client. It’s available on your NAS at http://ip_address:9091/transmission/web (ip_address = the IP address of your NAS)
- Twonky Media – This lets you configure the Twonky Media server on the NAS. The Thecus NAS comes with a license key (found on the back of the CD jacket). The current version is 7.0.11 Special. The icon is essentially a link to port 9000 on your Thecus NAS.
- McAfee Virus Scan – I installed the McAfee VirusScan program. The program doesn’t run automatically by default. You have to manually update the virus signatures and manually create scanning jobs. Your choices are limited. You can either quarantine or delete a virus. Similarly, your scanning options are limited to “Now”, “Daily” or “Weekly”. You can set the virus signature update for either daily or weekly at the hour you specify.
Backup
- Rsync Target Server – Configure NAS as an Rsync target. You can enter up to 3 allowed IP addresses and can optionally upload a public or a private key.
- ACL Backup/restore – this feature lets you back or restore up your access control list for a specified RAID Name
- Data Burn – There are three modes: Write Files/folders to disc; Write image to disk; and Write files/folder to image. This is a feature on theN6850/N885/N10850.
- Data Guard – this is where you configure backups. You can configure to a remote NAS, to files/folders/devices on the local NAS or to Amazon S3. A backup wizard helps you create backup jobs.
- Amazon S3 – this takes you to the same backup wizard as found in Data Guard.

Thecus OS6 – Data Guard has a backup wizard to help configure backup jobs
External Devices
- Printer – this menu lets you remove documents from the queue and restart the printer service. Of course, a USB printer needs to be connected to a USB port on the NAS.
- Uninterrupted Power Source – This menu lets you configure and control a UPS attached to a USB port on your NAS. It has an extensive list of manufacturers and models in the drop down configuration boxes. You can configure notification times as well as shutdown your NAS when the battery charge on the UPS drops to your specified level.

Thecus OS6 – UPS Manufacturer support
Hands On
I did some extra poking at the Media server, XBMC Media Center and Mobile apps. Staring with the Media server, I loaded video, music and image files into the appropriate folders in \NAS_Public\_NAS_Media. Both the Twonky media server and the iTunes server enumerated the files correctly.
Using my standard DLNA test media streamer, at WDTV Live device, I tested music, video and images. All played as expected. The only problem that I ran into was one that I’d seen before on other NAS products. When I tried to view images, I ended up with highly pixelated images. Apparently, the media server indexes the thumbnails that the server automatically creates when you copy image files to the folder being watched by the server. I don’t know if there’s a workaround, but it does make viewing images through a DLNA server fairly useless. It would be nice if you could configure the media server to not index files smaller than, say, 10KB. That might solve the thumbnail problem.
Thecus is making a push to have its SOHO NASes double as diskful media players by equipping them with HDMI ports and media add-ins. Scott took a look at Thecus’ early efforts about a year ago and wasn’t that impressed. At that time, the media capability was centered around its Local Display module.
Local Display is nowhere to be found in ThecusOS 6, at least in the 2560 that I’m using for review. But XBMC is still available, so I downloaded and installed it, plugged my HDMI monitor into the port on the back of the NAS and rebooted. After rebooting, the XBMC server loaded and the splash screen appeared on the HDMI monitor.

Thecus OS6 – XBMC
In order to navigate, I plugged a USB mouse into one of the spare USB ports. I was then able to play video, music and images from the files stored on the NAS. In addition, I was able to log into another NAS and navigate to a folder that contained image files that I could also view. In addition to playing multimedia files, there’s a tab for Weather. There’s also a program tab where you can download additional programs including five additional XBMC programs.
After the short time I spent with XBMC, I don’t think I would use it or have it influence my purchase decision. In the end, I think my conclusion is the same as Scott’s. "… Thecus has more work to do before promoting HD media playback features on its NASes and a lot more to do before you can swap out your HTPC for one of its NASes."
Thecus has several mobile apps. The one that you’ll undoubtedly find the most useful is T-OnTheGo, available for both Android and iOS platforms. The description Google’s Play Store includes a warning that your version of Thecus OS must be up-to-date. That means for OS6—you should be running build_205. For devices running ThecusOS5 64 bit, you need to be running 2.04.01.2. Check out this link for a full description of the features.
Thecus describes T-OnTheGo as “a comprehensive cloud management solution for various file spaces with a smooth UI and excellent performance. This powerful new app allows you to manage files, read documents, view images and play videos directly from your Thecus NAS while you’re on the go.” You can use these QR codes to download these apps to your mobile devices.

QR Codes for the Thecus T-OnTheGo mobile app
Indeed, it is a full featured product, so you’ll probably want to download the documentation for your mobile OS (Android, iOS). It runs on WebDAV and uses port 9800 and 9802 (secure). I was able to play video, music and photos on both platforms.
The second app is the Thecus Dashboard. To use the app, you have to install the server side app (Dashboard) in the NAS application menu. The app is supposed to be available for both the iOS and the Android platform, but I couldn’t find it on the Google Play store. The QR code from Thecus’ support site sent me to a web page that didn’t exist.
I did, however, download and install it on my iPad. It’s an iPhone app, so not optimized for the iPad, but it does work. Dashboard allows you to turn on/off protocols and to monitor statistics of your Thecus NAS on your local or on a remote network.
I’ve included a brief gallery to show T-OnTheGo on both platforms as well as Dashboard on the iPad. You can find these Thecus apps, as well as several third party apps here.
The intelligent NAS utility discovers your NAS on the local network and lets you choose the RAID creation method
If the NAS utility detects data on your drive, you have the option to re-initialize it (erasing all data) or to shutdown the NAS.
Create a name for your NAS and set up the initial user
If you don’t have a Thecus account, you can create one here. Otherwise, login.
Here you enter in an email and password to be used for your Thecus account.
Your email address and the assigned host name (subdomain) for thecuslink are displayed on this page. For my NAS, the host name was "N" followed by the last six digits of the MAC address of the NAS.
Final Thoughts
ThecusOS 6 is a small step forward for the company’s NAS operating system. Thecus has always had the reputation for having the least user-friendly user interface. While they have made improvements over time, this latest effort in the form of ThecusOS 6 is going to do little to change that impression.
OS 6′ biggest innovation is the streamlining and automating of both OS and application / module updates and easy access to its new App Center. The "complete make-over, which promotes a faster, smoother and more fluid transition during NAS management" promised on the Live Demo page just isn’t there.
In some ways, ThecusOS 6 is a step backward, primarily due to its flat menu system that requires constant navigation back to the home screen to switch between functions. And the GUI didn’t seem any faster or smoother than the old OS 5.
Many SOHO/SMB users are just looking for shared storage. Once they create a share, set up users and map a share, it’s questionable how often they’ll log back into the NAS to make any changes. For me, the limited number of new features and the slightly different UI found in Thecus OS6 aren’t enough of a difference to influence my decision one way or another to purchase a Thecus.