Introduction
NOTE: 3SP has been purchased by Barracuda Networks
and there have been major changes to the program. Please see this Forum Thread.

| At a Glance | |
|---|---|
| Product | 3SP Ltd. SSL Explorer “Community” Edition SSL VPN 0.2.4 |
| Summary | Multi-featured open source browser-based SSL VPN server |
| Pros | – Easy to install and set up – Java and Web browser based – Requires only one port exposed to the Internet – Extensive configuration options – Free |
| Cons | – Some advanced capabilities are reserved for the “Enterprise” ($) edition – Limited support |
Remote access to a home or work PC is almost a requirement these days, especially if you telecommute. Unfortunately, navigating the plethora of remote access solutions available today can be a daunting task. Today most organizations require data to be secured in some fashion (i.e. encrypted). The standard accepted way of deploying remote access to users has been some sort of virtual private network solution (VPN).
Traditionally, IPsec and PPTP VPNs have been used to provide secure network access for mobile users by providing an encrypted tunnel for data. These VPNs can provide a remote user with an actual “local” IP address, which essentially makes the user’s PC a node on the local network. The user then has access to any of the resources on the local network with the exception of any restrictions enforced by the VPN server.
Unfortunately, VPN protocols by nature are very sensitive to hardware and network changes (IPsec especially) and require the installation of a specialized client software. With such complexity, it can be very difficult to troubleshoot what is wrong when it breaks. Nobody likes fielding the phone calls of frustrated VPN users who can’t connect or reliably sustain a connection back into a company network.
If any of these issues sound like situations to avoid then let me introduce you to a new type of VPN, which I believe offers the best of connectivity without all of the complexity. Secure sockets layer (SSL) VPNs have really begun to take the IT community by storm, in part due to their inherent ease of installation as opposed to the complexity of a traditional VPN setup. Most require only a Web browser and a small applet or ActiveX control to support the tunneling features.
Don’t be led to believe that only Web based applications can be served up through an SSL based VPN. In reality, an SSL-based VPN can offer the same services which you could access through a traditional IPsec based VPN through the implementation of a secure tunneling mechanism.
In this two-part series, we will explore a very popular open source SSL VPN from 3SP Ltd. called SSL Explorer. SSL Explorer can give you the ability to securely access your files remotely, access private intranet resources and even remotely control your PC desktop just by using a Java-enabled Web browser. Part 1 will cover SSL Explorer’s feature set and installation. Part 2 will then show you how to configure SSL Explorer for some common road-warrior tasks.
Features And Hardware Requirements
SSL Explorer is actually available in two flavors: the basic “Community” edition and an enhanced “Enterprise” edition. Complete feature lists for each version are available at 3SP’s Website, but here are a few to whet your appetite:
“Community” edition features
- Granular policy-based rights management
- No concurrent user restrictions
- Remotely browse Windows file systems via Windows Explorer
- Reverse proxy Web forwarding feature
- Configurable authentication schemes
- Access your desktop remotely
- Connect using any modern Web browser
- No dedicated appliance necessary
- Supports Wake-On-LAN – bring up systems remotely
- Supports Microsoft Windows XP/2000/2003 and Red Hat Linux 8.0 or later (other Linux distributions are unofficially supported)
“Enterprise” edition features (in addition to “Community” features)
- Commercially supported
- Enhanced Authentication including SSL client certificate, LDAP, public-key
- Bi-directional split-tunneling
- Full auditing and reporting capabilities
- Lightweight remote management applets supporting SSH1, SSH2, Telnet and VNC remote access protocols
- SSH-based remote management CLI (alpha)
One other important difference is that the Java VPN client included in the “Enterprise” edition provides a connection more like a conventional IPsec VPN as opposed to the port forwarding/tunneling functionality of the Java VPN client included in the “Community” edition.
Commercial support plans are available for a fee for both the “Community” edition and the “Enterprise” edition of SSL Explorer. Visit the 3SP Ltd. Website for more details on the support options available.
For the purposes of this article we’ll be looking at the free “Community” edition.
The SSL Explorer software package can turn a humble PC into a full-fledged SSL VPN gateway. SSL Explorer software is released under the GPL and is written in Java. All that is needed for a PC to become a server is Windows 2000/XP/2003 and the Java Runtime Environment 5.0 (JRE). It is also possible to install it on Linux distributions such as Redhat and Fedora. However, for this article, we will concentrate on the Windows platform.
All that is required on the client side is a Java-enabled Web browser such as Microsoft Internet Explorer or Mozilla Firefox. As far as hardware requirements go, SSL Explorer will run on a very humble PC. It will easily accommodate one to five concurrent users running on a Windows XP box with a 2 GHz Intel Celeron CPU with 256 MB RAM. You can actually get away with even a little less if you choose to install it onto Linux instead of Windows.
Prepare For Installation
The “Community” edition of SSL Explorer is distributed as an archive file with source code that needs to be compiled using the Apache ANT utility, available at ant.apache.org. You will also need the 1.5.0 Java Runtime Environment (JRE), which is available at java.sun.com. Make sure that the JRE package you download is at least version 1.5.0 or higher. Both Apache ANT and SSL Explorer require the JRE as both are Java applications.
Download and install the JRE first, then install Apache ANT. ANT does not come with an installer so we need to just extract the contents of the archive file into a suitable place on our system. If you wish, you can use “C:Program FilesApache ANT” as I did.
After the installs are done, we need to set up some environment variables so that our system can find the ANT and Java binaries. Go to the Windows Control Panel and select the System icon. Once the System Properties window is displayed, select the Advanced tab, click on the Environment Variables button and do the following:
- Create a new system variable called ANT_HOME and make its value the directory location of ANT. On my machine I placed ANT in C:Program FilesApache ANTapache-ant-1.6.5.
- Next, we need to create another system variable called Java_HOME and we will make its value the directory location of the JRE. The JRE is installed in C:Program FilesJavajre1.5.0_07.
- Lastly, we need to modify the PATH variable. Add the following to the PATH variable:
;%Java_HOME%bin;%ANT_HOME%bin;
The semicolons are there to separate the PATH entries. Now we can move on to the installation of SSL Explorer itself.
Installation
Updated 7/25/2006
Go ahead and download the SSL Explorer “Community” edition package from sourceforge.net and unzip the package to a suitable directory. On my machine I used C:Program Filessslexplorer-0.2.4. Then copy tools.jar from C:Program Filessslexplorer-0.2.4sslexplorerlib to C:Program FilesJAVAjre1.5.0_07lib folder.
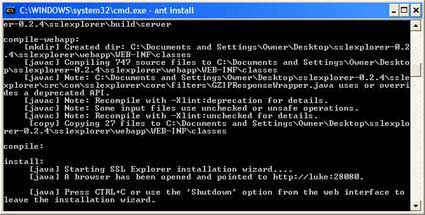
Next, start up a command window (this can be accomplished by selecting Run from the START menu and typing cmd). Navigate to the SSL Explorer directory (cd C:Program Filessslexplorer-0.2.4) and type the following command to start the compile/install process: ant install.
The command window at this point should look similar to Figure 1.
Figure 1: Command line window after build completes (click image to enlarge)
ANT will chug away for a few minutes compiling Java source files and then it will attempt to launch a Web browser pointed at special port (28080) on your machine. This special port is only used until you have set up the basic options for your install. You will configure your keystore and SSL certificate in this mode before placing the server into operation.
If you are installing SSL Explorer on a system with the Windows firewall enabled, then you will probably see a window similar to Figure 2 at least once.
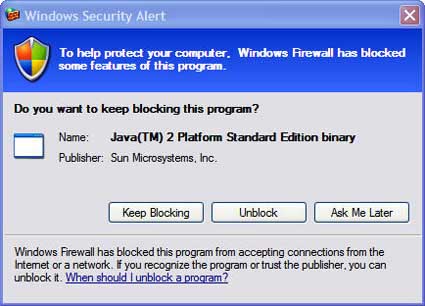
Figure 2: Windows firewall message
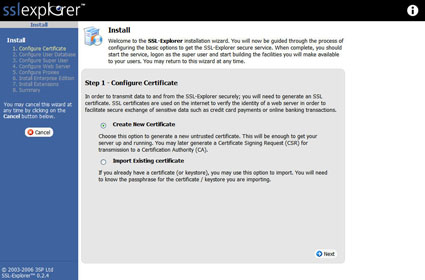
Be sure and choose unblock so that you will be able to configure the application through your Web browser. If SSL Explorer was successful at launching the Web browser, then you should see a screen similar to Figure 3.
Figure 3: Select certificate type (click image to enlarge)
If your computer did not bring up the Web browser automatically, then you should be able to open up a browser and connect to the setup page manually by using the following URL: http://127.0.0.1:28080.
Setup
Certificate Creation
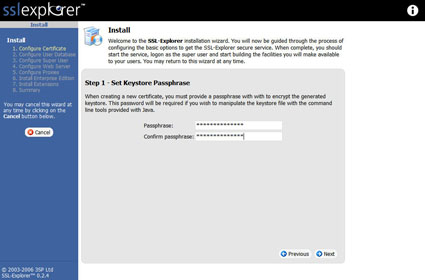
The first step in the setup is choosing what SSL certificate to use. Figure 3 shows the option of either importing an existing certificate or creating a new untrusted certificate. The SSL certificate is used in the encryption of the traffic between SSL Explorer and your PC. We will create a new untrusted certificate (Untrusted simply means that the certificate has not been digitally signed by a Certificate Signing Authority). Before creating the certificate we need to create a keystore password (Figure 4).
Figure 4: Create keystore password (click image to enlarge)
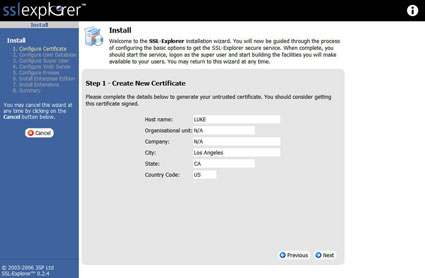
Next, we need to enter the information that identifies our certificate (Figure 5).
Figure 5: Create the certificate (click image to enlarge)
User Database, Super User, Webserver
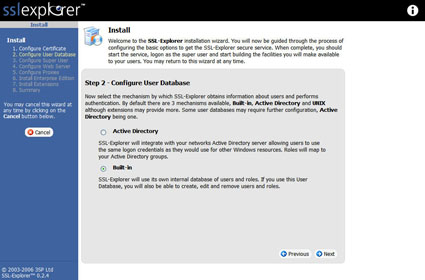
You will now be presented with options for where to obtain the user database. SSL Explorer has the ability to authenticate against Active Directory and several other mechanisms. However, we will choose the “built-in” option (Figure 6).
Figure 6: Configuring a User Database (click image to enlarge)
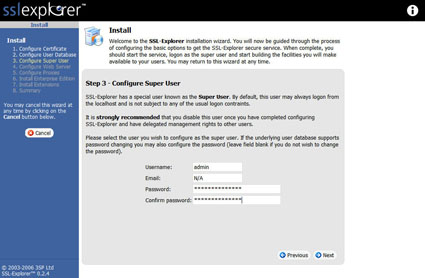
Now we need to create a “Super User” account (Figure 7) to perform administrative tasks including creating new user accounts.
Figure 7: Create Super User account (click image to enlarge)
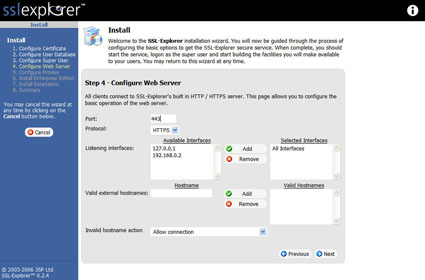
With that out of the way, we can now make changes to the Web server, such as the port number (Figure 8). We will leave all settings at the defaults on this screen and skip to the next section.
Figure 8: Configure Web Server screen (click image to enlarge)
Proxies, Extensions
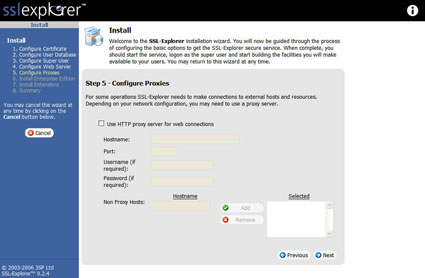
The Configure Proxies step (Figure 9) is only necessary if you have a proxy server on your network (such as a Web proxy). We will again take the default settings and skip to the next section.
Figure 9: Configure Proxies screen (click image to enlarge)
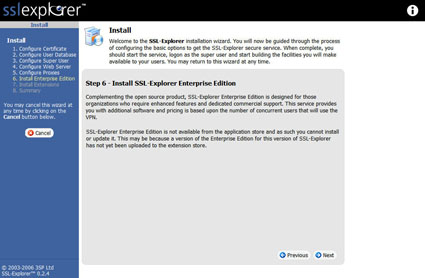
Now we should be at the “Install Enterprise Edition” screen (Figure 10). We will once again skip to the next section, as we are not interested in the “Enterprise” edition right now.
Figure 10: Enterprise Edition screen (click image to enlarge)
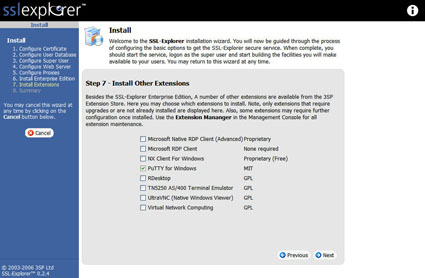
Once we are at the “Install other extensions” section, we need to check the PuTTY box (Figure 11). Feel free at this point to check any other extensions that might be helpful in supporting additional services that you might like to use with SSL Explorer. In the next section, we will install another custom extension not listed on the list called TightVNC.
Figure 11: Enable the PuTTY extension (click image to enlarge)
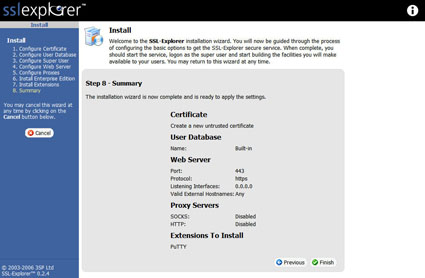
The last section of the install is a Summary page (Figure 12), which displays the choices that we have selected for our install. If would like to change your mind about any of the previous setup options now would be a good time to go back and make changes. Once you are confident of your settings click the Finish button to apply the new settings.
Figure 12: Setup Summary (click image to enlarge)
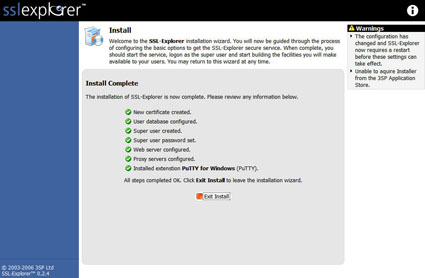
Once the Install Complete screen (Figure 13) is displayed we can move on to creating user accounts, installing the TightVNC custom extension and setting up shortcuts to our network services.
Figure 13: Installation Complete (click image to enlarge)
Add Users
Before moving on to creating a new user, we need to install SSL Explorer as a service so that it will be started each time our PC is booted. From our command line window we can run ant install-service.
NOTE: If you have another program currently listening on port 443 then you will have to disable that program before SSL Explorer will start successfully.
Now, let’s put the server into operation by issuing ant start from the command line window (this is a one time task as once it is installed as a service it should be started automatically upon bootup). Pull up a browser and type in the following URL: https://localhost/. You should see a login screen similar to the one shown in Figure 14.
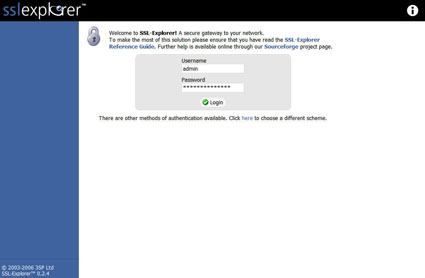
Figure 14: Login screen
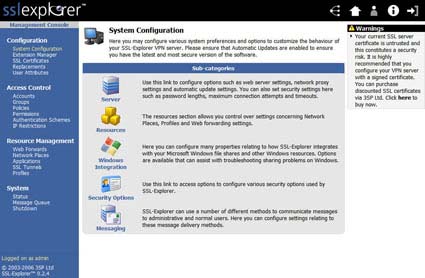
Go ahead and login as the “Super User” we previously created. If you type in the username and password combination correctly then you should be rewarded with the Management Console screen.
Figure 15: Management console screen (click image to enlarge)
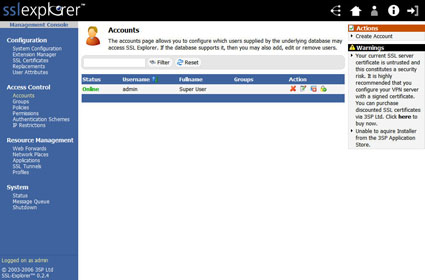
Click on the Accounts link under the Access Control menu and you will see a list of currently configured users on the system (Figure 16).
Figure 16: Accounts List screen (click image to enlarge)
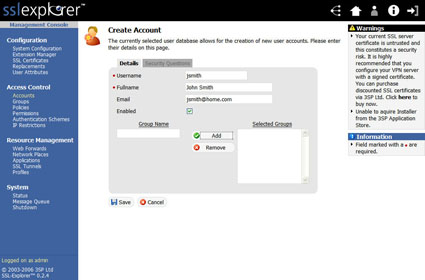
In the upper right hand corner of the screen, select the Create Account link to create a new user for the system. I created a user called John Smith (Figure 17).
Figure 17: Create account screen (click image to enlarge)
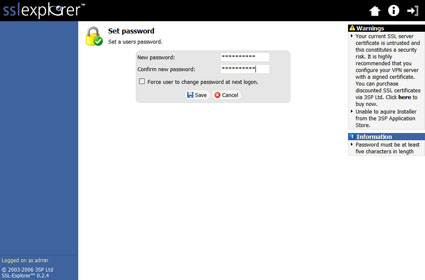
Enter all the details for the new user. For the group, I entered Users and then clicked on the Add button. Next, click on the Save button to finalize the new user. After finalizing the new user account the system will ask you to assign a password (Figure 18).
Figure 18: Account password screen (click image to enlarge)
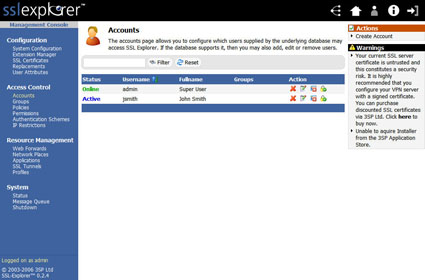
After clicking the Save button one more time you should be returned to the main Accounts screen. You should see both the “Super User” and the new user you created in the account list.
Figure 19: Accounts screen with new account (click image to enlarge)
Conclusion
SSL Explorer is now set up and ready to go. In Part 2, we’ll walk through how to set up access to a remote network’s shares. We’ll also show you how to use SSL Explorer for remote desktop access to even a Windows XP Home machine.
In the meantime, if you can’t wait to get going, you can explore these flash demos on 3SP’s website.

