Introduction
NOTE: 3SP has been purchased by Barracuda Networks
and there have been major changes to the program. Please see this Forum Thread.
![]()
| At a Glance | |
|---|---|
| Product | 3SP Ltd. SSL Explorer “Community” Edition SSL VPN 0.2.4 |
| Summary | Multi-featured open source browser-based SSL VPN server |
| Pros | – Easy to install and setup – Java and Web browser based – Requires only one port exposed to the Internet – Extensive configuration options – Free |
| Cons | – Some advanced capabilities are reserved for the “Enterprise” ($) edition – Limited support |
Remote File Access
In Part 1, we got SSL Explorer installed and ready for action. In this last installment, we’ll walk through how to set up access to a remote network’s shares and show you how to use SSL Explorer for remote desktop access to even a Windows XP Home machine.
You can test everything that I’m about to describe on your LAN. But since the whole point of a VPN is secure remote access, you should take the time to open up port 443 on your router’s firewall to the IP address of the computer that is running SSL Explorer.
Once you’ve set up the port forwarding, you’ll access the SSL Explorer server by entering the IP address of our router’s WAN port, i.e. the IP address assigned by your ISP, into your Web browser’s address box. For most of us, this address changes occasionally, if not more often. So if you’re going to be using remote access on a regular basis and don’t have a static IP address from your ISP, it’s a good idea to sign up for a dynamic DNS service.
One of the most basic tasks that remote users need to do is access remote shares. Let’s tackle that first by setting up an application shortcut, which is a link to a service or application that is served up through the SSL Explorer encrypted tunnel.
For this example, we set up a shortcut to an internal SMB/CIFS file server on the local network called ANAKIN. In this case, the file server is a Linksys NSLU2 mini NAS with two USB hard drives attached to it. I have three shares on ANAKIN that I would like to make available to remote users via SSL Explorer. The first step is to click on the Network Places link under the Resource Management menu (Figure 1).
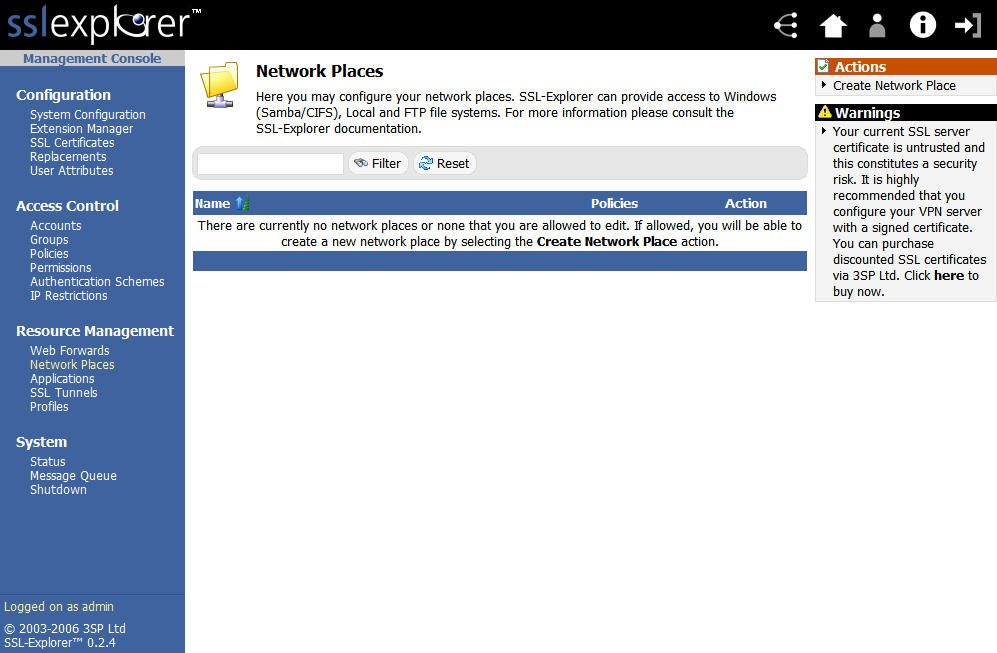
Figure 1: Network places screen (click image to enlarge)
Next, locate the Create Network Place link in the upper right hand corner of the screen and select it to start the process of defining our shares (Figure 2).
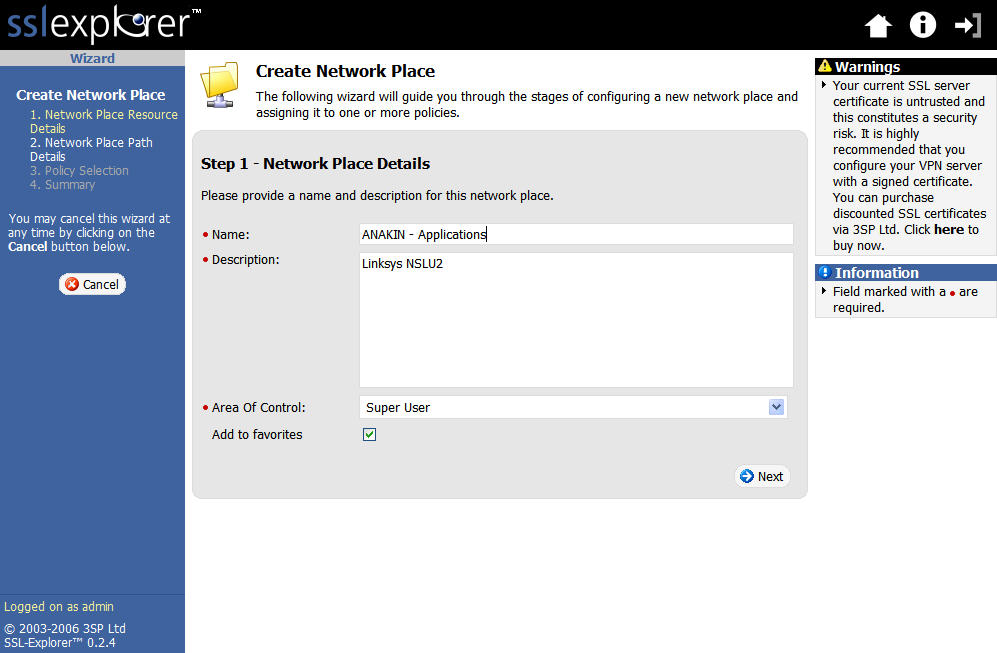
Figure 2: Create Network Place screen (click image to enlarge)
Enter the name and description details and proceed to the next screen where we fill in the network path details (Figure 3).
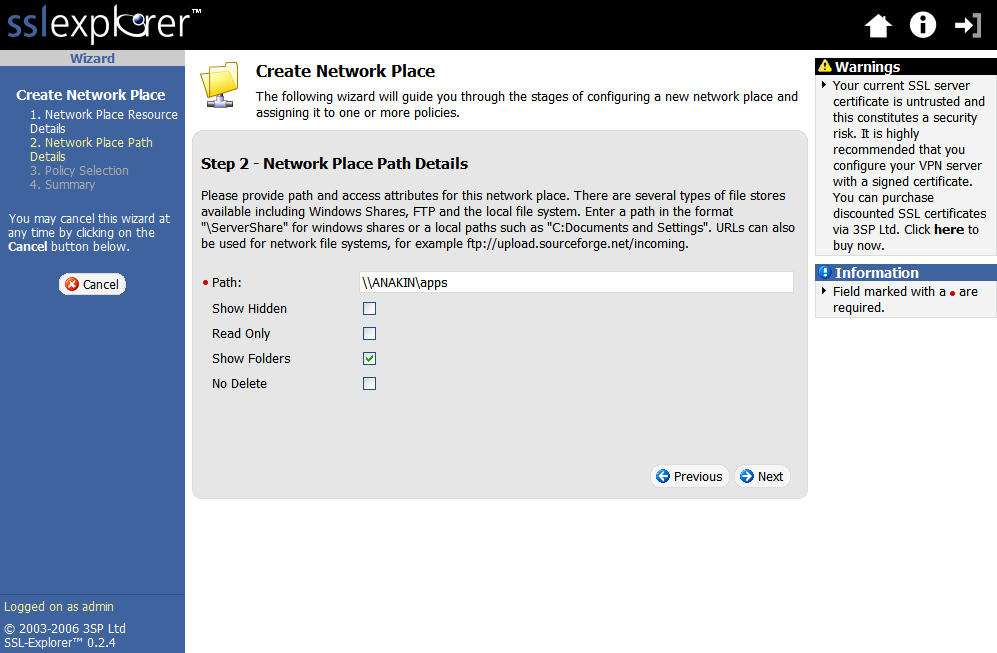
Figure 3: Network Place Path details (click image to enlarge)
Remote File Access, Continued
After entering the network path details, we move to the next screen to associate access policies with the Network Place (Figure 4).
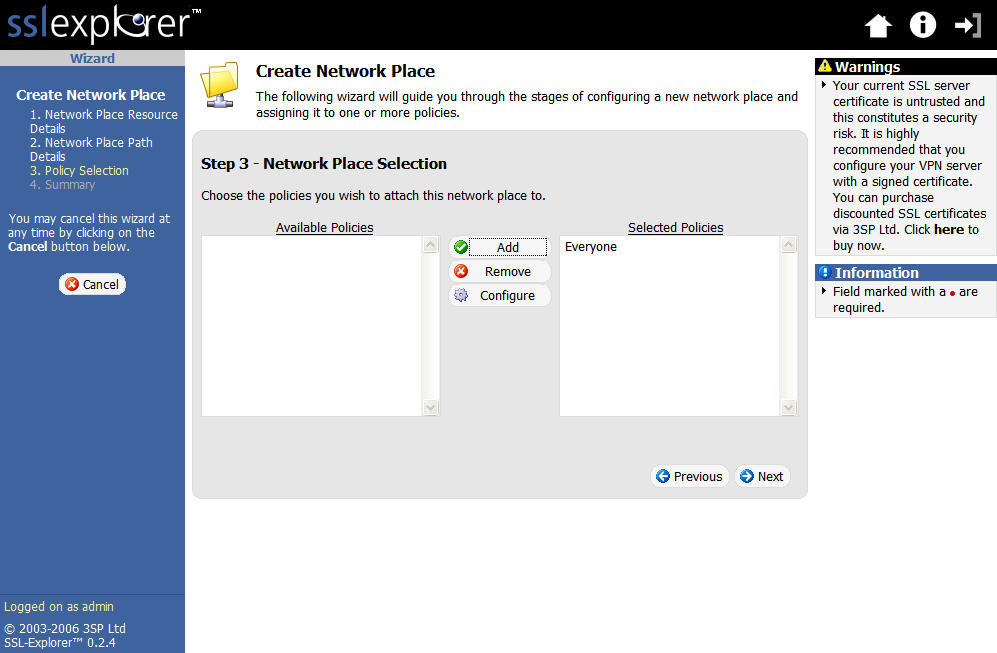
Figure 4: Network place association (click image to enlarge)
In this example, we’ll just add the Everyone policy. This brings us to the Summary screen (Figure 5).

Figure 5: Network Place Summary screen (click image to enlarge)
Here, we check the settings and then create the network place by clicking the Finish link. After the network place shortcut has been created you will be returned to the main Network Places menu (Figure 6). You will notice from the screenshot that I added all three of my shares.
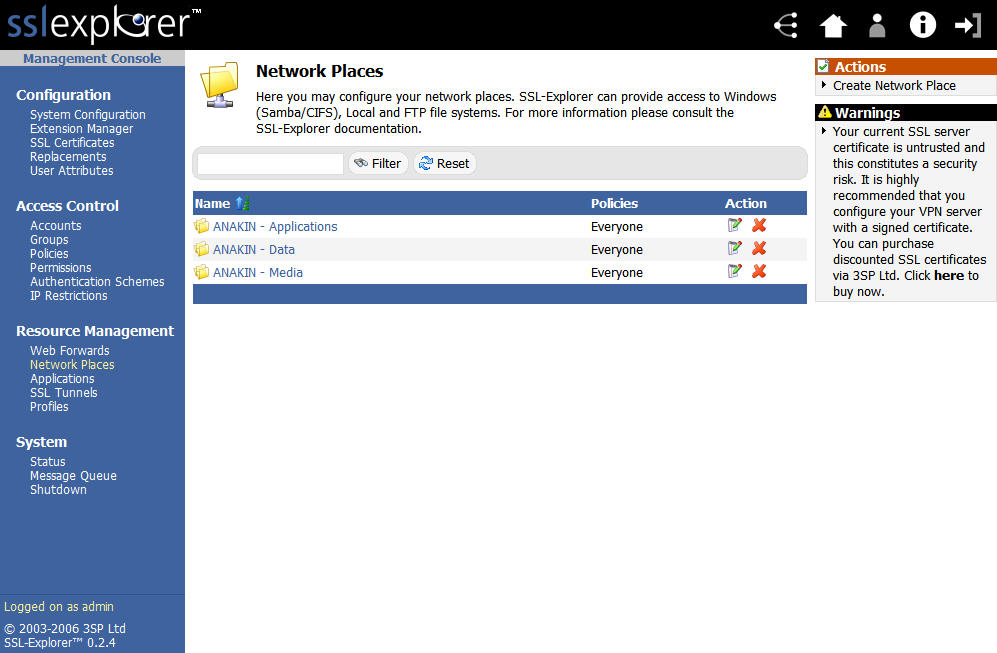
Figure 6: Network places with shares created (click image to enlarge)
Since we’re already logged in, we can just click on one of the shortcut links shown in Figure 6 and be presented with a GUI that allows us to transfer and manipulate files on the network shares we set up. Otherwise, we’d have to hit the login screen first, click on the Network Places link under the Resource Management menu and then open the desired share (Figure 7).
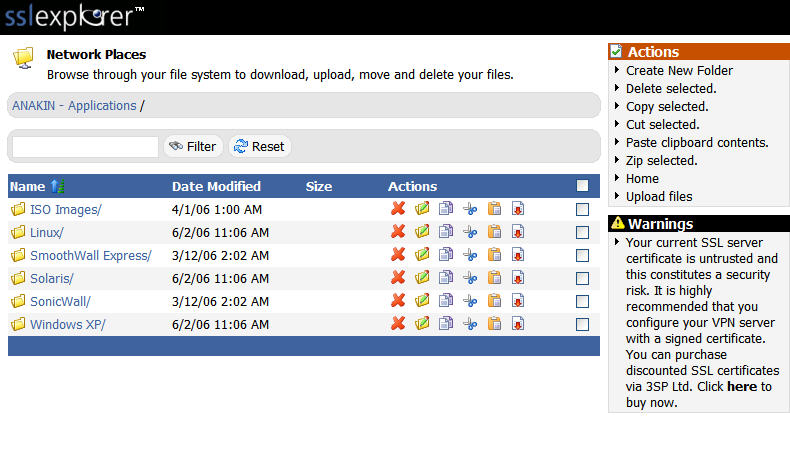
Figure 7: Network places screen (click image to enlarge)
If this is a little confusing, there’s a great Flash demo on the 3SP site that walks you through all the tricks that the Network Places feature can perform.
Remote Desktop Connectivity Using TightVNC
The network shares example is just one of the many uses of the SSL Explorer package. In this section, I will describe a method for providing complete remote access to your Windows desktop using an open source package called TightVNC, coupled with the tunneling connectivity of SSL Explorer.
Many of you might ask: “Why do I need TightVNC? It looks like SSL Explorer already supports RDP through an included extension.” Well, the short answer is that RDP is indeed supported and TightVNC is not absolutely necessary. Unfortunately, if RDP were the only remote desktop method available, many individuals would be left out in the cold. The most common example is that Windows XP Home does not include RDP support.
Also, whereas RDP is a proprietary protocol, VNC is very much a cross platform protocol. This means that with a Windows TightVNC extension installed on your SSL Explorer box, you could access not only your Windows desktop but your Linux desktop and any other desktop for which you had a VNC server running. Another reason, VNC is open source so it is free and you can modify it if you so choose. SSL Explorer also comes with extensions that support many commercial desktop environments such as the Citrix ICA client extension for those who have Citrix servers.
There will three steps to setting up the TightVNC example:
- Upload the custom TightVNC extension to the SSL Explorer install via the “Extension Manager”.
- Install the TightVNC application on the PC that you want to be able to access remotely.
- Create the application shortcut, which will tell SSL Explorer how to connect to your PC.
Setup Step 1
First download the custom TightVNC extension. Extensions are packaged zipfiles that include specialized XML that tells the SSL Explorer Java VPN client what to do in order to utilize a specific service.
Next, we will need to click on the Extension Manager link underneath the Configuration menu (Figure 8).
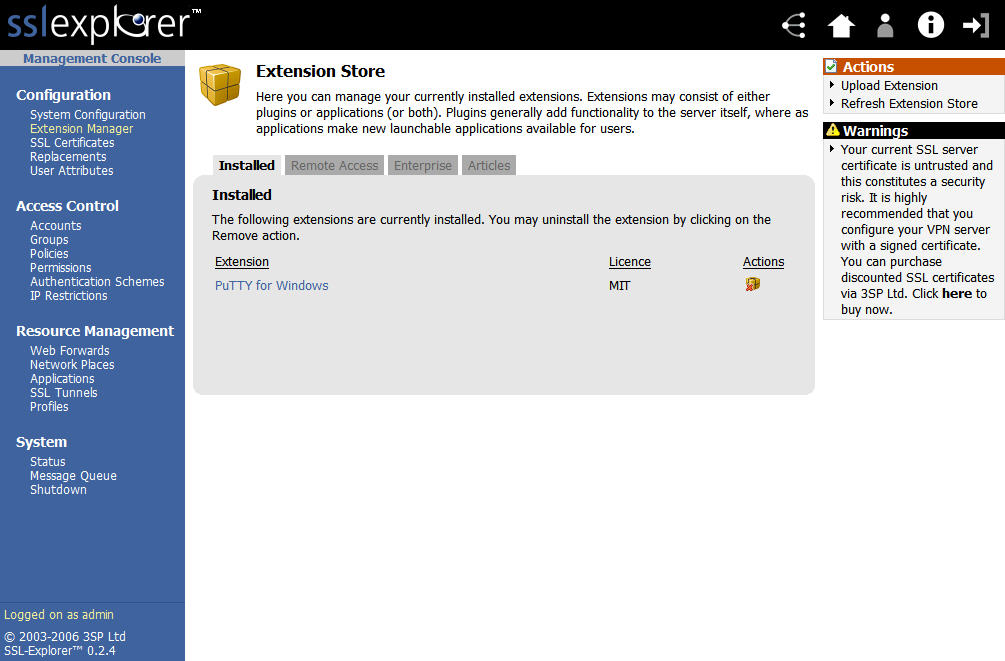
Figure 8: Extension Store screen (click image to enlarge)
In the upper right hand corner of the screen in Figure 8, we want to select the Upload Extension link. This will change the screen to the one shown in (Figure 9).
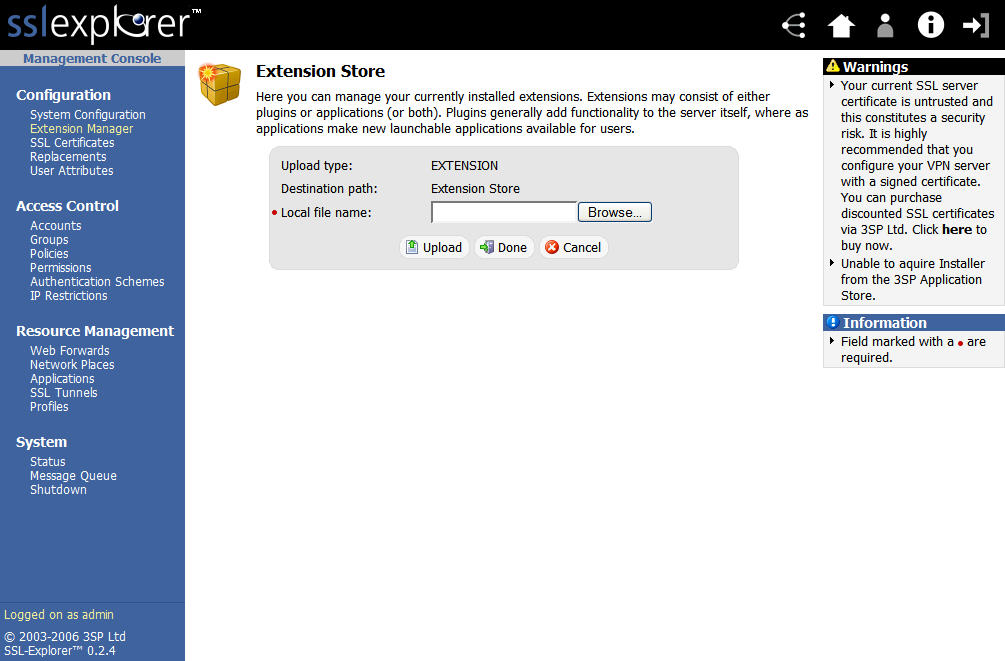
Figure 9: Extension upload screen (click image to enlarge)
Select the Browse button to select the location of the downloaded TightVNC extension on your local PC. Then select the Upload button to load the extension into the SSL Explorer installation.
Setup Step 2
Now we need to load the TightVNC server package onto the PC we wish to control. The package can be downloaded here. Once the download completes, install the application onto your PC. Make sure you allow the installer to install TightVNC as a service so that it can start automatically when the PC boots up. You will also need to set up a password for the server component of TightVNC. The setup tab can be found in the Show current user properties dialog box shown in Figure 10.
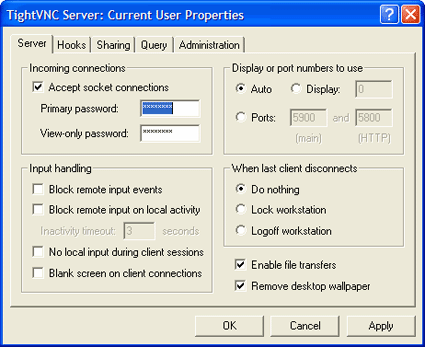
Figure 10: TightVNC server tab
The password you set up will be required anytime you wish to connect to your computer and control it from another VNC client (such as the TightVNC custom extension for SSL Explorer). Also be sure to check the allow loopback connections option under the Administration tab (Figure 11).
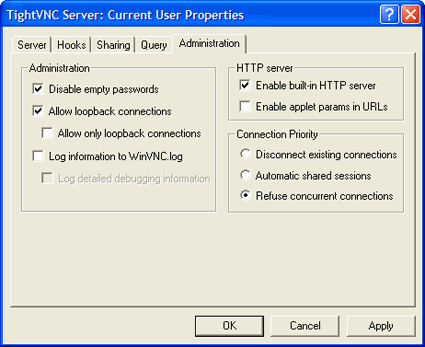
Figure 11: TightVNC administration tab
NOTE: Whereas SSL Explorer uses TCP port 443 for its communication, TightVNC by default will use TCP port 5900. So make sure any firewall software on the PC will allow incoming TCP connections to port 5900.
Setup Step 3
Now we need to create the application shortcut that will ultimately define how SSL Explorer is to connect to the TightVNC service on our PC. Click on the Applications link underneath the left-hand Resource Management menu. You’ll now see a screen similar to that in Figure 12.
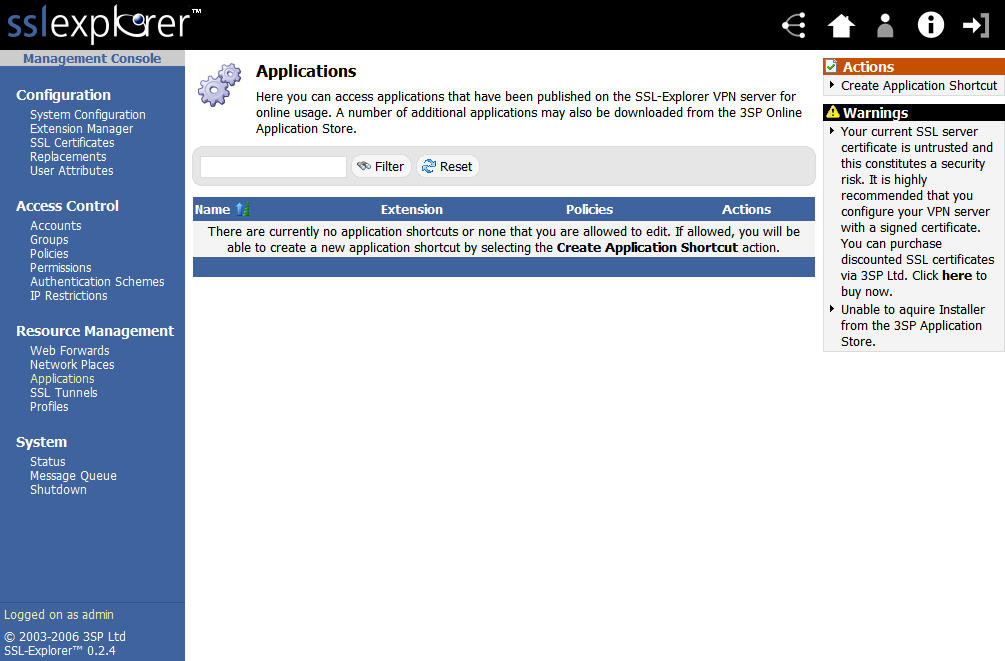
Figure 12: Applications screen (click image to enlarge)
Next we need to choose the type of application shortcut that we wish to create. Click on the Create Application Shortcut link in the upper right-hand corner of the Applications screen and choose TightVNC for Windows from the selections shown in Figure 13.
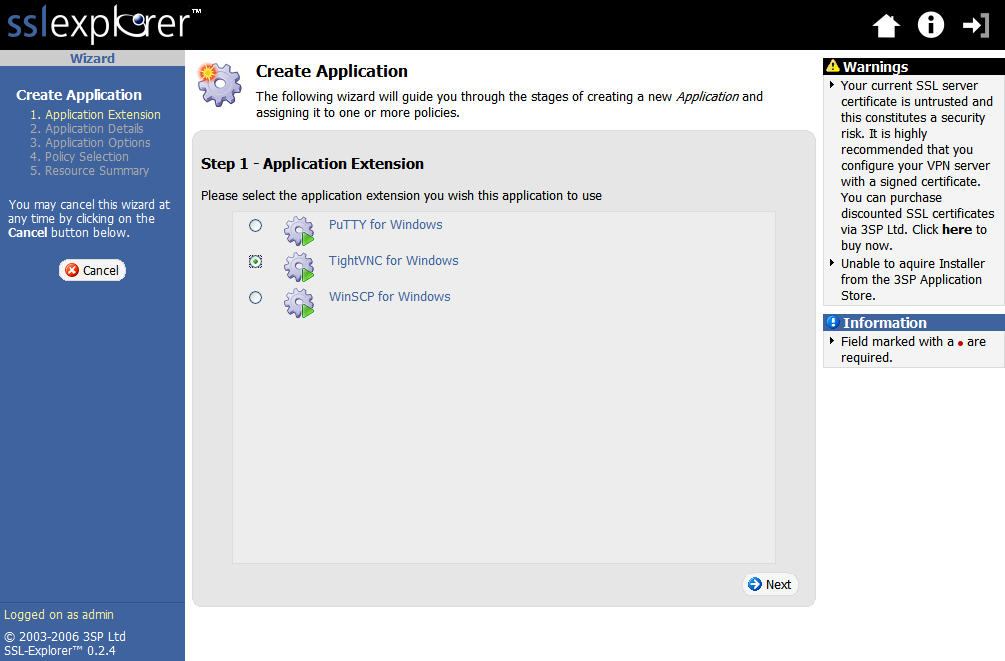
Figure 13: Create Application screen (click image to enlarge)
Now, enter a name and description details for the shortcut (Figure 14).
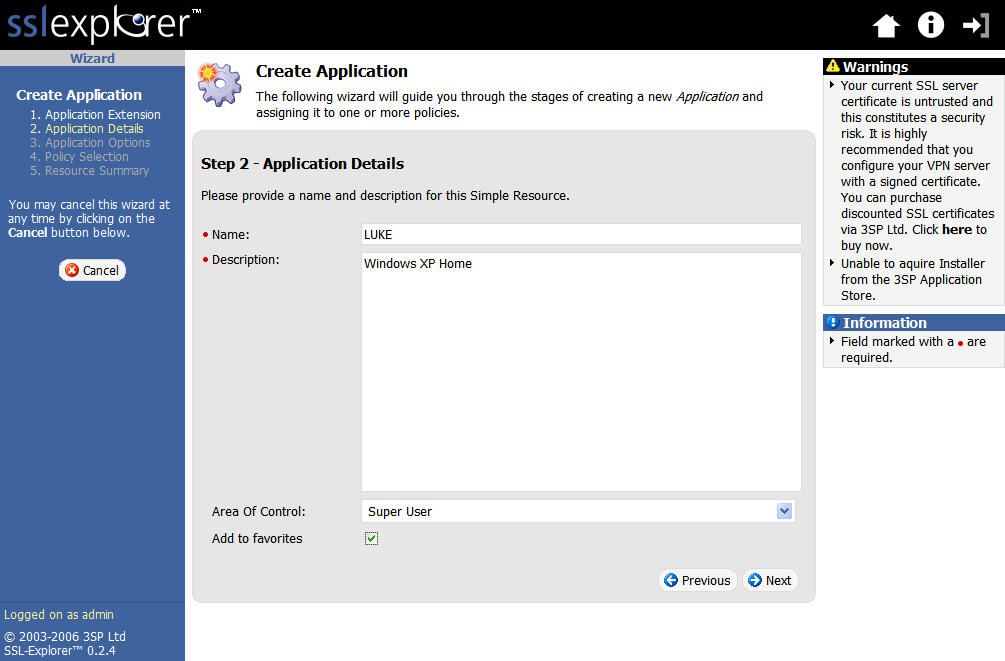
Figure 14: Applications Details screen (click image to enlarge)
Setup Step 4
The next step requires entering the IP address and connection port for the TightVNC server on your PC, which is 5900 unless you have specified otherwise (Figure 15).

Figure 15: Application Options screen (click image to enlarge)
We need to select the policy that we want to associate with this resource. Be sure and select the Everyone policy (Figure 16).
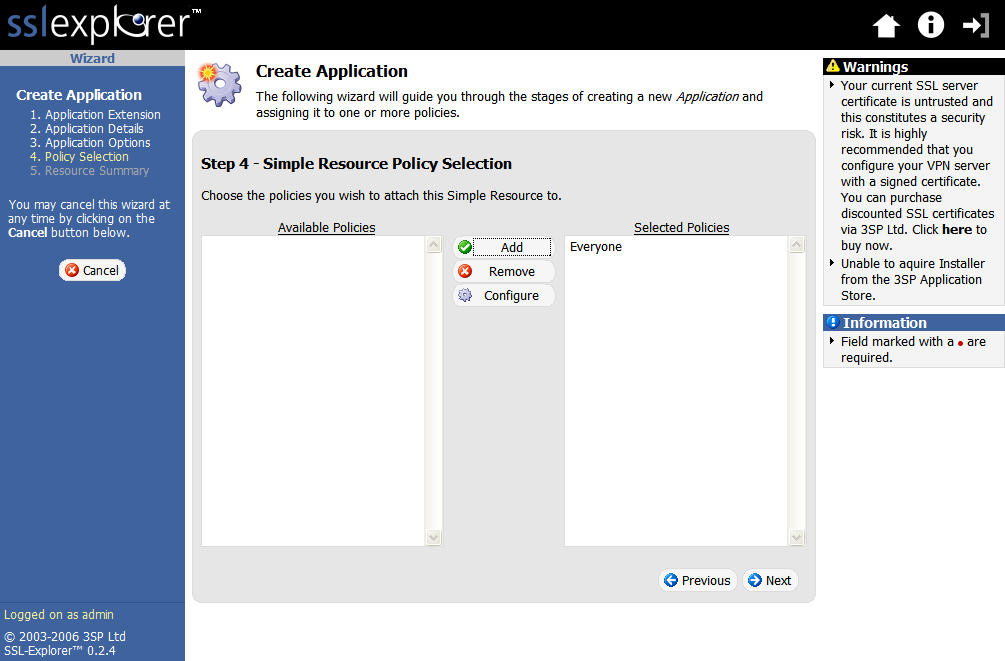
Figure 16: Application Policy selection screen (click image to enlarge)
The next screen (Figure 17) simply confirms our choices. If all is correct, click the Finish button to finalize the application shortcut.
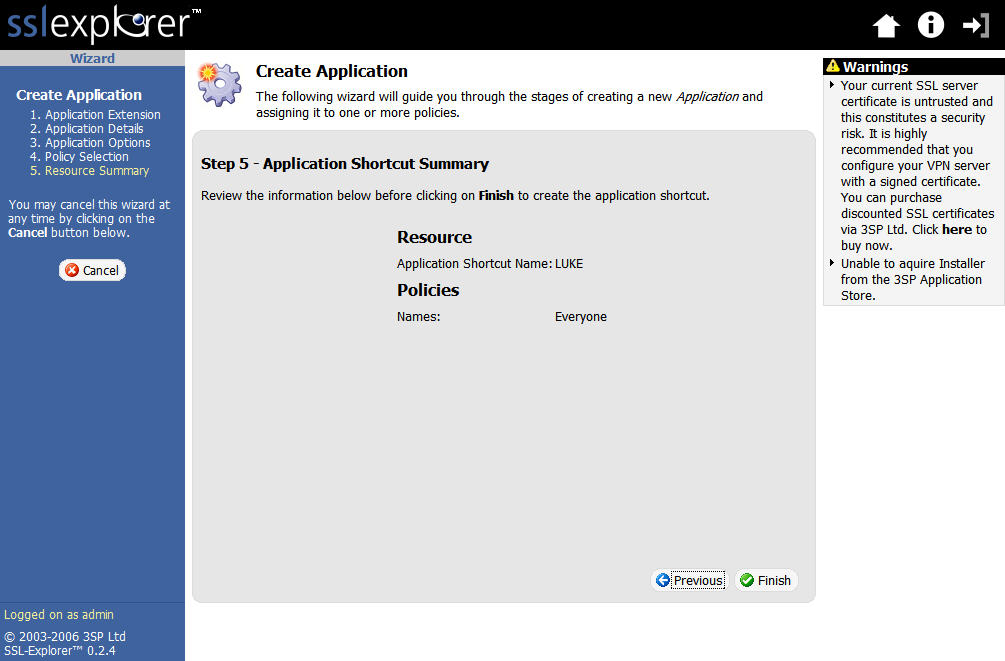
Figure 17: Application Shortcut summary screen (click image to enlarge)
The very last screen (Figure 18) should confirm creation of the application shortcut. Go ahead and click Exit Wizard at this point to return to our main menu.
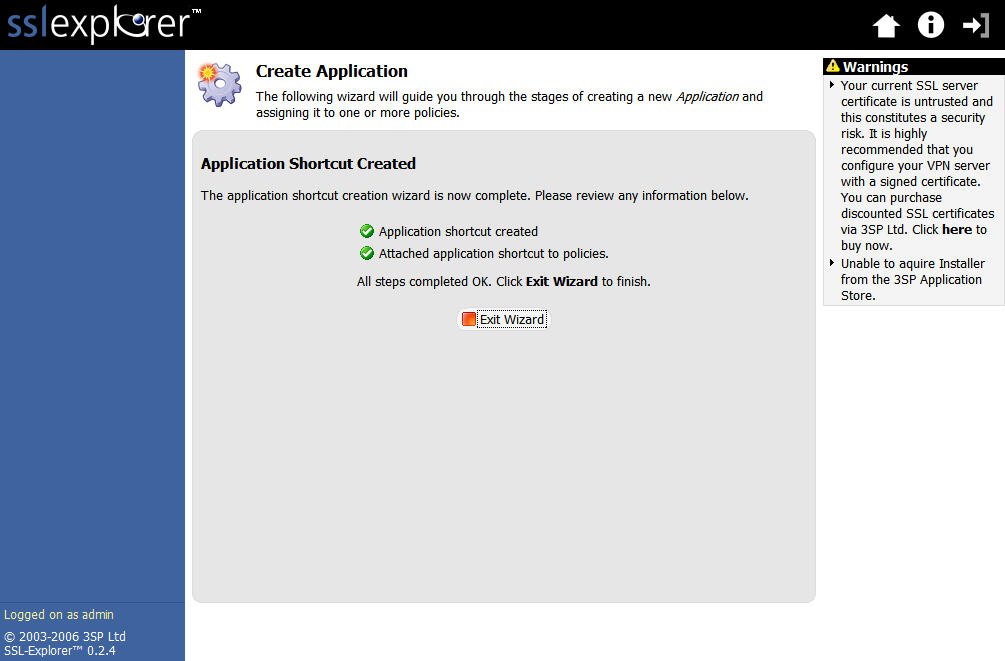
Figure 18: Applications Shortcut creation confirmation screen (click image to enlarge)
That completes the setup for Remote Desktop access using TightVNC.
Checking Out Remote Desktop
Use the Logout link located in the extreme upper right hand corner of the screen to logout as Super User. Now log back in as the ordinary user we created during the installation (ex. John Smith). Once logged in, you should see a list of shortcuts referred to as My Favorites on the screen, which represent the applications that we set up (Figure 19).
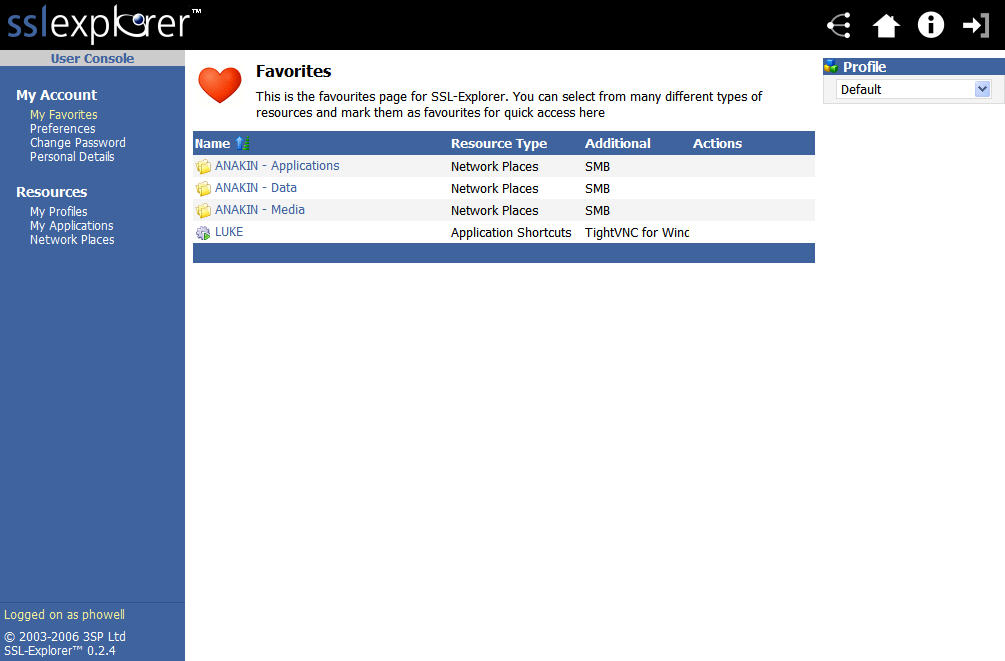
Figure 19: User console screen (click image to enlarge)
This screen shown in Figure 19 is what most normal users would see on a daily basis when using SSL Explorer. Select the TightVNC connection link that we just created from the Favorites list. SSL Explorer will then launch the Java VPN client, set up a tunnel and execute the TightVNC client in an effort to connect to our PC desktop. If all is successful then you should see a TightVNC authentication dialog box asking for the TightVNC password that you set up (Figure 20).
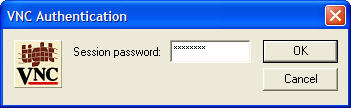
Figure 20: TightVNC authentication
Once you have successfully authenticated, you will be presented with a remote desktop for your PC. See Figure 21 for an example.
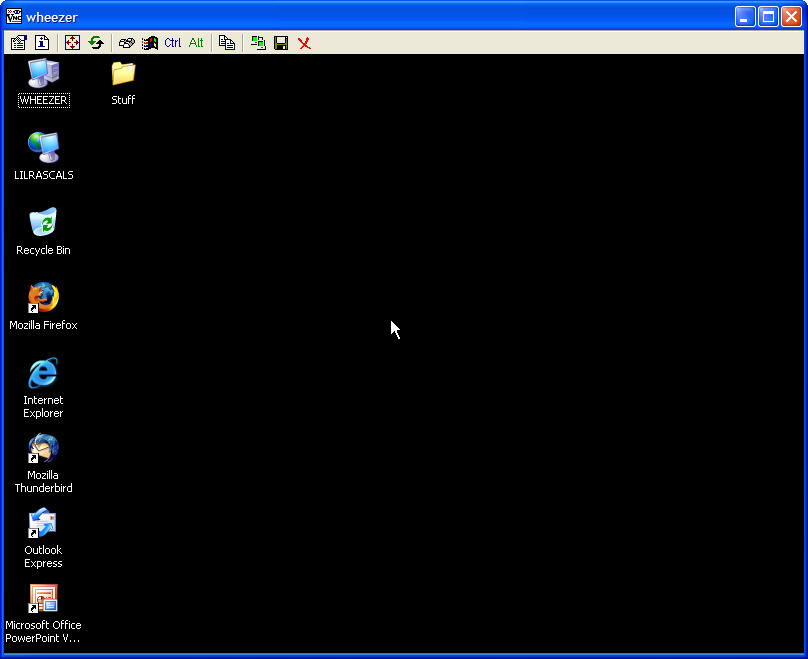
Figure 21: TightVNC remote desktop (click image to enlarge)
Once again, there is a great Flash demo on 3SP’s site that walks you through many aspects of setting up remote administration. Even though the demo uses SSL Explorer’s built-in RDP client instead of TightVNC, many of the other aspects of remote administration are the same. You can obtain further documentation on how to use TightVNC from tightvnc.com.
Conclusion
SSL Explorer makes a perfect secure gateway to your SOHO network if you need to access data or applications on your PC from time to time. It is very user friendly and very robust. And there are many other features that I have not even begun to touch upon in this article due to space limitations.
I hope that this article has given you some ideas on how to free yourself from the hassles of IPsec and PPTP tunneling through the wonders of an SSL VPN. Now go have some fun and do some office work from the beach maybe?
Other resources
Although the SSL Explorer Community Edition doesn’t include free support from 3SP, there are a number of resources available from 3SP’s Website and SourceForge:
- Quick Start, Configuration and Access Control manuals are available at the SSL-Explorer SourceForge Project page
- SourceForge also hosts the SSL-Explorer user forum
- In addition to the Network Places and Remote Admin Flash demos, 3SP also has few more Flash movies. Here’s a complete list: