Introduction
Updated 12/27/2009: VuNow is now free.
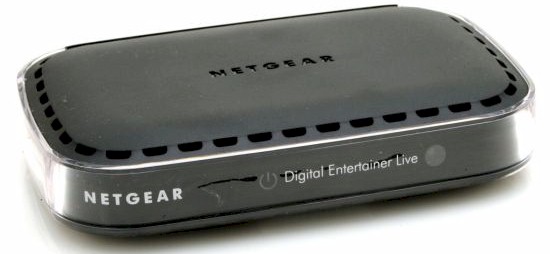
| At a Glance | |
|---|---|
| Product | NETGEAR Digital Entertainer Live (EVA2000) |
| Summary | Easy-to-use device plays multimedia content from local or Internet sources on analog or HDTVs. |
| Pros | • Simple Setup • Supports both analog and HDTV (720p) • Plays content from DLNA and UPnP A/V devices |
| Cons |
• Need to purchase licenses to access anything other than YouTube, VuNow and your own content after trial periods expire • Need to run a Windows app to access Hulu, Netflix and other better content • Search not available for all content types |
NETGEAR’s ITV2000, announced at CES 2009, has finally emerged as a revamped and less expensive product – the EVA2000 Digital Entertainer Live. Priced at $149.99, the EVA2000 not only plays multimedia content stored on your computer, DLNA / UPnP AV servers or USB devices, it also plays video and radio from a number of Internet sources.
Without using your computer, this compact HDTV media player can browse YouTube, search for video clips via vtap on the Internet, view streaming video from over 200 websites and live Internet TV via the VuNow service, or play your choice of Internet radio stations on your standard or high definition (720p) TV.
In the United States, you also an buy or watch pay-per-view movies on demand through NETGEAR’s partner, CinemaNow. And with the installation of MediaMall’s PlayOn media server on a compatible PC, you can also view content from Hulu, your NetFlix account, CBS, CNN and other content providers through MediaMall’s partners.
The EVA2000 is pretty small—about the size of one of NETGEAR’s 5 port switches. The front panel, shown above, has only a power indicator that flashes until it is connected to your network and the Internet. The rear panel (Figure 1) has a connector for the power supply, a 10/100 Ethernet port, HDMI port for connecting to an HDTV, and a jack to connect to an analog TV.
There are also two USB ports where you can attach USB disk or flash drives that contain multimedia content. Alternatively, one of the USB ports can be used with the EVAW111 wireless USB adapter (MSRP $39.99) to connect the EVA2000 to your wireless home network..
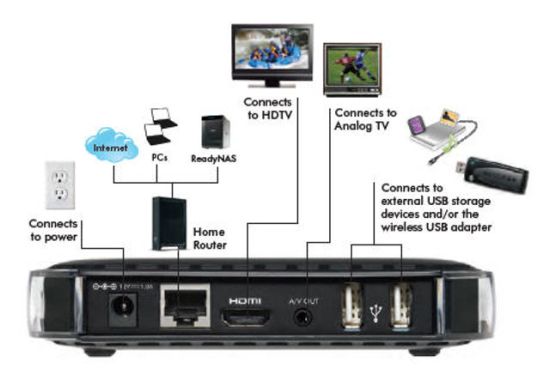
Figure 1: Rear panel of the EVA2000
The EVA200 ships with everything you need to get started – except an HDMI cable. Included in the box is an Ethernet cable, power supply, analog cable, installation CD, and a 17 button IR remote control (including 2 AAA batteries) shown in Figure 2.
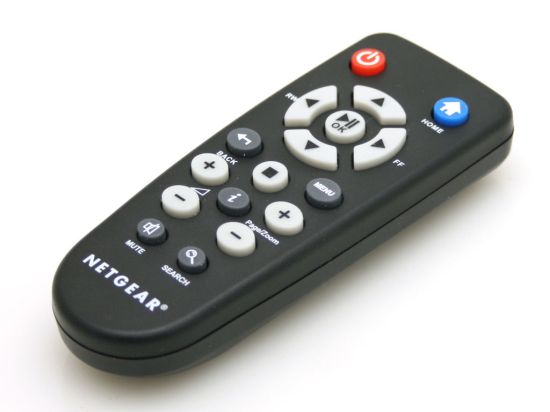
Figure 2: All functions of the EVA2000 are controlled by the included 17 button IR remote control.
I wasn’t able to get the case open with risking breaking it, so I wasn’t able to get a photo of the board. But the Product Manager told me that the EVA2000 uses one of TI’s DaVinci Digital Media Processors.
Setup
There’s really not much involved to set up the EVA2000. If you just follow the instructions on the quick start guid (Figure 3), you’ll be up and running in just a few minutes. There is an installation CD, but you only need to use it if you want to install the PlayOn media server (more on that later).
The Guide also includes instructions on how to share media using Windows Media Player 11. However, if you have a new computer with Windows 7, those instructions will be of little value to you, as WMP 12 ships with Windows 7. Windows 7 does, however, let you easily share content with the EVA2000.
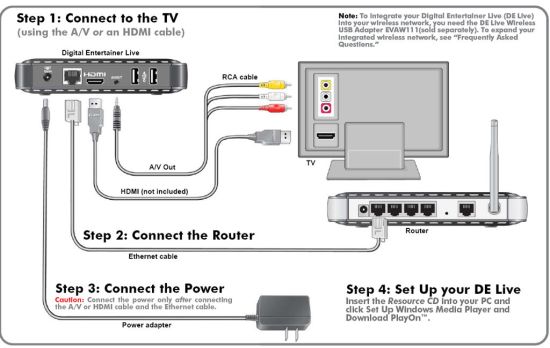
Figure 3: The quick start guide is about all you need to set up the EVA2000.
After connecting the EVA2000 to your network and TV, a splash screen appears within a few seconds of applying power. It took just slightly over a minute for the full boot sequence including acquiring an IP address from my network, connecting to the Internet, and running an Internet speed test. For all of my tests, I connected the EVA2000 to an analog TV in my office, so I apologize in advance for the quality of the TV screen shots.
Figure 4 shows the main menu after the EVA successfully connects to the Internet.
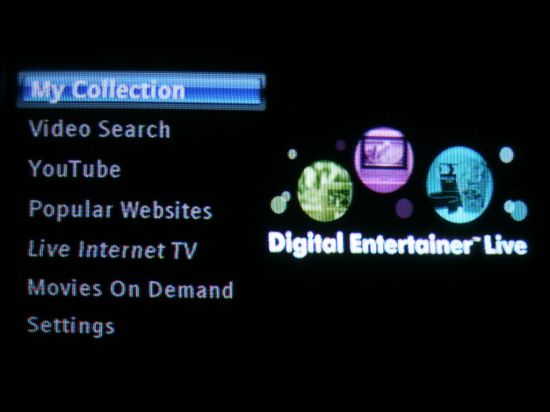
Figure 4: EVA2000 Main Menu
The curious can scroll down to the Settings menu and check out the various options there. You can check your Internet connection speed, set an IP address manually, or run the network wizard which resets the network interface, reacquires an IP address and tests your Internet connection. Figure 5 shows that I have a fairly good Internet connection.
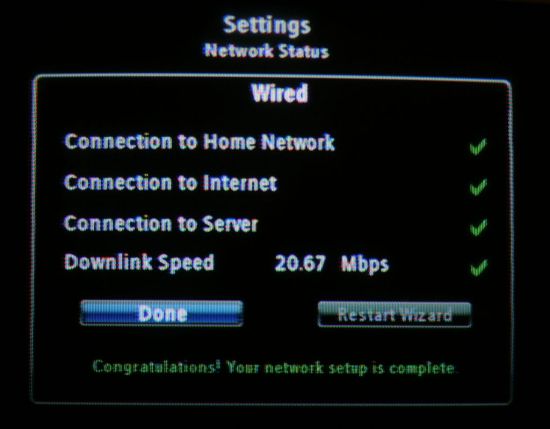
Figure 5: Network Status and wizard
Setup – PlayOn
If you want access to the more compelling content that the EVA2000 can play (Hulu, Netflix, Amazon VOD, CBS), you’ll need to install the PlayOn media server on a Windows PC. This software turns your PC into a media server which, in turn connects to the Internet to stream content from Hulu, your NetFlix account and other services.
You can try out a trial version of the software for 14 days to ensure that your computer has enough horsepower to act as a media server. If you want to continue access after the trial period is up, then it’ll cost you $39.99 (one time fee) to license the PlayOn software. (Though it’s not well documented, EVA2000 owners can get a $10 discount by typing “NETGEAR” in the promo code box when purchasing a license.)
Figure 6 shows the General tab of the PlayOn control panel where you set video performance levels and start/stop the server.
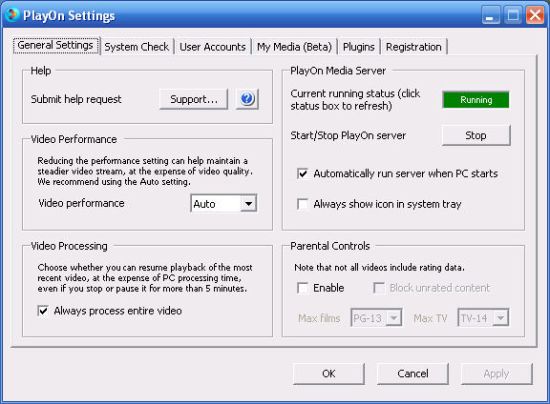
Figure 6: PlayOn control panel general settings
It’s a good idea to perform the system checks show in Figure 7 available in the System Check tab. I initially performed this test on my old Pentium IV desktop, and the performance was rated as low. Granted, the system was slightly below the minimum 3.2 GHz processor speed requirement, but I tried it anyway. Not unexpectedly, the performance of Hulu was poor, and I couldn’t even connect to NetFlix.
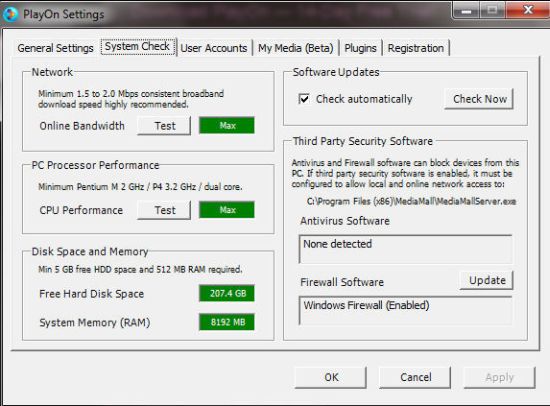
Figure 7: PlayOn System Check
During these tests the CPU utilization for the PlayOn server was about 50%, but at times it peaked at over 90%. This told me that it was time for a new computer. All it took was money, and now PlayOn runs flawlessly on my new quad-core Windows 7 64 bit system with CPU utilization while streaming running about 10-12%.
You can add additional content for the PlayOn server from the PlayOn Plugin site. Though not officially supported by the MediaMall, the plugins I download and installed for MTV and CSPAN seemed to work properly.
In order to access Netflix, Amazon VOD and Hulu, you have to enter your user name/password in the User Accounts tab shown in Figure 8. For each account, you can test your credentials to confirm that the PlayOn server can access your accounts.
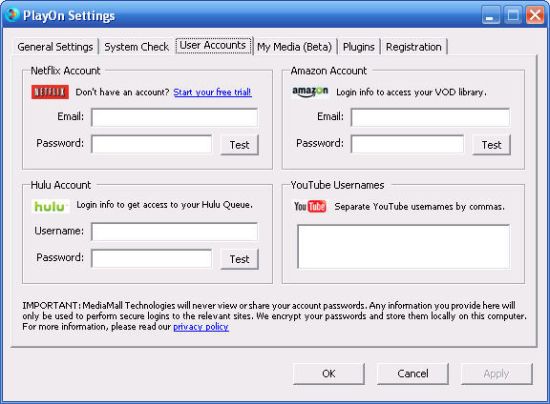
Figure 8: PlayOn User Accounts
Currently, there’s a beta feature that allows you to share your local media with your EVA2000 using the PlayOn server. You merely add directories, including those on network shares, if you wish, as shown in Figure 9.
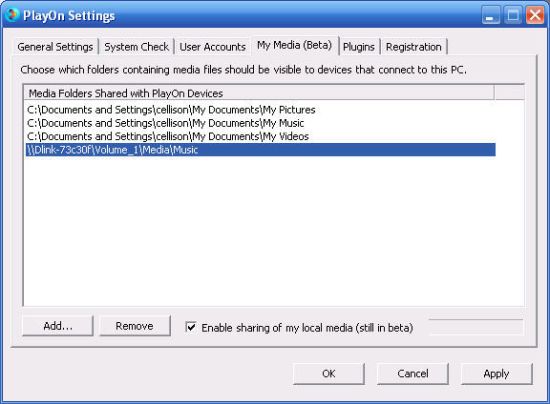
Figure 9: PlayOn settings for sharing local media with the EVA2000
I tested this, and even though it’s “beta”, was able play music and videos and view photos on my computer without a problem. With Windows 7, however, you don’t really need to use this feature, since it’s built into the operating system.
Feature Tour
Let’s take a spin through the menus to check out the EVA2000’s features.
My Collection
The first menu item (Figure 10) lets you view your own content. Your content can reside on a DLNA or UPnP A/V compliant device such as a NAS, be shared via the PlayOn server described above, or reside on a USB disk or Flash drive (Fat 16, FAT32 and NTFS supported) plugged into one of the EVA2000’s USB ports. My Collection also lets you play rented movies and keeps track of recently played items.
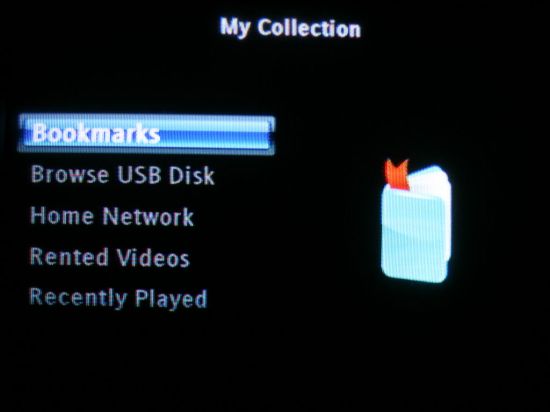
Figure 10: My Collection menu
If you select the Home Network option, the EVA2000 looks for media servers. In my tests, I enabled the media servers on a Buffalo LinkStation Live and a Synology DS107+. The EVA2000 failed to connect to the Buffalo device, returning an “unknown error”. But it connected seamlessly to the Synology NAS. In all fairness, the media server in the LinkStation Live is pretty old and not DLNA-compliant.
I was able to play an assortment of video file types as well as music and view images as a slide show from the content stored on the NAS. Similarly, I also had no problems with multimedia files read from the USB flash drive that was plugged into the EVA2000.
Figure 11 shows the options for playing the music found on my Synology DiskStation.
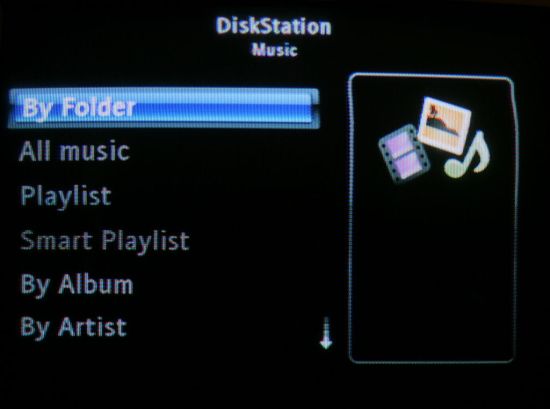
Figure 11: Play options for music found on the Synology DiskStation
Video Search
You can search the Internet for video by selecting this option. Featured videos appear on the right side of the screen. The left side of the screen is reserved for a keyboard that you navigate using the IR control. Figure 12 shows the search results for “Apple”. As you can see, content was discovered from multiple sources.
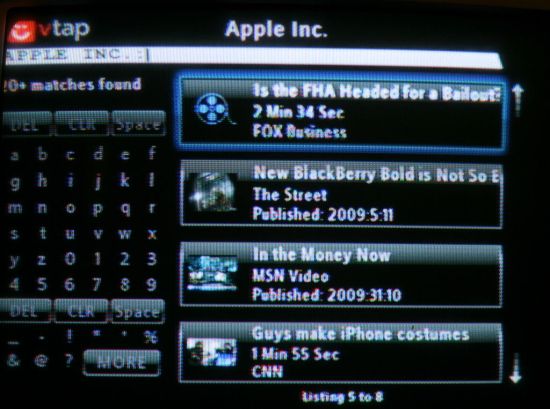
Figure 12: Video search results
YouTube
Figure 13 shows the YouTube search options.
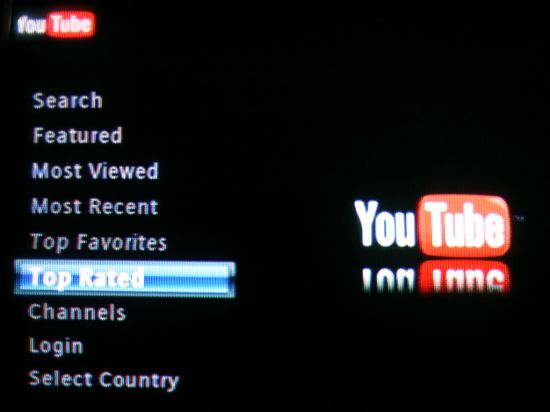
Figure 13: YouTube search options
And Figure 14 shows results for this week’s most popular videos. I encountered no problems searching for or playing YouTube videos.
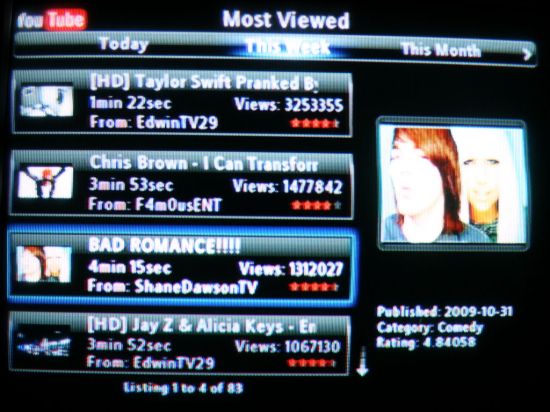
Figure 14: YouTube Most Viewed
Feature Tour – more
Popular Websites
This page (Figure 15) is a subset of all content available through PlayOn and VuNow. But you’re looking at NETGEAR’s definition of "popular" since you can’t edit this page. There are 91 entries on this list including the four default sites (Hulu, NetFlix, CNN, and CBS) available through PlayOn. The rest are provided through VuNow. Currently, the trial subscription of VuNow is valid through March of 2010. After March 2010, the trial period will be 60 days and an annual subscription will cost you $24.
Updated 12/27/2009
NETGEAR has a new agreement with Verismo that the VuNow service on the EVA2000 will no longer require a subscription and is included free of additional subscription charges. This applies to previously sold and all future EVA2000s.
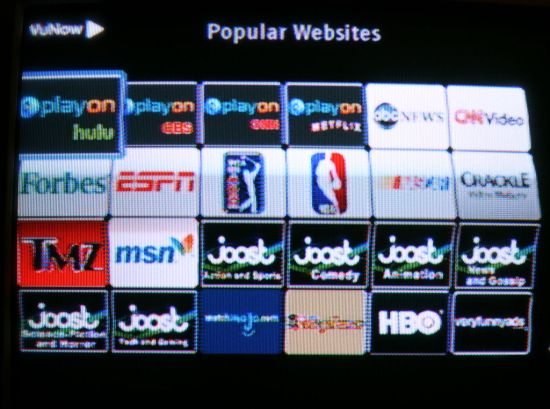
Figure 15: "Popular" Sites
On this page, you don’t have access to the IR-based keyboard, so finding your content involves scrolling through menus and using the page up/down keys, which can get tedious.
Live Internet TV
Figure 16 shows the first page of the Live Internet TV offerings, which is also provided via VuNow. So you’ll need to buy a subscription at the end of the trial period if you want the feature. From what I saw, I’d skip it.
The Live Internet TV menu has entries for Americas, Europe, UK, Middle East, Asia as well as an entry for Live Radio. For the Americas, there are currently 160 entries. While that may sound like a lot, I didn’t find too many of them very interesting.
There were a lot of channels dedicated to local weather or special interests such as The Knot (weddings) or Rail TV, which broadcasts hours of movies of old trains chugging along the tracks(!). Similarly, there was a San Diego channel that was playing the agenda for an upcoming town council meeting. While these channels might provide hours of viewing pleasure for someone, that would not be me.
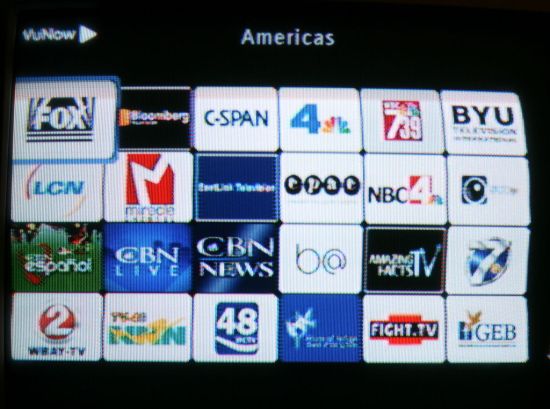
Figure 16: VuNow Live Internet TV for the Americas
Movies on Demand
Movies on Demand (Figure 17) is yet another pay-to-play option (are you seeing a pattern?) provided through NETGEAR’s partnership with Cinema Now, where you can either purchase or rent a movie through the EVA2000. But I was disappointed with the offerings of movies for rent.
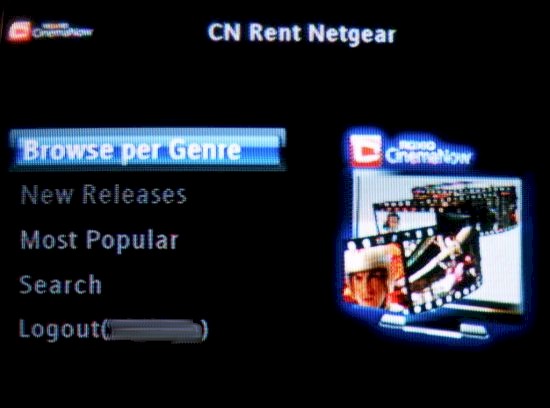
Figure 17: Movies on Demand Rental Main Menu
It seemed like, at least for my random sample, there were a lot more movies for sale than for rent. For example, I searched for Star Trek and found none of the movies found were available for rent, but virtually all of them were for sale. I’m not sure about the licensing arrangements, but I would think that if you can sell a movie, you’d be able to rent it.
As with the menus for Hulu and NetFlix, etc., you can’t search using the keyboard. You have to navigate through menus and scroll down through pages (and pages) of selections.
Closing Thoughts
As a hardware device, the Digital Entertainer Live delivers on what it promises. It’s a simple to install and easy-to-use box that allows you to play your own or Internet media content on either standard or HDTVs. It also supports a wide range of video and audio file formats. Indeed, in my tests, it played Internet video without problems as well as multiple video formats I tried locally. It even played the.AVI files that came directly out of my digital camera.
If you have sufficient Internet bandwidth, and the providers have adequate server capacity, the video experience will be a good one. I did note, however, that on several occasions during my testing, I received errors indicating that VuNow’s servers weren’t available.
But from a content perspective, the EVA2000 falls far short of what it should have been. For $150, you’re getting a basic 720p media player that will play your own digital media files and YouTube—hardly a step forward in digital media player technology. All other Internet-based content requires a yearly subscription and / or a relatively powerful Windows PC, and one-time license purchase. And even then, you’re in the usual "walled-garden" that lets you access only "partner"-provided content.
Since we all know the wealth of content available for free if you’re willing to use your computer to watch it, that’s the benchmark by which all dedicated media players are measured. And, like all media players that have come before it, the EVA2000 misses the mark by a lot. But at least you’ll pay only $150 to sit in front of your TV and wonder why someone can’t just produce an inexpensive box that lets you watch any Internet content on your main TV from your favorite comfy chair.
