| At a glance | |
|---|---|
| Product | Logitech Harmony Home Hub () [Website] |
| Summary | Home entertainment device control hub |
| Pros | • Easy iOS or Android set up • Extensive library of entertainment devices (>270,000) • Eliminates the need for multiple controller devices • Compatible with an assortment of Harmony controllers |
| Cons | • Very limited documentation • Limited to eight entertainment / media devices |
Typical Price: $78 Buy From Amazon
Introduction
If your living room is anything like mine, you probably have the same problem – controller creep. Every entertainment comes with its own remote with unique IR codes. And, most likely, each controller has a couple of special-purpose buttons. So you need to keep the remote handy even if you have a "universal" remote. Here’s what my coffee table looks like…

Controller creep – every device has its own controller
What if you could stash all of the remotes in a drawer and control everything with only a single device? That’s what the Harmony Home Hub promises. All of the clutter can be reduced to this:

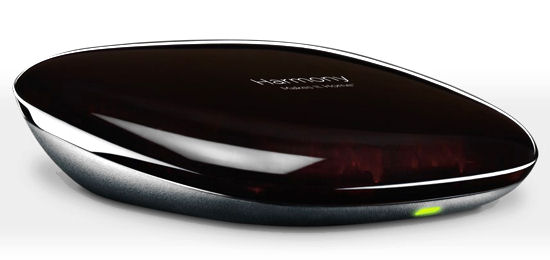
Harmony Home Hub and Samsung S5 (phone not included)
The Logitech Harmony Home Hub is a small device that connects to your wireless network and provides control for up to eight entertainment devices and an "unlimited number" of home automation devices. It uses Wi-Fi to connect to your Android or iOS device and Bluetooth and IR to control devices. While there is a desktop application that you can download to assist you with setup, Logitech recommends that you use the Harmony iOS or Android apps that you can find at their respective application stores.
The Home Hub uses IR, so must have a line-of-sight to controlled devices. The top of the unit is made of a dark red plastic that will pass the IR signals emitted by the hub. The Hub comes with one IR Blaster to reach devices that can’t see the Hub and can control two more connected ports on the rear. The callouts below show the top and rear panels.

Harmony Home Hub callouts
The top panel is quite plain, with only the “Harmony” logo. On the front, there’s a single multi-color LED. It glows red when starting up, when not yet configured, or if Wi-Fi connectivity is lost. If the LED is green, it means that setup has been completed and that the Home Hub is connected to your Wi-Fi network.
The rear panel has a reset button, two ports for IR blasters and a Mini USB port for power from an included power supply. For configuring some features using the desktop application, you also use this port to connect to a USB port on your computer. A USB / mini USB cable is also included with the product.
Setup
I’m always suspicious of quickstart guides that only contain a couple of steps. I’ve been burned enough times by products that have simple setup programs that don’t work smoothly. The quick start guide included with the Home Hub only lists three steps:
- Plug the hub into the power supply and connect the power supply to power.
- Download the Harmony app from either the Apple App Store or Google Play
- Launch the app, select Continue and follow the instructions.
I would probably supplement those steps with:
- Make sure that your Android or iOS device is connected to your Wi-Fi network.
- If you don’t know the Wi-Fi password for your network, look it up. You’ll need to type it in as one of the setup steps. The Home Hub does not support WPS (Wi-Fi Protected Setup).
- Create a list containing the manufacturer and model number for each of your devices that will be controlled by the Home Hub. You’ll need this information for the setup program. For me, gathering the information was probably the worst part of the setup process. All of my equipment is in a cabinet and often the model numbers were on a tag on the rear or the bottom and often printed in very small type.
The Harmony application downloaded onto your Android or iOS device walks you through setup using the following steps:
- Pairing. If you have an optional controller, you need to pair the controller with the Hub. The controller uses Bluetooth, so the controller doesn’t need line-of-sight.
- Connect to your home network. The application already knows the name of the network that your Android or iOS device is using, so it just prompts you for the Wi-Fi password.
- Name the Home Hub (eg, Living Room)
- Sign in or create a Harmony account. This account will be used to sync your hub to multiple controllers and Android/iOS devices.
- If necessary, the firmware will be updated. My device did require a firmware update.
- Device discovery. The Hub will look on your Wi-Fi network to find compatible devices. It found a Roku 3 on my network.
- Add devices that you want to control with the Home Hub. It supports up to eight entertainment / media devices.
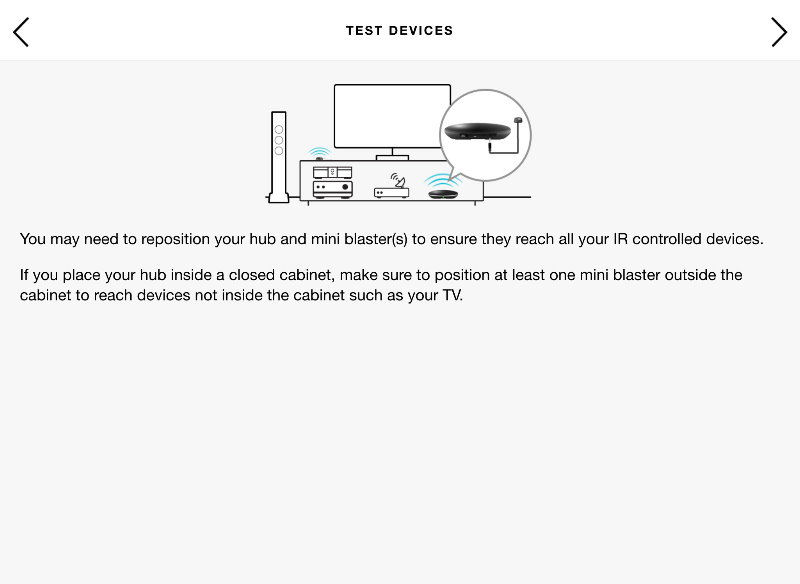
- Test that you can power on/off each device.
- Add activities. Activities are groups of actions associated with something that you want to do. Your furst suggested activity is Watch TV. For this activity, you select devices involved in the activity, which input to use on the TV and which device the controller should control for channel changing and volume Up/Down. For my setup, I chose my Vizio TV, Xfinity cable box and Panasonic receiver. At the end of the configuration, you are prompted to test your configuration to see if everything works.
- Finally, you can set up your favorite TV channels by entering in your Zip Code, selecting your provider (or over the air), and picking your favorite channels.
While this list might seem daunting, it actually only took me under 15 minutes to complete. I spent more time rounding up all of the model numbers on my equipment than I did performing the the initial setup. Each additional activity, such as Watch Roku or Watch Movies took only about a minute or so to complete. With an extensive database of over 270,000 devices and 6000 manufacturers, I was confident that my entertainment devices would be found. Indeed, all were discovered and the IR codes transmitted by the Home Hub worked flawlessly for every device.
I found setup very easy and simple to complete. Each step was done in a logical order and performed only one action. I documented each step of the setup process with screenshots, shown in the gallery below. I chose to use an iPad, primarily because it has the largest screen of any of my mobile devices.
The iOS and Android apps have a very similar look and feel. So if you feel comfortable using one platform, there will be little to no learning curve to switch to the other one. By the time you complete the initial setup, you’ll have a pretty good understanding how the Harmony control system works.
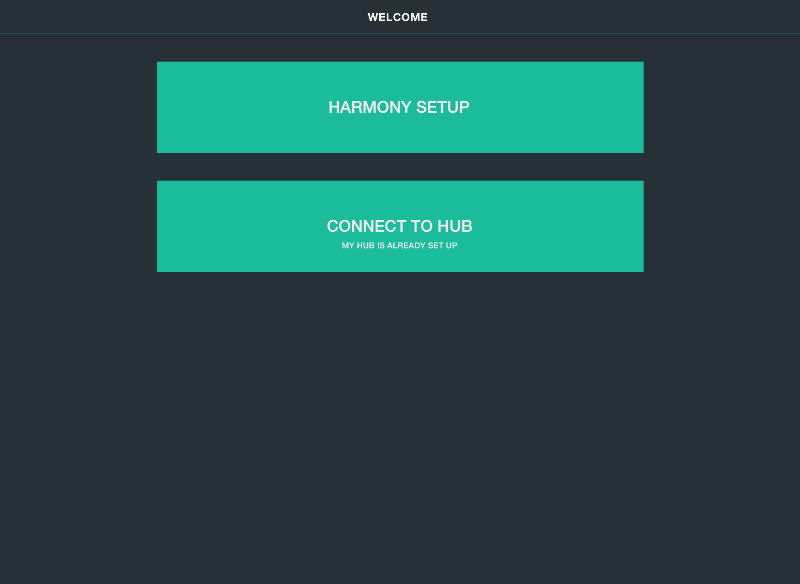
Setup device or connect to a hub that is already configured
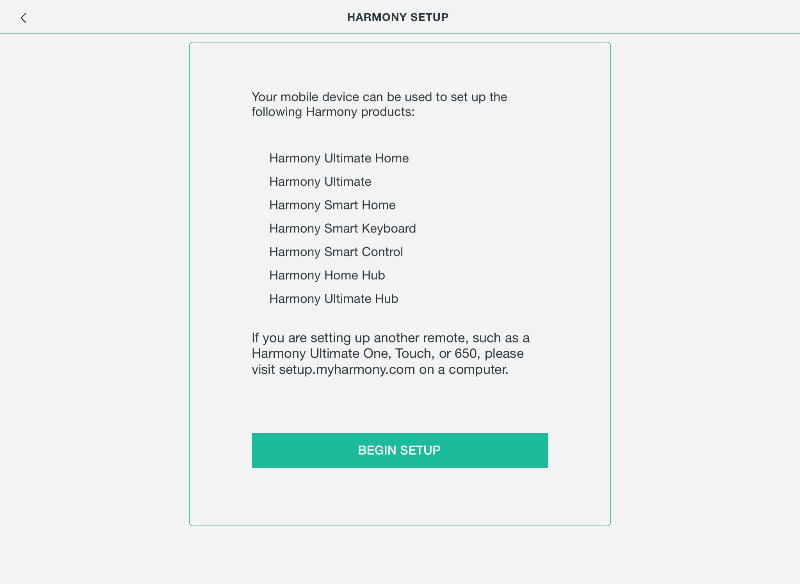
List of devices that can be setup
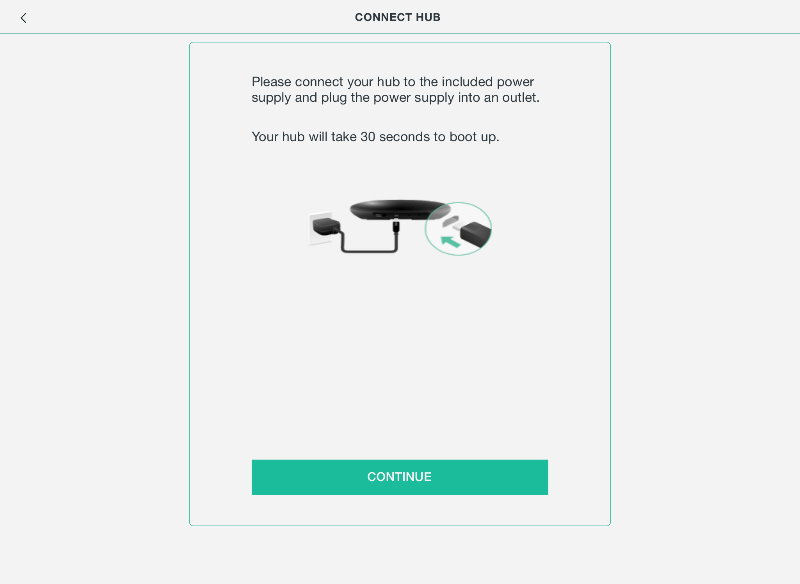
Plug in your hub
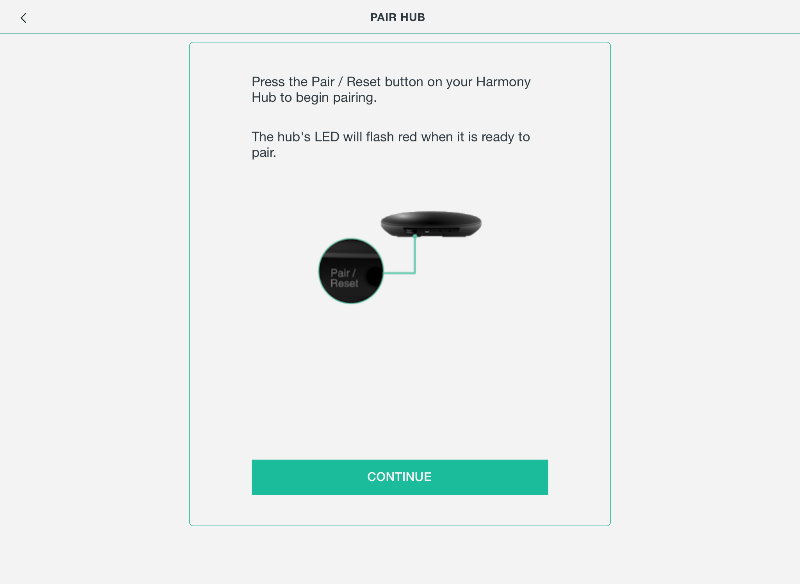
Pair Hub with remote, if applicable
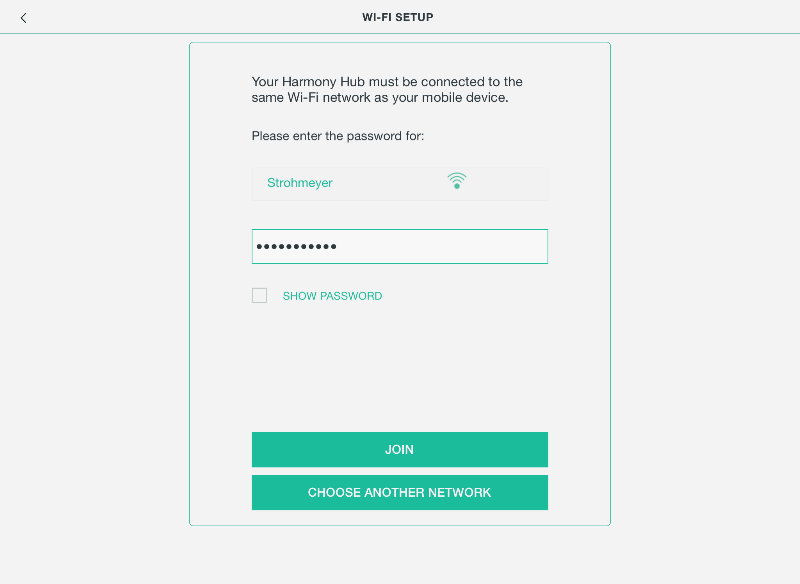
Enter Wi-Fi password and click Join. Alternatively, select another network
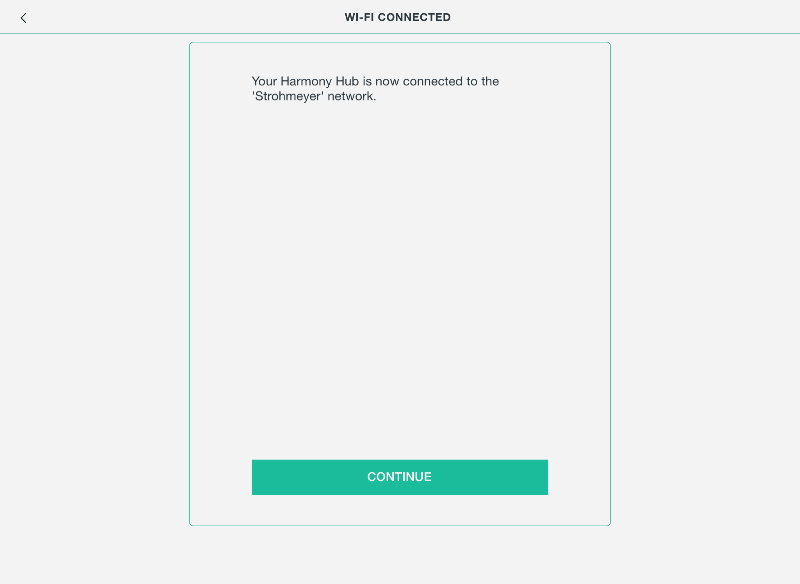
Successfully connected to selected network

Type in a descriptive name or location

Account used to sync settings and access device database

If necessary, the firmware will be updated
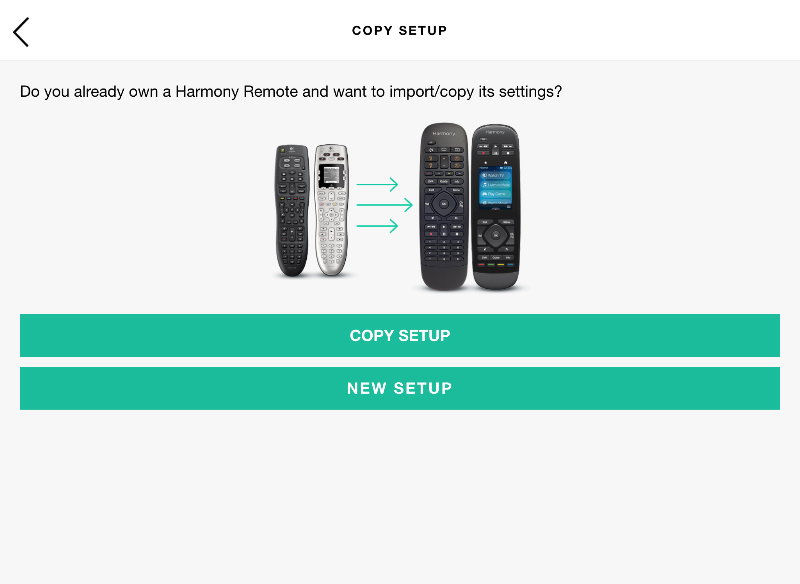
Click on New Setup for initial setup.
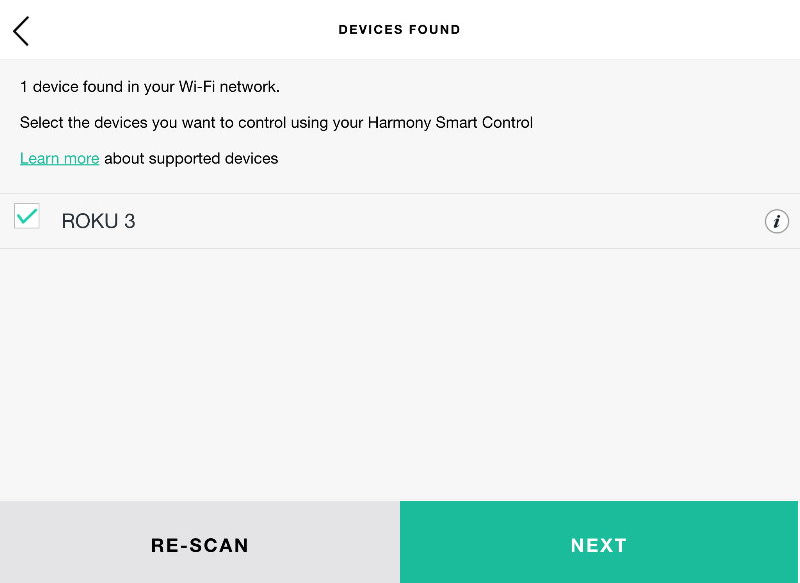
These are devices found on your Wi-Fi network

Add devices to be controlled by the Home Hub
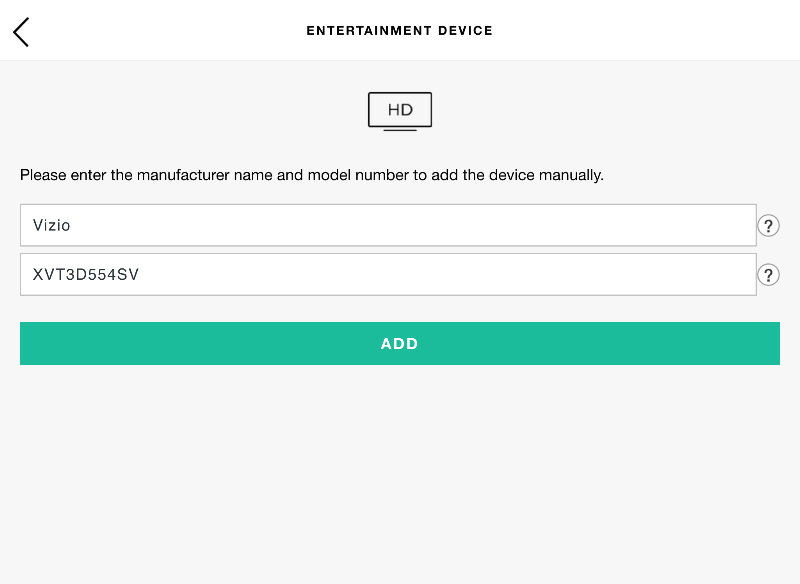
Add my Vizio TV
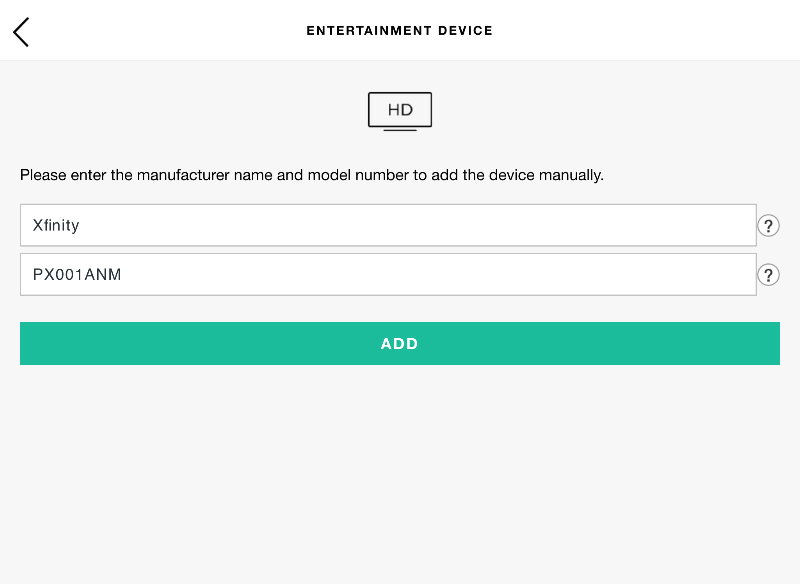
Add Xfinity Cable box
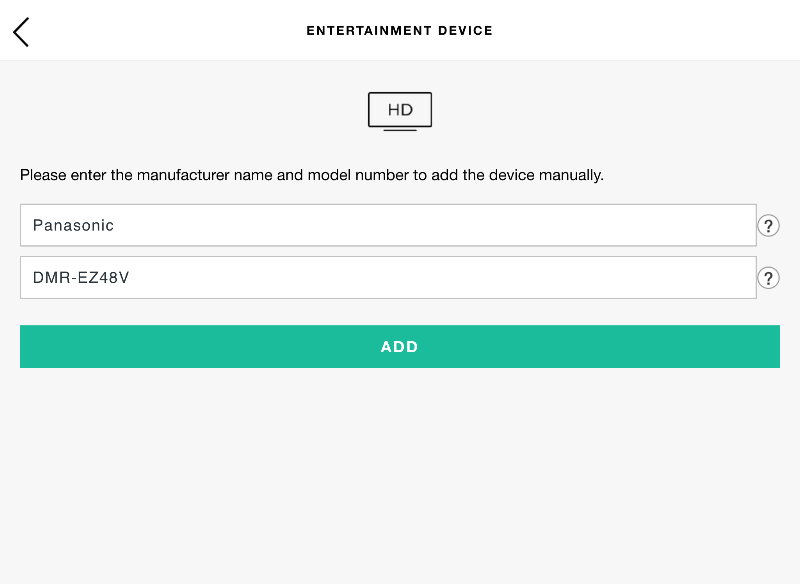
Add Panasonic receiver
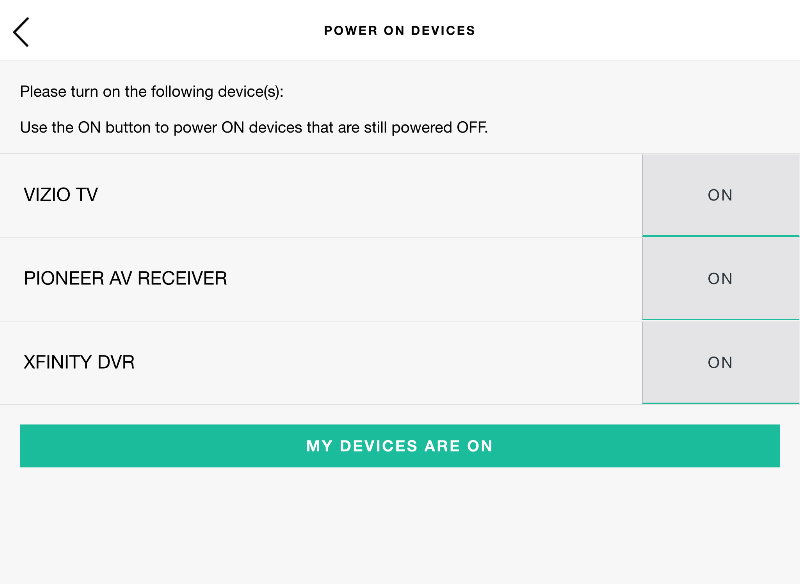
This will attempt to power on configured devices
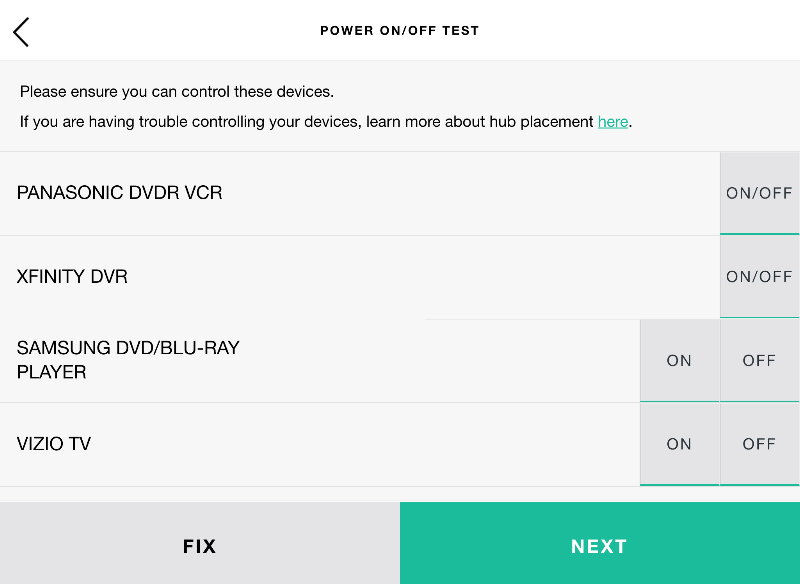
Here, you can test each device to make sure that you can control them.
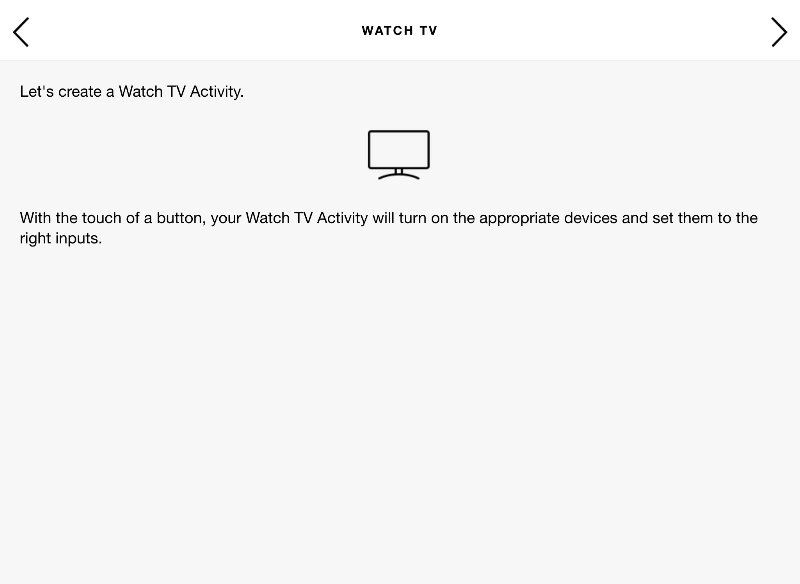
Create Watch TV activity

Select the devices that will participate in this activity
The home hub keeps track of device status, so you should only use the apps or a harmony controller.
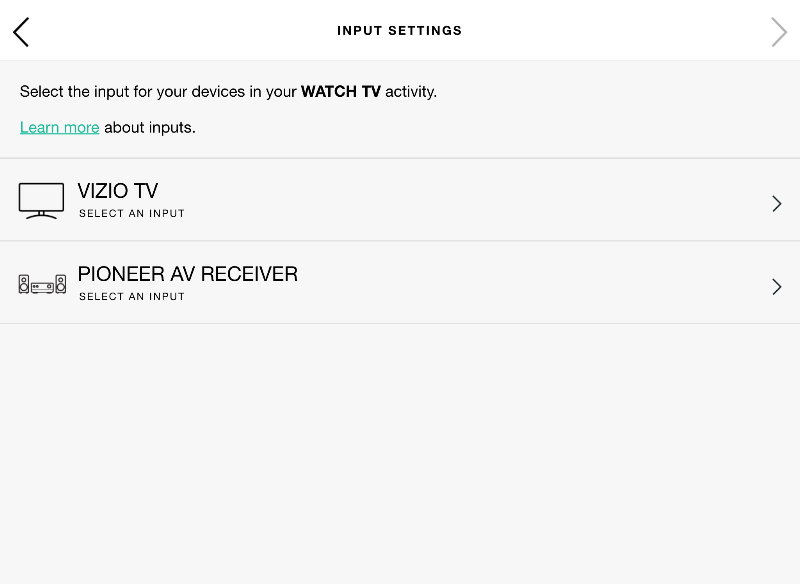
Select input settings for participating devices
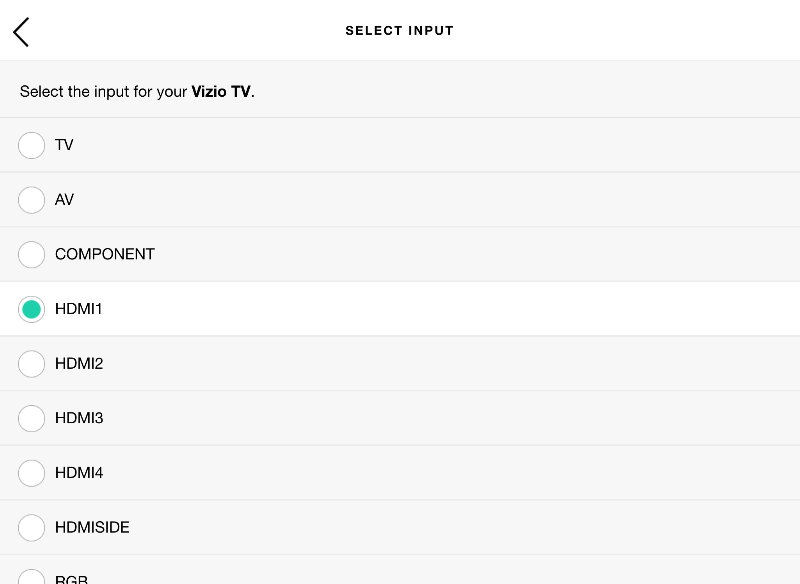
Select input for the Vizio TV

Test to make sure you can see and hear content
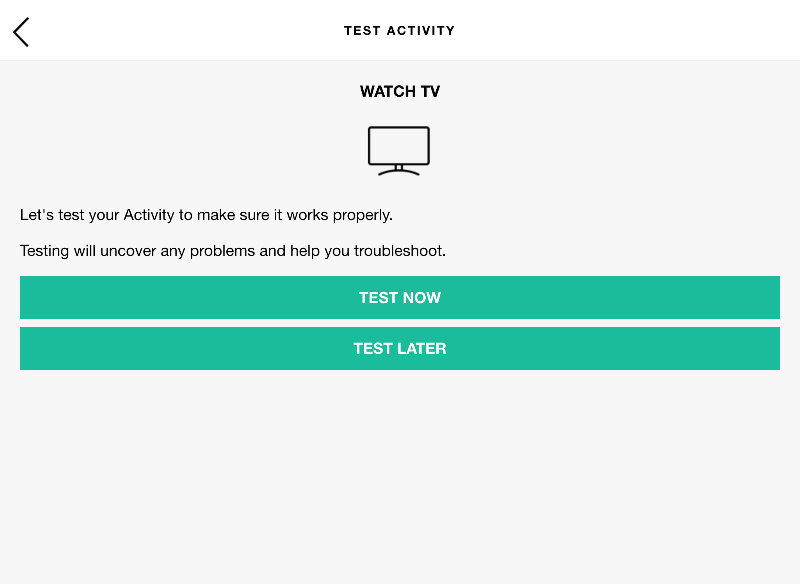
Test the activity to make sure that it’s doing what you expect it to.

You should see each device power up, the correct port selected, and see/hear TV.
In Use
The setup program for initial configuration is built into the same Harmony app that you run to control your devices. As mentioned earlier, the applications for iOS and Android are similar, but there are some variations due to screen size and aspect ratio. I suspect that there would also be variations between the displays on the iPad and on iPhones, as well.
The next three screenshots show a comparison of the UI on an iPad (left) and on a Nexus 7 (right). (All screenshots were resized to 30% of their original size.)
The first image below shows the landing page with no activities running. Configured activities are shown down the left side of the screen. The center of the screen shows a controller configured correctly for the running activity. On the right side of the screen you can see a list of devices.
 and Nexus (right)")
Harmony Home Hub landing page – iPad (left) and Nexus (right)
The composite image below shows the “Watch TV” activity. This activity was configured to use the TV for audio; all other functions are handled by the XFinity cable box via IR commands. Taping the power icon associated with the currently running activity will end the activity and turn power off for all devices associated with the activity.
If you look carefully at the two screens, you’ll see some differences in the screen layout. On the iPad screen, the layout, because of its aspect ratio, had enough screen real estate to accommodate a menu bar across the bottom of the screen. On the Android device, those same functions are arranged below the navigation circle.
 and Nexus (right)")
Harmony Home Hub Watch TV – iPad (left) and Nexus (right)
The three horizontal bars in the upper left corner provide access to the application’s menu, where you can change settings, add/edit devices, etc. The most frequently used submenus will be the Edit/Reset menu and the Harmony Setup menu.
The Edit/Reset sub menu lets you reorder activities and devices, edit favorites, gestures and buttons and reset favorites and buttons. The Harmony Setup sub menu lets you add/edit devices and activities, add a smart keyboard or smart remote, set up a new remote or sync the device to the settings in your account at MyHarmony.com.
When adding or editing an activity or device, you run through screens very similar to those shown in the setup gallery above.
 and Nexus (right)")
Harmony Home Hub Menu – iPad (left) and Nexus (right)
If you look at the bottom of the screenshots above, you’ll notice that there are three icons: a pointing finger, a star, and an icon that returns you to the controller screen. The pointing finger icon takes you to the Gestures screen. The gestures screen lets you configure various combinations of swipe, tap and swipe/hold. There are 11 combinations for using a single finger and 11 combinations for using two fingers. These gestures are associated with the current activity.
Gestures are also configured for individual mobile devices, though you can sync gestures from your MyHarmony.com account. You can accept the defaults, or change any of the 22 combinations for each activity. When you choose to edit a gesture within an activity, you can set it to send a command to any of your configured devices.
You could, for example, change the Long Press gesture to send a mute command to your AV receiver rather than muting the speakers on your TV. The image below shows the Edit Gesture screen for the “Watch Roku” activity.

Harmony Home Hub – Configure Gesture
Some activities have favorites. The composite screenshot below shows favorite channels for the Watch TV activity (left) as well as favorite channels for the Watch Roku activity (right). For TV channels, you can configure favorites for each mobile device. For example, I could have a different set of favorites on my iPad than on my wife’s iPad. Alternatively, you can use the same set of favorites for every mobile device, using settings stored on your MyHarmony.com account.
You get the list of available channels by entering in your ZIP code and selecting your service provider when configuring favorites. For the Watch Roku activity, I was surprised (and pleased) that the list was pulled from my Roku device. For favorites in either activity, a tap on one of the icons takes you directly to the corresponding channel.
 and Watch Roku (right)")
Harmony Home Hub favorites for Watch TV (left) and Watch Roku (right)
Within any current activity, you can select a device on the right hand side of the screen and open a controller for that device. Here’s a possible scenario. You’re watching TV and you’re controlling the sound coming out of your TV with the Harmony application. But you also have music coming out of speakers attached to your AV receiver. If you want to change the volume on your AV receiver, you tap on the AV receiver device icon and use the on-screen controller to adjust the volume. The screenshot below shows my Pioneer AV receiver’s controller..

Harmony Home Hub – virtual controller for AV Receiver
The Home Hub keeps track of the status of each device, so it’s recommended you don’t change power state or inputs using the original controllers. The mobile applications are also kept up-to-date with the current status over your Wi-Fi network. As one of my tests, I had the Harmony app running on both my phone and iPad. When I started or ended an activity on one mobile device, that changed status was immediately reflected on the other mobile device.
Desktop Application
At one point in time, you could configure Harmony devices using a web-based program. Logitech has moved away from the web-based setup to application-based setup. As shown above, the Harmony app on mobile devices do a really good job of setting up the vast majority of features. However, there are a few features that you can only configure using the desktop application. (There are versions for both Windows and MacOS.)
If you have set up your Home Hub, you have created a MyHarmony.com account. After installing and launching a desktop application, you just log into your MyHarmony.com account and the home page shown below will appear.
Along the left side of the screen, there’s a vertical menu to add/edit Devices, Activities, Buttons (for an optional remote), Favorites, and settings. The center of the screen summarizes your devices and activities. The titles shown in blue are links that correspond to the entries in the left pane that let you add/edit activities and devices, change the buttons on the remote, and change your favorite channels.

Harmony Home Hub – Desktop Application Home page
One of the things you can do with the desktop application that you can’t with the mobile apps is edit an activity. In the screenshot below, I added a startup step to change the channel on the Xfinity cable box to 802. You can also add delays.
However, I wasn’t able to add a delay between any of the default steps. I would like to have added about a 5 second delay between steps two and three, as the Vizio TV boots fairly slowly, and occasionally, I noticed after powering up, the command to change HDMI ports had been sent before Visio was ready to accept them. The desktop application also lets you upload an image file (.jpg,.png, and.gif) to change activity icons.

The MyHarmony desktop application lets you customize activities
The settings menu contains most of the items that would require the use of the desktop application. For most common activities, such as adding a device, or adding an activity, it’s just as easy to do on your mobile device as it is on your desktop.

MyHarmony desktop application settings menu
The Hub Assignments menu shown above lets you select the IR source for each defined device. Controlling the IR source is not included in either of the mobile apps.

The MyHarmony desktop application lets you control the IR source for each device
Should you need to change your Wi-Fi settings, the desktop application is the best way to do it. You’ll need to connect your Home Hub to the a USB port on the computer that is running the MyHarmony application. The hub will be powered by your USB port, and you’ll be able to reconfigure Wi-Fi settings.
Harmony Smart Control
Logitech has a separate SKU that bundles the Home Hub with a Smart remote controller. With a list price of $129.99, it sells for $30 more than just the Home Hub alone. My review unit was actually the Harmony Smart Control product, so I got a chance to test out the remote as well. Note that Logitech Harmony remotes won’t work with the Hub right now. Logitech’s site notes "Compatibility will be available in early 2015".
The remote control communicates with the Home Hub via Bluetooth, so it doesn’t need line-of-sight. It is synchronized with the Hub, so it “knows” the currently running activity and the buttons are configured specifically for that activity. You can, however, change the key assignment for any key. The row across the top of the remote selects an activity to run. You run an activity by using either a tap or long tap, so you can run your choice of up to six activities.

MyHarmony desktop application – Assign Activities to buttons
As noted above, the functions of the buttons on the remote change to provide the correct commands for each defined activity. However, you can also change any of the buttons. While you can do this on the mobile apps, I think that it’s a little easier to do using the desktop application.
In the screenshot below, I decided to add a custom feature for my “Watch Roku” activity. On the controller supplied with the Roku, there’s an “*” button that takes you to the option menu on the Roku interface. Unfortunately, there’s no corresponding key on the remote. When you choose to customize buttons, unassigned keys are circled in blue.
In this case, I elected to change the record button, highlighted in orange to show that it has been selected. I selected the Roku3 device and a list of available commands appeared. I selected the “*” command and clicked OK to save the configuration. I also configured the red option button for Netflix and the green option button for Amazon Prime Video to provide one button access to my most frequently used video services.

MyHarmony desktop application – Customize remote buttons
While I like the fact that I can now use any of my mobile devices to control my home entertainment devices, I think spending the additional $30 for the smart remote is money well spent. First, people not familiar with technology may feel more comfortable using a remote control. Second, if you’re watching TV and your cell phone rings, you’re probably not going to want to start the Harmony application to mute the TV before answering.
However, if you have an old Android or iOS device gathering dust because you’ve upgraded to something newer, using it as a remote to control your equipment might be a good way to breathe new life into old technology. (I have two decommissioned Android phones that could work just fine.)
Closing Thoughts
The Home Hub is currently also capable of controlling an "unlimited" number of a handful of Wi-Fi based Home Automation / Control / IoT devices shown in the graphic below. I didn’t have any of them on hand, so wasn’t able to test the Hub’s HA abilities.

Home Automation devices supported
For those of us with Zigbee and Z-Wave devices to control, the Harmony Home Hub Extender is "coming soon". When it arrives, we’ll revisit the Hub to see how it does for Home Automation control.
When you review a lot of products, it’s easy to get cynical. Many don’t deliver on their promises, are difficult to set up or have enough bugs to make you reach for a can of Raid.
The best products identify a problem and solve it – simply. The Harmony Home Hub delivers on its promise of easy setup and simplifying the control of multiple entertainment devices. I’ve stashed all eight of my controllers in a drawer and am using only my iPad, phone or the Smart controller. Problem solved.