Introduction
Updated 9/4/2008: Corrected power supply info in Table 1
A post in the forums a few months ago asked what is the highest throughput that a NAS can achieve with a gigabit Ethernet connection. A gigabit connection is theoretically capable of 125 MB/s, but the fastest products we have tested typically run at less than half of that, even in a JBOD configuration. So I decided to start a multi-article series to see how close we can come to gigabit wire-speed performance with a NAS.
The first step was to assemble a test bed for the experiments. Motherboard choice was a little more difficult than I thought, since I wanted an onboard chipset with RAID 5 capability that also had Linux support. I also wanted an onboard gigabit LAN chipset that used PCIe, so that throughput wouldn’t be choked by a PCI-based LAN connection. One PCIe x 1 slot was also required, so that I could test the difference between on-board and add-in Ethernet.
I decided to focus on Intel chipsets to start, since they are widely supported and I have been using their PRO/1000 MT gigabit adapters for some time with good results. I also wanted to explore the Matrix storage manager that is used for onboard RAID configuration.
I initially chose a GIGABYTE GA-G33M-S2L motherboard, but was saved by forum reader Madwand. He pointed out that the Gigabyte board’s Intel ICH9 South Bridge did not support RAID 5 and instead suggested an ASUS P5E-VM DO (Figure 1).
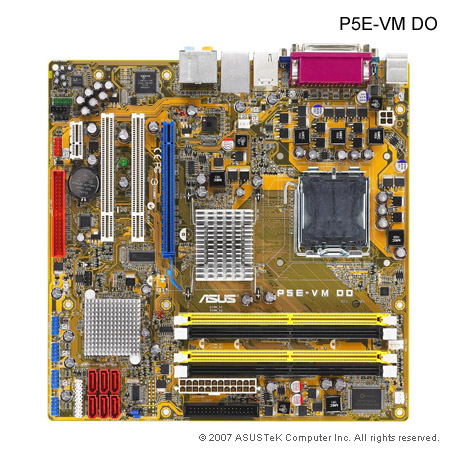
Figure 1: ASUS P5E-VM DO motherboard
The ASUS board uses an Intel Q35 North Bridge and ICH9DO South Bridge, which supports RAID 0/1/0+1/5. The board also has an Intel 82566DM gigabit Ethernet chipset, which connects via PCIe.
Before I purchased the ASUS board, I contacted Intel to see if they could provide one of their motherboards. There were not able to, but did send a Core 2 Duo E7200 CPU. Intel also provided a few Gigabit CT desktop adapters, which use Intel’s 82574L PCIe-based gigabit Ethernet controller.
I also purchased 2 GB of DDR2 800 Corsair memory to go with the motherboard. I got two 1 GB sticks so that I could try 1 and 2 GB memory configurations to see whether more than 1 GB of memory would significantly affect improve performance.
With the motherboard and processor taken care of, I turned to drive selection. I contacted Seagate, who initially wanted to provide Barracuda ES.2 SAS drives. However, even though the cost difference of the SAS drives wasn’t that great, I decided to stick, at least initially, to using SATA drives, since that is what most of you out there will be using. Seagate was kind enough to send four Barracuda ST31000340AS drives.
Finally, I needed something to put all of this in but found that choosing a case was harder than I thought it would be. Perhaps foolishly, I tried to find a small case, since I really didn’t want the NAS to be in a tower format. However, case manufacturers aren’t really catering to NAS builders, because I was able to find only one case that came anywhere near what I was looking for.
Chenbro’s ES34069 "Mini Server" Chassis (Figure 2) seemed like an interesting choice at first. But it could take only a Mini-ITX or Mini-DTX motherboard and required an external power supply adapter. So I had to give it a pass.
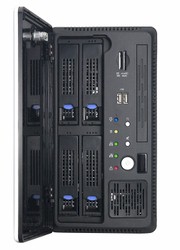
Figure 2: Chenbro ES34069 Mini Server Chassis
I instead opted to spend as little as possible on the case and chose a Foxconn TLM776-CN300C-02 from NewEgg, but ended up being sorry that I did.
The main reason that I chose the case was its ability to handle six 3.5" drives (Figure 3). The two 5.25" drives bays were a bonus, since I really only needed one for a CD/DVD drive.
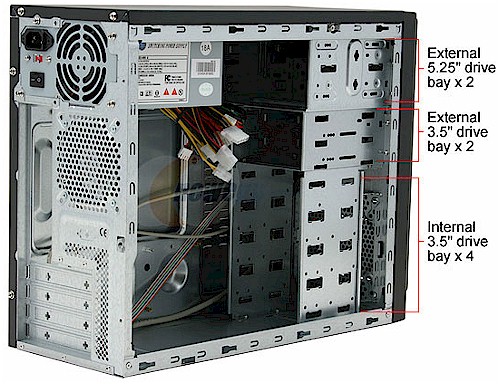
Figure 3: Foxconn case drive bays
Assembly
You sometimes get what you pay for and that’s what happened with the Foxconn case. It’s not that it is a horrible product, just not well suited for my use. The good news is that it comes with a 300W power supply, which seemed like a good deal. But the bad news is that the power supply fan is annoyingly loud, drowning out even the noise from the four drives! So once I am done with the initial set up, it’s moving to my back room while running tests. I might even replace the power supply with a silent one, if anyone can suggest one.
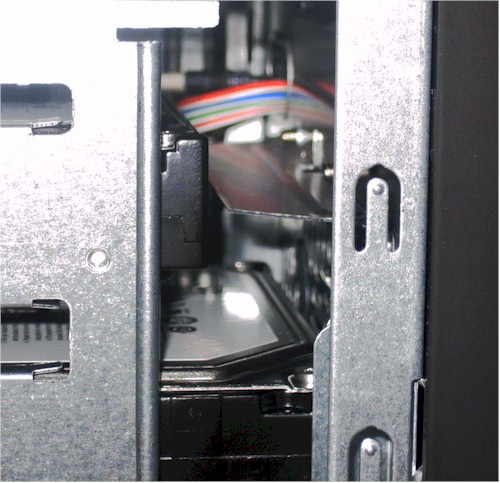
It turned out, however, that the top bay really was partially blocked by a bracket that was stiffening the front chassis panel (Figure 4).
Figure 4: Chassis bracket blocking drive
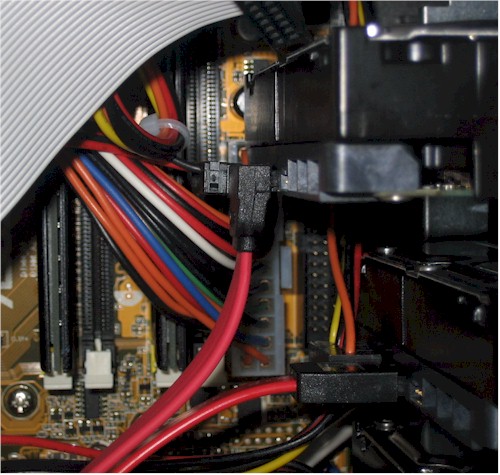
This made the drive stick out over the power connector of the ASUS mobo (Figure 5). It took some tricky maneuvering of the drive, but I was finally able to squeak it into place and even managed to get the power connector seated, too!
Figure 5: Drive blocking power connector
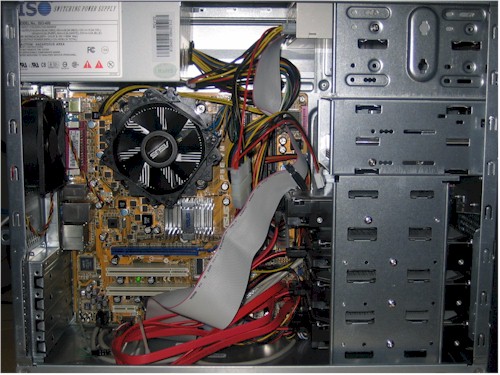
Why didn’t I use one of the "external" 3.5" bays? Well, I tried. But the chassis screw holes were misaligned with the drive holes by about half a hole and I didn’t want to let the drives just float in the chassis. The end result is shown in Figure 6. Not pretty, but it all fits. By the way, that’s an ASUS P5A2-8SB4W CPU cooler, which I chose because it was inexpensive and had good ratings from NewEgg users.
Figure 6: Fast NAS test bed
Table 1 has a summary of the components and costs of the Fast NAS test bed, which came to $355 (not including drives, shipping and taxes and including $120 for what a Core 2 Duo E7200 would have cost me, had Intel not provided it.
Updated 9/4/2008: Corrected power supply info in Table 1
| Component | Cost | |
|---|---|---|
| Case | Foxconn TLM776-CN300C-02 | $50 |
| CPU | Intel Core 2 Duo E7200 | $120 |
| Motherboard | ASUS P5E-VM DO | $117 |
| RAM | Corsair XMS2 (2x1GB) DDR2 800 | $57 |
| Power Supply | ISO-400 | (included in case) |
| Ethernet | 10/100/1000 Intel 82566DM | (included in motherboard) |
| Hard Drives | Seagate Barracuda ST31000340AS 1TB 7200 RPM 32MB Cache SATA 3.0Gb/s | $640 ($160 x 4) |
| CPU Cooler | ASUS P5A2-8SB4W 80mm Sleeve CPU Cooler | $11 |
Table 1: Fast NAS Test Bed Component summary
Closing Thoughts
As I mentioned earlier, component selection turned out to be more time-consuming than I thought, especially for the case, which I ended up being unhappy with anyway. I’m sure that the picks won’t please everyone, particularly AMD fans. All I can say is that this is a starting point, and we’ll see where it takes us.
Speaking of which, I have already chosen the first OS to be tested, which will be Windows Home Server. The main reason for this is that the HP MediaSmart Server (EX475), which runs WHS, has yet to be beaten in the 1000 Mbps Write Charts, turning in an average 67.1 MB/s for 32 MB to 1 GB file sizes. I have also seen other mentions of WHS’ high performance, along with Windows Vista, so figured I might as well start there.
But first, I need to make sure that my iozone test machine is up to the task of testing the high-performances NASes that I’m trying to create. That story is in Part 2.

