Introduction
Over the past few months I’ve been testing out many of the emerging NAS-as-HTPC solutions from various vendors, often with very mixed results. I also tested out a Raspberry Pi as an HTPC to see how well it would fare against the various NAS’. Turns out it did pretty well, so we decided to flip the tables. We wanted to see if a Raspberry Pi could take the place of a NAS.
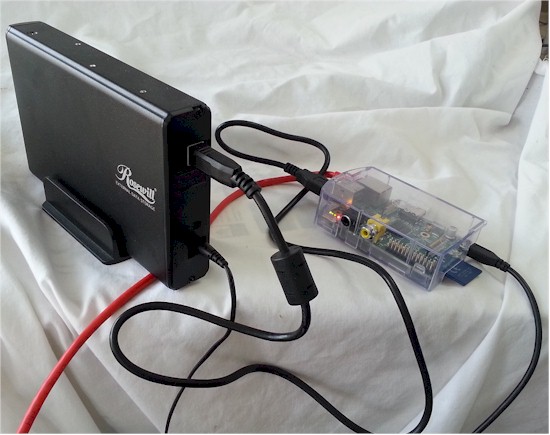
With that I mind I disconnected Raspbmc from our TV, popped in a new SD card, pulled out my USB drive enclosure and set to work building R-Pi NAS. As you can see in the picture above it wasn’t necessarily an aesthetically elegant solution, but it was functional and served the purpose it was designed for.
Setup
When calling the R-Pi NAS a NAS, I guess in the strictest sense of the word it is network attached storage. However, there is no dedicated NAS software for R-Pi NAS. Repurposing it as a NAS involves installing various Linux applications and configuring them via SSH command line.
When I first set up the R-Pi NAS, I wanted the option of connecting via an SSH client or by using Windows Remote Desktop Connection. To accomplish the latter I installed xrdp, which uses VNC to allow the Windows RDP client to connect to Linux. The command to install xrdp was simply:
sudo apt-get install xrdp
The xrdp installer will download the needed files and run through the install. Once complete, you’ll be able to log into the Raspberry Pi via Windows Remote Desktop, which you see in the image below.
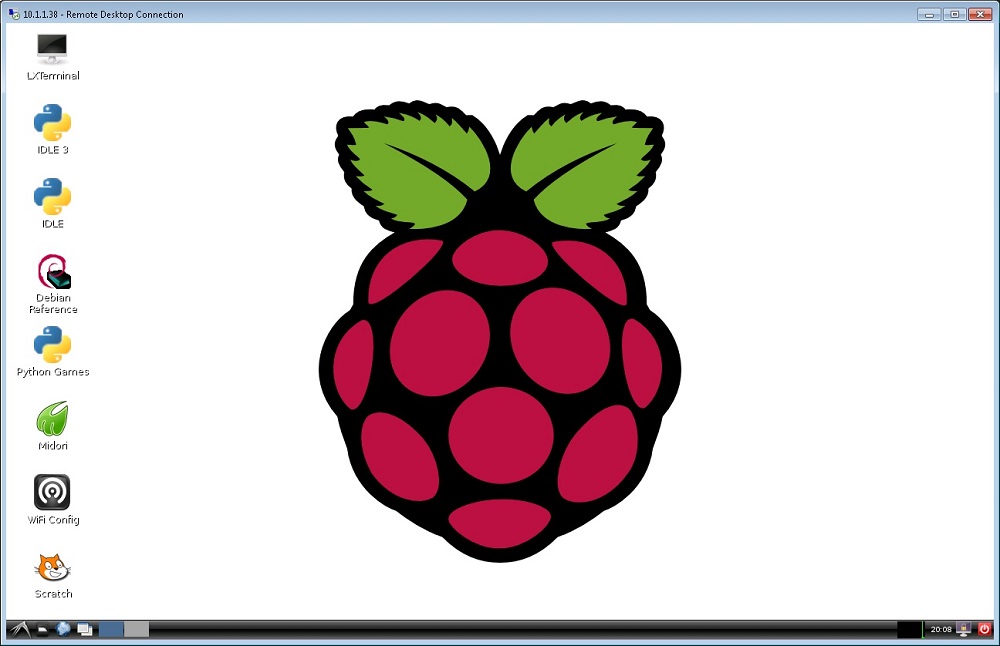
Raspberry Pi xrdp screen
A more verbose explanation of the xrdp installation can be found in the great guide at An Unofficial Raspberry Pi Blog. The image below shows the VNC/RDP connection screen.
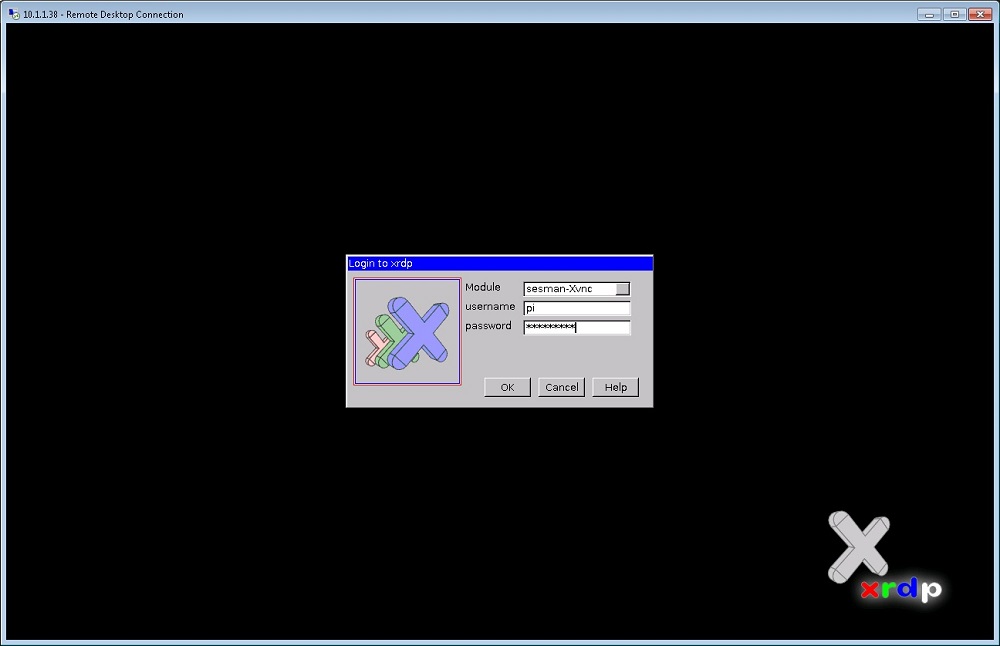
Raspberry Pi xrdp connection screen
Even if you are not necessarily comfortable in Linux, in time you’ll more than likely gravitate towards using the Raspberry Pi via an SSH client. Much of the setup and configuration of R-Pi NAS needs to be done via command line anyway, so it makes sense. To install R-Pi NAS I followed the instructions at eLinux.org, with some supplemental instructions along the way.
The next step of the installation was to configure a Samba server so it could seamlessly interface with Windows machines, which is most of what we have in the house. The command for this was:
sudo apt-get install samba samba-common-bin
Setting up Samba, especially the first couple times around, can be rather tricky. As a supplement to the R-PI NAS instructions, I also followed the information from Simon the Pi Man, which really completed the picture and helped me get Samba going with no issues.
When Samba was up and running, it was time to connect my USB drive. I used a 2 TB Hitachi drive in a Rosewill external enclosure. The enclosure is USB 2.0, which is fine since the Raspberry Pi only supports USB 2.0. I first made a directory that the USB drive could attach to, simply:
sudo mkdir /mnt/2TBdrive
Then I mounted the drive:
sudo mount /dev/sda1 /mnt/2TBdrive
I am by no means a ‘nix expert and a lot more could be said about that. Linux.org has an excellent article on adding USB drives.
Lastly I edited /etc/fstab to ensure the drives remained even after a reboot. Since I was going to be changing filesystem types and didn’t want to change the line each time, I added the following line to /etc/fstab, which you can also see in the screenshot below it.
/dev/sda1 /mnt/2TBdrive auto noatime 0 0
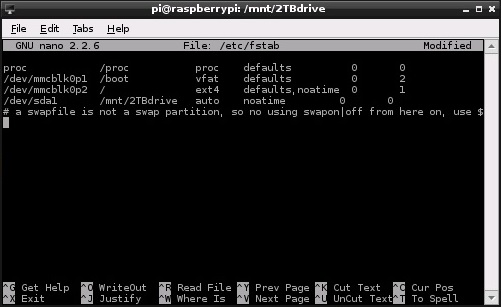
R-Pi NAS fstab entry
My R-PI NAS installation was complete and I was ready to test. The screenshot below shows the USB drive as part of the filesystem and ready to go.
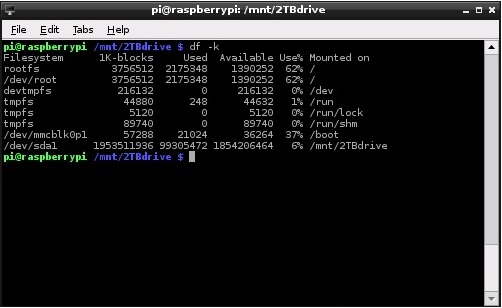
R-Pi NAS filesystem with 2TB drive mounted
Features
The R-PI NAS can be looked at in two ways when compared to a commercial NAS. Commercial NASes are crammed with features that can do anything from serving media to recording from network cameras. The R-Pi NAS inherently has none of that. However, since it runs on Raspbian, an operating system based on Debian that is optimized for Raspberry Pi hardware, the possibilities to expand it with other software, such as minidlna, is always present.
That said however, it’s not nearly as user-friendly as a commercial NAS. Although the commands are relatively easy, a lot of configuration of files and command-line knowledge are needed to install, configure and maintain a Raspberry Pi NAS. With a commercial NAS, one could get away with never touching the command-line in most cases and have loads of functionality at their disposal.
Performance
To test the performance of the R-Pi NAS, I set it up against a Synology DS111 we use for PC backups and other tasks in the house. The Synology has a little speedier processor and a Gigabit network interface, but otherwise it is a relatively close comparison.
I first ran a test with LAN Speed Test version 3.4.0 from Totusoft. The test sent 100, 1 MB packets. The Synology DS111 wrote at 34 MB/s and read at 47 MB/s. Not really all that awe-inspiring. The ext3 filesystem on this NAS is several years old and had probably suffered a little slowdown over time.
I next ran the same test against the R-Pi NAS, which only has a 100 Mbps network interface. Reads would always come back as 8.5 MB/s test after test, consistently across exfat, ext3 and ext4 filesystems. I had a little more trouble with write, however. It would start around 10 MB/s, but somewhere between packet 50 and packet 88, the test would always hang, which would in turn drop write speed results to anywhere from 8 – 5.4 MB/s. I poked around on some Samba forums and saw similiar issues, suggesting a write cache problem, but no concrete solutions.
On a whim, I decided to run rpi-update, which updates the Rapsberry Pi’s firmware. I did this after completing the tests below. I had done this prior to setting up R-Pi NAS, but decided to do it again since I was having problems. After updating, the write pauses went away. I don’t know if something to specifically address the write pauses was included in the update, but I do know that the community is constantly refining and improving code. Table 1 summarizes the results after the firmware update.
| Device | Write (MB/s) | Read (MB/s) |
|---|---|---|
| R-Pi | 8.9 | 8.5 |
| Synology DS111 | 34.0 | 47.4 |
Table 1: Throughput Comparison – LAN Speed Test
I thought some real world directory copy tests were in also in order. I tried three directory copies, whose results are summarized in Table 2:
- 28 MB directory, 126 small files (29 KB to 2135 KB each)
- 108 MB directory, 34 files (3-5 MB each)
- Very large backup test (314 GB, 248,777 files, 13,363 folders)
| Device | 28 MB Write (MB/s) |
108 MB Write (MB/s) |
314 GB Write (MB/s) |
|---|---|---|---|
| R-Pi NAS | 3.3 | 6.2 | 3.5 |
| Synology DS111 | 1.8 | 30 | 6.2 |
Table 2: Directory copy – R-Pi NAS
The 28 MB directory consisted of several GPX files, but it could very easily have been a web directory with tiny files, which often takes quite some time to back up when size is considered. To my surprise, the R-Pi NAS handily beat the Synology DS111 at this test, with copy throughput of 3.3 MB/s vs. 1.8 MB/s.
The 108 MB directory consisted of music files, all 3-5 MB each. The R-Pi NAS chugged along at only 6.2 MB/s on this test vs. 30 MB/s for the Synology. This performance number was after running the rpi-update.
A primary task for the NAS in our residence is to sync user profiles from desktops and laptops after hours so that if anything were to happen to the drive in the system such things as documents, pictures, music and even profile settings would not be lost. Our Synology has served us well for this usage, but some profiles are very large. The Synology NAS with its faster throughput and Gigabit network interface can still sometimes take a very long time to complete the tasks.
In fact, the Synology took 860 minutes (14+ hours) to copy this very large directory, copying 289 files\min and clocking in at only 6.2 MB/s. The 3.5 MB/s throughput for the R-Pi NAS shown in Table 2 is what I measured before I ran the firmware update. But because this test takes so long, I didn’t rerun it. I doubt if the results would have changed significantly, given the large number of small files in this test.
Closing Thoughts
When considering the R-Pi NAS compared to a commercial NAS, it really comes down to several things. The first being how comfortable you are with Linux. If you don’t like installing software from the command-line and manually configuring files, then the R-PI NAS is not for you. Commercial NASes have a plethora of ready-to-go applications that compliment their file serving capabilities. While you can find many of the same types of applications for the Raspberry Pi, you have to install, configure and often debug them.
Speed is also a consideration. While the Raspberry Pi did ok when compared to the DS111 when copying lots of small files, the Synology definitely was significantly faster with larger media files and speed can really matter with large backups. When used as a media repository serving files to a media player, the R-Pi NAS would do just fine, however.
Something I thought would matter, but really didn’t was power consumption. The Raspberry Pi draws almost no power—I measured around 3W in the Raspbmc article. And with a USB drive attached, about 8W was typical. The DS111, on the other hand, takes about 18W in use. While that difference is large in comparison, the Synology also finished tasks more quickly, allowing it to hibernate at 8W for much of the time that the R-PI NAS was working on my multi-Gigabyte backup.
For cost, an R-Pi isn’t as cheap as you would think given its $35 starting cost for just the board. My price breakdown was:
- $35 for Raspberry Pi B board from official vendor
- $6.47 Clear case
- $16.19 4 GB preloaded SD card
- $12.78 Micro USB power adapter
- $19.99 for Rosewill USB enclosure
- $74.99 2 TB Toshiba drive from Newegg
Grand total $165.42 before tax and shipping.
The DS111 is no longer for sale on Newegg, but that DS112 is. Current cost without tax and shipping is $209.99. Add $74.99 for the same Toshiba 2 TB 3.5″ drive used in the R-Pi, for a grand total $284.98. While this is still almost twice the cost of the R-Pi NAS, it isn’t the 8X implied by the R-Pi’s $35 board cost.
Of course all of my testing was with a single drive. Since R-Pi NAS runs on Debian optimized for the Pi, it theoretically should be able to use the same Linux utilities and techniques seen in the SNB forums to create multiple drive arrays in a more ambitious build. But keep in mind access to that storage will still be through a relatively small USB 2.0 pipe.
The bottom line is that commercial NASes can rest easy that that are in no danger of being replaced by R-Pi DIY NASes. But where simple, basic shared storage is needed, an R-Pi NAS could be a great choice.
