Introduction
| BuffaloTech TeraStation TeraByte Network Attached Storage | |
|---|---|
| Summary | Four-drive TeraByte (1000GB)-capacity NAS with built-in print server, USB2.0 disk expansion, and RAID 1, 5 support
Also available in 0.6 and 1.6TB versions |
| Update | None |
| Pros | • Supports disk spanning, Raid 1,5 • Gigabit Ethernet • Four USB2.0 ports for printer & more drives • Very quiet |
| Cons | • Difficult to replace drives • Not fast enough to use its gigabit Ethernet to full advantage • Terrible documentation |
One of the complaints I hear from folks shopping for networked storage is the shortage of reasonably-priced products that support multiple drives. Buffalo Technology appears to have heard this cry and their answer is the TeraByte Network Attached Storage, or TeraStation for short. Available in 0.6, 1.0 and 1.6 TeraByte flavors, the TeraStation is the first mass-market NAS to break the TeraByte (that’s 1,000 Gigabytes) barrier and do it for around a buck a gigabyte.
The Terastation is packaged in a silver chassis that is about the size of a smallish sub-woofer. You can also get an idea of its dimensions by looking at the comparison shot of it beside Buffalo’s smaller LinkStation (Figure 1).

Figure 1: Link and Tera Stations compared
(click image to enlarge)
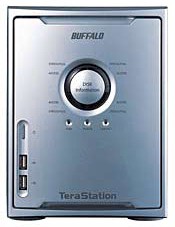
All the TeraStation’s disk Status and Access indicators are arranged in a circle (Figure 2) and use colors and blinking to help communicate what’s happening.

Figure 2: Terastation Front panel details
(click image to enlarge)
Figure 3 shows the TS’ rear panel with its complement of ports. One item of note is the 3.5 inch variable speed fan, which I’m pleased to report was quieter than the fans in my PC. Another is that the power supply can handle an AC mains of 100 – 240V without the need to set a manual range switch.

Figure 3: Terastation Rear panel details
(click image to enlarge)
Construction Details
A tradeoff that Buffalo made to keep the cost of the TS down was ease of (dis)assembly. Simply put, you won’t enjoy getting this sucker apart when the time comes to replace a dead drive. But at least Buffalo provides a PDF document with photos to guide you through the procedure.
As the larger version of Figure 4 shows, the TS uses a Freescale MPC8241 PowerPC processor running at 266MHz with 128MB of RAM. The 10/100/100 Ethernet LAN connection comes courtesy of a Realtek RTL8110S-32 gigabit Ethernet controller and a NEC D720101 USB 2.0 host controller handles the four USB 2.0 ports.

Figure 4: TeraStation Internal view
(click image to enlarge)
The storage in my TS was provided via four Maxtor 6B250R0 (PDF link) 250GB 7200RPM hard drives that have ATA/133 parallel interfaces and 16MB of buffer. (The 0.6T and 1.6T models use 160 and 400GB 7200RPM drives respectively.) But these exact drives aren’t part of the TS’ spec, so your TS might report that it is using different drives. The drives are connected to an ITE 8211AF ATA 133 IDE controller (actually two with two drives per controller).
The file system used on the internal drives is XFS, a high performance 64bit journaling system developed at SGI. The TS supports TCP/IP and Appletalk transport protocols and speaks both SMB / CIFS and Apple File Protocol AFP 3.X, but doesn’t support NFS.
Setup & Admin – Basic Configuration
Let me preface the tour through the TS’ features by saying that the documentation included with the TeraStation is awful – especially for a product costing as much as the Terastation does! You don’t even get a coherent User Manual, but instead a set of three PDF files that you have to bounce among in order to find information. And the information you find – especially in the Advanced Configurations document – isn’t very helpful. Here’s an example that describes the RAID Array Configuration feature:
“RAID Array Configuration
If the drives are grouped into a RAID Array, the basic information will be displayed. For further information about the RAID Array or to make modifications, click on the array’s name.”
The product (and its purchasers) certainly deserve better than this and Buffalo apparently agrees, since they told me that they plan to have revised documentation available in June (2005).
Setup was uneventful, except for the strange and scary noises that came from inside the TS when I first powered it up. I guess it was just the drives going through some sort of initialization cycle because once they settled down, I never heard the noises again.
Buffalo has the TS try to lease its IP address info from a DHCP server, but it will fall back to using 192.168.11.150 if it is unsuccessful. Once you log in, however, you’ll probably want to assign a static IP to the TS so that you always know where to find it.
Login brings you to the Home page (Figure 5) where you can start your explorations.

Figure 5: The TeraStation Home page
(click image to enlarge)
Although you get some of the info you’ll want to know about the TS’ status, this page (Figure 6) taken from the Buffalo Defaults and Internal Drives PDF describing the product’s default settings is more informative.

Figure 6: TeraStation default settings
(click image to enlarge)
You’ll note the defaults are friendly to both Windows and Mac OS users, but I thought it curious that Buffalo didn’t have the TS automatically set the time from a pre-set NTP server as most other networking products do these days. Instead you’ll have to enable the feature and enter the IP address of an NTP server (find one here), or just grab the time from the machine that you’re browsing from.
Among the Network settings you’ll find an Ethernet Frame Size control that lets choose from two settings for Jumbo Frames that could help improve gigabit Ethernet speeds. Note that the network adapters and switch that the TS communicates with all must support these same frame sizes.

Figure 7: Network settings
(click image to enlarge)
The only admin security feature you have is password protection since you can’t change the port that the HTTP interface responds to from its default of 80. You also can’t enable secure HTTP (HTTPS) for the admin interface or restrict HTTP access to specific IP addresses or ranges. There doesn’t seem to be any admin login idle timeout, nor is there a logout button, either. That’s ok, though, because the TS allows multiple users to log in simultaneously and doesn’t complain a bit.
Setup & Admin – Disk Management
The TS comes with the four drives set in spanning mode so that they appear as one large drive. If you want to change this setup, you’ll use the Disk Management menus. Figure 8 shows only part of the page, which scrolls down to show info for the RAID arrays, each of the four individual drives and up to four USB drives that you may have connected.

Figure 8: Disk Management settings
(click image to enlarge)
The RAID configuration screens (Figure 9) aren’t entirely self-explanatory and the documentation isn’t much help. But I managed to muddle my way through guided by the warnings issued by the TS when I didn’t make the correct configuration selections. Be warned, however, that when configuring the TS to either RAID1 or 5 modes, you’ll trigger a 3+ hour formatting process that can’t be stopped, during which the TS will be unavailable.

Figure 9: RAID settings
(click image to enlarge)
I would have preferred to have seen a warning similar to the one I got before launching a disk check, which didn’t take long at all (at least not on a drive with virtually nothing in it). Note that formatting, changing disk setup or running a disk check will make the TS unavailable while they are running and these processes can’t be stopped either.
USB Drives
The four USB 2.0 ports on the TS can be used to connect a USB printer for print serving or USB 2.0 hard drives for backup or sharing. The good news is that the USB drives don’t have to be formatted with XFS. The bad news is that: 1) the alternative formatting recognized is only FAT16 / 32 (instead of the more current NTFS); 2) only the first partition of multi-partioned drives is recognized; and 3) FAT 16 / 32 drives can only be used as backup targets and not shared. I suspect these limitations will limit the usefulness of this feature and hope Buffalo upgrades it at some point to fully support NTFS drives.
The other bummer is that only USB hard drives will be recognized – no Flash keys. So forget about being able to walk up to the TS, pop in a USB Flash key and copy its files to the TS.
Setup & Admin – Shares, Groups, Users
The default share that the TS comes with is wide open to all users. But if you’d like to establish protected shares, you can do that through the Shared Folders settings.

Figure 10: Shared folder settings
(click image to enlarge)
Figure 10 shows the settings for a folder I set up called testfolder. Even though the shared folder attributes on the upper part of the page are set to “writable” (Buffalo’s way of saying “read/write”), the settings in the lower Access Restrictions section take precedence and establish read-only privileges for a Group I created named “test”.

Figure 11: Group management
(click image to enlarge)
Figure 11 shows the members of the “test” group and that there are no other group attributes that can be set, such as disk quotas. The User settings page is a little more interesting in that you must set passwords for each user, but there is no quota setting there either.
Note that with this simple interface that you can’t set permissions for nested folders and therefore won’t get into the permissions problems that nested folders can create. You can, of course, create nested folders in the shares themselves – you just can’t set permissions on them.
Backup, FTP, Print Serving & more
The focus of the TS’ backup features is on backup of the TeraStation’s drives, not on backing up clients to the TeraStation (Figure 12). All you need to do is define backup folders, password-protect them if desired, define the source and destination folders for each backup and schedule daily or weekly backups.

Figure 12: Backup job settings
(click image to enlarge)
Options are also available to start a defined backup immediately, or temporarily suspend its execution. You can also compress or encrypt transfers, set incremental backups and automatically overwrite previous backups.
If you want to backup clients to the Terastation, it looks like the “info” folder contains a copy of Buffalo’s HDbackup program (Windows only), or you can download a copy of a 30-day trial of Tanagra’s Memeo backup program (Win 2000, XP only) if you don’t find it included on your TeraStation CD.
One of the options you may have noticed in the Shared Folder setting screen is the ability to enable FTP access. Buffalo’s documentation says only anonymous FTP is supported, but my experience was different. I found anonymous FTP didn’t work, but when I reported this to Buffalo I was told that it was available on Port 8021, which I verified is correct (but which also isn’t documented). However, while I was trying to get anonymous FTP to work on Port 21 (where FTP is normally found), I found that I could login using any established user account except the built-in guest account.
Once logged in, I could see folders for each drive, plus a folder for an “info” folder that did not appear in the TeraStation’s Shared Folder list. I did find that only folders within each drive’s folder (other than the “info” folder) that had FTP access enabled in their Shared Folder settings were visible. But I also found that I had to set User level privileges for folders in order to make the available for FTP – Group level privs appeared to be ignored.
The settings for the built-in Print Server are pretty basic – just separate enables for Windows and Mac OS (“Apple”) print servers. While there is no status monitor or ability to see the jobs in queue, you can kill all the jobs in queue with a click on the Delete button on the Delete Print Queue page.
There are a few other features that I don’t think I touched on, so I will now:
-
You can enable emailed alerts. But I couldn’t get the TS to send me anything, even when I used the Send Test Message button. This was probably because my ISP enforces username / password login in order to use its SMTP server and the TeraStation doesn’t support any method of SMTP authentication
-
You can shutdown the TS from the browser inteface and reset it to factory defaults. But you can’t perform just a soft reboot
-
The Disk Sleep function allows you to set sleep and wake up times that will be executed daily
-
The TS can initiate a shutdown from a serial-connected UPS
- Drives automatically spin down after 30 idle minutes
Note that the TeraStation doesn’t include the PCast media server function found on Buffalo’s LinkStation. This appears to be a UPnP-based streaming media server that can provide access to TeraStation-stored media files for Buffalo’s LinkTheater [reviewed here] and other streaming media players. Buffalo told me, however, that PCast is available in a firmware download currently available only by calling their support center [(866) 752-6210], and that their June TS documentation update will also include PCast documentation.
Performance – Write
If you think that having a gigabit Ethernet interface on a consumer-priced NAS guarantees high performance, the TeraStation has a few surprises in store for you. As I do with all NAS testing, I used IOzone to check out the TeraStation’s file system performance (the full testing setup and methodology are described on this page).
I tested the TeraStation in each of its four possible modes: Standard (250GB×4); Spanning (1TB×1); Mirroring (RAID 1) (250GB×2); and Parity (RAID 5) (750GB×1). For each mode, I ran the test with the Terastation and computer running iozone connected via a 10/100 switch, then moved them to a NETGEAR GS108 10/100/1000Mbps switch for gigabit-speed testing.
The iozone computer connected via an Intel PRO/1000 MT Desktop gigabit Ethernet adapter, which was set to auto-negotiate its connection speed. Note that since the GS108 switch doesn’t support Jumbo Frames, I couldn’t test its effect on the TeraStation’s performance.
NOTES:
• Firmware version tested was 1.34
• Keep in mind that the maximum raw data rate for 100Mbps Ethernet is 12500 kBytes/sec and 125000 kBytes/sec for gigabit
Figure 7 shows a 3D surface plot of the TeraStation write performance using file sizes from 64 kBytes to 128MBytes and record sizes from 4 kBytes to 16MBytes. Note that the plot is oriented so that larger file sizes are closer to the front.
")
Figure 13: TeraStation Write performance – 100Mbps Span mode (default)
(click image to enlarge)
This plot is typical of those that iozone produces, with the peak speeds that are well above Ethernet speeds produced due to both Windows OS and NAS caching and buffering. But when I compared it to an iozone run performed under the same test conditions on a 160GB LinkStation, I was surprised by the result shown in Figure 14.

Figure 14: LinkStation Write performance
(click image to enlarge)
Yes, those are the same vertical scales and, yes I re-ran the tests to make sure they were repeatable. The LinkStation uses a 200MHz PowerPC processor (vs. the TeraStation’s 266MHz PowerPC), and has 64MB of RAM (vs. 128MB for the TeraStation). But the two products use different hard drives and IDE controllers, so the results aren’t unexpected – at least that’s what a Buffalo applications engineer felt when I shared these results pre-review.
Performance – Read & Gigabit
Figures 15 and 16 show a much different story for read performance between the Link and Tera Stations.
")
Figure 15: TeraStation Read performance – 100Mbps Span mode (default)
(click image to enlarge)
Note that the vertical scale in both figures is reduced by more than an order of magnitude from the write graphs. Caching and buffering isn’t really much help for read, so the results more closely reflect the products’ innate performances.

Figure 16: LinkStation Read performance
(click image to enlarge)
The other interesting result from my testing was that the plots produced by the TeraStation’s other modes and with gigabit Ethernet connections were pretty uniform, except for one effect. Figures 17 and 18 show that the peak buffered write performance with a gigabit connection is actually lower than with a 100Mbps connection.

Figure 17: TeraStation Write performance – 100Mbps RAID 1 mode
(click image to enlarge)
Peak write performance came in at 191994 kBytes/sec with a 100Mbps network connection and 162358 kBytes/sec @ 1000Mbps. Both peaks came with a 256 kByte file and record size.

Figure 18: TeraStation Write performance – 1000Mbps RAID 1 mode
(click image to enlarge)
The same effect was seen in other TS modes, with the peak speeds varying slightly.
Performance – Mode comparison
To get a better feel for the non-buffered performance of the TS in its different modes, it’s more helpful to look at the tests for a 128MByte file size. Figures 19 and 20 show write performance for all four TS modes with 100Mbps and 1000Mbps LAN connections respectively. I’ve also included data for the same tests taken with a LinkStation for comparison.

Figure 19: TeraStation 128M file Write performance – 100Mbps LAN
(click image to enlarge)
While the LinkStation beats the TeraStation at 100Mbps, it generally drops to last place when the TeraStation is switched to a gigabit LAN connection. Keep in mind that the LinkStation supports only 10/100Mbps Ethernet, so the same test results are used in both plots.
The other interesting performance “feature” is that in RAID 5 mode, write performance drops with larger record sizes.

Figure 20: TeraStation 128M file Write performance – 1000Mbps LAN
(click image to enlarge)
Figures 21 and 22 show read performance for 100 and 1000Mbps LAN connections respectively. Here the TeraStation beats the Linkstation in all modes, although by a narrowing margin at higher record sizes.

Figure 21: TeraStation 128M file Read performance – 100Mbps LAN
(click image to enlarge)
Figure 22 shows that once a gigabit connection is used, the TeraStation turns in its best performance of all and leaves the LinkStation in the dust.

Figure 22: TeraStation 128M file Read performance – 1000Mbps LAN
(click image to enlarge)
The important thing to note is that while the TeraStation’s gigabit LAN mode does significantly help boost performance (about 40% for write and around 60% for read), maximum read rates rise only about to the maximum supported by a 100Mbps connection! This really isn’t that surprising, however, given the relatively slow (at least by today’s standards) 266MHz clock rate of the TeraStation’s PowerPC CPU. But hey, 40 to 60% speed improvement is still helpful!
It’s also good to see that with the exception of RAID 5 write performance at higher record sizes, you won’t pay a significant performance penalty for using the TeraStation’s RAID capabilities to improve the robustness of your data storage.
Closing Thoughts
It looks like the other “name brand” NAS folks are content to see how Buffalo does with the TeraStation, since they’re generally sticking with single-drive products. The exception is NETGEAR’s soon-to-be-released SC101, which will be a BYOD product supporting two drives. But it’s not a true NAS, since it will require a client app that runs on WinXP or 2000 only.
The only direct competition I see right now is the ReadyNAS 600 from Infrant Technologies. Although it’s pricier at $1,395 for a four-drive 1T configuration, it uses SATA instead of IDE drives and other hardware features that could give it a performance edge over the TeraStation. But while it has two USB 2.0 ports, they support only USB printers for the built-in print server and can’t support USB drives for storage expansion or backup.
So if your appetite for storage is big or if you’re looking for the added data security that RAID 1 or 5 can provide, the TeraStation could be just what you need. You’ll need a fat wallet to get into the TeraStation club, however, even at the bargain price of $1/Gigabyte.