Introduction
| At a Glance | |
|---|---|
| Product | Buffalo Technology LinkTheater mini Network Media Player (PC-P1LAN) |
| Summary | Sub-$100 media adapter for photo, music and standard definition TV, but with limited format support |
| Pros | • Inexpensive • Small • DLNA certified • Works with NAS media servers |
| Cons | • Composite AV only • Problems with MP3s • Limited format support |
I’ve long been a fan of little home network devices that do only a few things, but do them well. To that end, I make use of a number of Network Attached Storage (NAS) devices on my LAN for storing multimedia such as music, images and movies. Last year, I reviewed the LinkTheater media player from Buffalo Technology that could use my NAS devices as a source of content. I liked the device, but it was a bit expensive, and I ended up never using its built-in DVD player.
Now Buffalo has come out with a “mini” version of the LinkTheater that drops the DVD player – and the price – and has a very small form factor. The mini doesn’t have support for wireless LANs or high definition video like its big brother does, but one thing it does add is Digital Living Network Alliance (DLNA) certification. DLNA is a standard designed to allow different digital multimedia devices from various manufacturers to seamlessly interact. I’m all for open standards that will allow all of my little LAN devices to play nice with each other, so I was happy to see this standard start to be picked up by manufacturers.
Features
Physically, the mini is similar in size and shape to a VHS videocassette, so it was pretty easy to find a place for it in my entertainment center. The front panel sports a Buffalo label, a power button and a couple of status LEDs. However, the back panel, shown in Figure 1, is pretty sparse as these types of devices go.
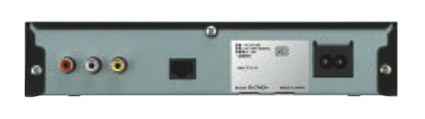
Figure 1: LinkTheater mini Back Panel
The panel has a power connector, a 10/100 Ethernet connection and composite A/V connections. It would have been nice to see at least an S-Video output, but Buffalo is evidently trying to keep this unit’s price as low as possible. The mini also comes with a fairly large remote control, shown in Figure 2.
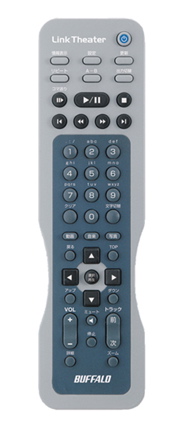
Figure 2: LinkTheater mini Remote
Setting Up
Since I’m lucky enough to have a network drop in my entertainment center, hooking the unit up was just as easy as plugging in network and A/V cables. By default, the unit acquires an IP address via DHCP, so if you have a DHCP server on your network, no configuration is required. If you don’t have a network drop handy, you’ll have to rig up a wireless bridge or something similar.
Buffalo supplies a media server to run on your PC. I installed it, but my main interest in these types of devices is use in conjunction with a media server running on an NAS device. Using a low-powered, low-noise storage device means that I don’t need to have a computer running just to listen to music or watch a slide show.
To test it in this mode, Buffalo supplied me with a “Home Server” version of their popular Linkstation NAS. I won’t review the Linkstation Home Server in detail, because except for the media serving capabilities, it’s the same device reviewed in an earlier article. But to get started, and to get some content to the mini, I plugged the Linkstation into my LAN, powered it on, and explored it a bit.
Figure 3 shows the main menu from the Linkstation that deals with media serving. The basic idea is that you select a folder on the Linkstation that will be used for serving media content, then mount that directory from a PC on your LAN, and populate it with media files. Once the server catalogs the media files, they will be available to be served up to a compatible device such as the LinkTheater mini.
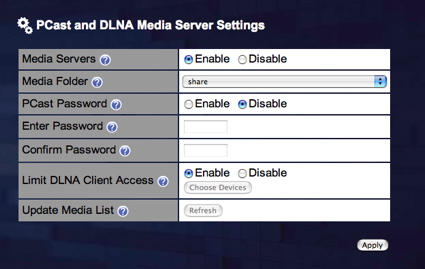
Figure 3: LinkTheater DLNA Setup
To test out this process, I mounted the shared directory from my Apple iBook and populated it with several movie files, several MP3 files from my iTunes directory, and a number of photos from my iPhoto directory. Once I had done this, I hit the “Refresh” button shown in Figure 3, just to make sure that the media server had seen my new files.
Continued
Next, I turned my attention to the mini. When I powered the mini on, a message appeared on my TV: “Now downloading the firmware…” (see Figure 4). Along with this message I noticed a lot of activity on the network LED.

Figure 4: Boot Message
It appeared as if the mini was booting by acquiring a firmware image from the network. To test this theory out, I unplugged the network cable and tried again. Sure enough, it failed. So this tells me that to even turn the mini on, you need to have either a PC running with Buffalo’s server, or a Buffalo NAS device on the net so firmware can be uploaded. Once the mini successfully booted, an initial menu screen was displayed, as shown in Figure 5.
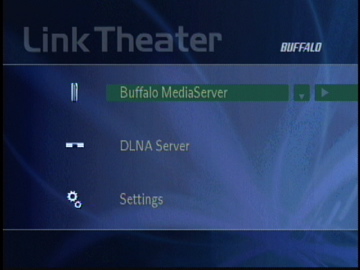
Figure 5: Main Menu
There were only a few settings available under Settings: network settings could be changed, the screensaver timeout could be modified, and the amount of time pictures were displayed during a slideshow could be set as well. The “DLNA server” is designed to allow access to any DNLA servers located on the local LAN. The “Buffalo MediaServer” option allows access to servers on the LAN that use the proprietary “PCast” protocol by Buffalo.
Buffalo’s own server supports both the DLNA standard and the proprietary PCast protocol. While it may seem strange to simultaneously support both, it appears as if Buffalo is straddling the fence a bit when it comes to standards. DLNA is built on top of the UPnP standard; my experience with various devices that support UPnP is that you get a fairly basic level of functionality with bland user interfaces. The PCast protocol used by Buffalo allows more features and a richer user interface.
Pictures
For example, Figure 6 shows a photo directory listing using the DLNA server.

Figure 6: DLNA Photo Selection Menu
Figure 7 shows the same directory when connected to the “Buffalo MediaServer” (PCast) server.
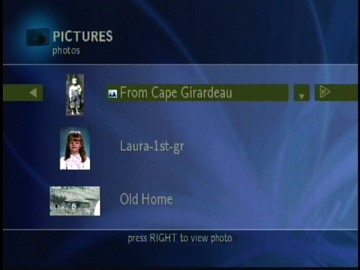
Figure 7: PCast Photo Selection Menu
In both cases, still image support was pretty much what you’d expect: directories of images are displayed, and you can navigate around and view single images. Using the “Play” button on the remote, you can also view the entire directory in a slide-show fashion. All photos are scaled to fit the TV display, and according to the documentation, JPEG, BMP, GIF and PNG formats are supported, but only JPEG images are supported by the mini itself. The other formats require conversion via the Buffalo-supplied PC Server software (which occurs on the fly during playback).
As I roamed around the various menus and directories presented to me, I was impressed with the interaction speed. Menus and options were presented quickly, and reacted to my remote commands immediately. This was in contrast to many of the other media player devices I’ve worked with, which all seemed to react very slowly to remote commands.
Music
Once I had copied music from my iTunes folder to the Linkstation, I made sure not to copy anything that had been purchased from the iTunes music store, because these encrypted files are not supported. Instead I copied a number of MP3s that I had ripped myself from CDs. Figure 8 shows the top-level Music menu, with various categories that are automatically populated from the MP3 tags.
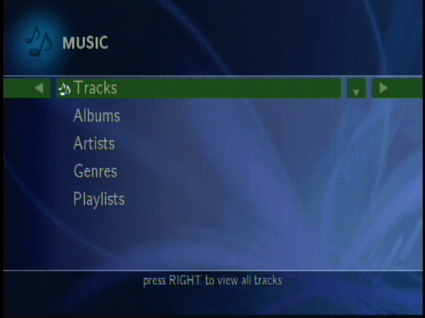
Figure 8: Music Categories
When I went down into a directory and attempted to play a known-good MP3, the mini started to show the song information, but then the screen flashed and I was dumped back to the very top level – it appeared to be a mini crash and reset. I tried this a few more times with other MP3s and got the same result. Sigh. After some checking to make sure that the files hadn’t been corrupted somewhere along the way, I remembered previous problems I’d had with MP3s and UPnP devices, especially related to album art.
Almost all of my MP3s had album art added to them using the iTunes player. My standard LinkTheater didn’t have a problem with these files, nor did iTunes or MS Media Player, but maybe the LinkTheater mini did. To test this idea, I found an obscure “Music of North Africa” CD for which I had never gotten around to adding album art. I moved a ripped song over to the Linkstation and the mini played it fine. Then, using iTunes, I added an image of the CD cover to the song and moved it over to the Linkstation. Crash – the mini couldn’t handle it. This was a bit of bad news for me, since I have hundreds of MP3s, all with album art, and none of them would play on the mini.
On a brighter note, I did find that I could play a song and display a photo slide show simultaneously, which was a nice feature. By the way, the only other audio format supported by the mini besides MP3 is LPCM, more commonly known as WAV format.
Video
Next I moved on to the video capabilities of the mini. I kind of dreaded this part of the review, because I’ve never had much luck with displaying movies through these types of devices. There are just too many variations out there, with files in formats like MPEG1, MPEG2, MPEG4, WMA, AVI, DivX, XviD, QuickTime, and so on; it can make your head spin. Last year I reviewed three different network media players, and they all had limitations – unfortunately, I found that the mini was no different.
According to the documentation, the mini’s only natively supported format is standard-definition MPEG2, i.e. 720×480 at a maximum 8 Mbps bit rate. Some WMV and AVI file formats can also be played, but once again, only if you are running the Buffalo server on a PC to perform the required on-the-fly transcoding. This requires a bit of horsepower, so Buffalo recommends at least a 1.8 GHz processor in the PC.
I had several standard-definition MPEG2 files available on my Linkstation and the mini played them fine. When I attempted to play a high-definition MPEG2 file, however, the mini appeared to accept it, but I got nothing more than a black screen. I also had several MPEG1 files that I tried out and they were also playable, even though Buffalo’s documentation doesn’t mention this. But true to the documentation, when I tried files in the AVI, QuickTime, MPEG4 or DivX formats from the Linkstation server, none of the movies would play.
DLNA Testing
One of the stated benefits of the DLNA standard is cross-platform support; that is, devices certified as being DLNA-compliant should have no trouble interacting with each other. To test out the mini in this regard, I tried it with a DLNA certified Twonkyvision media server that I have running on my network. When I fired up Twonkyvision on my Kuro Box, a new server was displayed in the main DLNA menu of the mini (see Figure 9).
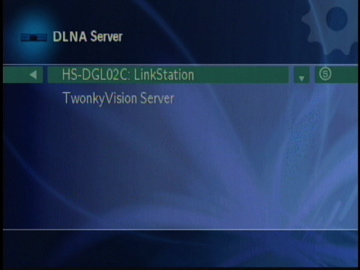
Figure 9: DLNA Server Selection
The mini’s interaction the Twonkyvision server worked well, with little visual differences compared to the Buffalo DLNA server. However, one benefit of the Twonkyvision server that I did notice was Internet Radio. Twonkyvision’s server listed a selection of Internet Radio stations that were usable from the mini, but Buffalo’s server had no such capability (see Figure 10).
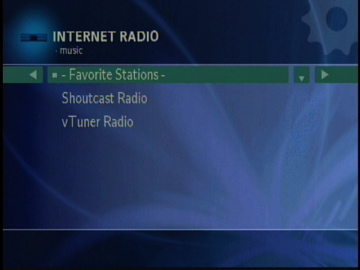
Figure 10: Radio Stations available from a Twonkyvision server
Under The Covers
I was interested in the fact that the mini appeared to boot over the network, so I set out to explore it a little further. Browsing through the installed software on the PC, it was easy to find a directory with two telling files: initrd.boot and uImage. The initrd file is a typical one used by Linux systems during boot, and the uImage appeared to be a Linux kernel image. So this little box was clearly running Linux.
Other than the brute force strings command, I didn’t have any tools on hand to examine the contents of these files. But running the strings command on the uImage file at least told me that the box was running a fairly recent kernel: “Linux-2.6.5-it0.” I suspect that with a bit of time, one could recreate and customize both the kernel and initrd for special uses. And since the box boots a new image each time, the dangers of damage should be minimal.
While I was poking around, I set my sights on the Linkstation as well. The Linkstation already has a dedicated group of developers working to extend its capabilities, but since this was a loaner unit, I wasn’t willing to re-flash the unit with custom firmware. Still, I thought that I could at least see what was happening in the running box. I had noticed that the unit supported anonymous ftp, and that menus were in place to allow the user to specify which directory would be exported.
Looking at the source of the web page revealed that sanity checks were executed in JavaScript, which is always a bad idea. Validation should always be done on the server side, not the client side, because there’s nothing that says I have to use the supplied forms to set up the box. I can always directly contact the web server, thus bypassing the input validation from the original forms – so, that’s what I did. After examining the web page source, I figured out the correct variables to use and the correct server-side cgi script to call. The result was a URL in this format (all on one line):
| http://192.168.1.104/cgi-bin/setup-ftp-in.cgi?txtFTPAnonyShare=../&rdoFTPServer=rdoFTPServerOn |
Continued
This told the Linkstation that I wanted to share the root directory of the box with anonymous ftp. Once I had done this, I could FTP into the box and roam around all of the operating system directory structure. This didn’t tell me anything that I didn’t already know about the box, but it was interesting to me nonetheless. The box was running on a PowerPC processor, and it was using a typical set of embedded Linux executables.
Figure 11 shows the main board of the Linkstation mini. It’s hard to tell from the photo, but the main processor is a Texas Instruments DM320, which seems a bit hard to find information on, and Ethernet is provided by a SMSC 91c113. According to what I could find, among its other capabilities, the DM320 has an ARM CPU core running at 200 MHz with an embedded MPEG2 decoder.

Figure 11: LinkTheater mini Main Board with Power Supply
(Click image to enlarge)
Conclusion
This was an interesting, but essentially already outdated, little box. The price is certainly right, at under $100, and the fact that it is certified to work with other vendors is a plus. But the pluses pretty much end there.
The first negative is that it failed to play the majority of my MP3s due to their album art, which is a definite downside that Buffalo can hopefully correct. But even if this is corrected, the limited number of supported video formats means the mini is less useful than it could be, and the absence of any high-quality video output capabilities limits it as well.
The next disappointment is that the mini isn’t really a $100 media adapter because it comes with a hidden cost. Unless you can live with playing content from the very limited list of supported formats, you’ll need a networked PC running Windows XP Home, Pro or 2000 Pro SP4, to run the mini’s transcoding software. This PC-based server is key to the mini’s low cost since it lets a PC do the heavy processing that would otherwise need to be performed by a beefier, more expensive internal processor.
The subtlest gotcha, however is that the mini isn’t really as vendor-neutral as its DLNA certification might imply. The mini needs either the PC-based server software or a Buffalo LinkStation Home Theater NAS to load its firmware image from when it is powered up. This is unusual for a consumer multimedia product and it seems like an unnecessary complication. Buffalo confirmed that this requirement is indeed the case, but offered no explanation as to why the mini uses this unusual boot process.
So if all you want is a way to play only a few digital formats, DLNA compliance is on your shopping check list and you’re happy with a standard definition composite connection to your AV setup, then maybe this little box will suit your needs. But while the mini’s price is attractive, it falls too far short of where the digital multimedia market is quickly heading.