Introduction
Updated 21 March 2007: Minor clarifications
| At a Glance | |
|---|---|
| Product | Smartvue S4 Video Surveillance System |
| Summary | High price, high quality video surveillance system using draft 11n wireless technology. |
| Pros | • Easy Setup • High Quality Video • Superior wireless range with good frame rate • Attractive Case |
| Cons | • Very expensive • No audio • Noisy (fans) • More bugs than there should be for the price |
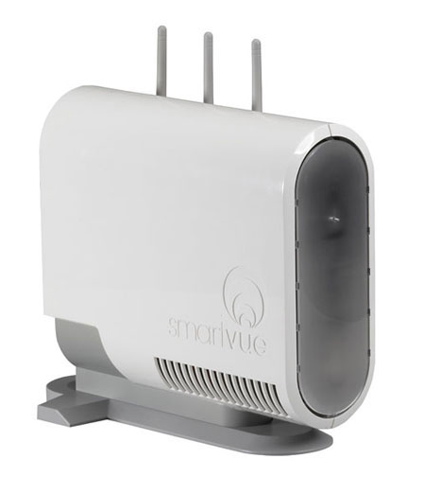
Last summer we had a serious problem with an arsonist in our neighborhood. Within a couple of months, three houses, all within view of our bedroom window were torched. During this period, I started evaluating networked security cameras with the thought that maybe a surveillance system would act as some level of deterrent.
The first system I checked out was a low-end system from Hawking Technologies. This $120, single-camera system suffered from numerous problems including buggy software and low quality video. For my next review, I stepped up a notch and checked out a system from Lukwerks. This surveillance system was much more capable, being able to control up to six independent cameras with a well-done user interface. But these capabilities came at a much higher price than the Hawking unit. Depending on the options selected, you could easily spend $1500 or more. And on top of the base-price, the system required a dedicated high-end Windows computer for recording and playback.
About the time I was doing the second review, the arsonist was caught, so my need was lessened, but I’m still interested in seeing what’s available on the market. In this review, I’ll take one more step up, checking out an even higher-end, stand-alone, wireless surveillance system from Smartvue.
Feature Tour
The Smartvue S4 system comes with its own base station, can handle up to 10 independent cameras and operates on a private draft 802.11-n wireless network for what Smartvue calls "DVD-Resolution" video, i.e. 720×480. Since it operates on its own private network, it doesn’t place any load on existing LANs.
Figure 1 shows the back of the attractively styled base station. Along with network and power connectors, you’ll notice three prominent fan vents.
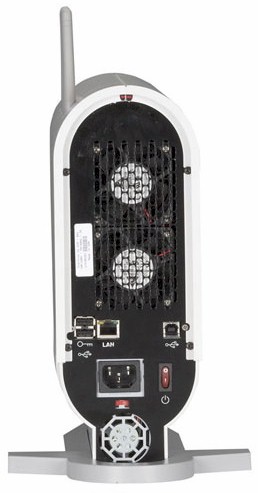
Figure 1 : Base station back panel
Even though it draws only about 50 W, this is not a quiet unit. When it’s powered on, it’s noisy. You can also see USB ports on the back. These are designed for an optional security key for restricting usage.
The front of the unit has various status LEDs for both the unit and for each connected camera. The unit was fairly large as these things go, being about the size of a compact PC.
For this review, I was supplied with two indoor cameras (Figure 2).
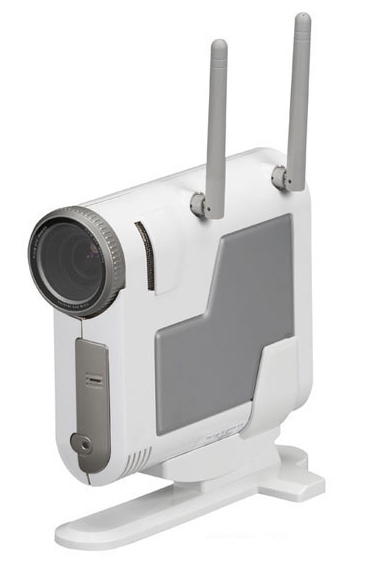
Figure 2 : Camera
Figure 3 shows the back where you can see a network port for wired use, an analog video out port for direct viewing, and another fan vent.
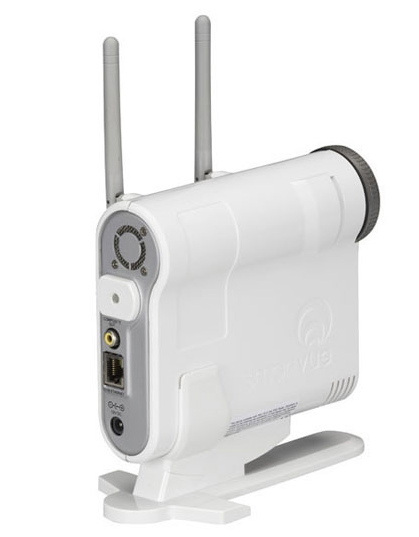
Figure 3 : Camera back Panel
This unit, much like the base station, was a bit on the noisy side as well sounding like a distant hair dryer (power draw was around 10 W). The cameras I received had base stands, but Smartvue also offers an interesting connector that allows the unit to be attached to, and powered from, a standard track-lighting bracket. But with the noise and a status LED on the front, don’t expect these to be particularly stealthy cameras.
One of the touted benefits to the Smartvue system is easy configuration and setup. Setting the system up was documented to be nothing much more than plugging in a network cable to the base station, powering it up and powering up any remote cameras.
As advertised, setup of the system was really that easy. I plugged a network cable into the base station, powered everything up and turned to the Windows-only software install disk. Figure 4 shows the installation software running. For the most part, the main job of the “Assistant” is to install software to find the IP address of the base station on the LAN.
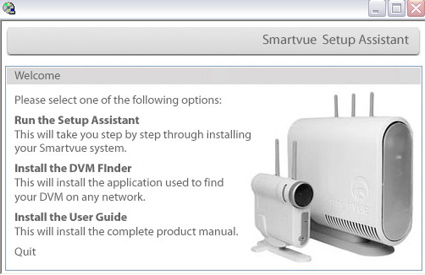
Figure 4 : Setup Assistant
Once it is located, the camera is configured via a web browser. Administration of the system can be done either via a standard HTTP connection, or via secure HTTPS connection. Once I logged in with my browser, I immediately jumped to the “Live Video” page to check out my cameras. Viewing the cameras required the installation of an Active-X plug-in to Internet Explorer, but once this was done, video from my two cameras was available inside the browser and I was up and running. So basically, the system was self-
configuring. The base station found the two cameras on its own and configured them for viewing.
In Use
The image quality looked good and I appeared to be getting a decent frame rate although there was nothing to tell me what my rate was. But one thing I noticed right off the bat was some "fisheye" distortion in the video. Figure 5 shows a capture from a camera pointing out my front window. This was a bit annoying, but once I zoomed in a bit using the controls on the bottom of the window, the distortion was no longer noticeable.
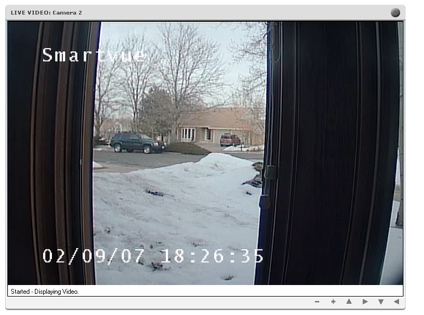
Figure 5 : Video Distortion
In the live video mode, the system can be configured to view a single camera, view all cameras simultaneously at a low resolution, or it can rotate through all of your cameras. Figure 6 shows the display of both of my cameras, one looking out the front window, and one out the back.
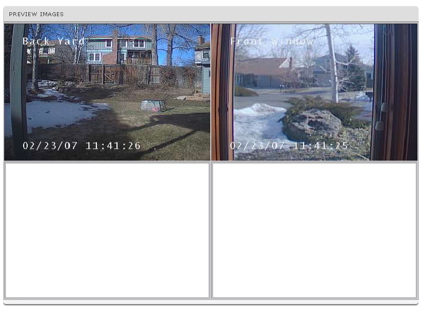
Figure 6 : Dual Camera View
The title on the videos is a configurable item, and the time-stamp can be displayed or not. I found that at least once, the timestamp shown in the video was a couple of hours off from what the base station was configured to.
One thing that would have been nice was the ability to change the color of the overlays. Figure 7 shows an image out my front window after a snow-storm. There’s a time-overlay present, but you can’t see it because of the snow.
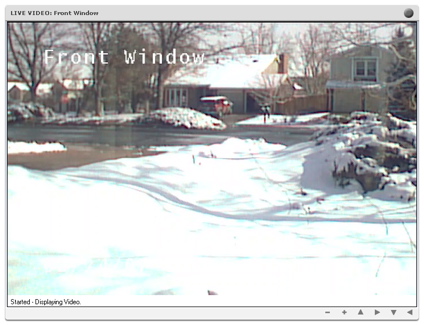
Figure 7 : Obscured timestamp
In Use – more
Another little annoyance I found on this screen was the constant re-load occurring on the background as some AJAX-type code was continually polling the base station for camera status. Every second or so, the status bar of the browser would flash with a “loading” message and the browser cursor would change to an hourglass and then back to normal. It was a bit distracting, but other than these little items, the basic functionality worked well. I could cycle back and forth to view my cameras and the controls on the bottom of the player allowed me to zoom in and out a couple of levels which was nice.
Smartvue advertises the ability of the system to work well in varied lighting conditions. Figure 8 shows an image taken in the middle of the night. As you can see, the image is a bit dark, but considering that there was very little light available the camera did a pretty good job.
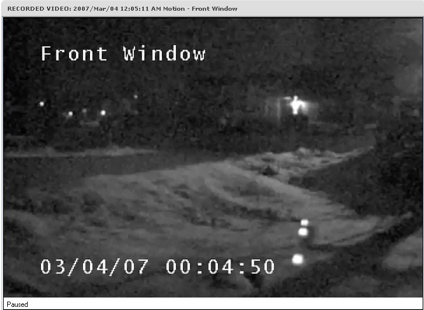
Figure 8 : Night Video
While viewing the camera, if I saw something interesting I could also hit a “record” button on the window which recorded the video to the 250GB hard drive inside the base station. Once a video is recorded, it can be selected for playback. Figure 9 shows a portion of the playback selection screen.
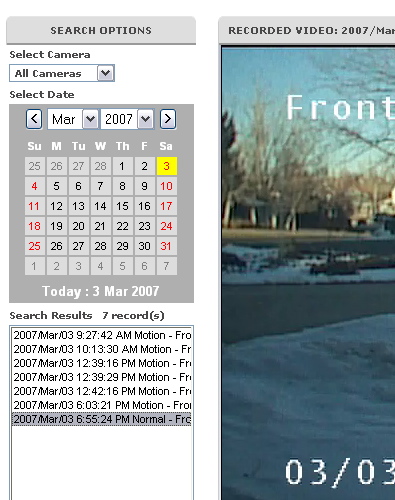
Figure 9 : Playback Selection
Videos can be selected by date and camera. I found this a little bit cumbersome to use, especially when there were a lot of videos in the list. The video files in the list can be selected for deletion in this list, but it was a bit awkward when dealing with a lot of files. You can either delete all videos in the list, or you can delete them one at a time, acknowledging the action each time. There was no capability to just do a multiple-select for deletion.
You’ll also notice in the list above that the info on the recording is clipped off with no way to make the window wider. When a video is selected, you can choose to save either a still-shot or the video itself to your local system. With still-shots, I had no problem, but when I went to save a copy of the video, I would often get the error shown in Figure 10. This behavior seemed to come and go. Sometimes it would work, and sometimes, the same video that gave me an error before could be successfully downloaded.
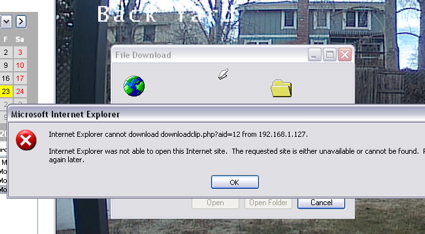
Figure 10 : Download Error
And once the video was on my local system, I also had a bit of an issue playing it back. Neiter the Quicktime, VLC, or Microsoft Media players would handle the
H.264 encoded video.
Only when Smartvue directed me to a 30-day trial version of a player from Elecard could I play the video back.
Motion Detection
An important feature for these types of system is motion detection, because you don’t want to always watch the camera to see what is going on. You’d like to just point it at an area of interest and have the system alert you when something changes. Figure 11 shows the setup for motion detection. The basic
idea is that you draw a rectangle on the screen, and then anything that moves in that area triggers a motion alert.
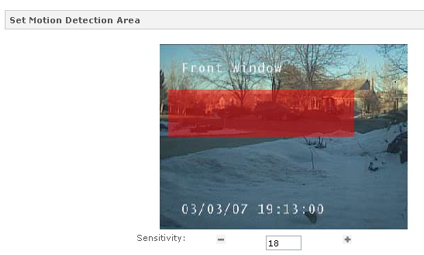
Figure 11 : Motion Detection Setup
Note the sensitivity setting in the display above. This lets you specify how much movement is considered relevant. This can be a bit tricky to set up. When I first set it up, I was getting a flood of events as the wind blew branches. But when I turned it down, it wouldn’t detect people walking by, but would get triggered when a big truck drove by (Figure 12).
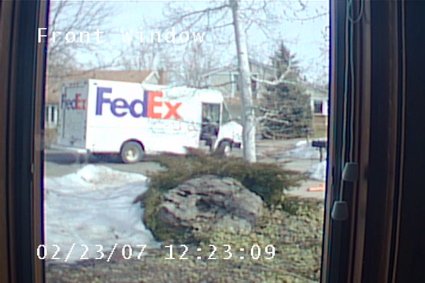
Figure 12 : Motion Alert
The action to take when a motion-event occurs is also configurable. Options include recording the event, and sending out email either to an email address or to a cell phone. Figure 13 shows the form used for setting up the alert.
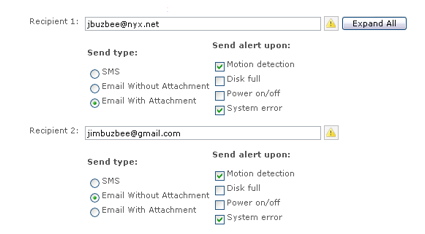
Figure 13 : Alert Setup
And Figure 14 shows the outbound SMTP server setup.

Figure 14 : Mail Setup
My ISP, Comcast, does not support the use of usernames and passwords for outbound SMTP connections, and this configuration was not an option in the setup screen. I also have a Google email account that does support SMTP usernames and passwords, but this account requires encrypted connections, which apparently Smartvue does not support.
The form accepted my info, but during the time I was testing the system, I never received a movement alert email. To see if any errors were being registered on attempts to send email, I checked out the log feature of the product and turned up another problem. When viewing the Smartvue log under Internet Explorer, you can only see the oldest entries. The newer entries just don’t appear. When viewing the log under Safari or Firefox, all the log entries were visible, but there was nothing relating to email failure. I checked back with Smartvue regarding this email issue and they acknowledged that there have been some issues with some SMTP servers. Hopefully they will get this corrected in a future release.
Range Test and Other Features
Along with higher throughput, one of the benefits of the draft 802.11n wireless standard used in the Smartvue system is supposed to be increased range. During my review, I had the Smartvue base station located in my basement, so I wanted to see if it could communicate with cameras placed at the far reaches of my house and yard.
Typically, I’ve issues with long-range access around my house since there is a lot of furnace ductwork in the basement, but the Smartvue system didn’t seem to have a problem, being able to view both a camera up on the second floor, and a camera out in the corner of my yard. The frame rate may have been a bit lower than I’d seen before, but it wasn’t bad.
I also wanted to check to see if the wireless network used in the Smartvue system would cause interference issues with my usual 802.11g home network. To check this out, I set up my 802.11g access point to use channel 6, a frequency in the middle of the wireless range, and I moved some large files across the network, measuring their speed both when the Smartvue system was running, and when it was not. If there was an interference issue, my simple little test didn’t show any drop in speed. In both cases, my throughput was similar.
NOTE:Smartvue said that the radio used in the S4 can operate in both the 2.4 and 5 GHz bands and use either 20 MHz (normal) or 40 MHz (channel bonded) modes. But they currently set the radio to operate in the 5 GHz band with no channel bonding.
When using a system like this, it is often desirable to get access to the cameras from remote locations. To support this capability, you can either punch holes in your firewall to access the box directly, or with Smartvue, you can use an intermediate service they supply. To check this out, I logged into their service using a supplied username and password, and selected my system.
The first time I tried it, I got nothing, but when I figured out that my pop-up blocker was interfering, I got a window with my video (Figure 16). This worked pretty well, but given the lower available bandwidth, the image was smaller and the frame rate was quite a bit lower than on my local LAN. Smartvue also provides an even smaller view for use on cellphones.
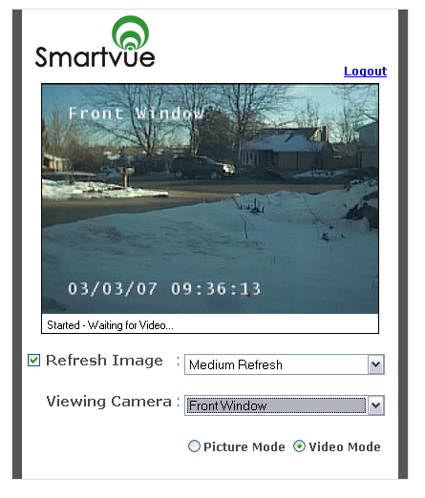
Figure 16 : Remote Viewing
Most of my testing was with Windows, but since Smartvue had recently announced support for Macintosh systems, I wanted to try it out. I didn’t see it documented anywhere, but one key appears to be configuring the camera to output MJPEG instead of H.264.
Once I had done this set, I could occasionally view video from the cameras from my Safari browser, but behavior was inconsistent. And even Internet Explorer didn’t seem to like the MJPEG setting, occasionally giving me unhelpful error pop-ups as see in Figure 15. So at this point, I’d stay away from the MJPEG setting.
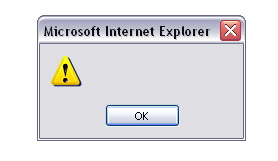
Figure 15 : “Helpful” Error
Under the Covers
Usually at this point, I crack open the case of the item under review to get an image of the internals. But this time I had a hard time getting into the both the base station and the camera. Not wanting to risk marring the finish of the units or breaking their plastic cases, I had to move on. When I can’t get in, another option is to look up the FCC images of the units, but I was thwarted in this as well. I could find no FCC registration numbers on the units.
Checking with Smartvue, I was told that the FCC ID was SA3AGN1223AR0100, which is for an Airgo a/b/g True MIMO mini-PCI radio module. As mentioned earlier, Smartvue uses the module in the 5 GHz band and without channel bonding enabled. This ensures best compatibility with existing wireless LANs.
Smartvue advertises the fact that the unit runs Linux internally, so that was no secret. Connecting to the web server to read the headers told me that it was running Apache 2.2.2 with mod_ssl and PHP. Port-scanning both the base station and the cameras told me they were both Linux-based and turned up a number of open ports including ssh. I was able to connect with ssh, but the username and password used for configuring the unit were not accepted by the ssh daemon on the box.
At least some of the other open ports were used for streaming video, but none of my normal video viewers could successfully read from the port. When I sniffed the MAC address of the base station it pointed me to Advantech so that is a bit of a clue as to the heritage of the unit.
Finally, while I was poking around I found that by messing with the URL used to access the unit, I could bypass the login/password screen completely and access both live and archived images. Oops. Smartvue tells me that they’ve fixed the bug and will have a patch released shortly, but if you currently have a Smartvue system on your LAN, be aware.
Conclusion
Of the three video surveillance systems I’ve tested, the Smartvue S4 is by far the most expensive. The base station retails for $2800 and each camera will set you back around $1300. So a decked-out system with a base station and six cameras is in the $10,000 range which is around three times more than an equivalent PC and set of cameras from Lukwerks.
Smartvue says the system is sold as a commercial application and not really configured or priced as a home surveillance system. They feel the higher price is comparable to other commercial systems when the total cost of ownership is considered, which includes the cost of installation and maintenance.
| Attribute | Smartvue S4 | WiLife Lukwerks |
|---|---|---|
| Price (single camera system) |
$4100 | $330 plus cost of PC |
| Setup | Easier (no PC involved) |
Easy |
| Video Quality | – 30 FPS max. – Good low light performance |
– 15 FPS max. – Mediocre low light performance |
| Administration | Browser based | Windows application |
| Networking | Ethernet and draft 11n wireless | Homeplug (powerline) |
Comparison summary table
So is it worth it? As always, it depends on your needs. I won’t compare the Hawking unit, since it was more of a toy. In comparing the Lukwerks system and the Smartvue system, both were easy to set up, but the Smartvue system was probably a bit easier since it had fewer parts and used its own base station, not relying on your configuring a PC to do the real work.
Since the Smartvue system is self-contained, you could deploy it quickly into an existing environment without disturbing the current infrastructure. The Smartvue system was also more attractive than the Lukwerks, so if you’re planning on putting your system out in the open in a business environment, that’s a plus. But the camera fan noise is a negative that the Lukwerks system didn’t have.
Video quality is important, and both systems did well. Smartvue advertises up to 30 frames per second while Lukwerks only advertises 15. The Smartvue camera also took a better picture in low-light conditions than the Lukwerks did, but it had "fisheye" distortion that the Lukwerks camera did not.
Software-wise, Lukwerks delivered a stand-alone application while Smartvue uses a browser-based app. There are plusses and minuses to both approaches. The stand-alone app was more sophisticated, but it means having to install the application anywhere you want to view the cameras. The browser-based approach also brings the possibility of cross-platform support, but at the moment I found it lacking. And as far as bugs, both systems had them, but I think that Smartvue has further to go before they are eliminated.
So in short, if you’re looking for a high quality easy way to set up a video surveillance system, check out the Smartvue S4. But be prepared to pay a premium price and to put up with some annoying bugs that shouldn’t be included for that price.
