| At a Glance | |
|---|---|
| Product | mydlink DNR-202L Camera Video Recorder [Website] |
| Summary | Cloud-based Network Video Recorder offering simultaneous Recording and Playback of up to 4 mydlink cameras. |
| Pros | • Inexpensive compared to NAS solutions • Simple, but effective • Storage space and hardware are managed by you |
| Cons | • Inconsistent local and app / remote user interfaces • Not visually elegant with USB drives, etc • Storage space and hardware are managed by you |
Introduction
One of our biggest complaints with cloud-based network cameras has been that recording in the cloud is either non-existent or prohibitively expensive. For instance, cloud recording of seven days of constant footage with Dropcam costs $9.95 a month or $99 a year, while storing 30 days costs you $29.95 or $299 a year. That cost is for the first camera, additional cameras are 50% off. For another data point, Y-Cam gives you seven days of alert-only recording free and you can upgrade to 30 days of alert recording for $39.99 a year.
D-Link’s line of mydlink cameras had had no cloud-based recording option up until this point. But all this has changed with D-Link’s introduction of the DNR-202L.
The DNR-202L is a hybrid NVR (network video recorder) for the mydlink cloud cameras. The hard drives (up to 8 TB total) are bought and managed by you, but they are accessbile via the cloud. The DNR-202L can handle two USB 2.0 drives and can store and playback footage for up to four mydlink cameras, all in a device about the size of a deck of cards.
Compare this to a NAS solution such as Synology. With Synology, you first buy the NAS with one free Surveillance Station camera license, then you buy the drives. If you’d like to monitor additional cameras, they are around $50 for one camera or about $180 for 4. The advantage of Synology’s solution (and that of some other NAS vendors) is multiple camera vendor support and support for 8 or more cameras depending on model.
So the DNR-202L is an intriguing concept, available in the cloud, relatively inexpensive and rather simple to administer. With that in mind, let’s take a look.
In the box, you get the DNR-202L NVR, a 5V wall-wart power adapter, Ethernet cable and a Quick Start guide. You supply the USB drive and cameras; for $99 you can’t expect the drives to come with.
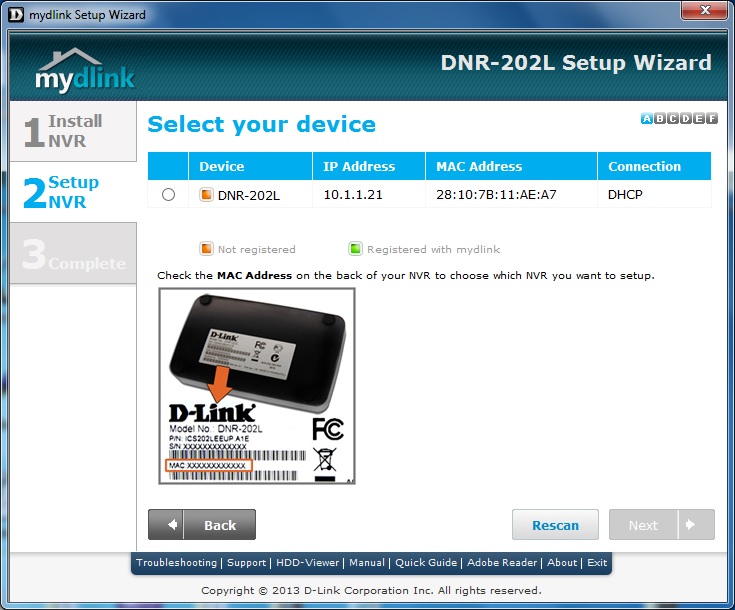
The image below shows the callout information for the DNR-202L. Two USB 2.0 ports, a 10/100 Ethernet port, power, a couple of buttons to dismount the hard drives, a button to scan for cameras and a reset button.
The top of the unit has an LED circle to indicate status and there is a built-in speaker for beep codes. Thankfully, the beeper can be disabled; it is loud and it was unclear how to acknowledge a beep code. I frantically searched the admin GUI pages for how to disable the loud continuous beep before simply shutting the buzzer off and rebooting the DNR-202L.

DNR-202L callouts
Setup of the DNR-202L was rather simple once I downloaded the wizard from D-Link. I was loaned two DCS-5020L cameras for testing. One camera was already set up in mydlink from a previous review, while I set the other one up as part of the install. Interestingly, the camera set up with the DNR-202L did not show individually in mydlink and was only accessible via the DNR-202L. During setup, I did get stuck in a loop regarding failing to set an account password for the new camera. I eventually got past it by cancelling setup, setting the camera password via its local interface and re-running setup.
The install also formats your USB drive(s). Once that it complete, setup is finished and you are ready to go.
Inside
The DNR-202L was pretty easy to disassemble (two screws under foot pads and then tabs that easily release). The hardware inside is very minimal based on the Realtek RTL8197D SoC, which is the same chipset D-Link uses in its DIR-850L cloud router. WikiDevi lists it as based on a Lexra RLX5281 (MIPS-based) core clocked at 500 – 660 MHz.
In the picture below you can see the board, chipset and the big round item is the LED light diffuser. Not a whole lot to it. There is probably some RAM and flash on the other side of the board, but I didn’t look.

Board of the DNR-202L with RTL8197D chipset
Hands On
First, let’s cover some things that may help anyone having problems. When you first install and view just about any IP camera, you’ll probably be installing three or four ActiveX controls, which can send you down a rabbit hole if you have any problems. Many of the camera interfaces you’ll find are also Java-based, which can often throw security warnings.
Starting with Java 7 Update 51, the Java security model has been enhanced to minimize external exploits, which you can read about here. I had to follow the workaround provided in the link above to get any functionality for the NVR and the mydlink cameras. Once the workaround was in place, they worked fine.
You can see the error I first received below; a black video screen was my other symptom. D-Link mentioned a firmware update is scheduled for February to fix the issue. For now, the workaround is adequate.

Java error due to Java 7 Update 51 security changes
In order to complicate matters while troubleshooting, I also was using IE11, which has an advisory posting on mydlink that also contains a workaround. The text of the advisory says a solution will be in place "mid-to-late December", so D-Link may already have the fix for IE11 in place. My problems seemed to be 100% related to the new Java security enhancements.
I found working with mydlink on the DNR-202L a little confusing at times, mostly because there are multiple ways (and places) to do the same thing. The more simple mydlink.com interface for the DNR-202L has all the basic Live Video, Playback and Status features that you might expect. But the meat of the DNR-202L was under “Advanced Settings”, which was simply the DNR-202L’s local interface. The local interface had all of the mydlink.com items plus features such as Motion Detection, audio and video tweaking, drive formatting, camera status and all of the admin functions you would expect such as upgrading firmware, setting time, etc.
The DNR-202L allows for simultaneous recording and playback and that’s where the strength of this little device comes in. My testing indicated I could have four browsers/apps viewing the Live Video, but only one device could view recorded Playback at the same time.
Trying more than one gave a message about another device already accessing Playback, which you can see below. I found one Playback view adequate. While multiple family members may want to view Live Video at the same time from different locations, it’s reasonable that only one could view recorded playback at a time. The single user can view all four channels at once, however.

Only one user/device can view Playback at a time
The DNR-202L offers a few options for Playback. The mydlink NVR app is available in Android and iOS and there is HDD Viewer desktop software that you download from the mydlink.com Support > Download > Storage page, that lets you simply plug the USB drive from the DNR-202L into a Windows PC to analyze video content. HDD Viewer does appear to be Windows only and there isn’t a lot of documentation on Windows versions supported. I’ve included a couple of screenshots for the Android and iOs apps in the gallery.
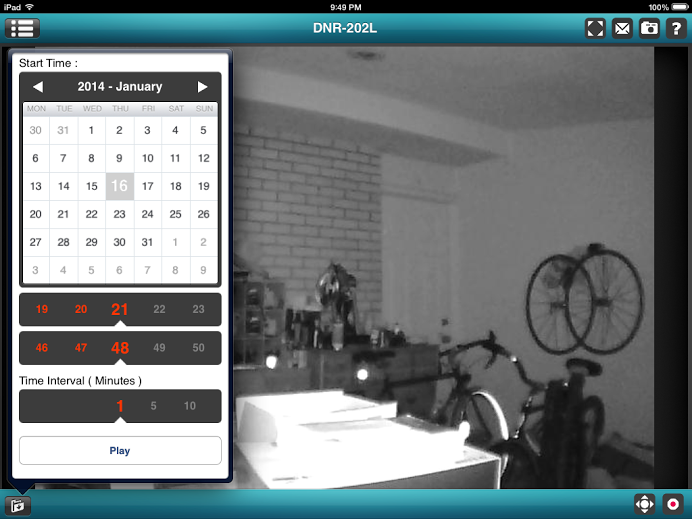
Playback works very well once you figure it out. The interface was very consistent between Android and iOS and transferred over to the browser adequately as well. The playback selection screen lets you preview video at a time frame you select and the browser lets you select an end time.
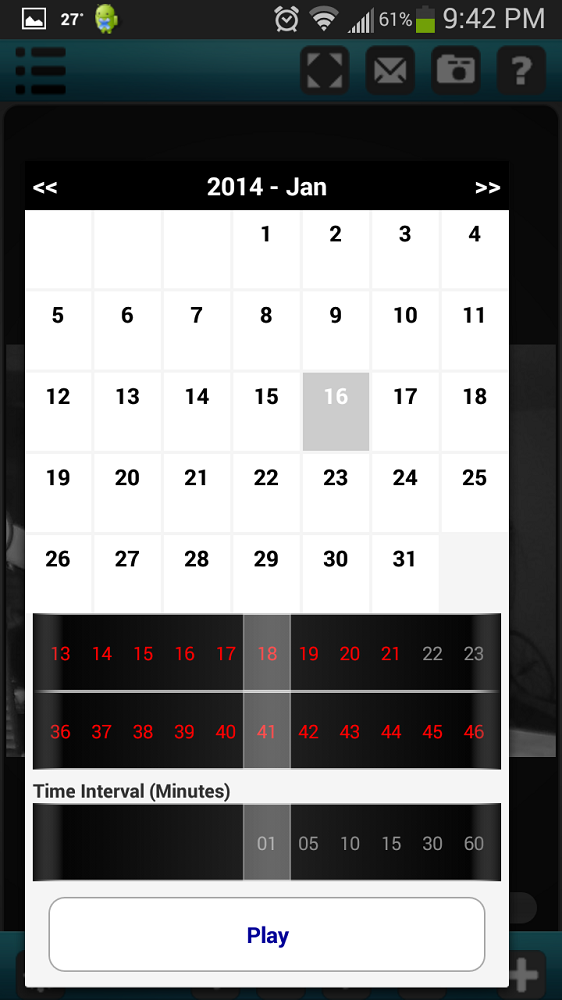
On the Android/iOS apps, you select a video length from 1 to 60 minutes. Event recording, such as motion detection, is shown in a different color for easy differentiation. You can see an image of the browser playback selection below.

Browser playback screen
The Playback Selection screen reminded me of Dropcam’s comparable screen with its preview and easily discernible event recording, which you can see below. Dropcam differentiates events a little more prominently with the bubble, but otherwise the two methods are very similar.

Browser playback screen
Hands On – more
Once your selection is made, you are brought to the Playback screen, which I really enjoyed. Video speeds can be set from 1x to 32x. You can save an image of what you are looking at, or save the entire video as an AVI. An additional option is sending it to the printer. And of course, you get the obvious things such as zooming, stepping forward or back and cueing.
The playback screen worked well once you got past that they worked differently on mydlink.com and the Advanced Settings page. The functionality was the same, but the controls were not.

mydlink Playback page
The Live Video and Playback screens between mydlink.com and the local interface were close to the same, yet different as you can see in the Advanced Settings Playback image below. It took a little adjustment to go from one place to another and get used to the different button configurations.

Local Advanced Settings interface Playback page
The DNR-202L has other functions, such as motion detection, but those controls are simply an intermediary for what is set up on the camera. The DCS-5020L cameras have their own grid-selectable motion detection within their interfaces and I wasn’t initially sure if the DNR-202L took that into account or not, since the manual was rather vague.
My testing appeared to indicate that Motion Detection was enabled and set up on the camera at its local interface first, then enabled on the DNR-202L. It makes sense, but as an integrated mydlink package, it just seemed a little more complex than it needed to be. The positive side is that it’s more configurable that way. The camera’s motion detection can be configured at mydlink.com as well as via the local interface.
Storage
Depending on the camera configuration you use, it would be wise to plan drive configuration accordingly. Constant recording of video will eat up drive space very quickly. D-Link provided an example storage amount, but I found their example to be a little deceiving because of the configuration selected. It’s based on one 1280×720 HD camera at medium quality and 5fps.
The DNR-202L can manage up to four cameras and most people are probably going to want high quality at 30fps. Framerate will dynamically decrease depending on activity in the frame, but medium quality at 5fps would be useless for any sort of forensic analysis. Below is the example storage provided.

DNR-202L example storage which I found to be unrealistic
Realize that is 5fps of medium quality for just one camera and adjust accordingly. I feel realistic estimates should be given, if for no other reason than to help the consumer make appropriate storage choices. D-Link provided me with a bandwidth and storage calculator that showed four 1280×720 cameras recording high quality at 30fps would use 1.7 TB of storage for 7 days of video, and 7.5 TB for 30 days. Storage is the price of admission with surveillance and you’re going to need roughly the same amount no matter what solution you choose.
Two drives of up to 4 TB each are supported on the DNR-202L. A two-drive configuration is recognized as two single volumes. All video goes to the first drive until it is full, then video automatically goes to the second drive. You can not choose which drive cameras record to, or set them individually.
D-Link doesn’t specify the drive formats supported, however the DNR-202L’s format tool formatted the drive in NTFS. I also formatted a drive in exFAT and it connected fine. Interestingly enough, the DNR-202L would not see the same drive if I formatted it to NTFS with a laptop. For fun, I installedthree drives via a USB hub, hoping to “trick” the DNR-202L in to seeing more than two drives. But it was having none of that. I received a “Disk Error” for my efforts.
The DNR-202L does provide status of current drive usage and can be set either to automatically overwrite or not. The Advanced Settings Live Video screen shows a a graphical representation of space available, while mydlink.com shows just the numbers. Both are adequate for knowing how much storage is used. The Advanced Settings Live Video screen is below, you can see the line graph for disk usage on the lower left.

Advanced Settings Live Video screen with disk usage on the lower left
A few final caveats, I tested the DNR-202L with two 640×480 cameras and the interface and playback were responsive. Four 1280×720 HD cameras may (or may not) tax this little device more than what I saw. I also had both cameras wired in via Ethernet vs wireless. Since the cameras stream constant footage to the NVR, 4 HD cameras could potentially make your main wireless very busy. A successful configuration using wireless cameras may be best suited for its own SSID and channel, separate from your main wireless network.
For a broader look at the DNR-202L, as well as some app screenshots, check out the gallery below.
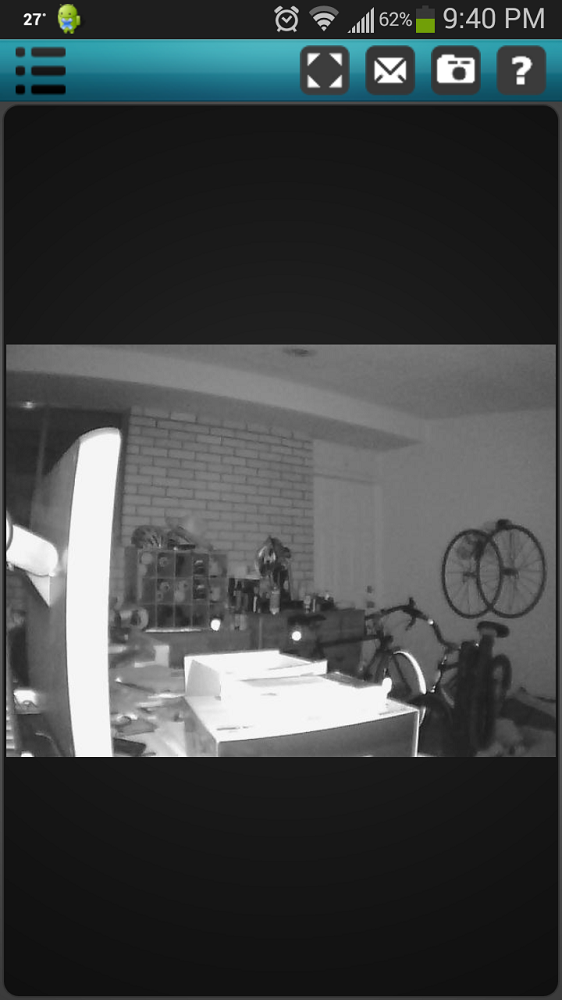
This is Live Video in Advanced Settings, which is basically the local interface for the DNR-202L.
Playback can also happen at the local interface.
This is the entry screen for the Android app
This is the Android screen to select playback date, time and duration of video.

This is the Android playback screen, video can be speed up to 32x
The DNR-202L has two USB 2.0 ports for connecting up to 2 4TB drives
The DNR-202L uses a Realtek RTL1897D chipset
The iOS playback screen is very similiar to that of Android
Jave 7 Update 51 introduces new security policy that break the mydlink functionality
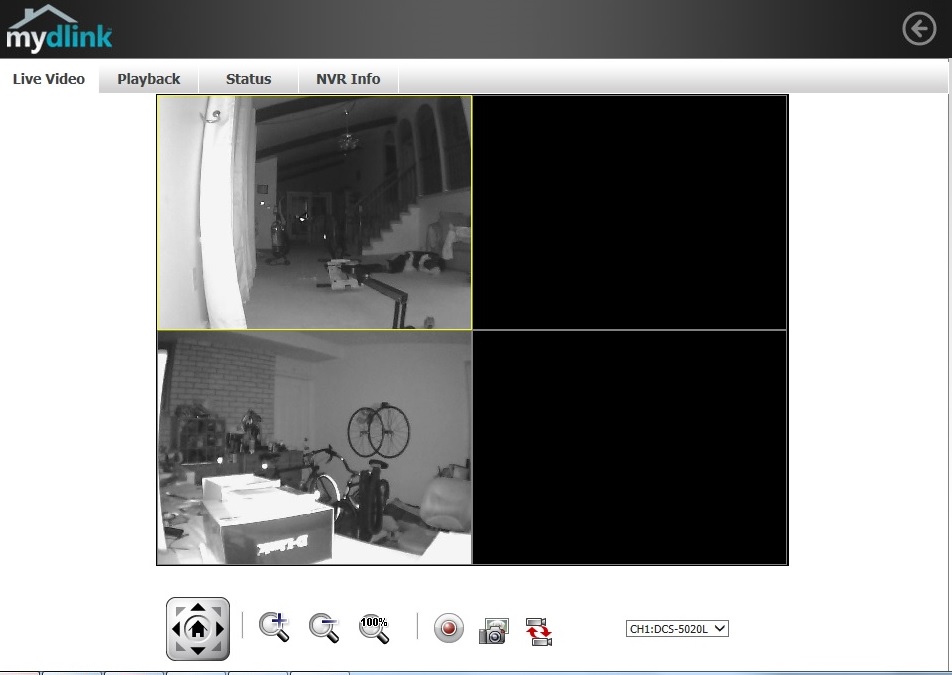
This is Live Video through mydlink.com
You can choose recorded files for any cameras and choose a start and end time.
Once a selection is made you can zoom, fast forward, adjust speeds and save to AVI.
D-Link’s unrealistic storage estimates show an example no one would probably record at.
The first setup screen finds the DNR-202L.

If you have a drive attached already you can format it now.
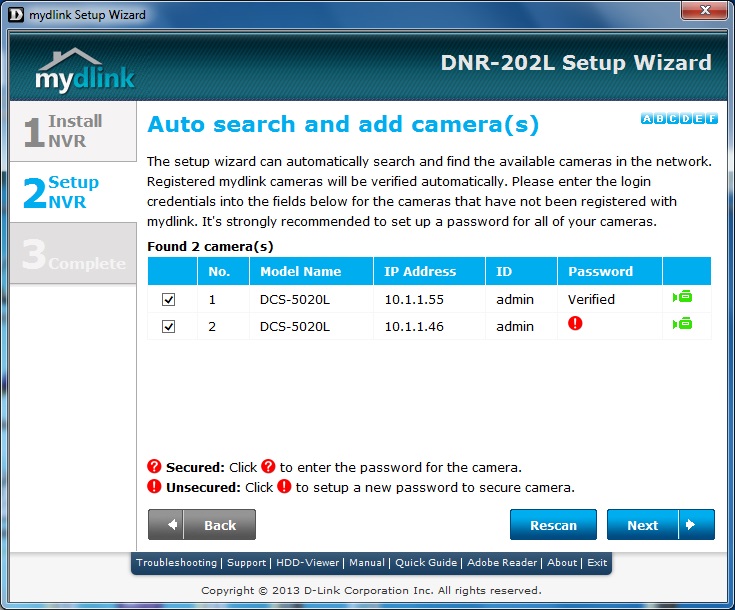
Cameras are found and you have the option to set them up if they aren’t already connected to mydlink.com
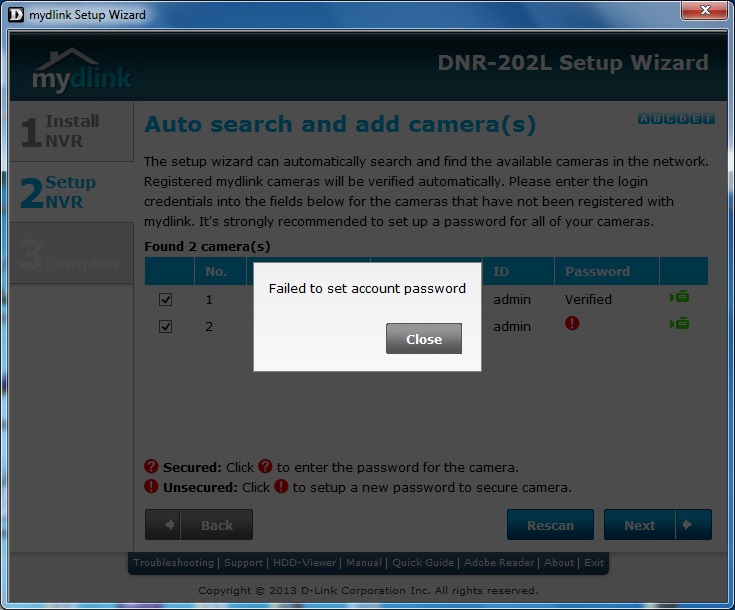
I got stuck in a continual loop for the camera that was not already set up on mydlink.com
Closing Thoughts
If you own mydlink cameras and want a more powerful way to record video, the DNR-202L could be a useful little device. Basic record and playback support for mydlink cameras on the DNR-202L is truly plug-and-play. Functionality such as motion detection requires more thought and is configured on each camera individually.
As a complete solution, the DNR-202L probably isn’t as visually elegant as a single NAS. With the DNR-202L itself and 1-2 external USB drives, you will have USB cables, wall-warts and multiple devices to contend with. Contrast this a NAS that’s a single box that you just need to connect power and Ethernet to.
Depending on where you choose to locate the DNR-202L, the tangle of little boxes and cables may not be a problem at all, but it is something to note. If you use the DNR-202L for security, choose the location wisely; it’s small and easily taken and there is no K-Slot to help you lock it down. If someone disconnects a camera, the DNR-202L will broadcast its location loud and clear if you haven’t disabled the buzzer.
Compared to other solutions such as Y-Cam, the DNR-202L’s big win is that it can record constant video vs. only motion detection triggered events. But more video requires more storage space, which is the main downside I find for the DNR-202L. Footage is available in remotely, but managing your "personal cloud" storage space and hardware is done by you locally. Some may find this to be a strength, while others will see it as a disadvantage. You can forego managing storage yourself with something like Dropcam, but you’ll pay dearly for it.
If you have up to four mydlink network cameras and want to easily add recording and playback that’s viewable from anywhere you can hop on the net, it’s hard to beat the DNR-202L for only $100 (plus the cost of drives).