Introduction
Smart LED bulbs are the easiest and most popular devices to add to your smart home. It’s been a long time since we first reviewed a group of "smart" bulbs. In that review, we covered five of the first generation of connected LED light bulbs. All five had one thing in common – they all relied on a hub to connect to the internet and to a companion cloud service.
Fast forward about two years and the next generation of smart bulbs has appeared on the market. These bulbs no longer require a hub, instead connecting directly to your Wi-Fi network. I first reviewed a Wi-Fi connected Smart Bulb, the TP-Link LB120, in September. The LB120 is a white bulb with a tunable range from 2700K-6500K.
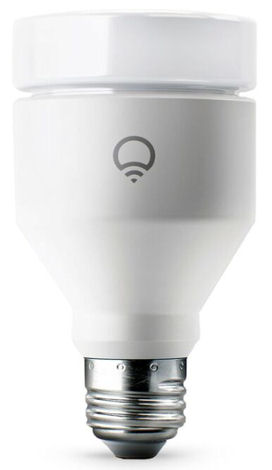
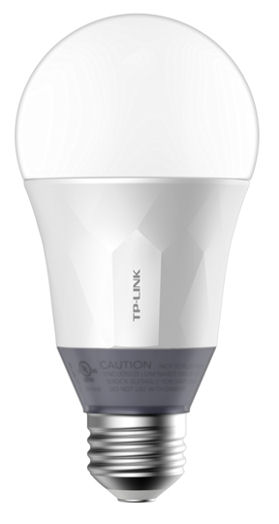
This review will focus on three Wi-Fi Color smart bulbs shown above: The LOFTEK-SANSI (l), the third generation LIFX (c), and the TP-LINK LB130 (r). All three connect directly to your Wi-Fi network and provide both local and remote access to your lights. Each product has its own Android and iOS applications. Worthy of special note, the LIFX bulb also has a Windows 10 app. None of the products are Apple HomeKit compatible, but LIFX is planning HomeKit support early next year.
LOFTEK-SANSI LED Bulb

| At a glance | |
|---|---|
| Product | SANSI 10W RGBW light Bulb () [Website] |
| Summary | 10 W 800 lumens color Wi-Fi Smart Bulb |
| Pros | • 20 preset scene modes • Relatively inexpensive for a Smart Wi-Fi color bulb • In Music mode, light follows music |
| Cons | • No Setup Wizard • No support for Alexa • No support for IFTTT • No schedules • Only music on device drives light bulb |
Typical Price: $0 Buy From Amazon
With a price of just $27.99, the LOFTEK-SANSI bulb is the least expensive of the three products in this review. The product name shown on Amazon is a long, but apt description of the product: “LOFTEK-SANSI 10W RGBW light Bulbs, Wi-Fi Smart Led Bulbs, 800 lumen dimmable colorful party lighting with APP control function” We’ll see how the bulb fulfills its “party lighting” function when we dive down into some of the features.
Setup
Setup is done using the Stellar Wi-FI app found in the Apple App Store (iPhone only) or the Android Stellar Wi-Fi app in the Google Play Store. You can also scan the QR codes below. Apple (l); Android (r).
 and Android (r) to download Stellar app")
QR Codes for Apple (l) and Android (r) to download Stellar app
The LOFTEK-SANSI bulb comes with a folded color quick start guide with instructions for both iOS and Android installations. You can also view help here. Of the three products, this was the most difficult one to set up – mostly because there wasn’t a wizard. You had to manually perform each step in the quick start guide in order to set it up.
For example, you have to manually change your Wi-Fi connection to the bulb’s Wi-Fi network (SLRGB********), discover the bulb, and then click on a setup icon to change the network to your home network. To join a Wi-Fi network, you need to type in the network name – the setup app doesn’t provide you with a list of available networks. To set up remote control, you have to go to a separate Remote Control menu and create an account. None of these steps are difficult, but other products walk you through the setup process with wizards that virtually eliminate the need to refer to a quick start guide or an online manual.
The composite image below shows the landing page (l) and the bulb control page (r). With Global control selected, you can control all of your LOFTEK-SANSI bulbs. The On/Off switch is in the upper right corner. Selecting an individual bulb takes you to the bulb control page.

LOFTEK-SANSI Smart Bulb Landing page and bulb control page
The bulb control page also has an on/off switch in the upper right-hand corner. The red, green, blue and yellow dots surrounding are presets that change the color of the bulb to the selected color with just a tap. The dimmer control is below the color circle. Across the bottom of the screen are additional options for Music, Scene, and Config.
You can change the color of the bulb by merely touching on the small circle inside of the large color circle and drag it to the color you desire. As shown in the left image below, RGB values are shown for the currently selected color. The right image shows you the exact percentage of dimming selected.

LOFTEK-SANSI RGB values and dimming percentage
If you tap the music icon at the bottom of the bulb control page, you can select music from the local library stored on your mobile device. You can search by Artists, Albums, Songs, Genres, Composers, Compilations or Playlists. Once selected, hit the play icon, and the LOFTEK-SANSI bulb’s colors and brightness will change with the music. The on-screen animation also pulsates with the music.
When you tap the Scene icon at the bottom of the screen, you are presented with a scrollable list of 20 choices. There are choices for transitions between single colors and off, or combinations of colors. In addition, there are choices for blinking individual colors. The list is fixed, and you can’t add your own choices.
Across the bottom of the screen is a slider that allows you to control the speed of transitions/blinks. The slowest cycle, including on and off times measured 25 seconds. The shortest cycle measured ~ 0.5 seconds. The composite image below shows the Music and Scenes menus.

LOFTEK-SANSI Music and Scenes Menus
The Config menu lets you change the name of the bulb, and lets you configure which Wi-Fi network to use.
The LOFTEK-SANSI Wi-Fi Smart Bulb is a fairly simple device. It lacks support for the Amazon Alexa platform, though LOFTEK-SANSI plans to add Alexa to the new version of the light bulb coming out in 2017. It also lacks support for IFTTT and doesn’t support any scheduling, so you won’t be turning this light on/off using schedules. It does support remote access (tested). One nice feature, however, is that you can control your lights on the local network without an internet connection. If you want to remotely control the lights, you’ll need to sign up for an account and have an internet connection.
For a simple, inexpensive RGB Color, the LOFTEK-SANSI Smart Bulb is adequate, but if you want/need more features, the two products below offer more features, for, of course, more money.
LIFX Gen 3
| At a glance | |
|---|---|
| Product | LIFX Color LED Smart Bulb (Generation 3) [Website] |
| Summary | Full-featured 11W 1100 lumens color Wi-Fi Smart Bulb |
| Pros | • 1100 lumens output (75W equivalent) • Controls color, brightness, and saturation • Alexa support for basic functions • Limited Alexa support for changing color • Support for IFTTT • 14 preset colors and 19 themes • Highly configurable effects • Robust scheduling options |
| Cons | • Expensive • Windows 10 app not as fully featured as the mobile apps |
Typical Price: $39 Buy From Amazon
Priced at $59.99, the LIFX Generation 3 bulb is the most expensive Wi-Fi Smart Color bulb in this roundup. It’s also the most fully featured and the only one that boasts an 1100 lumens (75 W equivalent) output. It is available in the standard A19 configuration as well as a BR30 configuration that’s suitable for both indoor and outdoor use. The third generation LIFX bulb features integration with Nest, IFTTT, SmartThings, Amazon Echo and Logitech Harmony, making it the best-integrated bulb in the roundup.
Setup
Setting up the LIFX Bulb is very simple because it’s all wizard based. Just download the app and launch it. The wizard prompts you to change to the bulb’s default Wi-Fi network. After discovering the bulb, you are prompted to select your home Wi-Fi network from a list of available networks. After entering the Wi-Fi network’s password, the wizard finishes setting up the bulb. You also set up an account with LIFX (or sign in if you already have an account) so that you have remote control over your LIFX product(s).
The image below shows the LIFX bulb’s home page just after the initial setup. There are menu tabs that you can open/close for lights, groups, and integrations. Additional groups appear on the home screen when you add schedules or scenes.

LIFX Bulb Home page
From the Lights menu, you can see that there is one bulb installed with the default name LIFX Bulb. Under groups, there is one group (Office) and it shows that there is one light in that group. The LIFX Bulb icon below tells you three things: The light is on; it is set to full brightness because the circle around the light icon is a full circle and the color.
If you tap the bulb name, a control for that light appears and looks like the screenshot below. When first installed, the LIFX bulb defaults to white, so the white color control screen appears. Tapping the Edit icon in the control panel lets you rename the bulb, change location and groups, change Wi-Fi networks, and shows cloud status, model, and serial number. If you tap the share icon located below the Edit menu, you can share this color with your friends.

LIFX white control panel
You control the color temperature by dragging the circular dial clockwise/counterclockwise to position your choice of color temperature under the arrow or by just tapping on your preferred color. In the center of the color control dial, you control the brightness by moving your finger up and down on the control. An On/Off switch is at the bottom of the color circle.
If you tap the Color icon at the bottom of the control panel a similar screen appears that gives you full control of all colors. The color control panel works just like the white control panel. You can tap on a color or drag and rotate the color you want to the circle located at the 12 O’clock position. The left image below shows that color temperature 76 was selected and that the brightness is 50%. The circle surrounding the light bulb above the control panel correspondingly is 50% filled and the color shows the color selected.

LIFX color control panel
LIFX also lets you control the saturation to give you more control over the light. To change the saturation, just drag the dot vertically, and watch the saturation level change on the bulb. The color remains the same – only the saturation is reduced. The icon above the color control panel changes to show the saturation level. As with the white control panel, there’s also an on/off switch.
The Windows 10 app, available in the Windows app store, looks a little different than the screenshots above. There are separate horizontal sliders brightness and color saturation. Actually, I like the mobile applications a little better than the Windows 10 app as they show you a numeric value for the color. The mobile apps, both Android and iOS also have a color history icon located in the upper-left corner of the screen. In the screenshots above the history “dot” is green. If you tap on that, it toggles back to the previously set color. Both of those features are missing in the Windows 10 app below.

LIFX Windows 10 app showing home screen and color control panel
There are some other minor differences between the Windows 10 app and the mobile apps. First, the mobile apps both have 14 preset colors and 19 preset named color themes. The Windows 10 app doesn’t have any preset color icons and only 10 themes which aren’t named. The effects available in the Windows 10 app are somewhat different than in the mobile apps. It would be nice if the Windows 10 themes and effects were consistent with those found in the mobile apps.
The composite screenshot below shows the presets and some of the named themes as well as the effects as shown using the Android app on a Samsung S7. Tapping on a preset color changes the color of the bulb to the selected color. Tapping on a theme changes the color to a preset color, brightness and saturation setting. You can go back to the color control panel to see the settings for each theme if you are interested.

LIFX Bulb Themes and Effects
Each effect is configurable as shown in the example below.

LIFE Effects configuration example
The LIFX mobile apps appear to be more fully featured than the Windows 10 app. LIFX has excellent scheduling features including time of day and sunrise/sunset schedules. Schedules created on the mobile apps appear on both platforms. However, schedules and scenes created on mobile apps don’t appear in the Windows 10 app. Nor does the Windows 10 app have the ability to create schedules or scenes. You can, however, pin any of the four menus to the Windows 10 start menu.
The image below shows the LIFX scheduling options. For this schedule, I configured the Desk lamp to turn on at sunset on weekdays at 30% brightness, using the color blue, and to use a fade-in time of 5 seconds.

LIFX schedule
Alexa Support
There are actually two LIFX Skills available through the Alexa app. The “LIFX Optimized for Smart Home” skill lets you turn lights or Alexa groups on/off and set brightness. You can use traditional commands like “Alexa, turn on Desk lamp at 50%”. This skill has the LIFX logo with a white bulb on a purple background.
The second LIFX skill that has a purple bulb on a white background enables you to control and set colors for groups, but not individual devices. For this skill, you have to use the syntax, “Alexa, tell LIFX to set the office lights to red”. You are limited in the colors supported by the Alexa skill to red, orange, yellow, green, cyan, blue, purple, pink or white. If you attempt to choose an unsupported color such as magenta, Alexa will recite the list of supported colors to you.
IFTTT support
Your LIFX bulbs are easily controlled by IFTTT. You can choose from many LIFX applets published by other IFTTT users or easily create your own. The LIFX support site has an article to help you. Using Weather Underground as a service, I created an applet that would blink my Desk lamp five times using the color blue when the temperature drops below 25 degrees. Using advanced options you can specify color, saturation, brightness, number of blinks and fade in/fade out times.
TP-LINK LB130
| At a glance | |
|---|---|
| Product | TP-LINK WI-Fi LED Bulb with color Changing Hue (LB130) [Website] |
| Summary | 11 W 800 lumens color Wi-Fi Smart Bulb |
| Pros | • Works with Amazon Alexa • Supports sunrise/sunset scheduling • Works from anywhere • Measures energy usage for the day, week and 30 days along with a yearly estimate |
| Cons | • Requires internet connection to work • No RGB values or color temperature (white) numerical values appear on control panel • No support for IFTTT • Can’t control colors or color temperature via Alexa (yet) |
Typical Price: $0 Buy From Amazon
Several months ago, I reviewed the TP-LINK LB120 Smart Wi-Fi LED bulb. It was a tunable white light bulb. In this portion of our color Wi-Fi Smart Bulb roundup, I’ll be looking at the LB120’s color sibling, the LB130. The LB130 is very similar to the LB120. It uses an updated version of the KASA app which also works with the other versions of TP-LINK bulbs. Many of the screens are identical to what was in the previous review, so I urge you take a quick look at it.
Setup
Since I’ve previously reviewed TP-LINK smart bulbs, I already had an account and the KASA application was installed on both my iPad and my Samsung S7. To add the LB130, I simply opened the KASA app, tapped the “+” icon in the upper right corner of the screen and selected Smart Bulb as the device to add. All you have to do manually is connect to the unconfigured TP-LINK Smart Bulb’s Wi-Fi network and return to the KASA app. When prompted, I named the LB130 “Color 1”, and setup was complete.
For the LB120, the application presented a choice of either White or Circadian. Circadian is a mode that adjusts the color temperature and brightness throughout the day. As I’m writing this review near the end of the day, I’ve had the LB130 in Circadian mode. I’ve noticed that the color has gotten to be a warmer white and that the brightness has been decreasing as it gets later in the afternoon. For the LB130, the KASA app adds color to your choices of White and Circadian modes.
Here’s an updated look at the home screen of the KASA app that shows the addition of the LB130 (Color One). Here you can see that the LB130 is set to blue at 20% brightness. The other two bulbs, both LB120s, are set to a warm white at 20%. For the two LB120 bulbs, you can see that the next scheduled event is to turn off at 11:00 PM today.

TP-LINK KASA home page showing three TP-LINK Bulbs
If you tap on the Color One bulb, you’ll see the control panel for that bulb. You have a choice of White (l) Circadian (c) and Color. To adjust the color, merely drag the cursor to the desired color. Across the bottom of the screen, there’s a slider to control brightness. Unlike either of the other two products in this roundup, there’s no numerical value associated with the associated color or color temperature. This makes it more difficult to configure two bulbs exactly for the exact same color.

TP-LINK color control for the LB130 Smart Bulb
Since all of the TP-LINK Smart Home products use the same KASA app, I updated my scenes to include the LB130. I also created the same sunset on schedule for the LB130. I noted in my previous review that scheduling options and Scenes didn’t appear in the iOS version of the software. I’m happy to report that the latest version of KASA addressed that shortcoming, and you can create/edit scenes and schedules on either iOS or Android.
As you would expect, the LB130, like the LB120 bulbs, monitors energy usage. Though I’ve only been using the LB130 for a brief period of time, I have had the pair of LB120s in my dining room lamps for several months. Both lamps are scheduled to turn on at sunset and turn off at 11:00 PM. With more than 30 days of usage, the screenshot below shows the 30-day average usage and the estimated annual savings. Over time, this will be updated as the days start getting longer, and the lights are on for a shorter period of time each day.

TP-LINK LB120 30-day usage
Alexa Support
As with the LB120 bulbs, the LB130 Color bulb also works with Alexa. Since I already had the KASA skill enabled on my Amazon Echo, very little was required to get the LB130 enabled for Alexa. Just click on Discover devices in the Smart Home menu in your Alexa app. Unfortunately, you can’t control either the color or the color temperature (for white) via Alexa – yet. TP-LINK says that additional control for TP-LINK bulbs is in the works.
One final note. Like its LB120 sibling, the LB130 requires an internet connection to function, even for local control.
Closing Thoughts
There are no real losers in this roundup. All products performed their advertised functions, i.e. connecting via Wi-Fi and producing a wide range of colored light. But each product had one or more features that the others lacked. So if you’re looking for one product that does everything, the solution depends on what "everything" is.
At $28, the LOFTEK-SANSI bulb was the cheapest, had the fewest features and was the most difficult to set up. It also had what some might consider deal breakers: lack of Alexa support; and no scheduling. Still, for a party room or to add some mood lighting to a room, the LOFTEK-SANSI is an inexpensive way to go. But without Alexa integration, which LOFTEK said is coming in 2017 products, you’ll be stuck using the Stellar application.
The TP-LINK LB130, at $50, is a mid-range product with mid-range features. It’s easy to set up, provides good scheduling capabilities, has the unique feature of monitoring energy usage and a good set of Alexa skills. Its main negative is that it requires an internet connection to function at all. Having used Alexa to control TP-LINK bulbs for three months, I can attest its Alexa skills work quite well. The upgraded TP-LINK KASA app addressed a problem identified in my earlier review, and both the iOS and Android software seems solid. Having seen the other two products, I wish the KASA software provided the ability to see colors/hues and color temperatures numerically. And upgraded Alexa support for colors and colors as well as IFTTT support would be welcome upgrades.
At $60, the LIFX Gen 3 is the most expensive bulb in the roundup and the most fully-featured. I especially like that in addition to color and brightness, you can also control color saturation. I also like that you can control the colors (somewhat) with a second Alexa skill, but I have to remember to tell Alexa to “Ask LIFX to change office to xxx”. The skill to control the color lacks the ability to address the device name (desk lamp). However, it’s currently the only Alexa-enabled Smart Home product that I’ve tested that does provide any control of color using your voice.
I’m also a big fan of IFTTT. So LIFX as a supported service made me happy and I’ll be creating some new applets to make use of the LIFX bulb. The Windows 10 application was a bit disappointing. I didn’t expect it would have a subset of features found in both mobile apps. Still, for someone who is frequently bound to a desktop computer, the ability to pin control panel menus to the Windows 10 Start menu will be useful. I’m confident that the Windows 10 app will be brought up at least par with the mobile apps. For the extra $10 compared to the TP-LINK, the LIFX bulb adds features and functions I’d be willing to pay for.
Buy SANSI 10W RGBW light Bulb from Amazon