Introduction
Due to popular demand, we will be reviewing things that form the other end of a wireless connection, i.e. adapters and bridges, more often. We will be using a reconfiguration of our octoBox-based testbed to get full throughput vs. attenuation profiles for these products, just as we do for wireless routers and access points. (We described the technology used in our new wireless test process in this article.)
Environment
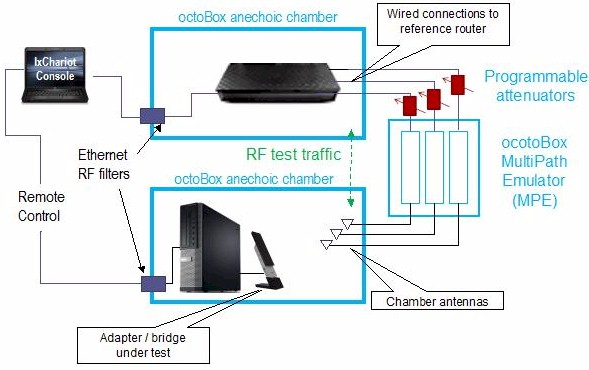
Our method uses the setup shown in the block diagram below. We need to keep total path loss to a level that allows us to test performance over a sufficiently wide signal level range. So we are sticking with using direct connection at one end and antenna coupling at the other. Only this time, the router is cable-connected and signals from the device under test (DUT) will be transmitted and received via antennas.

Wireless Adapter / Bridge Test Setup
The client end of the connection is still a Dell Optiplex 790 Small Form Factor (SFF) computer (Core i5-2400 @ 3.1 GHz / 4 GB RAM) running Win 7 Pro. It will run an IxChariot endpoint and connect to the device under test (DUT) via USB (adapters) or Ethernet (bridges).
Since the Dell doesn’t have built-in USB 3.0 ports, we have added a UtechSmart PCIe USB 3.0 card (US-USB3-PCIE-P2). This adapter uses Renesas’ µPD720202 USB 3.0 Host controller.
When testing Ethernet-connected wireless bridges, an Intel Gigabit CT Desktop adapter is swapped in for the UtechSmart USB card to provide a second Ethernet port.
We were limited in choice of a reference router to AC1750 class routers with connectorized external antennas. This pretty much limited us to the ASUS RT-AC66U. We briefly considered using an AC1900 class router as the reference. But these products are not sufficiently stable at this point, which was confirmed by running some comparison tests.
Test Description
All testing is done on the LAN side of the router so that the product’s routing performance does not affect performance results, i.e. the IxChariot endpoint computer is connected to a router LAN port.
The reference router is set as follows:
- Router reset to factory defaults, 3.0.0.4.374_726 firmware
- WPA2/AES security enabled
- 2.4 GHz band: 20 MHz bandwidth mode, Channel 6
- 5 GHz band: 40 MHz bandwidth mode for N devices, 80 MHz bandwidth mode for 802.11ac devices, Channel 153
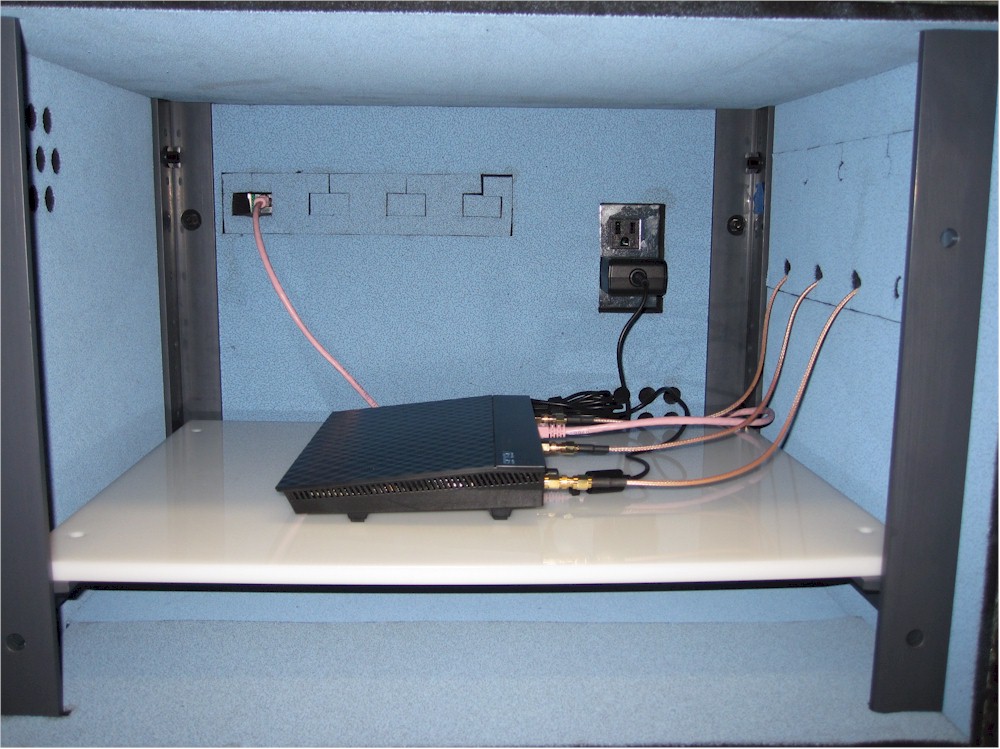
Here is what the ASUS RT-AC66U looks like in the top test chamber.

ASUS RT-AC66U cable connected in Upper Test Chamber
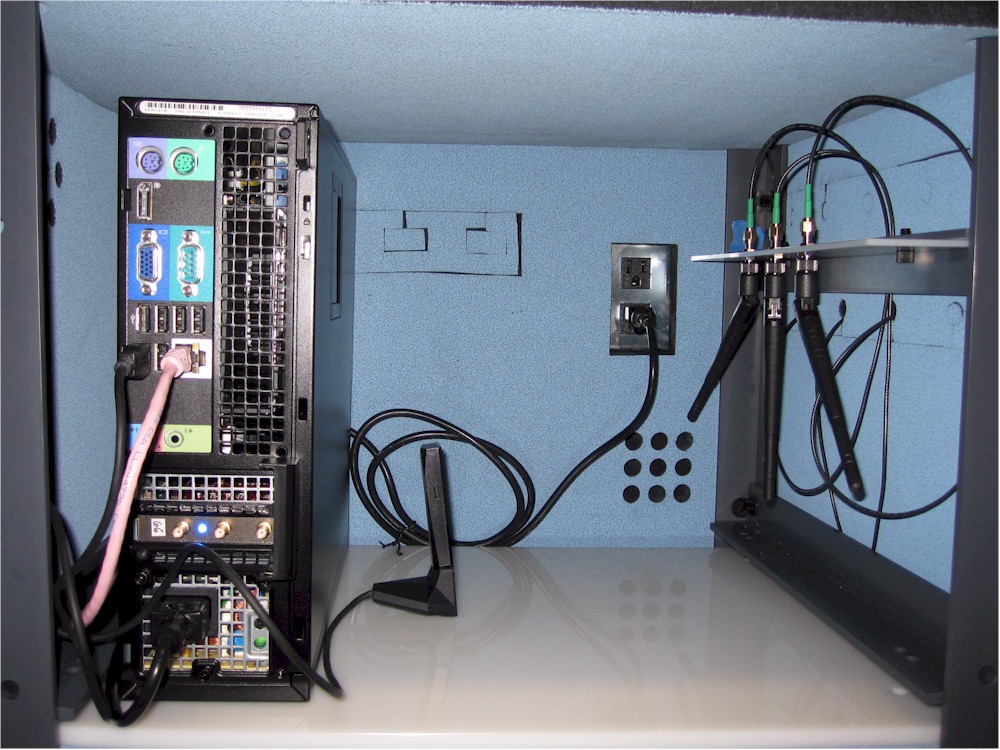
The wireless adapter / bridge under test (DUT) is placed into the lower test chamber. The three reference antennas are moved from the upper to lower chamber. They arranged as shown in the photo below, i.e. the two outer antennas are set at 45° from vertical and the center antenna remains vertical. This is intended to not provide an edge to products with vertical antenna polarization.
The DUT is positioned with its front surface facing the chamber antennas and 8 inch distance between chamber antennas and DUT.

ASUS USB-AC53 in lower test chamber
A Windows batch script is used to run the IxChariot throughput.scr script multiple times. The only changes to script defaults are to select TCP/IP protocol and set the test file size to 5,000,000 Bytes.
The test sequence is:
- Set the attenuators to 0 dB.
- Manually associate the test client to the DUT on the desired band using remote desktop access via VNC.
- Run the Windows batch script, which executes the following loop at 3 dB steps from 0 to 63 dB for 2.4 GHz and 0 to 45 dB for 5 GHz.
- Set the attenuators
- Wait for 2 seconds
- Run throughput.scr for 1 minute for simultaneous up and downlink (0 dB only)
- Run throughput.scr for 1 minute for uplink (STA to AP)
- Run throughput.scr for 1 minute for downlink (AP to STA)
The same sequence is repeated for the second band for dual-band devices.
The batch script also converts each IxChariot test result to a CSV file. A Windows Powershell script then collates these CSV’s into an Excel workbook where the results are analyzed and then entered into the Charts database.![]()
