| At a glance | |
|---|---|
| Product | NETGEAR ProSafe Dual WAN Gigabit Firewall (FVS336G) [Website] |
| Summary | Dual gigabit WAN IPsec and SSL gateway router supporting 25 IPsec & 10 SSL concurrent tunnels with 4 port gigabit switch. |
| Pros | • SSL VPN Support • Gigabit WAN and LAN ports • Dual WAN • Internal Power Supply |
| Cons | • Dynamic DNS slow to update • Only 1 IPsec client license included • No DMZ functionality (future release) |
Typical Price: $449 Buy From Amazon
Introduction
At the conclusion of my review on Linksys’ RVL200 last month, unaware of this upcoming product, I wrote that “an SSL VPN router with gigabit LAN ports, dual WAN connections and multiple Gateway-to-Gateway tunnel capacity would be a very cool product.”
Well, I feel like I just got a belated answer to a Christmas wish! NETGEAR has just released the FVS336G, a new product for small networks, with a compelling combination of features and capabilities. Primarily, I’m talking about SSL VPN capability and six ports (two WAN and four LAN) of gigabit goodness! Let’s see if the FVS336G is that shiny new bike under the tree or a lump of coal, shall we?
Physically, the FVS336G is a compact 10″ wide, 7″ deep, and 1.5″ high, with an On/Off switch on the back and no external power brick. It’s a little bigger than other 4-port routers, but I like the fact that the power supply is internal. This makes for a neat installation and eliminates the hassle of bulky power bricks.
NETGEAR dressed it up in their business blue metal, with indicator lights for power, WAN, and LAN Port status. The FVS336G also gets NETGEAR’s new look menus recently introduced in the FVX538.
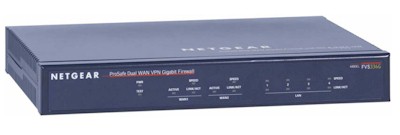
Figure 1 shows the front panel and port indicators, and Figure 2 provides a look at the back panel of the FVS336G.

Figure 1: Front panel and port indicators

Figure 2: Rear panel
There are quite a few options for the network administrator to configure to optimize the FVS336G, and for the most part, they are relatively intuitive. Table 1 below provides a matrix of the main and submenus,with each submenu containing one or more tabbed configuration pages.
| MAIN | SUBMENUS | |||||
|---|---|---|---|---|---|---|
| Network | WAN | Protocol | Dyn DNS | LAN | Routing | |
| Security | Services | Schedule | Block Sites | Rules | MAC Filter | Port Triggering |
| VPN | IPSec | SSL | Certificates | Status | ||
| Users | Users | Groups | Domains | |||
| Admin | Remote Mgt | SNMP | Backup and Update | Time | ||
| Monitoring | Router Status | Active Users | Traffic Meter | Diagnostics | Firewall Logs | VPN Logs |
| Web Support | Overview | Knowledge base | Documentation | |||
Table 1: FVS336G menu matrix
The bulk of the FVS336G’s configurations are accessed via the Network, Security, and VPN Menus, which will be the focus of this review. Let’s dive into the VPN capabilities first.![]()
VPNs
The FVS336G first and foremost is a VPN device, with the ability to support up to 25 IPSec and 10 SSL VPN tunnels simultaneously. Either the SSL or IPsec tunnels can be used for remote access and there are enough IPsec tunnels to support multiple gateway-to-gateway secure links.
This a different approach than taken by the recently reviewed Linksys RVL200, which is primarily a VPN gateway with SSL tunnels for remote access and a single IPSec tunnel for connection back to a central corporate gateway.
IPSec tunnels are created via Site-to-Site configurations or via NETGEAR’s VPN Client software, as they were with the FVS124G [reviewed] or FVX538 [reviewed]. The SSL VPN tunnels are a newer addition, enabling VPN connectivity without the hassles of licensing, installing, and configuring client software.
IPSec Site-to-Site tunnels set up quickly on the FVS336G. I had no problem connecting the FVS336G to a SonicWALL TZ190W over the public Internet. Using the NETGEAR VPN Wizard, I created a VPN Policy as follows and depicted in Figure 3:
- Select Gateway for tunnel type.
- Enter a name and password in the Connection Name and pre-shared key fields. In the example below, I entered “VPN to Other Site” as my Connection Name and “mypassword” as the pre-shared key.
- Enter WAN IP address or domain names for each endpoint, such as “othersite.domain.com” and “thissite.domain.com” as below. IP addresses are a more stable means of endpoint identification if you’re using ISP services with static IP addresses. I have some additional comments later in this review on using domain names instead of IP addresses for VPNs.
- Enter the subnet and mask of the remote network. (IMPORTANT: The remote network is the network on the other end of the tunnel, and it should be a different subnet than the local network.) In the example in Figure 3, I entered 192.168.1.0 and 255.255.255.0. Clicking Apply saves the new policy.

Figure 3: IPSec VPN Wizard
Using the VPN Wizard to create a VPN Policy automatically creates a corresponding IKE (Internet Key Exchange) Policy with the same name. I’ve found changing the Local and Remote Identifier Type fields to Local WAN IP and Remote WAN IP works best, even when using domain names instead of static IPs. Notice in Figure 4 how the Identifier Types are then grayed out.

Figure 4: Internet Key Exchange Policy configuration
Once the VPN and IKE Policies are built, they can be edited. For example, encryption can be changed from 3DES to AES-256 if desired. Note that Main Mode for Phase 1 and Perfect Forward Secrecy (PFS) for Phase 2 are automatically selected using the VPN Wizard. These options need to match on the far end for the tunnel to come up.
The options to configure Local and Remote Identifiers in my experience create more opportunity for configuration mismatches. Keep in mind that tunnel security is already established through a pre-shared key.
I have had better success creating Site-to-Site tunnels between different brand routers with these two fields blank. I find getting a tunnel established with basic settings and then experimenting with additional settings later is a more efficient and less frustrating approach.
I experimented with a variety of encryption settings, and was pleased that 3DES and AES-256 encryption both worked well with the FVS336G. I had a little problem with AES-256 encryption and the FVX538, but no problems with the FVS336G.
VPN Latency issues detected on the FVX538 also seem to be resolved with the FVS336G. I’ve updated Table 2 from our FVX538 review to include latency times for the FVS336G. As you can see, the latency issues we experienced in November with the FVX538 are not present in the FVS336G.
| Path | WAN-WAN | LAN-LAN VPN |
|---|---|---|
| RV042-TZ190W | 9ms | 11ms |
| TZ190W-RV042 | 16ms | 16ms |
| FVX538-TZ190W | 9ms | 36ms |
| TZ190W-FVX538 | 16ms | 33ms |
| FVS336G-TZ190W | 9ms | 9ms |
| TZ190W-FVS336G | 16ms | 16ms |
Table 2: Latency times
I noticed my NETGEAR-SonicWALL Site-to-Site VPN tunnel dropped several times over the course of my testing. I traced the problem to the fact that my ISP had changed my WAN IP, yet the NETGEAR dynamic DNS client hadn’t updated the domain name service. So, the domain name for the WAN interface on the NETGEAR end of the Site-to-Site tunnel was no longer mapped to the correct WAN IP and the connection dropped.
I reported this issue to NETGEAR, and they’re looking into it. Of course, using static IP addresses on both ends of the tunnel eliminates this issue.
VPN Remote Access
The other main use for VPNs is for remote users to access the network. As noted earlier, the 336G offers two secure tunneling options: IPSec and SSL. But note that NETGEAR includes just one license for its SafeNet SoftRemote 10.8.0 (Build 20) IPsec client. Note that this version has been updated to work with Microsoft Vista.
Although the software is updated, the best way to configure and use the IPSec Client software hasn’t changed significantly from our instructions with the NETGEAR FVS124G. Setting up IPSec software between a router and a PC is a detailed process, requiring precise configuration of IDs, Authentication, and Key Exchange on both the router and client.
Figure 5 is a screenshot of just one piece of the Client software configurations. I used NETGEAR’s instructions, located here, for configuring the FVS336G and the VPN Client software.

Figure 5: VPN client configuration
Having tested multiple vendors’ IPsec clients, I haven’t used one yet that I’d call a no-brainer, and NETGEAR’s is no exception. I found configuring IPSec Client connections challenging on the FVS124G, FVX538, and FVS336G.
With only one IPSec VPN license included with the FVS336G, NETGEAR seems to guiding customers to use the SSL VPN option to secure remote access users. In my opinion, this is a good thing.
SSL VPN connectivity is easier and cleaner, with fewer options to configure and no application to manually install and configure on the laptop. Like the Linksys RVL200 [reviewed], NETGEAR’s SSL VPN technology simplifies VPN connections for both network administrators and end users.
Enabling SSL VPN access on the NETGEAR FVS336G is a matter of defining users, selecting a few simple options, instructing end users on the loading of the web applet, and then optimizing security options. Adding a user is simple, as seen in Figure 6.

Figure 6: Adding an SSL user
A nice addition to SSL VPN security from NETGEAR is the ability to customize the web page presented to SSL VPN end users when they access the network remotely. As you can see in Figure 7, I’ve customized the login pages with the lines on top of the web page that say “SmallNet Secure Network” and the warning “Authorized personnel only, please.”
Further customization is available, allowing a network administrator the option of providing additional information or instructions to end users.

Figure 7: Customized SSL login page
SSL VPN Modes
NETGEAR’s implementation of SSL VPN offers a greater level of access control and security to network administrators in the form of three options: Full Tunnel Mode, Split Tunnel Mode, and Port Forwarding.
Full Tunnel Mode will allow a remote user full access to the LAN without restrictions. I found this level of access to be more than necessary, as it also routes simple web surfing for the remote client through the VPN tunnel.
A subset of Full Tunnel Mode is Split Tunnel Mode. This option allows a remote client full access to the LAN behind the 336G, while leaving web surfing to the end user’s local connection.
In this mode, the remote client is issued an IP address different from the NETGEAR LAN subnet, which is then routed to the LAN subnet. As shown in Figure 8, my PC has received IP 192.168.251.2, which the NETGEAR routes to my LAN subnet (192.168.3.0 /24)

Figure 8: SSL VPN IP address
Using a different subnet for SSL VPN clients is similar to NETGEAR’s Mode Config option for IPSec VPN clients in that it creates separate routed networks between VPN clients and the main LAN. Restrictions can then be applied to the VPN subnet, enhancing security with the ability to limit access based on originating IP addresses.
Split Tunnel Mode requires setting up a static route between the VPN Client subnet and the NETGEAR LAN subnet. It’s a two-step process, enabled by de-selecting Full Tunnel mode and entering the LAN subnet as shown in Figure 9.

Figure 9: Setting up Split Tunnel Mode
With Split Tunnel Mode, a remote client has routed access to the NETGEAR LAN 192.168.3.0 /24 from anywhere with an Internet Connection. Using the NETGEAR SSL VPN implementation, I was able to access my Windows and Linux servers via Remote Desktop, VNC, and SSH services, as well as map to my network drives.
I was also impressed that pinging LAN devices through the VPN tunnel added minimal latency. As shown in Table 2 previously, there was virtually no difference in ping times to the WAN interface and to LAN devices through the VPN tunnel. Encapsulating and encrypting packets in a VPN tunnel adds some expected delay. It was impressive to see 1ms or no difference between pinging the WAN interface and pinging a LAN IP.
NETGEAR’s third SSL VPN option, Port Forwarding, is similar to common firewall Port Forwarding. This feature enables restricting VPN access to only specific TCP ports, such as web and email servers, or other TCP-based applications. Note: UDP-based applications, such as VOIP, won’t work in this mode.
Additional configuration options for SSL VPN client exist through the use of User, Group, and Domain configurations. Further, the FVS336G can be configured to use a RADIUS server for user authentication. Finally, User Policies can be created to define which browsers are permitted for end user access.
Network
Network configuration is where WAN and LAN options are selected. Each WAN port can connect to a different ISP, using PPPoE or Ethernet, with Dynamic or Static IP addressing. Dual WAN connections, as with the FVX538 and FVS124G, can be configured in auto-rollover or load balancing mode.
In auto-rollover mode with WAN1 as primary, WAN2 will kick in after the defined number of retry intervals is exhausted. The default setting circled in Figure 10 is four tries on 30 second intervals, which will cause a failover in just over 2 minutes.

Figure 10: WAN failover settings
I tested WAN Failure Detection at the lowest setting, a Retry Interval of 30 seconds and Failover threshold at 2. On average, the WAN2 interface went active in 1 minute 10 seconds after failing WAN1. The NETGEAR DHCP server defaults to issuing its LAN Gateway IP as a DNS proxy address, which ensures clients will be able to surf via either Internet connection in a Failover.
In addition to Failover mode, Dual WAN connections can be set up in Load Balancing mode. It may seem that using two Internet connections simultaneously is advantageous, but this configuration can cause some routing problems. These can be overcome by setting Protocol Bindings to map specific traffic types to different Interfaces.
For example, mapping Web and Email (HTTP, SMTP, POP3) traffic to one WAN interface and everything else to the other WAN interface would be a simple means of segregating traffic over the WAN interfaces with common best effort traffic on one interface and higher priority traffic on the other.
The FVS supports Dynamic DNS connections to Dynamic DNS, Iego.net, and TZO.com. I had no problem setting up my accounts to Dynamic DNS and Iego.net, but had some issues with maintaining the mapping of my domain to my WAN IP as discussed in the VPN section.
As with the FVX, there are multiple LAN configuration options. The LAN subnet can be customized to any network; I set mine up to use the 192.168.3.0 /24 network. I like NETGEAR’s LAN Groups menu. The FVS is designed to be the core of a small office network, capable of supporting up to 253 nodes.
As shown in Figure 11, my test FVS is connected to 15 different devices. Using the LAN Groups menu, an administrator can easily name each device as it comes on line and draws an IP from the FVS’ DHCP server. Once a device is named and saved in the LAN Groups menu, LAN device administration is organized through this nice table.
In the example below, I’ve put all my devices in Group 1. In production, a network administrator may want to put devices into different Groups, which allows for applying different security policies to different Groups of devices.

Figure 11: LAN Groups setup
The FVS336G supports both static and dynamic routing in the event it is deployed in a network with other routers. Using static routes to send traffic to the LAN subnet of another router is easy to set up and works well, which I was able to verify between the FVS336G and a D-Link router configured as a simple stub router. (A stub router is often defined as a router with a default route for outgoing traffic, and whose neighbor uses static routes toward it.)
The FVS336G also supports RIPv1 and RIPv2 for dynamic route exchange between routers, which can be more efficient than setting up static routes on multiple routers in a more complex network. Note, though, that the FVS336G transmits routing updates only on its LAN port, thus to fully use dynamic routing with other LAN routers, the FVS336G needs to be the upstream router connected to the Internet.
Security
The FVS336G has a multitude of security options to customize its stateful packet inspection (SPI) firewall. By default, a stateful packet inspection firewall blocks all WAN-LAN traffic that hasn’t been initiated by a device on the LAN. NETGEAR has 54 pre-built TCP/UDP services, such as HTTP and FTP, to simplify the opening of ports on the firewall. If additional ports need to be defined, the Services menu enables adding the needed definitions.
Firewall rules can then be created to map traffic with specific destination ports to specific IP addresses. Additionally, up to three different schedules can be defined to apply to any custom firewall rules. This helps to lock down the network during off hours.
Figure 12 shows a successful FTP rule that maps external FTP requests to an internal server on my LAN, with no schedule applied, as per the “Allow Always” setting.

Figure 12: Setting an FTP rule
The FVS has a content filtering ability that can be configured to inspect the text in a URL for objectionable language. I was disappointed to find, however, that users clever enough to use an IP address instead of a URL can bypass URL text filtering. Up to 64 keywords can be added to the blocked list. Known acceptable URLs that may contain the objectionable word can be permitted via the trusted domain list.
For example, to block the word “ogle” but permit “google.com,” define “ogle” as a blocked keyword and “google.com” as a trusted domain. This configuration will give a screen like Figure 13 below warning if a user goes to ogle.com, but will allow access to google.com.

Figure 13: A URL blocked by keyword displaying an error message
Note: the FVS336G’s web filtering inspects the URL, not the content of the web page. An offensive web site could pass the content filter if the defined word isn’t in the URL.
To block specific end users from accessing the Internet entirely, source MAC filtering can be enabled. Devices with their MACs added to the NETGEAR source MAC table will be able to access LAN devices, but will be blocked from the WAN interface.
Some network applications present challenges for NAT/SPI firewalls, as they are initiated with one destination port, but the server responds on another port. The SPI firewall would then not recognize the response and block the incoming flow. This can be overcome by defining the outgoing port and responding incoming ports using NETGEAR’s Security-Port Triggering menu as displayed in Figure 14.

Figure 14: Port Triggering menu
Other
A feature missing from the FVS336G is the ability to define a port or specific server to be part of a “demilitarized zone,” more commonly known as the DMZ. I brought this up with NETGEAR, who indicated this is an intended feature that got delayed. A future release should add the ability of a software configurable DMZ port.
In the meantime, you can do essentially the same thing by setting port forwarding rules for TCP and UDP ports 1-65534 to the IP address of the machine that you want to place in the “DMZ.”
The FVS336G also includes multiple tools for network troubleshooting, including ping, log output for firewall and VPN trouble shooting, DNS lookup and a packet capture feature. I was also impressed that the FVS336G has a debug capability, which I used while working with NETGEAR’s Engineers on the Dynamic DNS issue. Debug capability is the ability to produce an output of the data streams sent between devices, useful in troubleshooting code and device problems.
Performance
The FVS336G throughput results in Table 3 are impressive, considering the FVS336G’s 300Mhz CPU compared to the FVX538’s 533Mhz CPU. IPSec and SSL throughput numbers are displayed with two values, the first representing Remote-Local throughput, and the second representing Local-Remote throughput.
Notice that the FVS336G’s SSL VPN performance is more than double that of the Linksys RVL200.
| IPSec Tunnels | SSL Tunnels | Throughput | ||||
|---|---|---|---|---|---|---|
| IPSec (Mbps) | SSL (Mbps) | WAN-LAN (Mbps) | LAN-WAN (Mbps) | |||
| FVS336G | 25 | 10 | 16.9/15.2 | 10.8/11.4 | 59 | 58 |
| FVX538 | 200 | 0 | 12.3/12.0 | 80 | 78 | |
| FVS124G | 25 | 0 | 5.1/3.6 | 13 | 12 | |
| RVL200 | 1 | 5 | 4.7/3.9 | 37 | 39 | |
| RV042 | 30 | 0* | 21.9/32.6 | 54 | 80 | |
Table 3: Tunnels and throughput
(*Note: the RV042 supports five PPTP VPN tunnels.)
Performance – more
Subjectively, I found the menus of the FVS336G to be quite responsive. As I was evaluating the menus and options of the FVS336G, I periodically logged into an FVX538 and RVL200 for comparison purposes. Menu responsiveness on the FVS336G seemed quicker than the FVX538 and equal to the RVL200.
Figure 15 shows stable routing throughput at nearly 60 Mbps both downstream and upstream. This means the router may not be able fully utilize its gigabit WAN port capability, but the lack of peaks and valleys in the graph indicates consistent performance and throughput.

Figure 15: Routing throughput
I am also impressed with the FVS336G’s solid 3DES throughput of 15-17 Mbps in Figure 16. In comparison, NETGEAR’s FVX538 3DES throughput maxed out under 13 Mbps, in spite of its additional 3DES Encryption Accelerator. The Linksys’ RV042 does provide superior 3DES throughput at 22-32 Mbps, though.

Figure 16: IPSec throughput
Figure 17 displays SSL throughput at ~11Mbps in both directions. Considering that most remote users utilizing an SSL VPN connection will be over links with significantly less throughput, this is certainly adequate performance.

Figure 17: SSL throughput
Conclusion
As displayed in Table 4, the FVS336G has a nice combination of features and ports for a middle-of-the-road price. At $265, the FVS336G is $60 less expensive than NETGEAR’s other new product, the FVX538, yet matches or exceeds its performance with a lower speed processor.
| Price | CPU (MHz) | WAN Ports | LAN Ports | Gigabit Ports | |
|---|---|---|---|---|---|
| FVS336G | $265 | 300 | 2 | 4 | 6 |
| FVX538 | $322 | 533 | 2 | 9 | 1 |
| FVS124G | $140 | 200 | 2 | 4 | 4 |
| RVL200 | $141 | 200 | 1 | 4 | 0 |
| RV042 | $157 | 266 | 2 | 4 | 0 |
Table 4: Feature comparison
The FVS336G is more expensive than the Linksys RV042 and RVL200, as well as NETGEAR’s FVS124G. However, it is in a different class, with dual WAN ports, gigabit LAN and WAN ports, and greater VPN Tunnel capacity.
Although Linksys’ RV042 PPTP client is also an easy client VPN solution, the FVS336G’s SSL VPN is a better solution for security and flexibility. And even though the FVS336G is more expensive than NETGEAR’s FVS124G, the FVS336G’s beefier CPU, higher throughput, and SSL VPN capability make it a better choice.
SSL VPN removes a lot of the headache of connecting remote users and a significant cost saver. With SSL VPNs, there are no client license fees to purchase as there are with IPSec VPN Clients. For example, a 5-user license to NETGEAR’s IPSec VPN Client runs about $125. With SSL VPN, the cost is $0.
I consistently ding devices for lacking gigabit ports. NETGEAR gets kudos for shutting me up this time by making all the WAN and LAN ports gigabit capable. (I would like jumbo frame capability, though.)
It’s unfortunately common for first releases of products to have a few bugs and the 336G is no exception. But I hope that Netgear quickly issues new firmware to correct the slow dynamic DNS update problem and missing DMZ feature.![]()
In summary, the FVS336G brings together the strengths of NETGEAR’s IPsec-based ProSafe VPN product line with the ease of use of SSL VPNs. The FVS336G provides a lot of value to small biz users looking for an easier way to provide secure connections to roving employees.![]()