Introduction
Updated 3/29/12: Added Link to SmallCloudBuilder article

| At a Glance | |
|---|---|
| Product | D-Link DCS-942L Enhanced Wireless N Day/Night Home Network Camera [Website] |
| Summary | Cloud-enabled day/night IP cam with local SD recording |
| Pros | • 30 fps framerate at all resolutions • Night vision worked to advertised distance and beyond • mydlink.com portal provides remote viewing with no router configuration |
| Cons | • Soft plastic ball and socket pivot construction feels cheap • Night to day mode transitions were problematic • Need browser open to record video • Could benefit from more IR illumination |
The D-Link DCS-942L is D-Link’s top-of-line network camera that works with the company’s mydlink.com cloud portal. If you haven’t heard about mydlink.com, take a look at D-Link In The Cloud: mydlink Reviewed, which Tim posted a few weeks ago.
The other models in the mydlink-enabled line are currently the entry-level DCS-930L [reviewed] and DCS-932L. The 930L doesn’t have IR illumination, so is daylight only. The DCS-942L edges aside the DCS-932L to take the top spot with 4X more RAM and flash, higher 30 fps frame rate at all resolutions (thanks to H.264/MPEG-4 encoding support) and local recording to a micro-SD card (not included).
In this review, I’ll be looking at the DCS-942L camera and the feature set supported by its built-in web admin interface. The integration with the mydlink.com portal is covered in a separate review on SmallCloudBuilder.
Internal Details
Not wanting to damage the camera while taking it apart, I decided to grab the FCC photos. In the photo below, you can see the 942L is powered by the Grain Media GM8126 SoC, which also manages the Ethernet connection.

Figure 1: DCS-942L Grain Media GM8126 SoC
The camera features 128 MB of SDRAM and 16 MB of flash memory. A Ralink RT5370 provides the 802.11b/g/n radio.

Figure 2: DCS-942L Winbond flash memory
Setup
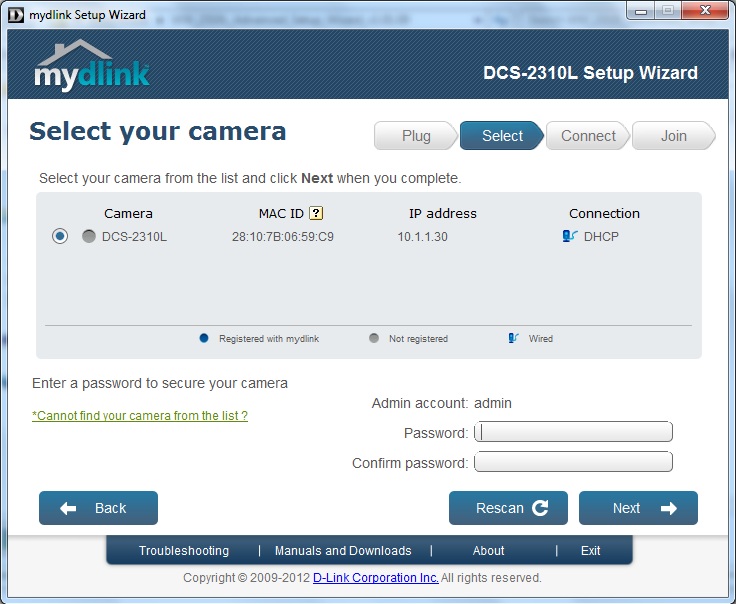
I followed the installation steps provided in the Quick Install Guide and had no trouble setting up the camera or getting it onto my network. The installation instructions were simple almost to a fault, even going as far to show how to adjust the collar on the camera base for correct positioning of the camera. I chose a wired installation for the initial setup vs. the WPS wireless option, but tried WPS later and found it worked correctly.

Figure 3: D-Link DCS-942L Quick Setup Wizard
Once on the network, the install wizard presented the network name of the camera, as well as its MAC and IP address. The install then proceeded with registration with the cloud by creating a mydlink.com account. Registration with mydlink.com went off without a hitch and I was ready to go.

Figure 4: D-Link DCS-942L Quick Setup Wizard Network identification
With installation complete, I moved on to setting it up in the first physical test location and a couple of things immediately caught my attention. First, the ball and socket design does not feel very sturdy. The socket is metal, but the ball is a soft plastic which then threads into metal on the camera itself.
Because of its lightweight size and plastic construction, the camera easily moved under tension from the power and Ethernet cables, sometimes working the ball and socket loose, but usually moving the entire camera. It took only a moderate amount of tightening before the plastic threads started to strip. This could easily be remedied if the camera were equipped with a ball and socket of harder plastic or metal.

Figure 6: D-Link DCS-942L soft plastic ball and socket
Another thing that might help would be a simple hook on the base of the camera so that cable tension wouldn’t pull the camera out of position as much. Connecting by wireless and getting the weight of the Ethernet cable off of the soft plastic ball and socket definitely helps as well. A quick zip tie to attach the wires to the camera base may be all that’s needed to keep cable tension at bay.

Figure 7: A plastic hook on the base or simple zip tie for the cables would help the camera stay in position
Features
The DCS-942L has four IR LEDs, which give it 5 M of night illumination distance according to D-Link’s specs. I’ll be testing this later in the In Use section. Live Video viewing has digital zoom options of 1x, 2x, and 4x, with the amount of pixelation increasing in relation to the amount of digital zoom. Video codecs supported are H.264, MPEG-4, MJPEG at resolutions of 640×480, 320×240 and 160×120, all at 30 fps. JPEG is used for still images.
In my testing with the Blue Iris Video Security software ($29.95 for one camera or $49.95 unlimited), the 942L held very consistently to its advertised framerate of 30 fps. My other IP cameras often drop down to 6-10 fps, when they supposedly support 15 fps. The higher framerate can often provide more detail when motion detection is activated.
Within the camera’s firmware version 1.01 admin interface, there are several useful features and many image settings that are highlighted in the gallery below. If you chose to do router port opening either due to lack of uPnP on your router, the camera firmware offers D-Link’s free DDNS service at www.dlinkddns.com to keep the internet host name consistent. To use this, you will need to open two ports on your router, one for HTTP, typically port 80 and the other for RTSP, for streaming using QuickTime or mobile devices.
The setup wizard allows you to walk through network connectivity and motion detection wizards.
Network Settings allow you to change ports and be visible to Apple devices.

Wireless setup lets you configure wireless networks.

Dynamic DNS allows you to connect wiht D-Link’s DDNS for a consistent hostname.
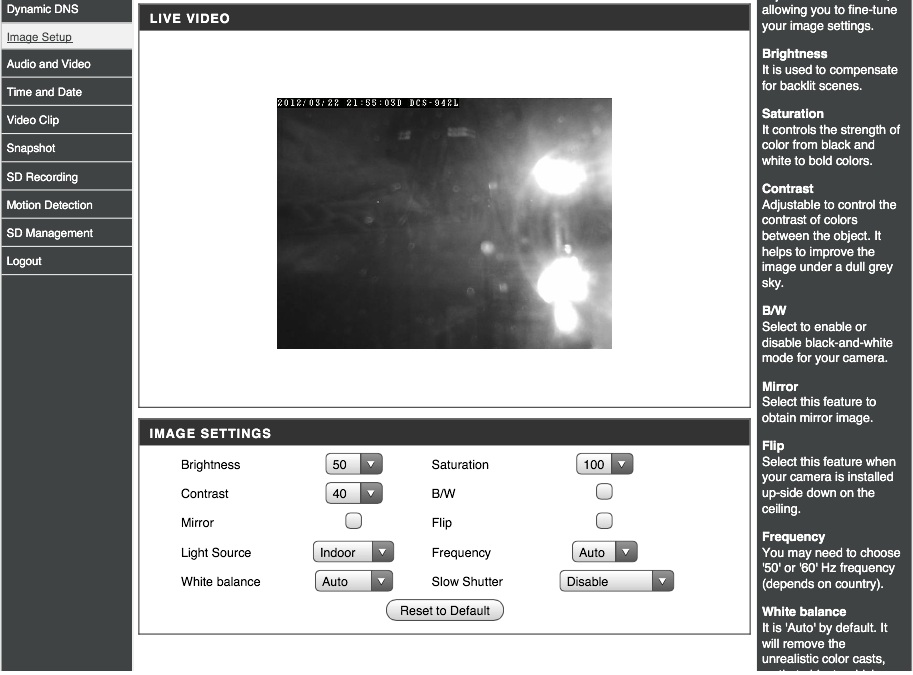
Image setup lets you change image quality settings.

Video setup lets you set 4 different profiles for different aspects of streaming.
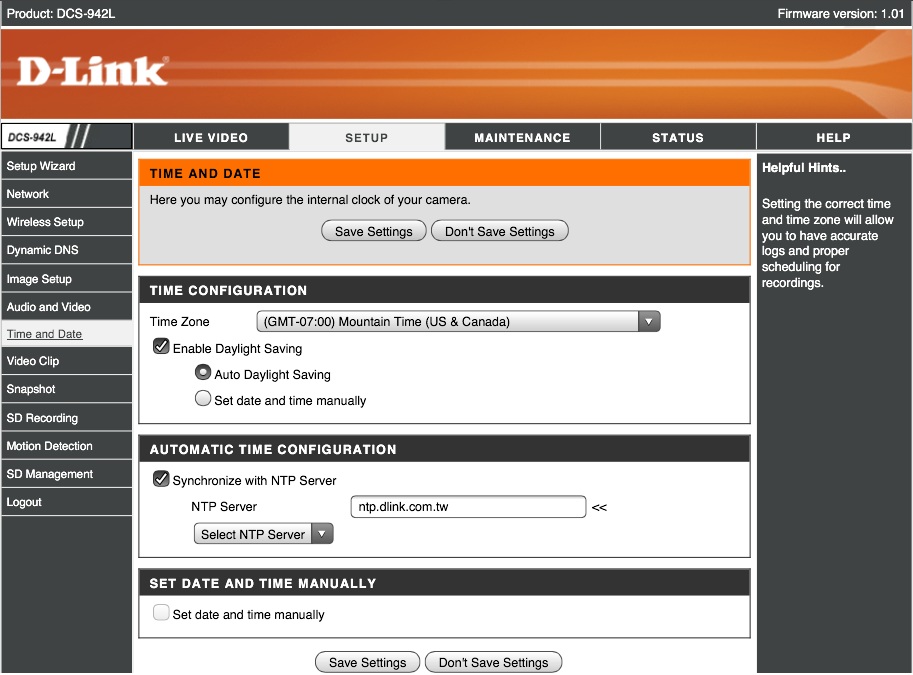
Time and date sets the camera date and synchs with an NTP server.
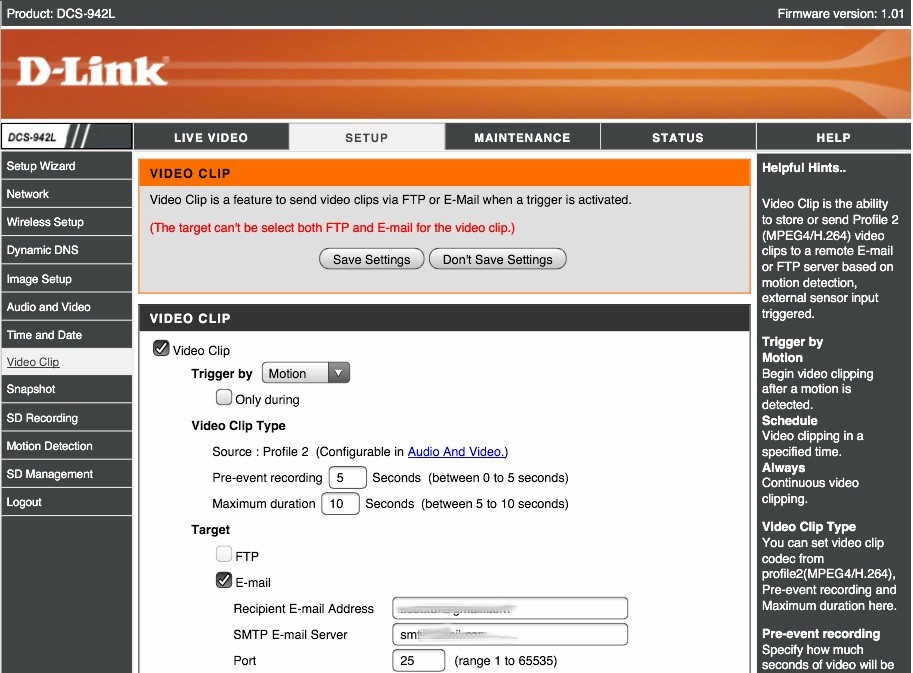
Video clip sets triggers and email configuration.
Snapshot sends static images to email or FTP.
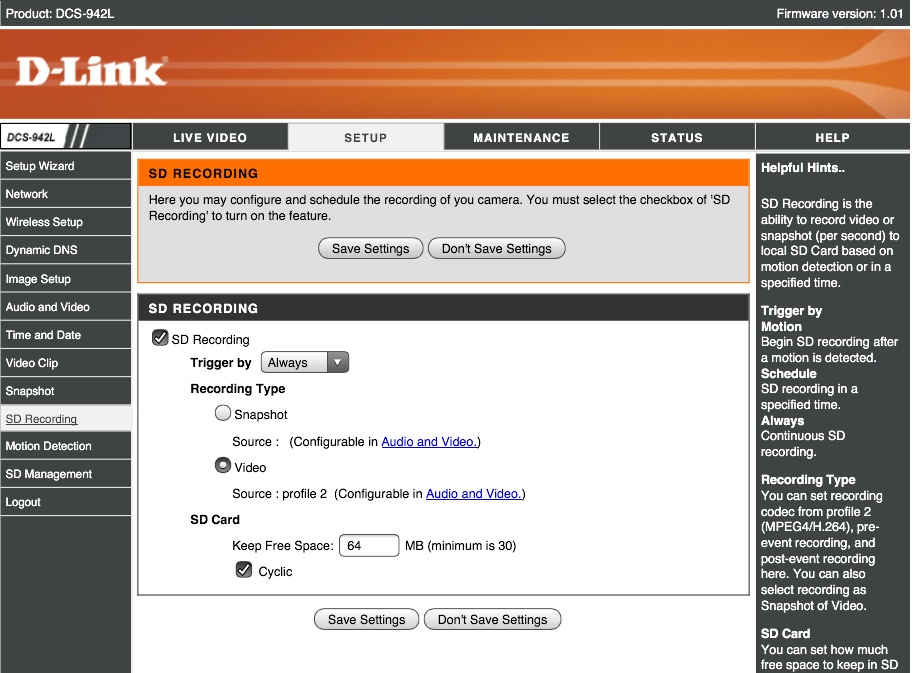
SD Recording allows you to record to a local SD card.
Motion detection sets motion detection sensitivity and area to monitor..
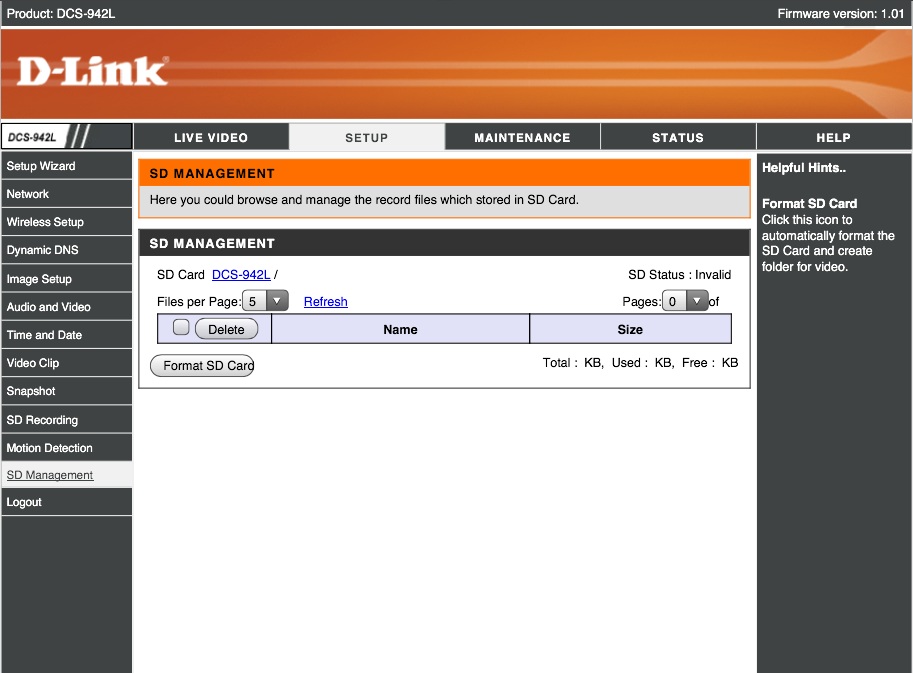
SD management lets you work with an SD card.
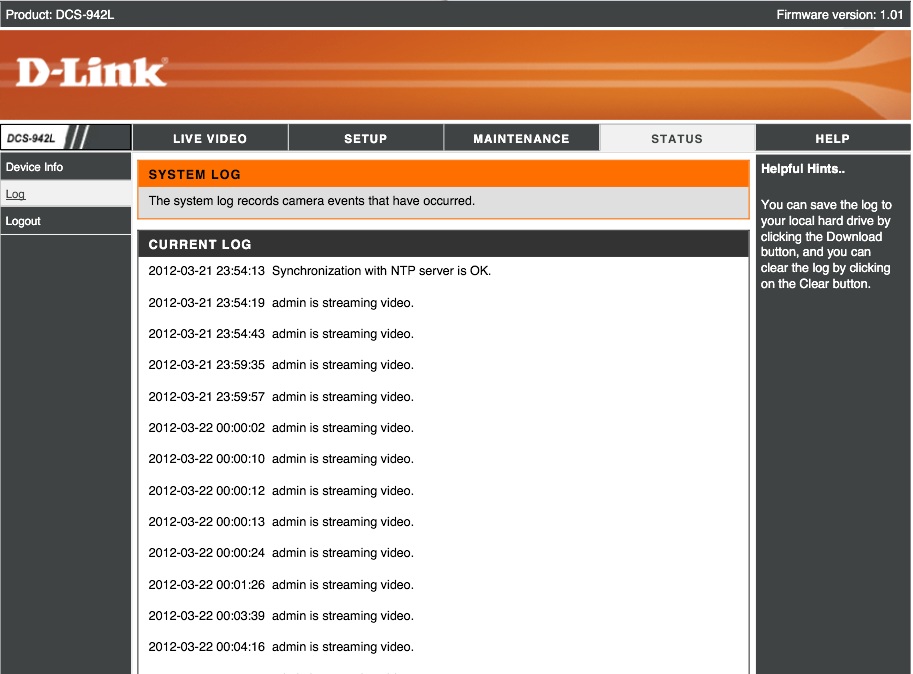
System log doesn’t show as much as you might expect.
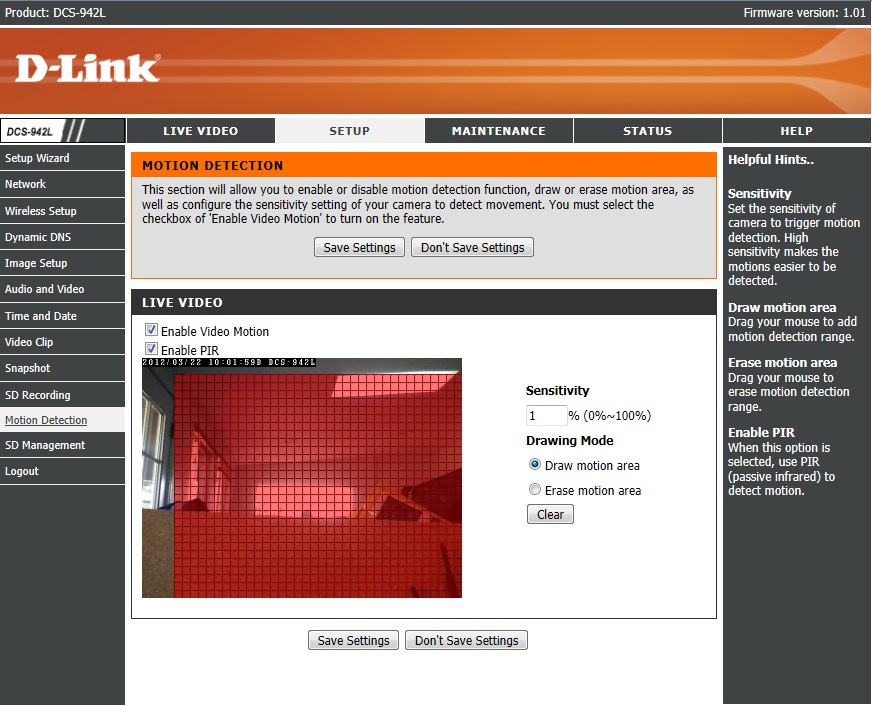
Motion detection settings are available in the camera’s web admin interface (Figure 8). You can restrict motion detection to only certain areas of the camera’s field of view. Sensitivity can also be adjusted from 0% to 100%, which simply means the percentage of change from one picture to the next to trigger motion. Passive infrared (PIR) can be used to detect motion. This simply means that an object enters the field that the sensor has determined to be normal.
Figure 8: Setting the motion detection area
Traditionally, I’ve found the motion detection in IP cameras a little quirky to use and the DCS-942L was no exception. While using the passive infrared option for motion detection, the Motion Trigger Indicator was lit 100% of the time, no matter what sensitivity I used!
With passive infrared off, settings were a bit more reasonable and I was able to set sensitivity to about what I thought was right. I should note this was simply by trial and error. There is no indicator on the motion detection page that allows you to see thresholds are met, which would have been nice to have.
As an example of what D-Link should have provided, look at Figure 9, which is Synology’s Surveillance Station interface. Detection sensitivity and threshold can be set, with the graph on the left of the image illuminating as motion is detected. Motion by Surveillance Station can be monitored as it happens and set accordingly when the threshold trips your specified level, in this case filtering out movement of the ceiling fan.

Figure 9: Synology Surveillance Station image showing realtime feedback of motion detection parameters
I had the admin interface set to email me a video clip if motion was detected. As Tim pointed out in his mydlink.com cloud review, the email options seemed awkward for a camera connected to the cloud. Rather than using a D-Link email server, I was required to enter my own. I used the same settings that I use for my Synology NAS and many monitoring scripts, but never received a motion detected email.
You may notice that a “Test Email” option is also curiously missing. Once email settings are entered, there is really no way I found to test it. I simply waited for motion, checked my email, found nothing, changed settings, rinse, repeat.. I never could get it to work. I did try FTP and recording to a local SD card and both worked well. FTP was also missing a “Test connection” function, leaving you to wonder if it could communicate with your FTP server.

Figure 10: D-Link DCS-942L email options, no cloud-based email server, and no test function
If you are serious about using the camera for motion detection, my recommendation is to skip this camera’s (or most IP cameras) motion detection functions. Instead, invest in a dedicated video security software such as Blue Iris ($29.95 for one camera or $49.95 unlimited) or the network camera support available with many NASes such as those from Synology and QNAP. This will give you more consistent options and a richer feature set.
Among the options for alternative IP camera software is D-Link’s own D-ViewCam software. Although this comes on the installation CD, it doesn’t install by default, it’s not in the Quick Install Guide and even the manual has only a short paragraph on it in the introduction. I spent only a brief time with it after it took me 10 mins to even find where to add the camera and got frustrated with it.
Jim Buzbee has a few more comments about D-View Cam over in his DCS-930L review. Granted that D-ViewCam is free, but it pales in comparison to Blue Iris and other options available.
In Use
Picture quality on the DCS-942L was good for an IP camera. I took several comparison pictures with it, a Nikon D5000 DSLR, and an $84 Foscam FI8918W IP camera in full room light in our downstairs junk room. I placed a vaccum at 15 feet from the camera with a sign on it that simply read, “15 feet”. This was meant to show camera clarity at 15 feet, as well as to test D-Link’s 5 meter claim for night illumination.
Figure 11 is from the Nikon D5000 DSLR, which will be our control.

Figure 11: Control image taken with Nikon D5000 DSLR
Figure 12 is the D-Link DCS-942L. You’ll definitely note the picture isn’t as sharp as the DSLR, but you wouldn’t expect it to be.

Figure 12: D-Link DCS-942L day mode
The last picture, Figure 13, is the Foscam FI8918W, with the vacuum replaced by a Linksys WRT54G router.

Figure 13: Foscam FI8918W day mode
A couple things to point out are the DCS-942L’s colors, which look pretty good for an IP camera, and the writing on the “15 feet” sign, which is washed out. Overall, though, there is enough detail for security duty if careful attention were paid to its field of view. The colors look much more washed out on the Foscam ,as you would expect for a cheaper camera. However, some edges appear sharper than the DCS-942L, such as the edges of the ironing board and the mirror beyond 15 feet.
One thing to compare in all three photos is the clarity beyond 15 feet. On the Nikon control picture, the furnace ducting is clearly visible through the doorway, as are some plastic storage containers. Those same items can be identified in the Foscam picture as well, although not nearly as clearly. With the DCS-942L, however, I cannot see them. So careful placement and consideration should be used when placing the DCS-942L for optimal security coverage.
Before going into how well the DCS-942L camera does in night vision, I should point out something I noticed. The light level in the three images above looks like a very lighted room, however the DCS- 942L wanted to be in night vision mode. To get the day image in Figure 12, I had to manually set the camera to Day Mode. I also found this to be a common complaint in the D-Link forum.
Figure 14 below shows the image the D-Link presented with the room light on. Notice how it’s still in night mode, but you can clearly see the lights on in the mirror on the top right.. As a security camera, I wouldn’t label this a deal breaker; such clarity in night mode during the day is still very good. But the camera seemed to transition between day and night mode much easier in response to natural light than it did to room lighting. It’s easy to tell when this is happening, due to the loud click sound it makes. If you want to stop the clicking, you’ll need to switch the camera to Manual day/night mode.
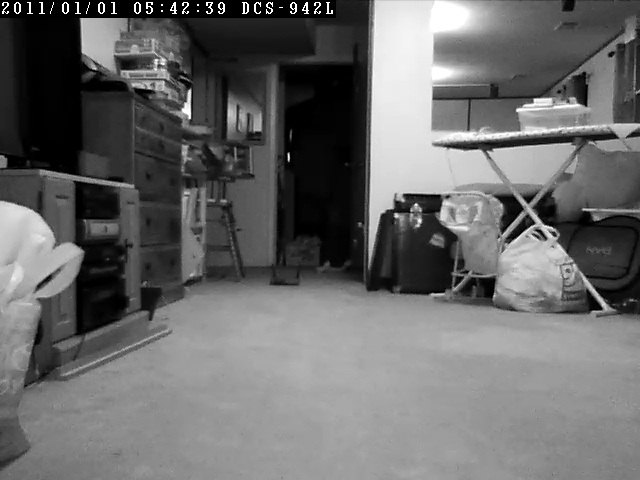
Figure 14: D-Link DCS-942L still in night node while set to “Auto” with the lights fully on
Figure 15 shows the true night vision mode of the DCS-942L. With the vacuum at 15 feet, you can see that everything around it can be identified, although the sharpness has definitely declined. The door frame five feet behind the vacuum can still be identified, however it is hazy around it.
In the 15 foot range that the specs of the camera indicate, it works moderately well. Jump back and forth between Figure 14 and 15, pick out an item in Figure 14 and look for it in Figure 15.

Figure 15: D-Link DCS-942L night mode
Figure 16 is the Foscam FI8918W. The Foscam has eleven IR LEDs to the DCS-942L’s four, plus a wider view angle. So it’s not surprising more items are visible, even back into the furnace room. I do not like the LED washout of the Foscam, however, which you notice on the carpet directly in front of it. However, it does illuinate the room better.
It should be noted that the Foscam only supports 15 fps at 640×480 and I’ve realistically seen only about 7-10 fps in Blue Iris. The consistent 30 fps at 640×480 with the D-Link would provide much clearer video and stills for fast-moving intruders vs. the Foscam.

Figure 16: Foscam FI8918W night mode
Closing Thoughts
I did have a fair bit of trouble with quirkiness with the camera’s admin interface, such as motion detection, frequent transition between night and day mode and SMTP email settings that didn’t work for me. The camera’s soft plastic ball and socket feel cheap and may prove to be problematic over time if careful attention isn’t paid to controlling tension on power and ethernet cables.
On the plus side, the DCS-942L showed consistent 30 fps framerates and daylight picture and video quality were good for a relatively inexpensive IP camera. Night vision capabilities were also good for the five meter range that the specs indicate. Wireless range on the camera seemed good, too making it through a brick wall back to my main router three rooms away.
As a static security camera, monitored by something like Blue Iris or Surveillance Station on a NAS to get around some of the admin interface shortcomings, I do believe the DCS-942L has value to justify its higher price over the DCS-932L. Just be sure to shop around. With Pricegrabber showing prices from $126 to $184 as I write this, you definitely can overpay if you don’t do your homework.