This article is sponsored by Synology.

Many Network Attached Storage (NAS) devices provide multiple services such as web, email , FTP etc. With a NAS doing double duty as server and storage device, failure is not an option. Sure, RAID provides some protection, but what happens if the whole NAS goes offline?
Synology High Availability (SHA) supports clustering two Synology NASes to provide redundancy and automatic failover in the event that either NAS suffers a storage, service, power or network failure. When a NAS fails, all data remains available and all services automatically failover to the second NAS. Moreover, Synology has simplified SHA so it can run even on a small 2-bay NAS and be set up by non-technical personnel. Even better, SHA is available free on select Synology Plus and XS/XS+ series NASes.
Requirements
Both Synology NASes in the cluster must essentially be twins. This means same model, Synology DiskStation Manager (DSM) version, RAM and storage configuration. Specifically, both NASes must have the same number of disks in the same slots in the same RAID storage configuration (Synology Hybrid RAID (SHR) is not supported with SHA). The only difference allowed is the "backup" NAS can have more storage capacity than the primary NAS. The graphic below highlights key SHA requirements.

Synology High Availability requirements
Setup
Start by configuring the network connections between the two NASes. At least two LAN ports are used on each NAS. Use the fastest LAN port to directly connect to the other NAS, which provides High Availability (HA) with a constant heartbeat and automatic continuous data replication.
It is strongly recommended that the HA connection between the two NASes is a direct cable. If necessary, a switch can be between, but the two NASes must be on a dedicated VLAN with no other devices. The second LAN port is used to connect each NAS to the data network. The gallery illustrates the network connections.
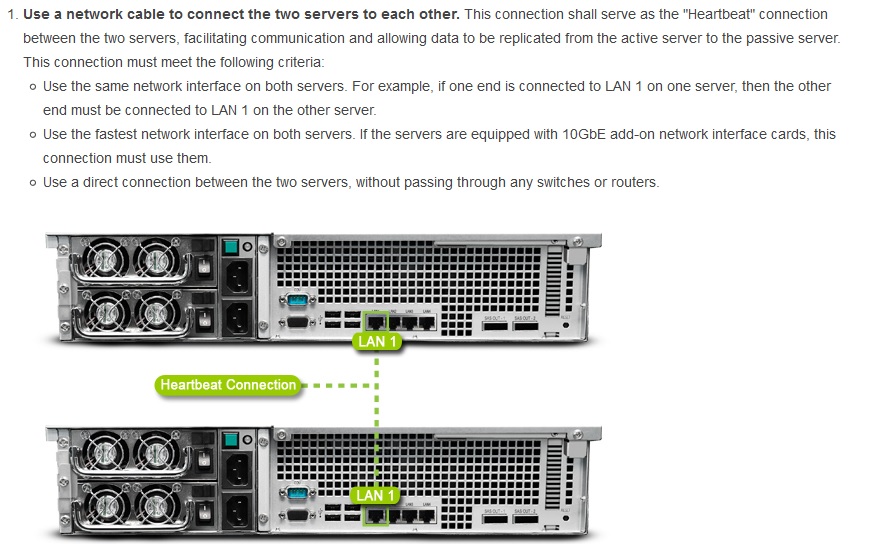
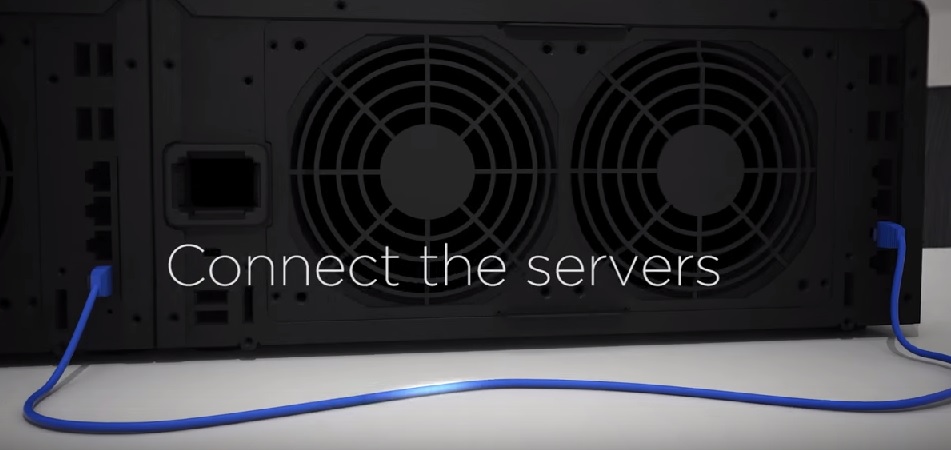
Directly connect the two NAS for HA.
Another view of two NAS directly connected.
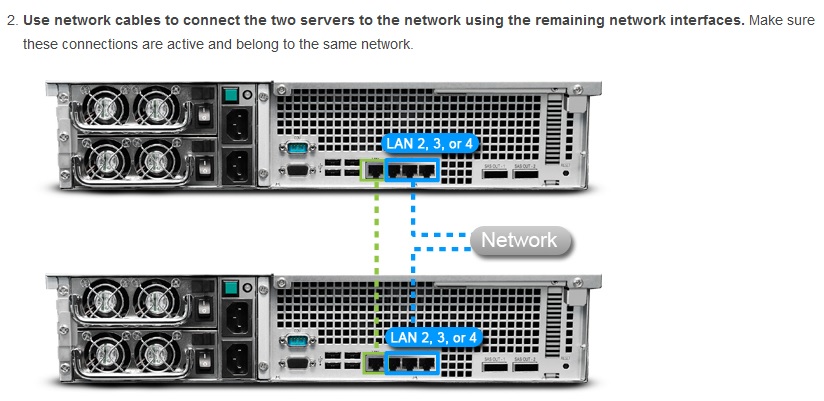
Connect the NAS to your LAN/data network.
Now assign Static IP addresses to each interface. Put the HA LAN ports on an unused subnet and the data network LAN ports on one of your network subnets.
Finally, on higher end Synology NASes with more than two LAN ports, Link Aggregation is supported for the HA connection and/or the data network connection to provide greater bandwidth and redundancy.
With network setup done, it’s time to configure SHA. You only configure the "active" NAS for HA; it will automatically apply the required SHA configuration to the "passive" NAS.
A key step is assigning a virtual IP address that will be used to access NAS data and services. This virtual IP address must be in the same subnet as the IP addresses assigned to the LAN interfaces connected to the data network. Below is a gallery of screenshots showing step-by-step configuration.![]()
Directly connect the two NAS for HA.
Another view of two NAS directly connected.
Connect the NAS to your LAN/data network.
When the two NASes are in sync, you’ll see the screen below, showing the HA cluster status. You’re done!

Synology High Availability up and running
Conclusion
A disaster preparedness survey shows that the average business loses over $12,000 in a service disruption, 50% of small and medium businesses are unprepared for disaster and 40% of small businesses never reopen after a catastrophic data loss. These are certainly sobering stats!
So this doesn’t happen to you, check this Synology KnowledgeBase article that describes implementing SHA, read the SHA white paper or watch the video below.