Introduction
Update 2/20/15: Added Pros and Cons

If you’ve walked down the lighting aisle in your local hardware store recently, you’ve probably noticed a few things have changed. First, as mandated by law, incandescent light bulbs are being phased out; all you can still purchase are fairly low wattage incandescents.
Second, compact fluorescent lights (CFLs), once the “green” go-to replacement for incandescent lights, are starting to be replaced by LED light bulbs. CFLs, while much more energy efficient than incandescents, have two key drawbacks; they take awhile to warm up and achieve full brightness; and they rely on a small amount of mercury to operate, which creates a disposal hazard.
LED light bulbs are very energy efficient and mass production has lowered the price of a 60 W LED equivalent to about $10 or less. This is cheap enough that you should recover the cost of the bulb through energy savings over the life of the bulb. Most LED bulbs are dimmable, have a pleasing soft “warm” light similar to incandescent bulbs and achieve full brightness instantly.
The latest twist on LED light bulbs has made them “smart”. Smart LEDs look very similar to their “dumb” cousins, but you can control them via an app on your smartphone or tablet. They are a direct replacement for whatever bulb you are currently using—you just screw them into an existing socket.
All smart LEDs rely on communicating with a gateway or “hub” device for their intelligence. If you don’t install the hub and apps, the bulb will respond the same as their dumb cousins. Your existing light switch will turn them on/off just like any other bulb. But if you do install the hub and apps, you’ll be able to turn your lights on/off and dim them according to schedules you create or are triggered by external events.
In this roundup, I’ll be looking at five different kits:
- Belkin WeMo LED Lighting Starter Set
- GE Link Starter Kit
- Insteon 2245-222 Hub and Insteon 2672-222 Bulb (sold separately – not sold as a starter kit)
- Philips Hue Lux Starter Kit
- Connected by TCP LED Starter Kit
The kits all include a gateway (hub) and two LED Smart Bulbs. Insteon, Philips and TCP hubs require an Ethernet connection to your network while the GE and Belkin hubs useWi-Fi. Bundled together as starter kits, these products offer a good, cost effective way to plunge into Home Automation for less than $100. Though not sold as a kit, you can find the Insteon Hub for $39.99.and the Insteon LED bulb for $29.99 at Smarthome.com.
I’ll get into the differences when we look at each kit. But first, let’s summarize the common features of the bulbs in this roundup.
- All are energy efficient consuming only between 9.5 – 12 W to produce the equivalent light output of a 60 W incandescent bulb. (~800 lumens – see table below for details)
- They are intended to be installed into a live socket that has power applied all of the time. They require the power to link to their hub and to respond to commands.
- They are intended for indoor use and should not be used in an enclosed fixture.
- They cannot be used in conjunction with existing dimmers. Existing dimmers cause a conflict and can cause flickering or flashing.
- The hubs, with one exception, require an constant internet connection and a user account, as the products are cloud-based.
- All are controlled by iOS and Android apps for your smartphone or tablet. Insteon also has support for Windows phone and Windows OS.
- All products support remote access from anywhere
- None of the bulbs will interoperate with the other manufacturers’ hubs or bulbs included in this roundup.
- All products require a Wi-Fi network (2.4 GHz band only)
- Each product can handle networks of at least 50 bulbs
- Lighting commands are communicated wirelessly directly between the manufacturer’s hubs and their Smart LED bulbs – not over Wi-Fi – so placement of the hubs is important.
Table 1 has a summary of the products and their key attributes. Term definitions are found below the table.
| Manufacturer | Belkin | GE | Insteon | Philips | TCP Inc |
|---|---|---|---|---|---|
| Name | WeMo LED Lighting Starter Kit | GE Link Starter Kit | Insteon Hub Insteon Bulb |
Hue Lux Starter Kit | Smart LED Light Bulb Starter Kit |
| Model # | F5Z0489 | PLINK-SKIT | 2245-222 (Hub) 2672-222 (Bulb) |
452714 | LCG2LD11 |
| Price | $99.99 | $49.97 (Home Depot) | $114.99 (Hub) $29.99(Bulb) |
$99.97 | $65 |
| Standard | ZigBee | Z-Wave | Proprietary | ZigBee | 6LoWPAN |
| Hub Connection | Wireless | Wireless | Wired | Wired | Wired |
| Lumens | 800 | 800 | 713 | 750 | 800 |
| Color Temp | 3000K | 2700K | 2547K | 2700K | 2700K |
| LED Power consumption (watts) | 9.5 | 12 | 9 | 9 | 11 |
| Lumens per watt | 84.2 | 66.7 | 79.2 | 83.3 | 72.7 |
| Timers | N | N | N | Y | N |
| Enable/Disable Schedules | Y | N | N | Y | Y |
| Scenes | N | N | Y | N | Y |
| Groups | Y | Y | Y (Rooms) | Via Scenes | Y (Rooms) |
| Sunset | Y | N | Y | N | Y |
| Away Profile (Random On/Off) | Y | Y | N | Can create | N |
| GeoFencing | N | Y | N | Y | N |
| Fade In/Out | Y | N | Y | Y | N |
| Sleep Timer | Y | N | N | Can Create | N |
| IFTTT | Planned | N | N | Y | N |
| Registration required | N | Y | Y | Y | Y |
| Cloud required | N | Y | Y | Y | Y |
| Activity Log | N | Y | N | N | N |
Table 1: Product Features
Definitions:
- Timers – this refers to setting a countdown timer for a specified period of time
- Enable/Disable Schedules – different manufacturers call schedules different things such as events, activities, scenes, and rules. While all products allowed you to create schedules for any day of the week, not all of them allowed you to disable a schedule so that the activity wouldn’t run.
- Scenes – Scenes is a bit confusing because different products use the term different ways. For the purposes of the chart, I consider that a product supports Scenes if you can schedule an on and off time within a single event.
- Groups – Groups refers to the ability to place multiple light bulbs into a group that can be treated as an individual device.
- Sunset – The ability to schedule events based on sunrise or sunset for your registered time zone. With this feature, you can schedule an event, such as turn on the bedroom lamp at sunrise, just once. The product takes care of knowing when sunrise/sunset is, and schedules the event accordingly, so you don’t have to change the schedule as sunrise/sunset times change throughout the year.
- Away Profile (Random On/Off) – This would be used for when you are away from home. Products having this either have a built in away profile, or you can create a schedule that varies the on/off times by a random amount of time around the start and end times so that the lights in your home don’t look like they are connected to a timer.
- GeoFencing – According to Wikipedia, a Geo-fence is defined as “a virtual perimeter for a real-world geographic area”. As applied to Smart LEDs, Geo-fencing could enable your product to turn lights on or off based on a location trigger. You could, for example, create an event that would turn on your house lights if when you get within a mile of your home.
- IFTTT – IFTTT integration allows you to add functionality to your smart bulbs by using or creating “recipes” on the IFTTT web site. For products like the Belkin WeMo that don’t have native Geofencing capabilities, an IFTTT script could turn on your lights as you near your home in the evening.
Protocols
While all smart bulbs communicate wirelessly, they use a few different protocols. Two products use Zigbee to communicate with their linked devices, but they don’t interoperate. According to multiple sources, including one from the Department of Homeland Security, ZigBee can operate either in the 2.4 GHz ISM band or 915 MHz band. Wikipedia also indicates that both bands can be used in the US.
WeMo products use ZigBee Home Automation Profile Version 1.2 on the 2.4 GHz band. Philips Hue Lux, on the other hand, uses ZigBee Light Link, which also operates in 2.4 GHz. Belkin has implemented the mesh networking feature of the ZigBee protocol. So not only does the hub communicate with the lights, but the lights form a mesh network that helps extend operating range. So if needed, one WeMo bulb could pass along a command to another that is farther away from the hub. I was unable to determine if Philips uses mesh networking, but here’s a link from Philips’ developers program.
Z-Wave is another popular wireless communications designed for Home Automation products and is the one used by the GE Link products. Like some ZigBee products, it operates in the 915 MHz band.
The Connected by TCP product uses yet a different communications protocol: 6LoWPAN. The acronym stands for either iPv6 over Low Power Wireless Personal Area Networks, or a more recent acronym, IPv6 over low power wireless area networks. Whichever yo choose, 6LoWPAN competes with Z-Wave and ZigBee.
Insteon uses its own proprietary protocol and is the only product that uses dual physical layers (RF and Powerline) to ensure reliability. The RF component of Insteon devices operate in the 915 MHz spectrum like Z-Wave and some ZigBee devices. Products are automatically enrolled in a mesh network, so as you add devices, the network becomes more robust.
There are other Smart LEDs that work using Wi-Fi or Bluetooth, like LIFX’ Wi-Fi and Ilumi’s Bluetooth multi-color bulbs. But those are beyond the scope of this review.
Basic Operation
All the kits install in a similar manner:
- Plug in and connect the hub
- Download and install the app from the app store for your platform;
- Run the app and find the Smart LEDs on your hub
- Set up scenes and groups (optional)
For wireless hubs, you have the additional step of connecting it to your home Wi-Fi network. Since all products follow the same process, I’ll only comment on setup in the individual reviews if I ran into an installation problem.
Belkin WeMo LED Lighting Starter Set
Belkin’s WeMo LED Lighting Starter Set uses a small square wireless hub, shown at left below, to connect to your wireless network.

Belkin WeMo LED Lighting Starter Set
The screenshot below shows the landing page (left) and the brightness adjustment page (right) when you tap the down arrow. The landing page screenshot shows that the Desk Lamp in on at 50% brightness and the Rear Desk is off. You just tap the power button to toggle the light on/off. The light will come on to the default brightness that you have configured.
The expanded page also exposes the Sleep Fader. This is like a sleep timer on your clock radio. You can set the amount of time over which the light will fade from its current brightness to off. Only the Belkin WeMo has this feature.
 and brightness page (r)")
Belkin WeMo Landing page (l) and brightness page (r)
In the WeMo environment, schedules are called Rules, which you access by tapping the Rules icon at the bottom of the page. Your existing rules are shown along with the option to create a new rule by tapping the “+” in the upper right corner of the screen. You can also edit, enable/disable or delete a rule by tapping on the right “>” on the right side of the screen adjacent to each rule.
A rule defines a single action. You can either turn one (or more) lights on / off with a rule. When creating the rule, you can configure the brightness and the fade in time (for “On” rules) or fade out (for “Off” rules) for each lamp. Your choices are Default, 1, 5, 15 and 30 minutes. To help you get a feel for the interface, I’ve created a short gallery that shows several interesting screens from the WeMo UI.

When creating a new rule, optionally you can choose the brightness and fade in time for the event.

This shows the Sunrise/Sunset options and day of week schedule
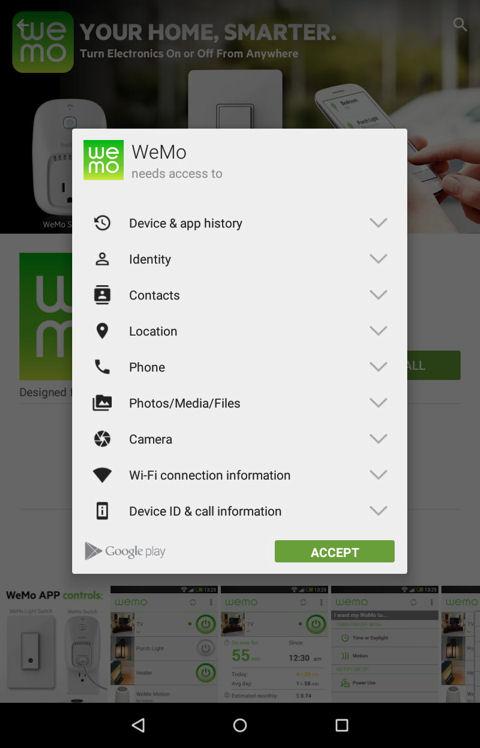
These are the permissions you have to grant WeMo on your Android device

It’s easy to create groups of light bulbs.
WeMo’s control architecture is simpler than other products’. Lighting commands are sent locally between the hub and the lights. While Belkin has a cloud infrastructure that stores your rules for synchronization between mobile devices, rules will execute on a local network even if the internet connection is lost. Other products use their clouds to send commands to the hub, which then sends the commands to the Smart LED bulbs. During the setup process remote access is set up without requiring an account setup. No changes or port forwards were required on my router.
The iOS app for WeMo is an iPhone app, but it ran normally on my iPad. With a color temperature rating of 3000K, the WeMo bulb is the coolest, most white bulb in our roundup. With the WeMo bulb placed near the other products, you could see that the light was whiter than the others. Still, 3000K is considered a soft white – not the cold white lights that turned many people off on the original CFLs. It uses a miserly 9.5 W to generate 800 Lumens of light which, at 84.2 Lumens/W, makes it the most energy-efficient bulb in the roundup.
I didn’t really run into any unexpected problems during setup. I did, however expect one problem because Tim had previously configured the WeMo before sending it to me. Being previously configured, when I reset the hub, it couldn’t find any bulbs when it searched for them. This gave me a chance to check out Belkin Tech support. After a very short wait, the support tech told me I had to reset the light bulbs to factory defaults.
To reset bulbs, the sequence is as follows:
- With the light bulb on, turn it off and wait for three seconds
- Turn the light bulb back on and wait for three seconds
- Repeat steps 1 and 2 three more times. The bulb will flash to indicate that it has been reset.
That solved the problem and I haven’t had any issues since.
I found the UI very easy to navigate and easy to learn and use. While I did all of my testing and screenshots on the iPad, the Android app looks and acts exactly the same as the iOS app.
I noticed while dragging the slider to adjust the brightness of a bulb, the bulb didn’t really dim or brighten until I lifted my finger. However, the percentage of brightness indicator did change as the slider was moved.
I was disappointed that Belkin hasn’t yet implemented IFTTT for the WeMo, which would provide additional functionality. But even without IFTTT, WeMo met my needs.
Pro: Does not require an internet connection to control lights
Con: IFTTT not yet implemented
GE Link
GE Link is a collaboration between GE and Quirky. GE builds the bulbs and Quirky supplies the hubs. The GE Smart LEDs, like the WeMo family of products, are part of a larger Home Automation offering from more than 15 companies.
The Link hub, included in the GE Link starter kit and shown below at right, is much like the WeMo hub. It has approximately the same form factor, is wireless and has a similar Wi-Fi setup scheme. Its communications are limited to Wi-Fi and Z-Wave.

GE Link Starter Kit
Quirky also makes the Wink Hub. In addition to Wi-Fi and Z-Wave, the Hub can communicate using Bluetooth LE, Lutron ClearConnect, ZigBee and Kidde protocols. Quirky has developed its own standard named “Wink”.
The first thing that you’ll notice about the GE Link is the bulb. Rather than having a frosted bulb, the GE bulb has a clear plastic dome. Looking at the bulb from the top, you’ll see that there are 16 LEDs arranged in a circular pattern around the center of the bulb. Surrounding the ring of LEDs, there’s a plastic ring designed to help diffuse the light. While the plastic ring does diffuse the light, at full brightness, the best way to describe the light is “glaring”. It’s the only light that hurt my eyes to observe at full brightness.
If you look back at Table 1, you’ll note that there are a lot of “N”s in the GE Link column. The product doesn’t support fade in/outs, scenes, sunrise/sunsets or away modes. However, it does provide a very usable interface for controlling the lights. You can create “shortcuts” for frequently used unscheduled actions such as “All on”, or “turn on light 1”. The actions are limited to turning on one or more specific bulbs at a specified brightness, or turning off specified bulbs. Interestingly, though the Wink interface supports grouping of bulbs, when you create a shortcut, the group(s) you created don’t appear as a selection for your shortcut.
Wink lets you create location-based “Robots” that perform actions such as turning on / off lights, sending a notification through your mobile device and / or sending you an email. I first created a location called “Home” based on my address. The robot lets you create a rule based on when you either arrive at a location or leave from a location.
I set up a rule to turn on Light Bulb 1 when I left home and to send me a notification. I had the Wink application installed on my Samsung S5 phone and gave the app permission to read my location. When I left home yesterday evening, I got an in-app notification that I had left and when I returned home later, Light Bulb 1 was turned on. I guess you can debate whether or not this is “geo-fencing”, as you can’t control the size of fence around your departure or arrival.
Wink is an extendable platform and products other than Smart LEDs may add capabilities to the Robot feature. While there aren’t any IFTTT recipes designed specifically for the GE bulbs, there are some recipes for other products controlled by the Wink infrastructure.
The GE-Link / Wink platform also has an activity log – a unique feature in this roundup. Every activity, including Robot activities, is logged with the action taken and the brightness level for the bulb(s).
The composite image below shows the Lights screen (l) and the dimmer adjustment screen (r). Tapping on the drawer icon (horizontal bars) in the upper left corner of the screen takes you back to the home page included in the gallery below. Tapping on the three “more” dots takes you to a screen that shows your linked devices, groups (if any), the activity log, and the menu for scheduling.
 and dimmer adjustment (r)")
Wink Light page (l) and dimmer adjustment (r)
The screen on the left shows that Bulb 1 is on and at minimum dimness, Bulb 2 is on at ~50% and Bulb 3 is off. To turn a bulb on or off, just tap the bulb’s icon. To change the brightness setting of a bulb, you drag you finger horizontally left (dim) or right (brighten) across the bulb’s icon. If you tap and hold a light bulb icon, the screen at the right appears.
In my testing, I started with the light at 100 percent – ie, the dark orange right fully clockwise. Sliding my finger horizontally to dim Bulb 2 (left image above) didn’t really have any effect at the “12 o’clock” position. Only when I got to about the ll o’clock position did the bulb start to dim. Neither dimming interface showed a percentage brightness. Although I don’t have a meter to measure light output, it appeared that the GE Link bulbs don’t dim as completely as some of the other bulbs in this roundup. Finally, if you tap the Groups icon, you can create or edit groups of light bulbs and control your groups of bulbs with a similar interface.
Like the Philips and TCP light bulbs, the GE Link bulb has a color temperature of 2700K, so it’s a "warm" bulb. The GE Link is specified to used 12 W to generate its 800 Lumens of light. At 66.7 Lumens/W, the GE Link bulb is the least efficient bulb in our roundup.
The gallery below illustrates several of the features discussed in the review.
When creating a new rule, optionally you can choose the brightness and fade in time for the event.
This shows the Sunrise/Sunset options and day of week schedule
These are the permissions you have to grant WeMo on your Android device
It’s easy to create groups of light bulbs.
Pro: Starter kit and additional lights are very affordable
Con: Clear bulb is glaring without shading
Insteon Hub & Bulb
As noted in the introduction, Insteon doesn’t have a starter kit. But you can assemble your own for about $100, buying a Hub and bulb. We included Insteon because the company has been deeply involved in the home automation market for a long time. Insteon has a complete product line home automation devices that provide solutions for lighting control, audio / video, security, convenience, energy saving, thermostats, pet care and even irrigation.

Insteon Hub and LED bulb
The Insteon hub is a small white rectangular device that connects to your wired Ethernet network and power. Just plug it in and, within a minute or so, the single LED will glow solid green. While most people will set up the hub using an iOS or Android device, there are also applications for Windows Phone and Windows OS.
Once you create an Insteon account and your hub is set up, you just add devices. The hub will scan your network for compatible devices. But unlike other products, you also have the option of entering a unique Insteon six character ID. To me, it looked like part of a MAC address. One of my bulb’s ID numbers was 2F 66 8A. I tried discovering the LED bulbs both ways, and device recognition seemed quite a bit faster using the Insteon code.
The composite image below shows the rather spartan landing page (l) and the main menu (r) that is exposed when you click on the drawer icon at the top of the screen. The landing page shows your favorite devices. Newly added devices are automatically added to favorite devices.
 and main menu (r)")
Insteon landing page (l) and main menu (r)
You can group devices together using the Rooms feature. All activities, scheduled and unscheduled, are created and managed using scenes. With scenes, you can add devices or room memberships. Once you select devices, you can select on/off or brightness levels for each bulb along with a fade on or fade off time. Scheduling options include time of day, Sunrise and Sunset.
As part of scene setup, you can set both the off time and on time for each device, and you can control brightness and fade in/out times. This saves a lot of clutter on your screen as compared to products that force you to schedule on and off activities separately. You can also select days of the week to execute the scene. You can disable an on or off event within a scene to prevent the schedule from running. This leaves your originally selected days checked, so you can come back and enable the event to run on its originally scheduled days, but you’ll need to re-enter on and off times. The scheduler is smart enough to check other schedules for conflicts. You can’t, for example, have two scenes containing the same devices scheduled for sunset.
All schedules executed on time and as expected. I tried different ramp rates for both on and off cycles. In the end, I think I preferred the 0.5 second fade times. Insteon has 15 preset ramp rates from which to choose as well as individual quick set icons for Instant (0.1 seconds), Fast (0.5 seconds), Medium (2 seconds), and Slow (5 seconds). The range of on/off fade times ranges from 0.1 second to 8.0 minutes. There’s isn’t a “custom” fade setting that allows you to set your own amount of time.
Each bulb has its own dimmer (see gallery below). Dimming seemed linear throughout the entire range. The bulb actually illuminated when I slid the control from off to 1%. Like the other products, when using the dimmer manually, the change in brightness doesn’t execute until I released my finger from the control.
With a color temperature 2572K, the Insteon bulb is the “warmest” bulb in our roundup. It was noticeably warmer than the next coldest bulb in the roundup, the Philips Hue Lux (2700K). The bulb is rated at 717 Lumens, which is less light output than any of the other bulbs in our roundup. I could notice the difference in output comparing it to the 750 Lumen Philips Hue Lux. However, at 79.2 Lumens/W, it was the third most efficient bulb in our roundup.
This configuration of Insteon lacks support for randomized scenes (schedules) to give your home a lived in look while you’re away, IFTTT, and geo-fencing. The gallery below will give you an additional feel for the user interface.
When creating a new rule, optionally you can choose the brightness and fade in time for the event.
This shows the Sunrise/Sunset options and day of week schedule
These are the permissions you have to grant WeMo on your Android device
It’s easy to create groups of light bulbs.
Pro: Dual wireless and powerline connections enable large robust networks
Con: Lacks randomized "Away" schedules and Geo-fencing
Philips Hue Lux
Philips created quite a splash, and a colorful one at that, when it introduced the Hue. It was the first smart color LED bulb that allowed tweaking the color of the bulb to virtually any color in the rainbow. With the large number of IFTTT community-published scripts, you can have a lot of fun triggering your lights and changing colors for specific events. Using a trigger from ESPN sports, you could, for example, turn on your Hue lights and change the color to orange when the Denver Broncos scored a touchdown.
As much fun as the Hue lights are, the starter kit at aroud $200 is probably too much for some who are just starting to dabble with Home Automation. Philips solved that problem by introducing the $100 Hue Lux Starter kit that includes a wired hub and two Hue Lux light bulbs. The Hue Lux bulb has the same somewhat flattened bulb top as the original Hue.

Philips Hue Lux Starter Kit
The Hue Lux bulb is a standard Smart LED bulb with a specified color temperature of 2700K and light output of 750 Lumens. This bulb is somewhat warmer than the TCP, Belkin WeMo and GE Link bulbs. This ZigBee-based product uses the same hub and software as the original Hue color bulbs, so if you like the features and want to try out color, you can easily upgrade your system by purchasing some Hue bulbs at around $60 a pop.
The bridge pictured at left above, is a white round device which plugs into your wired Ethernet network. It has three blue LEDs and a large blue illuminated center button used for synchronization. As with most of the other products, you create an account and link your bridge so that you can have remote access.
While the software found the bridge and was able to discover the two Hue Lux LED bulbs, for some reason, it was unable to link the bridge to my Hue account. I called tech support and though the tech was helpful and I didn’t have to wait long for the call to be answered, he wasn’t able to solve the problem. He said my problem was being escalated, but as of this writing about a week later, I haven’t heard back. So while I can use the lights locally, any remote access and features such as geo-fencing couldn’t be tested.
The user interface for the Philips Hue Lux is very simple. The native iPad app screen below shows the landing page (l) and the landing page with the main menu opened (r) by clicking on the drawer icon.
Philips uses the term "scene" somewhat differently than other vendors. Creating a Hue scene lets you select which Hue bulbs to include and select a brightness for each selected bulb. Scenes are then used when you create an Alarm (schedule). The software ships with five pre-configured scenes, and, of course you can add more. One example of a scene might be to turn on two lights at 50% brightness.
During the creation of a scene, the lights illuminate to full brightness. A slider lets you dim each light to the brightness you prefer. Unfortunately, there’s no percentage indicator to show percentages – you just pick the level of light that looks right.
You can select an image to use for the scene icon from a small library of photos supplied by Philips, or you can choose one of your own photos. Tapping one of the scene icons on the landing page causes that scene to execute immediately.
 and main menu (r)")
Philips Hue Lux landing page (l) and main menu (r)
A Hue alarm is a single event, turning a scene on or off. So you need two alarms for scheduling one on/off sequence. To set an alarm, you just select a time, and action (scene on or lights off), pick a scene (eg, Snooze), a fade time, and a repeat schedule.
For a fade time, you can select none, or 1 to 60 minutes in 1 minute increments. There’s a Random toggle switch in the Alarm creation menu that will trigger the alarm a random amount of time before or after the set time. This would be good for setting up an away from home schedule. (See screenshot included in the gallery below).
The Hue Lux has a pleasing warm light. Though it only puts out 750 Lumens, it only consumes 9 W. At 83.3 Lumens/W, the Philips Hue Lux is the second most energy efficient bulb in our roundup. It also dims to a very low level. I used one of the dimmers to dim one Hue Lux bulb all the way down, and left it on as a night light in my office.
While the three products above required you to remove your finger from the slider for the new level to take effect, the dimmer on the Hue Lux is more like a real dimmer. You can adjust the brightness up and down without lifting your finger from the screen, and the brightness of the bulb will track your finger movement after a brief lag.
The Philips Hue Lux doesn’t have pre-configured “Away” scheduling. But you can create an away schedule using the random feature when you schedule an alarm. Unfortunately, there aren’t Sunrise/Sunset triggers available to use for alarms. Similarly, there’s not a pre-configured sleep timer, but you can easily create one by creating a Timer event that sets a countdown timer. It defaults to the current time, and you can schedule the fade out period for up to 60 minutes.
I like the simplicity and look of the user interface. If only I could get the bridge to link to my account, I’d consider springing for a couple of Hue color bulbs to supplement the two Hue Lux bulbs that came in the starter kit.
When creating a new rule, optionally you can choose the brightness and fade in time for the event.
This shows the Sunrise/Sunset options and day of week schedule
These are the permissions you have to grant WeMo on your Android device
It’s easy to create groups of light bulbs.
Pro: Starter kit hub also works with Hue color bulbs
Con: Evaluation hub didn’t link to my Hue account
Connected by TCP
Like most the other starter kits in this roundup the Connected by TCP Gateway Starter Kit, hereafter referred to as TCP, contains a gateway hub device and two LED Smart bulbs. The TCP hub, like the Insteon and Philips hub, is a wired Ethernet device that should only need to be plugged into your network and have power applied. You would think that the setup would be simpler than a Wi-Fi setup, but I’m sorry to report that it wasn’t.

Connected by TCP Gateway Starter Kit
The TCP product requires an internet connection. If fact, if you don’t have an internet connection, you lose the ability to control your lights locally or even set up the product. After creating an account, I was initially able to get the hub to connect to TCPI’s servers. However, on a subsequent reconfiguration, the firmware was updated to the latest version and that’s when my problems started.
The Gateway wouldn’t connect to TCPI’s servers. And, without a connection to their servers, I couldn’t continue with the setup process. It turns out that I wasn’t alone. The latest firmware made some security changes that broke the app for a lot of people. Here’s just a small sampling of the comments on the Google Play Store subsequent to the 1/15/2015 update. Some of the comments were even harsher.

Google Play Store reader comments on the latest TCPI firmware upgrade
I called tech support and we performed the standard IP connectivity troubleshooting tasks (which I had already done before calling). Through the course of I troubleshooting I learned two key things.
First, the firmware update disabled the local HTTPS UI for the gateway. Though I never had a chance to use it, from the comments I read, it looks like you could have configured the product with a web browser.
Second, the application now also depends on UPnP to open a port on your router’s firewall. I have UPnP disabled on my router for both security and because I have NASes that compete for ports 80 and 443. So UPnP creates more problems than it solves for reliable remote NAS access.
I provided the MAC address of my gateway to the technician so he could see if my gateway came up and the tech provided the port numbers used (49494 TCP&UDP). As soon as I enabled a port forwarding rule, the gateway connected to TCP’s server.
While setting up a port forwarding rule and a DHCP reservation is something that most SmallNetBuilder readers would find easy, home lighting is intended to be a product easily installed by most consumers. I suspect that this latest firmware update, in addition to aggravating existing customers, will generate a lot of returns if it’s not fixed quickly.
The interface for the TCP lights is pretty slick. The application I installed was a native iPad app, so I could use it in portrait or landscape mode. The program remembers the last menu used, and when you re-launch the application, that’s the menu that’s presented.
The main menu consists of only three entries: My Lights; Smart Control; and Configure. TCP uses “Rooms” to group light bulbs. When creating a Smart control (schedule), you configure either individual lights to be part of the schedule, or rooms. You can also create scenes that appear in the Smart Control list without schedules. If you later decide to schedule a scene, you can do so.
The image below shows the Smart Control menu. The first four entries are pre-configured Smart Controlsl installed with the software. I created the All Dim, All On and All Off scenes. Menu entries with vertical “Pause” bars near the icon (Home and Outdoor) are Smart Controls that have been de-activated. Tapping any of the items immediately runs the Smart control.

TCP Smart Control menu
The image below shows the “My Lights” menu. In this menu, I’ve created a room named “Bedroom” and assigned both lights to the room. The icons are dynamic. They show not only the relative amount of brightness adjustment, but the illumination of the light bulb in the icon changes as you drag the slider up and down.

TCP My Lights menu
Like the Philips Hue Lux interface, the dimmer slider responds to sliding the dimmer up and down and the lights change brightness correspondingly after a brief delay. You don’t need to lift your finger off of the screen to execute a change in brightness. If you change the settings, you have the option of saving it as a new scene. If you tap “Dim”, a virtual dimmer slider appears on the screen which controls both lights as the same time/ (See gallery below.)
Creating a schedule for a Smart Control is very simple. The Smart Control scheduler lets you configure both start and stop times. Your choices for each are Sunrise, Sunset or Select Time. You can also pick days of the week the schedule will execute.
While the interface is attractive and easy to use, there are a lot of “N”s in Table 1. TCP doesn’t support Away Profiles (Random On/Off), GeoFencing, timers, fade in/out, Sleep Timers or have support for IFTTT.
The TCP bulb, like several others in this roundup, has a color temperature of 2700K, but consumes 11 W to produce 800 lumens. At 72.7 Lumens/W, the bulb ranks #4 (out of 5) for energy efficiency.
TCP is the only product in the roundup to use 6LoWPAN, so it is not compatible with any of the other devices. However, Belkin recently announced a partnership with TCP and will be supporting TCP Bulbs soon. However these will be different bulbs with a different SKU. The bulbs included in the TCP starter kit are not compatible with the Belkin WeMo system.
The gallery below shows several other features described in the review.
When creating a new rule, optionally you can choose the brightness and fade in time for the event.
This shows the Sunrise/Sunset options and day of week schedule
These are the permissions you have to grant WeMo on your Android device
It’s easy to create groups of light bulbs.
While I didn’t test extensively on the Android platform, I did install the Android client on at least two devices. The TCP gateway was the only product in the roundup that gave me problems with the Android client. The Android devices had difficulty finding the gateway – even during a refresh cycle (push the button on the gateway) – as suggested by their tech support.
Pro: Slick user interface
Con: Hub requires opened router ports
Closing Thoughts
Before drawing any conclusions, I wanted to run one more test to confirm which products depend on a back-end client server architecture. To test this, I first ensured that all lighting applications worked as expected when connected to my home Wi-Fi network. I shut down all applications on my iPad and then disconnected the Ethernet cable that connects my access point to my network.
I launched each application, tested, and then shut down the app. The only product that was still able to control its lights without an internet connection was the Belkin WeMo. All the other products timed out while trying to connect to their gateways through the internet. I then restored the network connection to the AP, and all five apps worked as expected.
In deciding which system is right for you, one way to look at the five products is to determine what you want to do with Home Automation. If you are only interested in controlling light bulbs, you have two choices: the Philips Hue Lux or the Connected by TCP. I liked the Philips system, and would be tempted to explore it more if I could get the gateway to link to my account. A linked gateway would enable remote access as well as some features that I couldn’t evaluate. While I liked the user interface on the TCP product, it lacked quite a few features found on competing products. In addition, initial setup problems, coupled with the ongoing problems that I experienced with the Android client makes it difficult to recommend the TCP product.
If you’re really looking to do a lot of home automation, both the GE Link (via Wink) and the Insteon products offer not only lighting, but large ecosystems of connected products that work together. Though I didn’t love the GE Link light bulb because of its clear bulb and glaring light, that may not be an issue for many people who will install them in lamps with shades or lighting fixtures.
The GE Link starter kit, priced at $50 (available through Home Depot – one of their partners) is the cheapest in this roundup, and additional bulbs are only $15. That price represents only about a $5 premium compared to 60W equivalent LED bulbs without any connectivity. Connected bulbs for each of the other systems hover around $30.
If you just want basic control over a lot of lights, but want to hedge your bet in case you want to add additional devices, the GE Link is a great buy. For under $100, you can have a basic smart lighting system with five bulbs. Insteon, on the other hand, is going to cost you more, but you have a significant number of choices of devices to add on to your network. And with their proprietary “dual PHY” network, you’ll be able to hang a lot of Insteon devices on your network.
Finally, there’s Belkin’s WeMo. Belkin is a relative newcomer to the Smart Home market, but is aggressively adding WeMo compatible devices to its line. I suspect that by sometime in the second quarter, most of the WeMo-enabled sensors introduced at CES will be available.
I reviewed the Belkin WeMo Insight Switch almost exactly a year ago. At that point in time, the platform was just launching and there were problems with the software as well as back-end servers, so I actually returned the product to the store. But now a year later, I found the WeMo LEDs were easy to set up, the applications ran smoothly and there were no issues related to the WeMo infrastructure.
For me, there is no one winner in this roundup. If I were considering automating more than lighting, Belkin’s WeMo system looks intriguing. The upcoming sensors look interesting and I like that the system works without an internet connection. On the other hand, I’m fascinated by the Philips Hue color bulbs and all of the recipes available on IFTTT. But I need to get the gateway linked before committing any dollars to Philips’ pricey Hue color bulbs.
No matter what you choose, you can start on the path to a smarter home with any of these products for $100 or less.![]()