| At a glance | |
|---|---|
| Product | Foscam Indoor HD 720P Wireless Plug and Play IP Camera (C1) [Website] |
| Summary | Inexpensive cloud-capable IP camera with night vision and configurable motion zones |
| Pros | • Very easy QR code based setup • Lots of features for a very good price • Motion detection seemed very solid • Two-way audio • Integrates with other systems, lots of configuration options • Cloud recording allowed for setting motion detection zones |
| Cons | • Cloud recording requires port forwarding and user account configuration • The use of multiple apps and URLs is confusing • Myfoscam.com works with limited browsers • Inconsistent information between product websites |
Typical Price: $0 Buy From Amazon
Introduction
Foscam has been around for awhile, selling a wide selection of cost-effective IP cameras. Today we’re going to be looking at Foscam’s C1. On the surface, the Foscam C1 looks like a it might compete with the Nest Cam at a third of the price. So I’ll be comparing the two frequently during the course of this review. Note I’ll be circling back to the Nest Cam for its own full review soon.

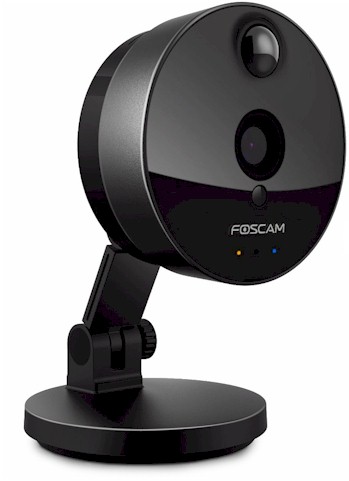
Foscam C1
The image below shows the Foscam C1’s callouts. Take note of typical features like 11 IR LEDs, PIR sensor for motion detection and microphone. Then notice things we don’t typically see as often (especially on a $60 camera), such as a 10/100 Mbps Ethernet port and Micro SD card slot for local recording. One more thing that’s not obvious, is the plastic construction of the Foscam C1 vs. the Nest Cam’s more solid metal construction.

Foscam C1 callouts
The C1 is a 720p HD camera, with videos from the camera downloading at 1280×720 resolution. The camera connects by either 2.4 GHz wireless or 10/100 Mbps Ethernet. Inside the box you get a microUSB cable, wall-wart USB charger, the C1, some mounting screws and a Quick Setup guide with optional CD.
I collected all of the information I could about Foscam C1 from their published specs into Table 1 below along with Nest Cam’s specs.
| Foscam C1 | Nest Cam | |
|---|---|---|
| FCC ID | ZDEC1 | ZQANC11 |
| Resolution | 1280×720 | 1920×1080 |
| Megapixel | 1 | 3 |
| Lens | f:2.8mm,F:2.4 | |
| Compression | H.264 | H.264 |
| Horizontal field of view | 115° | 130° |
| Vertical field of view | ||
| Audio | Two-way | Two-way |
| Night vision? | Yes | Yes |
| Number of IR LED’s | 11 | 8 |
| Record to SD card | Yes | No |
| Record to network share | No (FTP yes) | No |
| Record to cloud | Yes | Yes |
| Wireless | N150 class 2.4 GHz only | N150 class dual-band |
| Bluetooth | No | Yes |
| Ethernet | 10/100 Mbps | No |
| Battery backup | No | No |
| POE | No | No |
| Pan/tilt/zoom | Yes, digital | Zoom, digital |
| Can integrate w/ other systems | Yes | Sort of |
Table 1: Spec summary and comparison
Setup
The C1’s setup was easier than both the recently-reviewed Canary and Piper nv. After downloading the Foscam app and creating an account, the app popped up a QR code reader, which I simply used to scan the code on the back of the camera. This put the camera into "EZLink" mode. I just entered my wireless network information into the app, which then sent it to the camera to complete connection.
I was slightly puzzled as to how this works since the camera had only power connected. I checked and my phone had stayed on my home wireless network, so it wasn’t connecting to a proprietary wireless network like the Piper does during installation.
I opened a support case with Foscam to try and get information on how communication of the wireless network info was occuring. I received a very fast response, although with very little information.
Since the Nest Cam also uses a QR code for setup, I decided to open a support case with them. I found Nest Cam uses a Bluetooth connection for initial setup after the QR code is scanned. But since the C1 has no Bluetooth, some other mechanism is used.
The image below shows the steps that took place from scanning the camera to being online. If you note the phone time in the upper right-hand corner, you see that from scanning the QR code to being online with video it was literally two minutes, which included taking screenshots.

Foscam C1 QR code setup screens
It should be noted that the QR code method isn’t the only method available for setup. The camera also supports Wi-Fi Protected Setup (WPS) and a mode called “Soft AP”. With Soft AP, the camera creates its own wireless network (like we saw with Piper), which you then connect to for configuration. Lastly, you can simply plug in an Ethernet cable and let the C1 pick up an IP address via DHCP. Since the QR code method worked easily, I did not try the other three methods.
Once set up, live video can be accessed via the Foscam app on Android or iOS or via a browser at https://www.myfoscam.com. But this is where things gets a little confusing. The Foscam app, which you see below, shows Live Video remotely. You can save snapshots and manually record movie clips locally, as well use the camera as an intercom with two-way audio.
You can also turn the IR LEDs on and off, adjust video bandwidth, rotate the image and view Public cameras like the old Dropcam app had. There’s even a bandwidth indicator to show how much bandwidth you are using.
Just about anything you can do in the camera’s admin screens (which I’ve included in the gallery) can be done in the Foscam app (or myfoscam.com), which changes the camera configuration with no router port forwarding required. The Image below shows several of the Foscam app screens, including Live Video, Settings, Motion Detection and Night Vision Schedule.

Foscam app screens
However, both the Foscam app and myfoscam.com do not record or allow you to view cloud-based video. Cloud video requires a completely separate app and URL.To add to the confusion, the myfoscam.com website says cloud video is not supported for the Foscam C1 at all, when in fact it is. Note myfoscam.com does not support Chrome, Firefox or IE 64-bit and had a Flash player problem on IE 32-bit.
Features
I mentioned cloud recording is done with an entirely different app and website. The app is Foscam Cloud and the website for browser viewing is https://www.foscamcloud.com/. I opened a support ticket with Foscam to get more information about this and found that myfoscam.com is the cloud site Foscam China is working on, but hasn’t fully completed yet. Foscamcloud.com is the site developed by Foscam’s US arm (http://www.foscam.us).
Incidentally, the technology at foscamcloud.com works a bit better than myfoscam.com, in some ways. I didn’t see the Flash player problem and things just seemed smoother. However, setting the camera up at foscamcloud.com required port forwarding on my router and entering of camera username and passwords, something not required for the Foscam app or myfoscam.com.
So for cloud recording and viewing, the C1 falls far short of Nest Cam, which does not require any port forwarding for cloud recording and viewing. This could limit the C1’s appeal to mainly tinkerers and IT people, at least until myfoscam.com comes online. However, as we’ll see in a bit, foscamcloud.com includes some cool features that we haven’t seen in most cloud recording apps. The image below shows the Foscam Cloud camera setup screen with the required port forwarding.

Foscam app screens
Foscam Cloud presently has four different pricing plans shown below: Free; Basic; Standard; and Premium. The timeframe for stored videos, regardless of filesize or number, is sort of interesting, although it’s not entirely different from Nest Cam’s 10-day and 30-day subscription plans, which you’ll find here.

Foscam C1 pricing plans
For comparison, 10-days of video with one Nest Cam costs $10, but 10 days for 10 Nest Cams runs $55. A month of video for one Nest Cam is $30, but each additional Nest Cam on the 30-day plan costs $15. In this case, Foscam Cloud is a better value, but it’s comparing apples to oranges. Nest Cam records constantly vs. triggered recording only in Foscam Cloud, and Nest Cam’s interface is infinitely more polished than Foscam Cloud.
Foscam Cloud has very configurable motion detection settings, including the ability to set motion detection areas. This is helpful if you want to say, prevent motion visible via an exterior window from triggering recording. Nest Cam has this as well with its "Activity Zones" feature.
I found Foscam Cloud’s motion detection to be spot on, always capturing motion whenever it happened. Sensitivity could also be adjusted High to Average to Low in order to capture more or less. Capture modes include video or images. The motion detection screen in Foscam Cloud is shown below.

Foscam Cloud’s motion detection area settings
The timeline view in Foscam Cloud is very simple and streamlined, with blue lines indicating when video clips were recorded. Options for each clip are simply delete and download. Downloading is only available with paid plans.

Foscam Cloud timeline
Foscam Cloud also has its own app. Once cameras are configured at foscamcloud.com they are automatically available via the Foscam Cloud app. Most configuration changes that can be made at foscamcloud.com can also be made within the Foscam Cloud app, with the exception of setting motion detection zones. Note however, setting changes at foscamcloud.com, and within the Foscam Cloud app, do not make direct changes to the camera as the myfoscam.com and Foscam app do.
Below I’ve compiled a few screenshots of the camera, recordings, live view and settings screen of the Foscam Cloud app.

Foscam Cloud app screens
The final key piece of the Foscam C1 is that, regardless of the cloud options, it can be set up as a standalone camera or added to existing surveillance systems. This is one area that sets it apart from Nest Cam. Nest Cam isn’t meant to be standalone or added to existing systems.
The C1’s GUI is very feature-rich, including things like IP filtering, save to FTP, save to SD card, motion detection scheduling and configurable zones. I’ve included a picture of the camera’s GUI motion detection zone configuration below and linked a gallery to the rest of some of the key configuration screens available on the camera itself.

Motion Detection areas in the camera GUI when used standalone or with myfoscam.com

The Device Information screen shows key information such as firmware version and model.
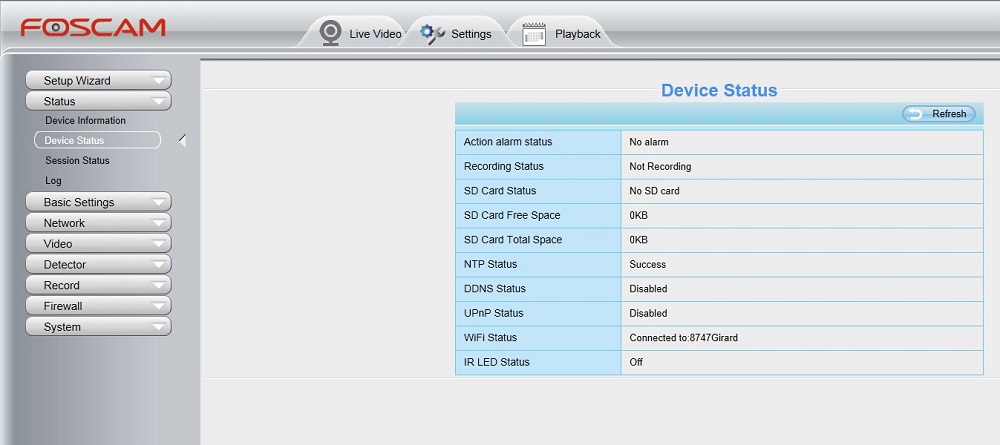
Device status shows status of SD card (if installed) and various network statuses
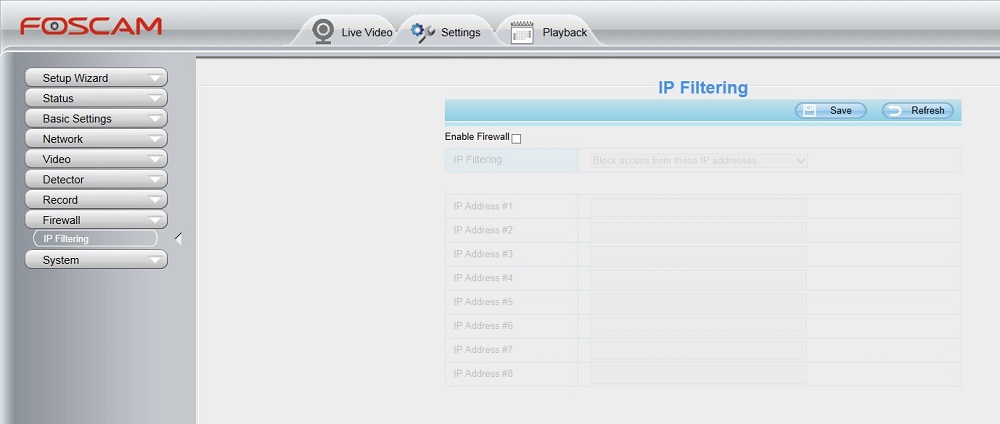
IP Filtering can block IP addresses or only allow access from certain addresses
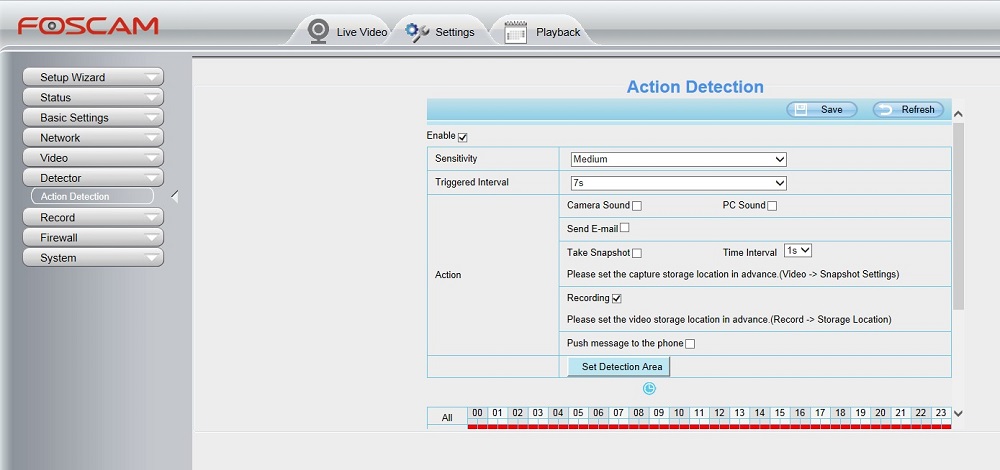
Motion Detection can be set to a schedule and has various recording options and actions
Detection Area can leave out parts of the image where you don’t want to be notified of motion
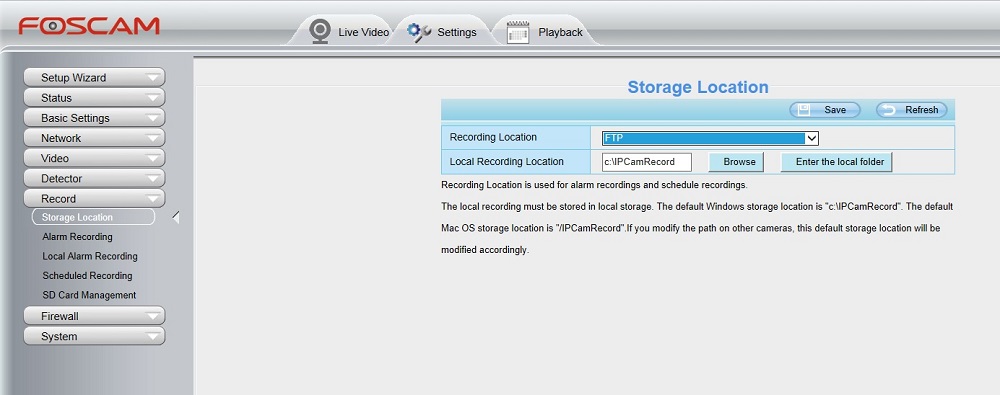
Storage Locations include SD card, FTP and local
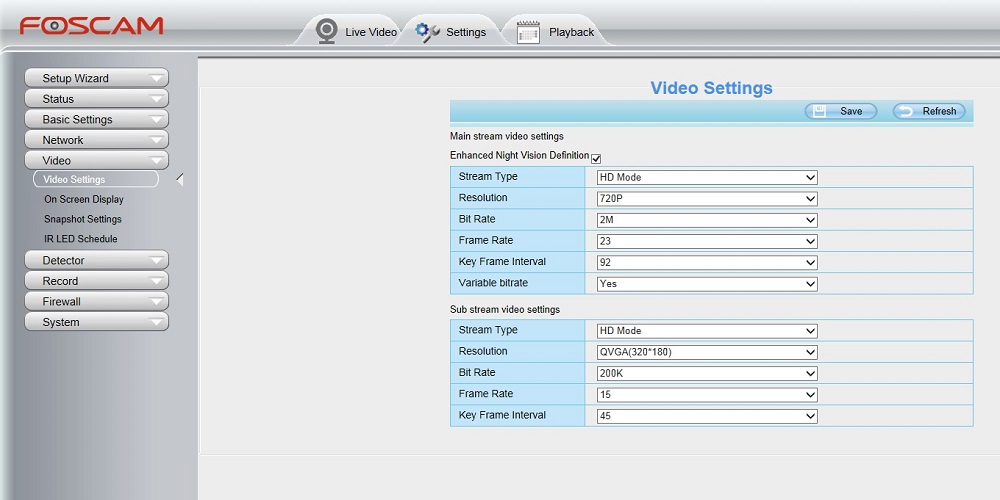
Video Settings allow you to customize the 2 video streams on the camera
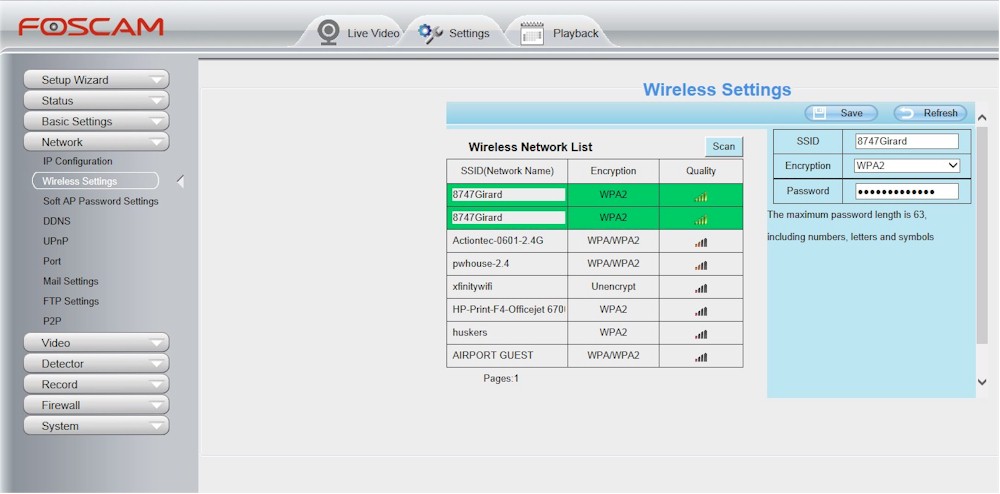
Wireless Settings shows the current connected network, plus a scan of available networks
Video and Image Quality
Let’s look at some still image quality and videos. We’ll compare it to Nest Cam as we’ve been doing throughout the review. Here’s Foscam day…

Foscam Day still image
… and Nest Cam. Not a lot to pick apart here on either one. Nest Cam appears to be a bit sharper and more of the room is available due to the slightly wider viewing angle.

Nest Cam Day still image
Let’s look at some night still images. Foscam first…

Foscam Night still image
…and Nest Cam.

Nest Cam Night still image
Does this surprise you as much as it does me? The Foscam C1 has a better night image. I’m standing at 25 feet in both images and the image is much more clear with the Foscam. Reading the markers the Foscam 15 foot marker has about the same clarity as the Nest Cam 10 foot marker. Of course, these are still images and won’t mean a whole lot if motion is blurred in one video at night, so let’s take a look at some videos to see.
The Foscam seemed to pick up motion each and every time anything went past it, as long as it was in the motion zone I set. In all videos I had motion sensitivity set to “Medium” and video set to the highest quality possible. First let’s look at Foscam during the day.![]()
Foscam C1 Motion Indoor Daylight
There are a few things to note here. The first is where I am in the video by the time recording starts. While it looks like Foscam has a delay in recording, it doesn’t. Instead, the camera is properly implementing the motion detection zone I set. It appears that the C1 has about a one second pre-buffer for motion detection.
The next thing to notice is right around the 0:05 mark, there’s an anomaly, I stall and speed up. I’m not exactly sure why this happens, but it could be due to less robust hardware on the Foscam. Lastly, notice how it keeps recording after I’m gone, up to about 34 seconds. In my testing, all videos were 32-34 second long. One positive thing is that if motion continues, a new clip is started. Although the clips aren’t continuous, the sequential clips still catch most of what’s going on.
Foscam C1 Motion Indoor Night
The Foscam C1 night video for some reason does show what appears to be a delay in recording start. I’m significantly closer to the camera than I was during the day, by time recording started. There is also no stall/speed up anomaly on the night video. Finally, the quality of the night video is fairly good with little blurring of me until I get near the top of the stairs. Let’s look at Nest Cam.
Nest Cam Motion Indoor Night
Both night vision videos look good, the Nest Cam also blurs on the stairs, but here is a key difference and it doesn’t really even need explaining. I pulled the most distinguishable close-up facial recognition shot from both videos, the difference is dramatic. Which one do you think is better? The Nest Cam is capturing more frames per second than the Foscam C1, which explains why my face is more recognizable instead of being blurred. The specs on framerate aren’t that different between the two. But the specs indicate maximum framerate vs. what we will actually get.

Nest Cam vs. Foscam C1 night vision facial recognition
Finally, I wanted to see how much bandwidth the video took, so I jumped around in front of both cameras. The upload bandwidth varied, but I saw around 2 Mbps maximum on the Foscam. Running the Nest Cam directly beside it, I saw around 800 Kbps with the exact same motion, which is a little peculiar since the Nest Cam records with higher resolution.
Closing Thoughts
Is the Foscam C1 a cheaper and better alternative than the Nest Cam? That might be a stretch. The C1 is a third of the Nest Cam’s price and does pack in a lot of features for that great little $70 price tag. Foscam Cloud is even pretty good once you get around having to do port forwarding, which is more than a little old school in this day and age.
Having used the Foscam C1 for a few weeks, I began to really like it for what it was. If I were looking for a camera to simply check in on the dog or look around the house at night, I think I would find it a lot easier to spend $70 and do a little port forwarding vs. dropping the more substantial $199 for the Nest Cam’s more polished interface.
Bottom line, if you’ve been considering the Nest Cam, you should take a close look at the Foscam C1.
Buy Indoor HD 720P Wireless Plug and Play IP Camera from Amazon