| At a glance | |
|---|---|
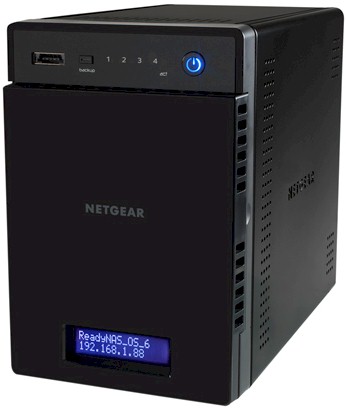
| Product | NETGEAR ReadyNAS 104 (RN10400) [Website] |
| Summary | Four bay Marvell-powered NAS with completely revamped OS based on BTRFS with built-in antivirus |
| Pros | • Built-in antivirus • Cloud based replication, access, drop folder |
| Cons | • Looong volume rebuild times • Some features not carried into new OS or require Genie Marketplace signup |
Typical Price: $0 Buy From Amazon
Introduction
Updated 6/12/2013: Linked to OS6 review
Updated 5/23/2013: Added a few clarifications
In March, NETGEAR announced its all-new ReadyNAS family, comprised of 100, 300 and 500 series models. The ReadyNAS 100 has two and four-bay versions, both powered by 1.2 GHz Marvell Armada 370 SoCs. This review covers the performance aspects of the RN104. The all-new ReadyNAS OS 6 is covered in its own review.
NETGEAR didn’t stray too far in the RN104’s redesigned look. The sturdy metal chassis and covers were carried forward and even the rear panel carry handle is there. The change is mainly in the front panel cover, which is solid plastic instead of perforated metal. The 104 still has a front panel LCD panel that is handy for checking the unit’s IP address and other information.

NETGEAR RN104 Front and rear panel callouts
As the callout diagram above shows, there is a decent assortment of ports including eSATA, USB 2.0, USB 3.0 and dual Gigabit Ethernet. Unlike some of the latest generation NASes, the 104 doesn’t have VGA or HDMI ports for attaching a display.
What is does have, however, is a tool-less drive tray, which is pretty nifty. Each tray has a label with illustrated instructions for loading in a drive. The video below also shows how it is done.
Inside
You have to pretty much disassemble the entire RN104 to get to the board. But the power brick is external and so easily replaced. Fan replacement could be simpler because it is connectorized and on the removable rear panel. But to get the back panel off you need to remove both side covers, which seems an unnecessary complication.

NETGEAR ReadyNAS RN104 board
The key components are summarized in Table 1. Note that both the CPU and SATA devices have heatsinks.
| CPU | Marvell Armada 370 @ 1.2 GHz |
|---|---|
| RAM | 512 MB |
| Flash | 128 MB |
| Ethernet | Marvell 88E1318-NNB2 (x2) |
| SATA | Marvell 88SE9215 4 port PCIe 2.0 SATA 6Gb/s and PATA Host Controller |
| USB 3.0 | Fresco Logic FL1009 dual port PCI Express to USB 3.0 host controller |
Table 1: Key component summary and comparison
NETGEAR supplied an RN10400 diskless model for review. So I added our customary four Western Digital Red 3TB drives (WD30EFRX) for testing. Power consumption measured 30 W with the 4 drives spun up. I couldn’t measure power consumption with the drives spun down because idle drive spindown didn’t make the cut in the transition to OS 6, at least not in the initial release. Fan and drive noise were classified as very-low; I really had to strain to hear it in my quiet home office, even when under load during testing.
Setup
The ReadyNAS setup process has been completely redesigned and doesn’t require a CD to be run or the RAIDar utility to be installed. You just connect the ReadyNAS to your network, boot it, let it grab an IP address, then aim a web browser from a device connected to the same network at https://readycloud.netgear.com/. The initial screen from the setup wizard is shown below.

ReadyCLOUD setup
Although you will be prompted to set up a ReadyNAS Remote account during setup, you don’t have to do so to get set up. To skip the nagging entirely, just aim your browser at https://ipaddress. This lets you do everything you need to do to get set up without an internet connection or registering with NETGEAR.
As with previous ReadyNASes, the RN104 by default is set to use NETGEAR’s automatic volume expansion X-RAID technology. If you want to kick it old-school and use RAID, you’ll need to switch to "Flex-RAID" mode. You still need to do this via the boot menu, which is still accessed by pressing the reset button while powering on the NAS. Unfortunately, unlike the old RAIDiator OS, OS 6 does not provide an option to format drives directly in Flex-RAID.
This set me off on an unnecessarily complicated and frustrating three-day exercise that was further complicated by the fact that the WD Red drives had been used in other NASes. After some intial problems, I found a helpful tidbit in the OS 6 Hardware manual (available from the RN10400 support page):
If you want to use disks that were previously formatted for an operating system other than ReadyNAS OS 6 (for example, Windows or RAIDiator), you must reformat the disks.
This was easier said than done, since I wasn’t successful doing this by following the instructions in the manual. In the end, I pulled the drives from the system, threw them in a SATA drive dock attached to my Win 7 system and deleted all partitions from each drive. This at least let me start the volume build process instead of encountering an error. But this just let me build an X-RAID volume; I still had to switch over to Flex-RAID.
Suffice it to say, I was not a happy camper by the time I finally had a four drive RAID 5 volume built and sync’d, a process that took almost 32 hours! RAID 10 build time was a lot faster, but still slow by comparison to other NASes at 18 hours and 30 minutes. Building a RAID 0 or RAID 1 volume took about 11 hours.
Updated 5/23/2013
NETGEAR asked me to clarify that users normally don’t need to wait for a volume to be completely built / resynced / cleaned before use. As soon as the volume is created, it can be used. However, our normal testing practice is to wait until the volume creation process is completely finished before running our tests. Otherwise we would be testing performance during volume build, which would be lower.
Features
NETGEAR has completely reworked the ReadyNAS OS, dubbing it OS 6. I was happy to see that the old frame-based admin GUI that I disliked so much is gone. It is replaced by a modern interface that looks like it can be driven comfortably from a tablet or a desktop machine. The screen that greets you upon login is shown below.

NETGEAR ReadyNAS OS 6 System Overview
As mentioned earlier, we’re going to be doing a separte review on OS 6. But here are some initial observations. The Admin GUI is visually attractive and responsive with logical organization. There are many shortcuts and overlays that speed things along by preventing complete page reloads. The Services screen shown below is a good example

NETGEAR ReadyNAS OS 6 Services
Some RAIDiator features didn’t make it into the initial OS 6 release. These include:
- Print serving
- JBOD (Planned for 6.1.0)
- Idle drive spindown
- WebDAV (Planned for 6.1.0)
- No bundled backup client for Windows or MacOS (branded version of Genie9 is planned for Windows)
NETGEAR said that multiple volumes and single-drive volumes are supported. With a two-drive RAID 1 volume created, I was offered the option to create a second two-drive RAID 0 or 1 volume. When I tried to create a single drive volume, only a RAID 1 option was provided. Oddly, NETGEAR says this is a valid choice and will create a single-drive volume.
All the new OS 6 powered ReadyNASes use a new filesystem based on BTRFS. One of BTRFS’ claims to fame is its unlimited snapshot capability. This is supposed to give ReadyNASes a Time-machine like capability to be able to dial back to any point in time (at least to the resolution that you choose to take snapshots in) to restore the filesystem to an earlier state. I didn’t play with this capability. But it will be explored in the OS 6 review.
Updated 5/23/2013
NETGEAR asked me to point out that setup isn’t the only cloud-enabled feature that OS 6 brings to ReadyNAS. You get portal-based (no fiddling with dynamic DNS or router port forwarding) file access and management, a Dropbox-like service (ReadyDROP), Remote support for Time Machine backups, remote play for media files and other features that will be explored in the OS 6 review to follow.
Performance
Firmware at test time was OS 6.0.5. As I was taking some screenshots for this review and after testing was done, I got a popup upon login informing me that version 6.0.6 had been released. Since testing took sooo long and the release notes didn’t indicate any performance improvements, I did not retest. As is our custom, I ran our standard NAS test process on RAID 0, 5 and 10 four-drive volumes.
Starting with this review, however, I also ran RAID 1 tests on a two-drive volume and will be doing so in the future for all NASes with two bays or more. This will let me re-use test data from four-bay and greater NASes for dual and single drive products built in the same hardware platform when I move the NAS Charts to the new consolidated NAS system. When that happens, you will be able to view (and Rank) NASes by processor class for fairer and easier comparison.
The Benchmark Summary below shows pretty consistent 50 MB/s-ish Windows File Copy write performance for RAID 0, 1 and 10 modes. RAID 5 write takes a hit, however, coming in at only 40 MB/s. File copy reads are uniformly higher for all modes tested with throughput in the mid to high 80 MB/s range.

NETGEAR RN104 Benchmark Summary
NASPT File copy are generally higher for write, but lower for reads across all RAID modes. RAID 5 again turns in the lowest performance at 51 MB/s write and 68 MB/s read.
Of particular note are the abysmal NASPT Directory Copy results. While these are always lower than File Copy, the 3 MB/s write throughput across all modes are particularly low and indicate that you’ll be waiting awhile when copying folder of lots of smaller files.
iSCSI target write performance to target created on a RAID 5 volume wasn’t too bad for a Marvell-powered RAID 5 NAS measuring 41 MB/s write and 50 MB/s read.
Your best option for attached backup looks like eSATA with an NTFS formatted drive. This combination produced the highest value measured—35 MB/s. Network backup to our standard rsync target came in at 28 MB/s.
Manufacturers have generally moved on to using at least single-core Intel Atoms in their lower end RAID 5 capable NASes. But I managed to find two other Marvell-powered four-bay NASes in our database, the Iomega ix4-300d and slightly older Synology DS413j. I combined these into the RAID 5 File copy charts below for comparison.

RAID 5 File Copy Performance comparison
The comparison shows that except for one benchmark—RAID 5 Windows File Copy—the RN104 ranks at the bottom of the group for RAID 5 performance.
Updated 5/23/2013
NETGEAR says this lower performance is the result of their choice of a filesystem (BTRFS) that "prioritizes data integrity over raw performance".
Closing Thoughts
NETGEAR has traditionally priced its ReadyNASes at a premium. But times have changed and the competition is much fiercer and the RN104’s pricing tries to reflect that. While not cheap at a bit above $300, it’s still about $70 cheaper than the Synology DS413j that forms the RAID 5 entry-level point for Synology’s offerings. But if you equip it with the same four 2 TB Seagate Barracuda 7200.14 drives that Iomega’s ix4-300d has at around $100 a pop, you’d come up to a bit over $700, which is about $80 more than the 8 TB diskful Iomega currently prices out at.
Since performance isn’t the only reason to buy a NAS, be sure to read the OS6 review before you make your final judgement.