Introduction
Earlier this year, I reviewed Logitech’s Harmony Home Hub that, with its companion Smart remote, has seen daily use in my living room. Since then, I’ve been reviewing other Home Automation products and discovered I’m now collecting apps like I used to collect IR remotes to control my living room electronics.
Having just reviewed the SmartThings Hub and several sensors, I was excited to read news that Logitech just released a new firmware update that adds smart home control to all Harmony Hub-compatible products. Support for SmartThings, along with peq hubs, Lutron Caseta lights and Serena window shades is baked into this latest firmware release.
While the previous version had support for Nest thermostats, the new firmware also supports viewing Nest Protect smoke and CO alarm status, Honeywell Wi-Fi thermostats and IFTTT integration.
I used a SmartThings Hub, plug, motion sensor and three LED bulbs to try out the SmartThings / Harmony Hub “mash up”. First, a couple of caveats:
- For SmartThings integration, the Harmony support site confirms the firmware upgrade is compatible with Harmony Hub-based and Harmony Home Products.
- Harmony Living Home products are unable to control cameras, moisture/water sensors and smoke/CO sensors connected to SmartThings.
- The update is not compatible with IR controllers.
In this review, I’ll be looking at the setup and control of SmartThings devices from the Logitech Harmony app running on both iOS and Android devices. While this firmware update refreshed the UI for remotes with displays, I won’t be looking at those features, as I don’t have a Harmony remote with an LCD. However, here’s a screenshot from the Harmony web site: that shows the refreshed UI:

Logitech Harmony – Updated screens
Setup
In order to get SmartThings support, you must install the latest firmware. I checked my firmware before starting and found support only for Nest and Hue Home Automation. The firmware upgrade is fairly simple; from either mobile platform, select Menu, Harmony Setup and Upgrade Hub Software.
After updating the firmware, it’s quite simple to add SmartThings to your Harmony. SmartThings is treated just like any other device such as a TV, Receiver, etc. From the Menu, go to Harmony Setup > Add/Edit Devices & Activities > Select Devices and click on Add Device. Next, select Home Control and scroll down to SmartThings.
You’ll be prompted to sign into your SmartThings account and asked to authorize Harmony to access your Hub. You’ll then select individual SmartThings devices for Harmony to control. While this might sound complicated, it’s really not. I’ve included a short gallery below to show you the steps.
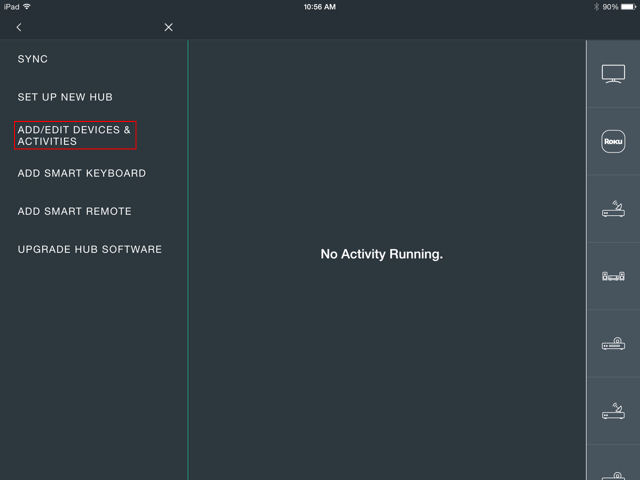
Add/Edit Devices & Activities
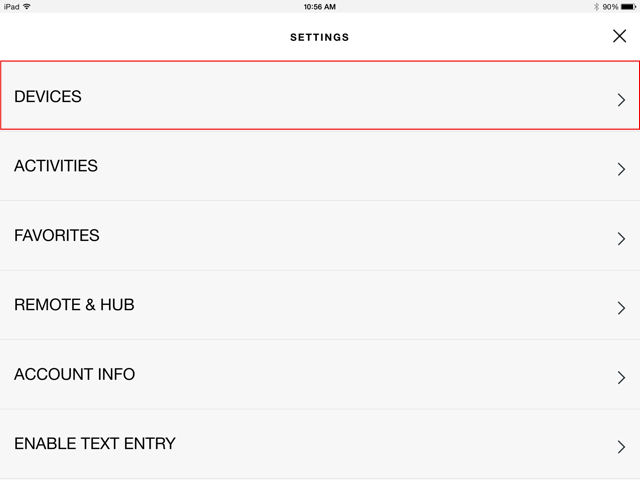
Select Devices
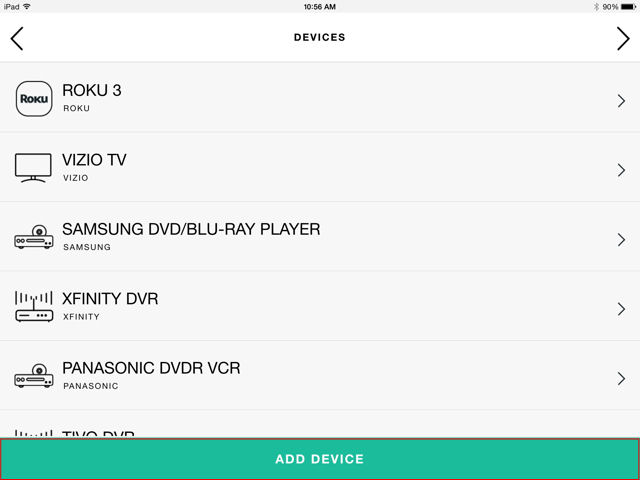
Select Add Device
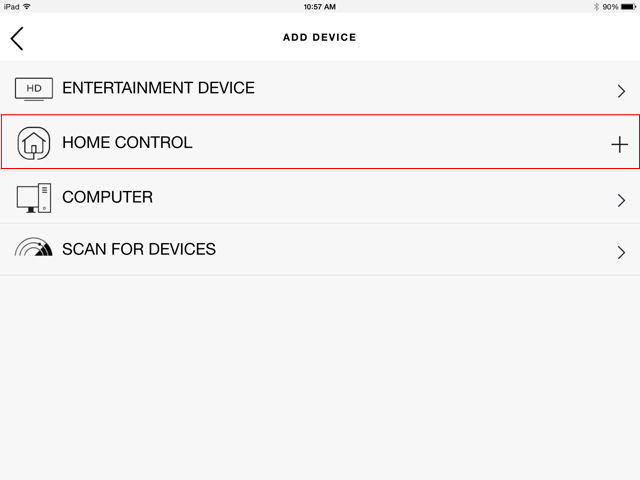
Select Home Control
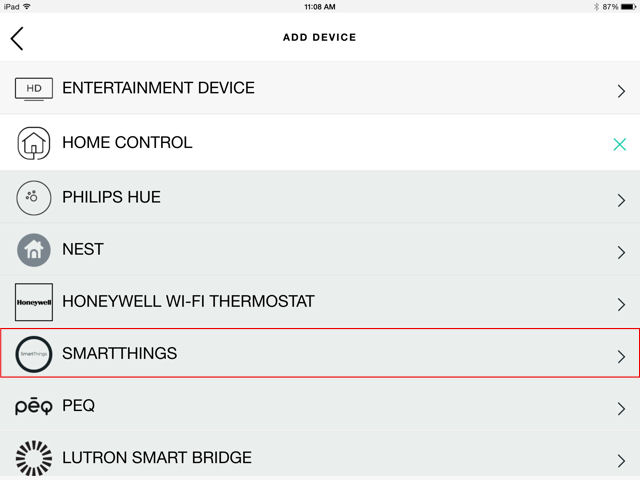
Select SmartThings
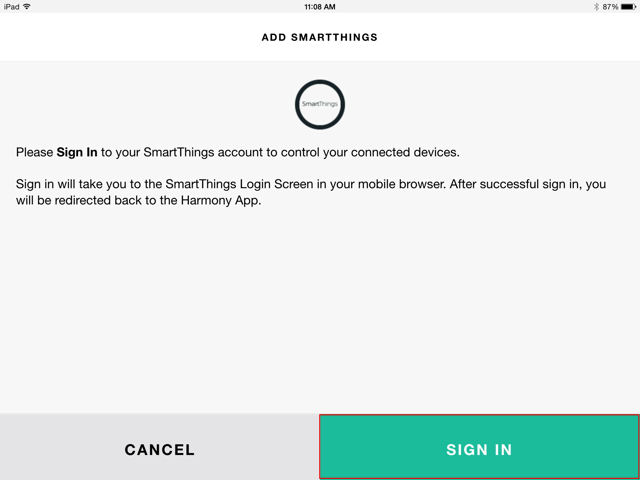
Sign into your SmartThings Account
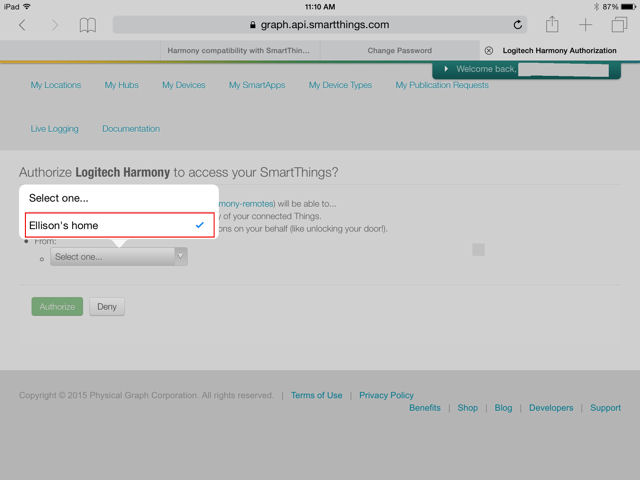
Select the Harmony Hub to link
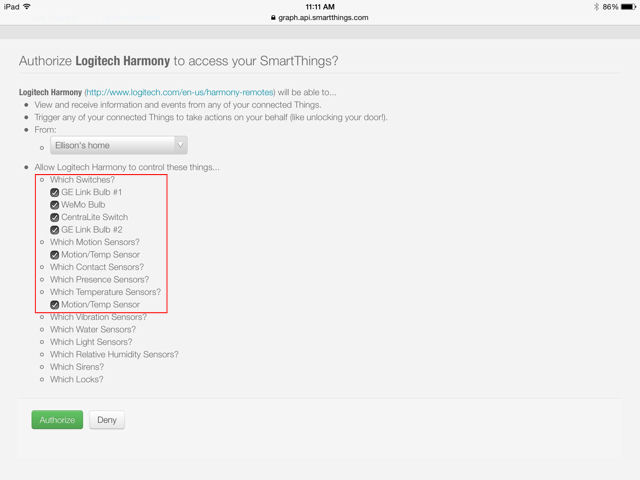
Authorize Harmony to control SmartThing devices
Return to Harmony
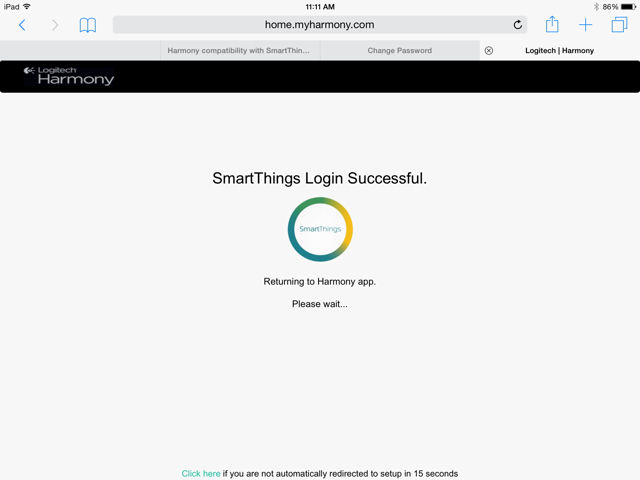
Once you add SmartThings to your Harmony Home system, Harmony will synchronize the new “device” with its servers. So when you launch the Hamrony app on other mobile clients, the SmartThings device will appear. However, I discovered that you will need to perform a refresh and re-login to SmartThings on each mobile device to authorize each installed SmartThings device. You only need to do it once per mobile device. If you don’t, the devices will appear, but you won’t be able to control them.![]()
Hands On
If you are familiar with the Harmony user interface, you’ll feel right at home accessing your SmartThings devices. Like all configured devices, SmartThings devices authorized for your device appear in the right-hand column. In the composite image below, the left screenshot shows the installed SmartThings devices in the right column highlighted in red.
Each device appears in an appropriate category. All three lights appear in the Lights category shown in the right-hand image. The category icon shows how many lights are on – a nice feature in the collapsed view.
Here, I’ve clicked on the right arrow next to WeMo Bulb to show detail for the device. Tapping on the icon toggles it on or off. From the center screen, you can also turn the device on or off as well as control brightness. If you click “Apply to all in lights”, that brightness level will be set for all devices in the lights category.
 and device control (right)")
Harmony – SmartThings devices (left) and device control (right)
As with entertainment devices, you can also create activities for your SmartThings devices. In the composite screenshot below, you can see I’ve created an activity to “Turn on all lights at 50%”. The left screen shows the activity and the right shows the Light group expanded and that all three bulbs are on.
 and device status (right)")
Harmony – SmartThings activities (left) and device status (right)
You can run this activity manually by tapping on the activity or you can schedule it. However, scheduling is fairly basic. You can set the start time and end time and select the days of the week that the activity will run. In the screenshots, you can see I have created a schedule to run the “Turn on all lights at 50%” activity at 8:00 AM in the morning and 5:00 PM in the evening on weekdays.
 and set start time (right)")
Harmony – SmartThings – Activity summary (left) and set start time (right)
You can also use sunrise or sunset for start or end times (right screenshot). You can create only one schedule for each activity. In my tests, I tested running the activity both with the Harmony app open on my iPad as well as with the app closed. In both cases, the schedule executed as scheduled and the lights turned on and off at the correct times.
Even though the user interface allows using the motion sensor as a trigger, I was unable to get it to work. Rather than using the schedule I created above, I configured the motion sensor to run the “turn on all lights at 50%” activity if motion was detected and to turn off all lights after one minute of no motion detected. Though I confirmed through the SmartThings app on my Nexus 7 that the motion detector was being tripped, the activity didn’t run.
Since the SmartThings-connected devices are part of the Harmony infrastructure, you can include devices as part of your Home Automation activities. You can turn on one or more lights at a specified brightness when a specific activity runs and change the lighting level when you stop an activity.
For example, on a “Watch TV” activity that turns on the TV, sets the HDMI port and turns on a cable box, you could also turn on your living room lights and dim them to 20%. When you stop your Watch TV activity, you could either turn off the light or reset them to a brighter level.
After linking to SmartThings, I edited my own “Watch TV” activity shown in the screenshots below to control my three smart bulbs. You can individually control the on sequence (left) and off sequence (right) for each device configured for an activity. I tested the integration of the SmartThings LEDs with the Watch TV activity and the lights came on at the correct levels when I turned on my entertainment system and went off when I shut down the system for the evening.

Harmony – SmartThings devices integrated into a home entertainment system activity
Closing Thoughts
The Logitech Harmony firmware upgrade is easy to accomplish and adding SmartThings-controlled devices to your Harmony environment is as simple as adding any other device. If Logitech adds more supported SmartThings devices (or any other supported system), all you’ll have to do is refresh your link and login again to authorize them.
The actual apps running on your iOS and Android devices aren’t upgraded. SmartThings just appears as an additional device, so the Harmony apps on both iOS and Android platforms work the same way, and as well, as they did in the past.
It’s nice to be able to perform simple on/off/dimming features through the Harmony interface – it could eliminate one additional program/UI you use daily. But for more complete control, you’ll need to use your devices’ native app. Still, if you happen to be at the intersection of those who own a Harmony Home and SmartThings Hubs, Logitech’s new firmware is worth checking out.![]()
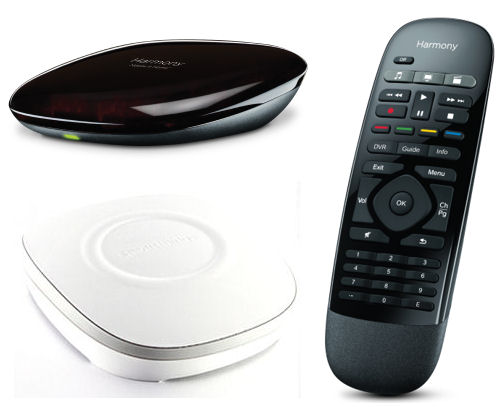 Buy Harmony Hub With SmartThings from Amazon