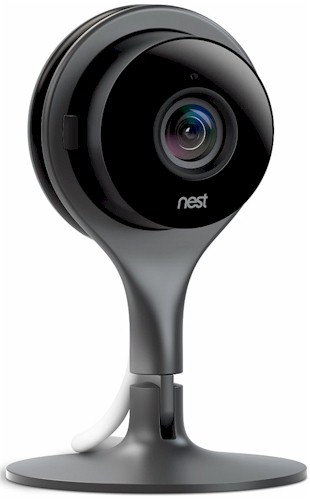
| At a glance | |
|---|---|
| Product | Nest Cam () [Website] |
| Summary | Cloud-based wireless camera with night vision, configurable motion zones and a great app |
| Pros | • Very easy QR code setup • “Enhance” feature of app works well • Solid motion and audio detection • Integrates with other Nest products • Magnetic mounting base • Configurable motion detection zones |
| Cons | • Expensive • Cord can be awkward when mounting • Integrates only with other Nest products • Can get hot |
Typical Price: $100 Buy From Amazon
Introduction
A few weeks back, we took a look at the Foscam C1 and compared it to Nest Cam quite a lot. We found the C1 to be good for what it is, an inexpensive IP camera. But its cloud features were limited and required manual port forwarding for remote access. For this review, I am covering the Nest Cam in more detail, including its great app. The ease of the app and its great features are really its special sauce and why you might buy it vs. the C1.
The present Nest Cam is the third camera descended from the original DropCam and brings better resolution (1920×1080 vs. 1280×720) to the table over the previous DropCam Pro.
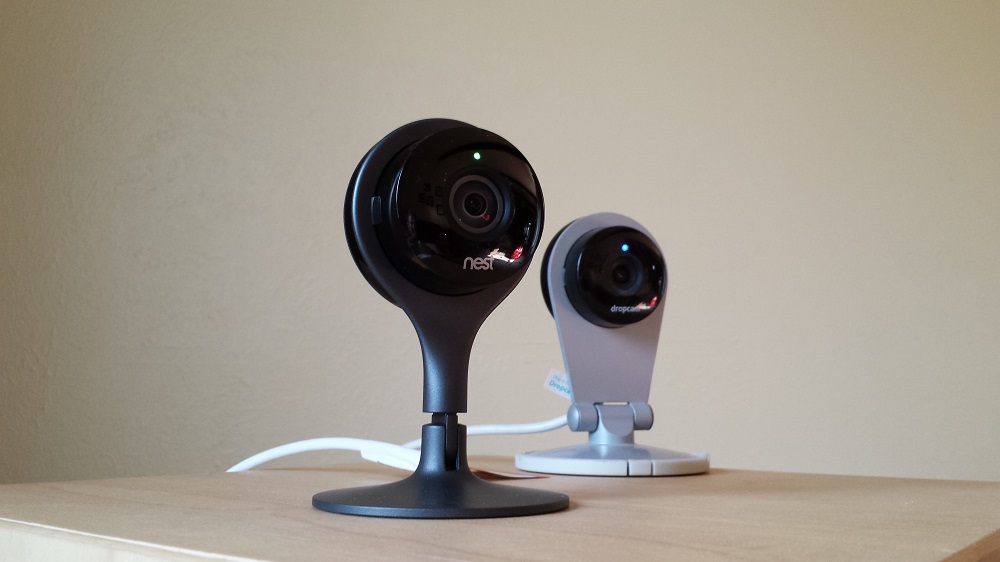
Nest Cam and Dropcam
The image below shows Nest Cam callouts, although it’s really more for reference since you don’t see the features. Hidden near the lens are 8 IR LEDs, speaker and microphone.
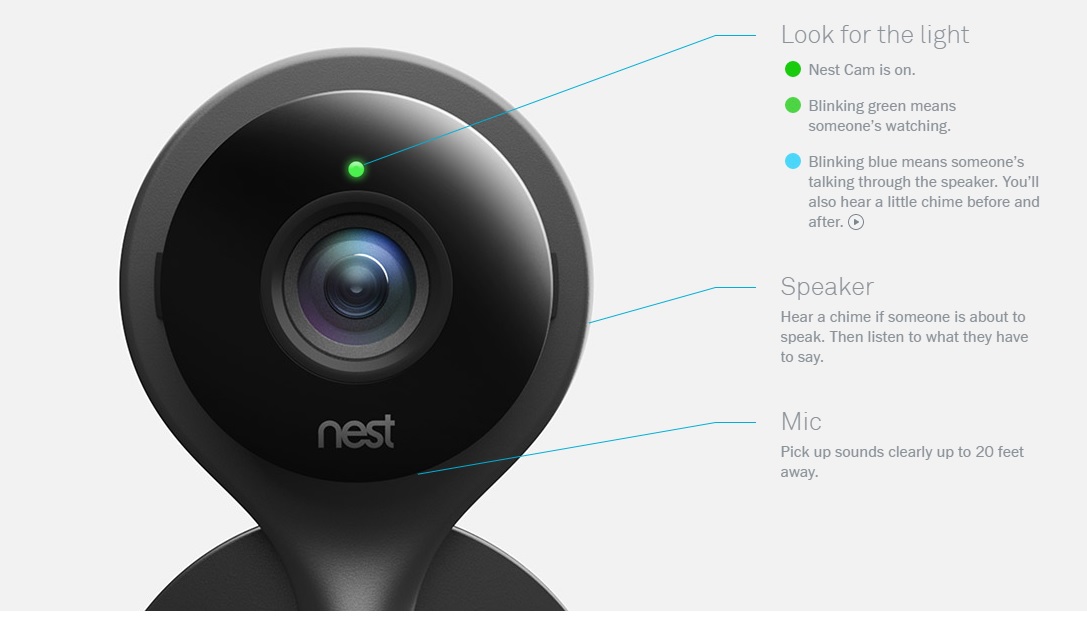
Nest Cam callouts
Nest Cam has a comprehensive set of mounting options. The camera has a magnetic base for mounting and can also be screwed to the wall. Or you can just twist it off the base and mount it on any univeral mount or tripod with a standard screw thread. With these mounting options, the camera can be easily twisted and tilted in to every conceivable direction to get the viewing angle just right. The image below shows the different mounting options.
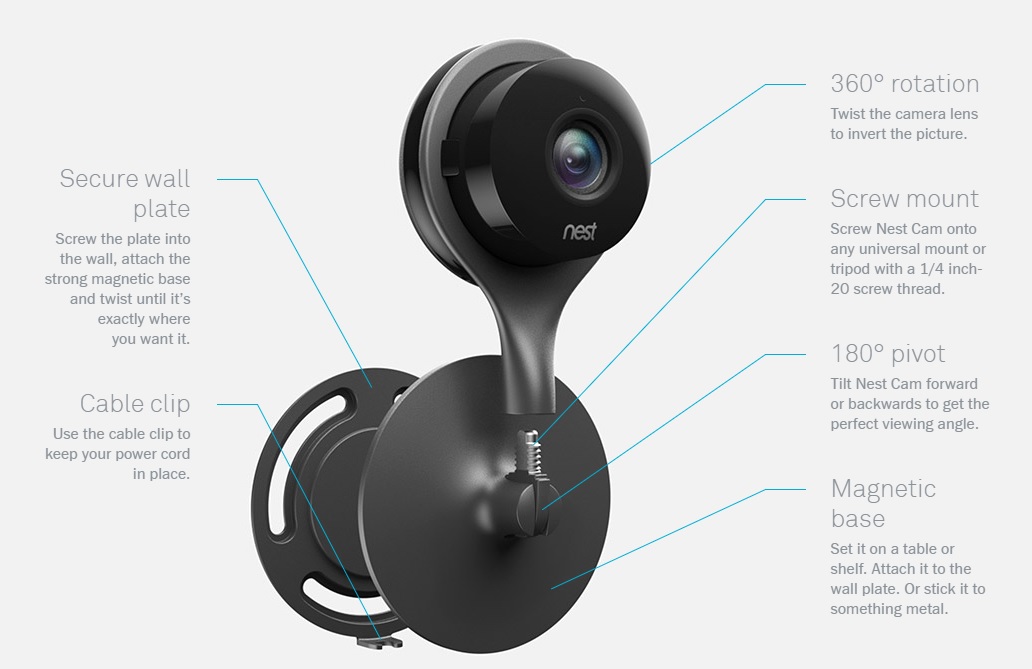
Nest Cam Mounting options
I collected all of the information I could about Nest Cam from their tech specs into Table 1 and included the Foscam C1 specs.
| Nest Cam | Foscam C1 | |
|---|---|---|
| FCC ID | ZQANC11 | ZDEC1 |
| Resolution | 1920×1080 | 1280×720 |
| Megapixel | 3 | 1 |
| Lens | f:2.8mm,F:2.4 | |
| Compression | H.264 | H.264 |
| Horizontal field of view | 130° | 115° |
| Vertical field of view | ? | ? |
| Audio | Two-way | Two-way |
| Night vision? | Yes | Yes |
| Number of IR LED’s | 8 | 11 |
| Record to SD card | No | Yes |
| Record to network share | No | No (FTP yes) |
| Record to cloud | Yes | Yes |
| Wireless | N150 class dual-band | N150 class 2.4 GHz only |
| Bluetooth | Yes | No |
| Ethernet | No | Yes, 10/100 |
| Battery backup | No | No |
| POE | No | No |
| Pan/tilt/zoom | Zoom, digital | Yes, digital |
| Can integrate w/ other systems | Sort of | Yes |
Specification summary and comparison
The Nest Cam is a 1080p HD camera and I confirmed the videos from the camera downloaded at 1920×1080 resolution. The camera connects by 2.4 or 5 GHz N150 class Wi-Fi. Inside the box, you get a microUSB cable, wall-wart USB charger, Nest Cam, mounting bracket and some mounting screws and the Quick Setup card, which I’ve shown below because I adore its simplicity. “Pick a spot and plug it in…It should only take a minute. Literally.”
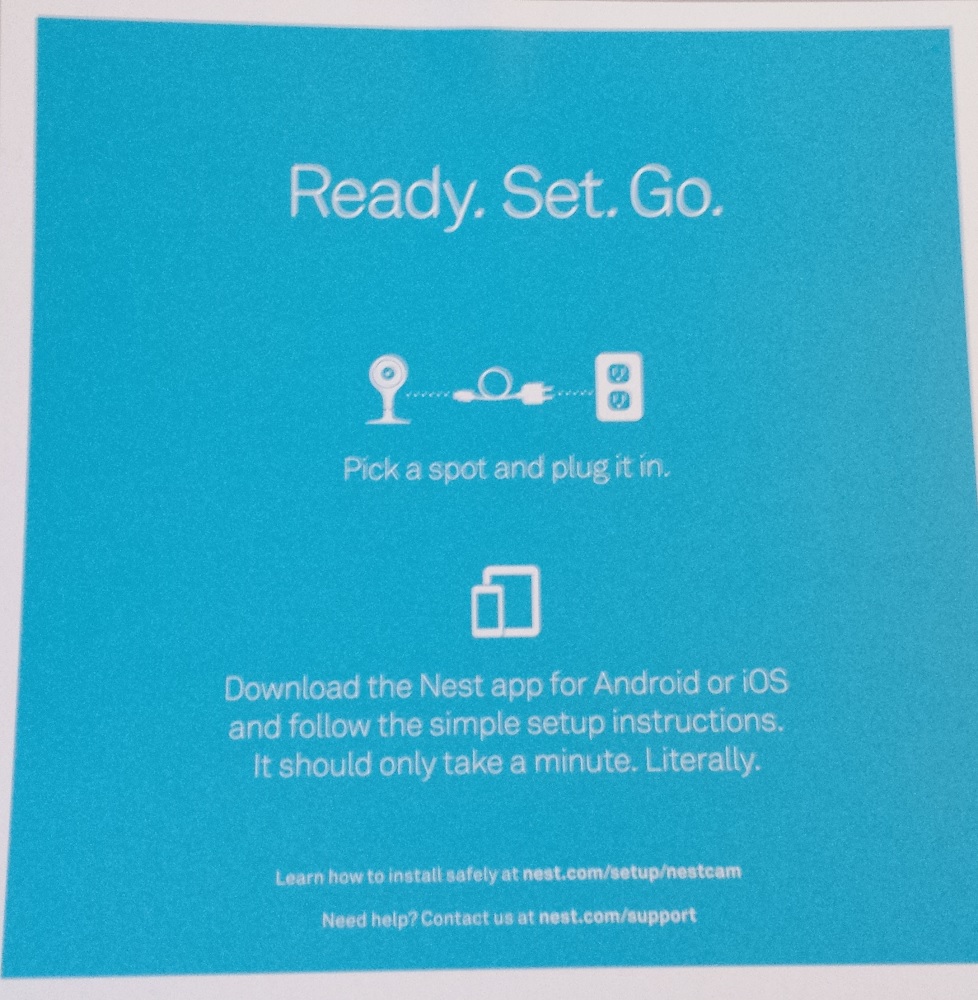
Nest Cam Setup card
Setup
The Quick Setup card did not lie. Setting up both the Foscam C1 and Nest Cam was insanely simple, taking just a few minutes, including the time to take screenshots. After downloading the Nest Cam app and creating an account and answering a few questions, the app pops up with a QR code reader that I simply used to scan the code on the back of the camera (just like the Foscam C1). The wireless network information entered into the app is sent to the Nest Cam via Bluetooth to complete connection and you are done.
The image below shows the key setup steps, from scanning the camera to being online. If you note the phone time in the upper right hand corner, you see that from scanning the QR code to being online with video was three minutes, and that included taking screenshots, accidentally exiting the app, etc.
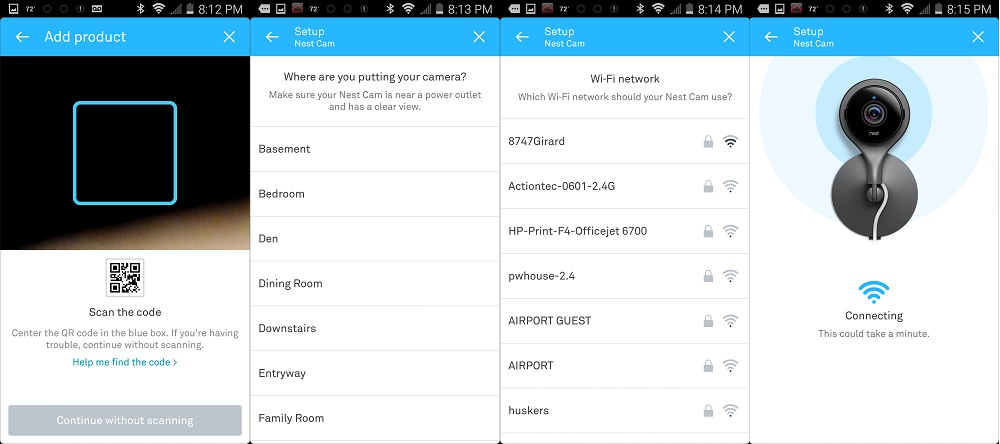
Nest Cam QR code setup screens
It should be noted that the QR code method isn’t the only setup option. If you don’t happen to have an iOS or Android device, no worries, you can still connect Nest Cam to a computer via USB and configure it the old DropCam way. Since the QR code method worked so easily, I had no reason to try the other method, although I had done it before with the old DropCam HD.
Once set up, live video can be accessed via the Nest app on Android or iOS device or via a browser at https://home.nest.com/login, which you see below.
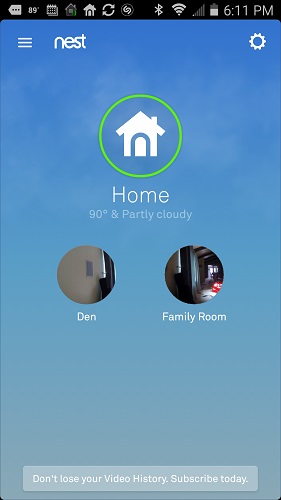
Nest Cam entry screen
Features
Nest Aware, which is the subscription based video recording, is available in 10 and 30 day plans. Without Nest Aware, your video history is not saved to the cloud. Unlike any other vendor I’ve reviewed, Nest Aware (and the old DropCam) record continuously vs. snapshots of simple motion events. Keep this in mind as we look at pricing, as it gets complicated. Nest Aware charges per camera and per situation, which is a bit different than the other vendors who usually charge “up to x number of cameras”. The graphic of the different plans is shown below.
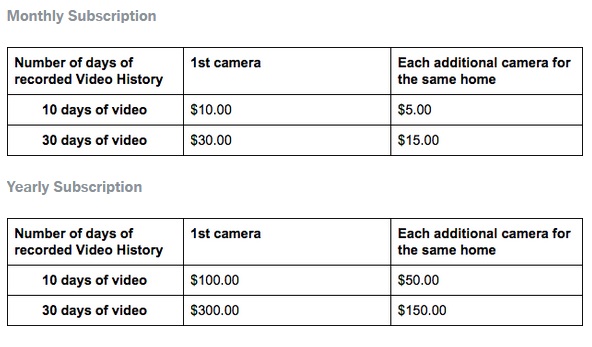
Nest Cam pricing plans
Seems simple enough right? But wait, there’s more, much more. I feel sorry for Nest representatives who have to explain the following pricing schedule to customers; there’s no better way to explain it than to post a large graphic.
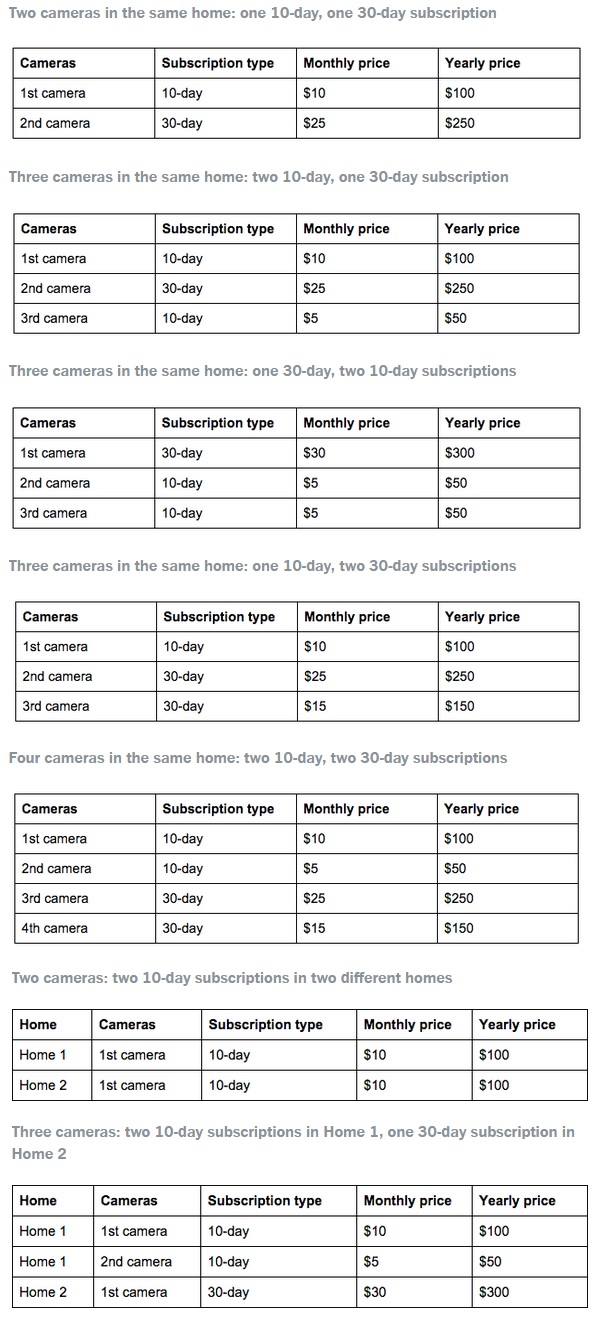
Nest Cam pricing plans
As you can see, you can mix and match 10 and 30-day plans, which is great and complicated at the same time. You can also have cameras at different locations (like your beach house) all in the same plan, although the first camera at each location will always be full charge. (Everything at a beach house is more expensive though anyway…)
Nest Aware’s timeline is simple, intuitive and available on iOS and Android devices and via browser. All options include the ability to watch your video history and look through all of your motion and sound alerts, as well as zooming and enhancing the image (which we’ll get to later) and two-way audio. It takes a browser on a computer to expand your video history for a minute by minute view, create motion detection zones, create and share clips and create and share timelapses. The timeline view via the browser is shown below, the action buttons are rather self-explanatory. The little dots along the bottom are sound and motion events.
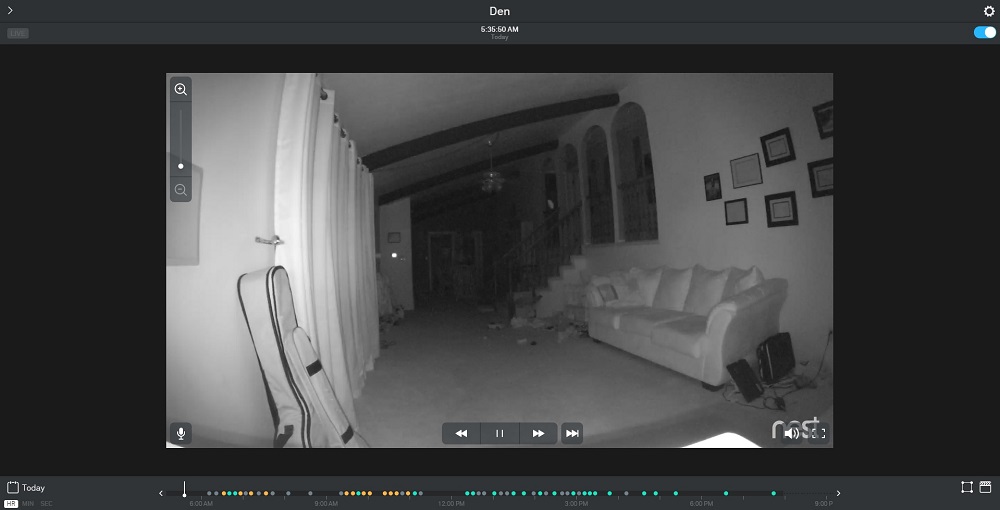
Nest Aware’s timeline view
Nest Aware has very configurable motion detection settings, including the ability to set up to 3 different zones to include or exclude activity from alerts. Nest Aware’s motion algorithms are very good. The cloud service pays attention to color (such as tree leaves) as well as shape and texture to help determine if an alert is needed. Nest Aware also incorporates face detection to try to determine if alerts are important. Nest Aware can also alert based on sounds, but it won’t just continue to send alerts for something like an air conditioner running; it looks for fluctuations in sound when sending alerts. The motion detection area I set within Nest Aware is shown below.
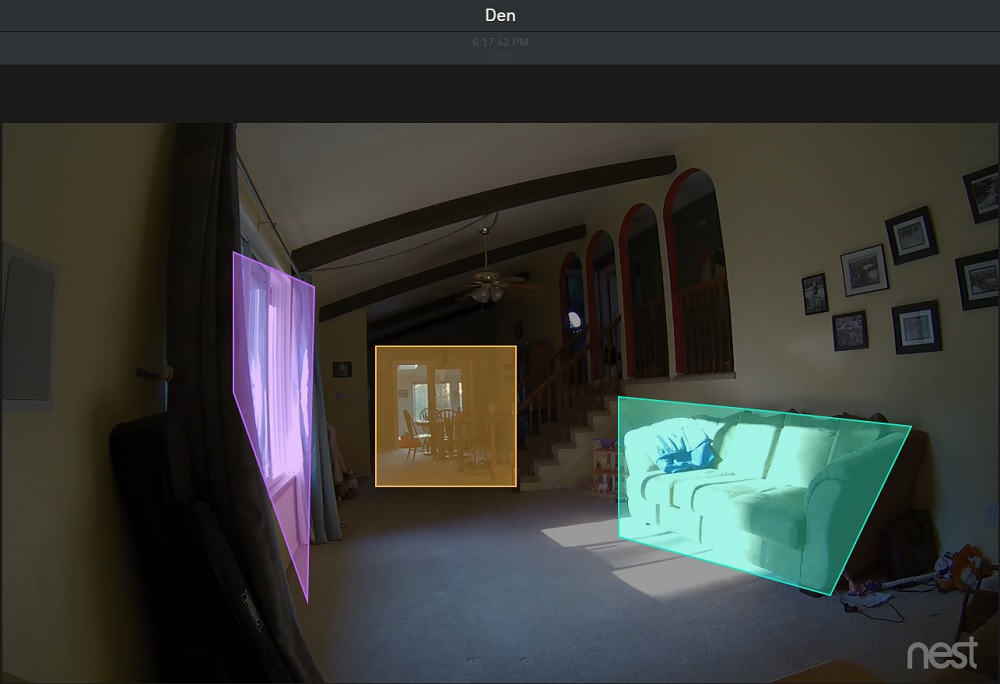
Nest Aware’s motion detection area settings
Features – more
In some of the other reviews, I’ve dinged cameras for the delay between the trigger event and recording start. I also had issues with even downloading clips. Nest Cam has no such problems. Because Nest Cam is constantly recording to the cloud (if you subscribe to Nest Aware), your entire video history is there for you to select and download as clips if necessary. It’s up to you to decide if you want time before the event started and how long you want after.
If I had to complain about anything related to that, I guess I could wish that I were able to download the motion event with one easy click vs. going into the timeline and lining up where I wanted the clip to start and stop. But really, that’s a petty complaint. In addition to creating normal clips, you can also create timelapses of video history.
Other features of the app include setting your camera as publicly viewable (great for daycares) and integration with Nest. The integration with Nest allows the Nest Cam to automatically record a clip and email you if the Nest smoke/CO detector detects an emergency, even if you don’t subscribe to Nest Aware. Nest Cam can also start recording when the Nest Thermostat goes into Away mode. You can also set up schedules for recording if you don’t want it to be constantly recording.
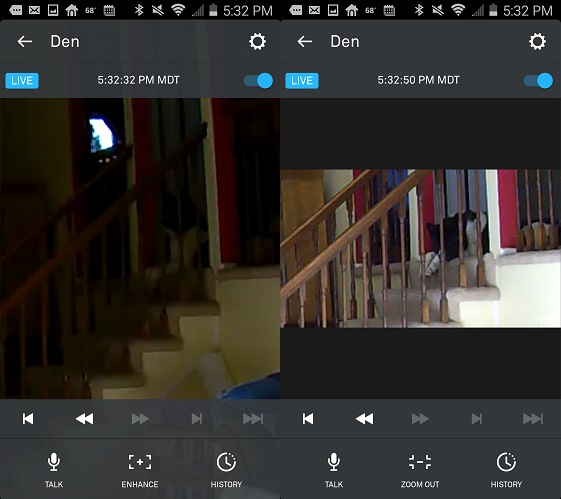
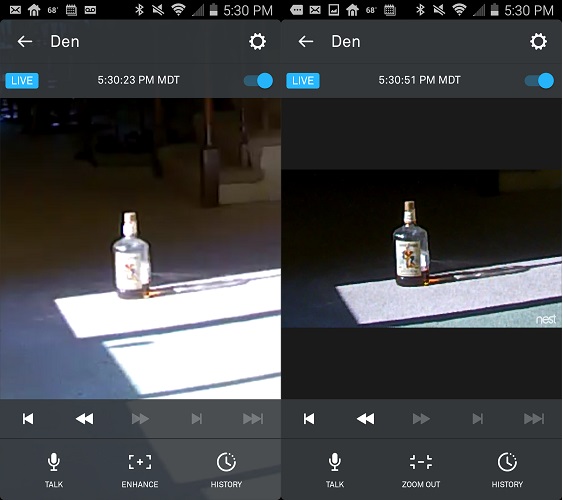
I’ve saved the best for last regarding the app. Nest Aware has an “Enhance” mode that is almost magic. We’ve all seen shows where the good guys take a blurry license plate picture, then zoom in and enhance so they can read the numbers and go nab the bad guys. We all sit there saying, yeah right, you can’t make pixels just automagically sharpen up like that.
Well, with Nest Aware you can, but for live video only, which tells me it’s being done via hardware vs. software. I tried to find out exactly how Enhance works, but all I could find was this snippet, “When you enhance the video zoomed in video (sic), your camera uses its entire image sensor to improve the video quality and show you more detail in the area you’ve zoomed. Since the camera is focusing on that one view, Video History won’t record outside of the frame you’ve chosen until you go back to full-screen view.” If you don’t believe me, take a look at some before and afters.
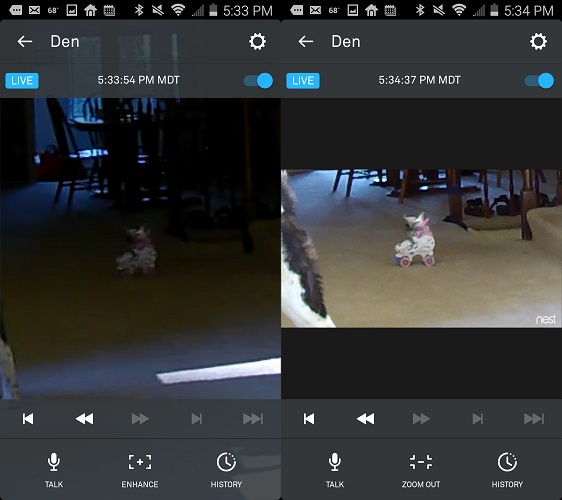
Nest Cam Enhancement Example #1
Wow! You can see in example #2 that my dog’s head position has changed, that’s because Enhance can only be done to live video and not recorded history. The results however are very impressive. The camera was not moved, nor was any lighting added between screenshots.
Nest Cam Enhancement Example #2
In example #3, the writing and image on the bottle are much clearer than the before picture.
Nest Cam Enhancement Example #2
I wish I had an old license plate sitting around so I could do that test. But I need to note that unless you check in immediately at an alert, the Enhance feature isn’t going to do you much good. Most of the time you would probably want Enhance for recorded video, which it’s not available for. Nonetheless, I like the feature and I find it very clever.
Update 9/4/15
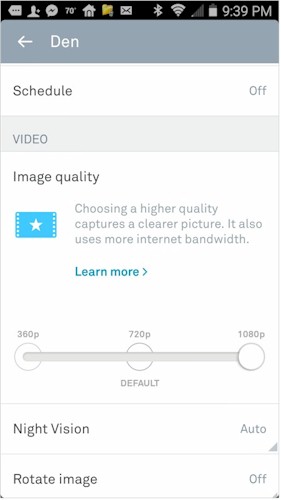
Since Nest Cam is constantly recording, it competes for upstream bandwidth. Since most of us have internet service with relatively low upload bandwidth (often 1 Mbps or lower), Nest Cam can effect other real-time applications such as FaceTime or Skype. The original Dropcam provided no ability to control bandwidth use and our testing found it could have a large effect on both up and downlink bandwidth.
Nest Cam provides an Image quality control that can be used to control bandwidth use. At the 1080p setting, I saw 800 Kbps of average bandwith use, with peaks as high as 1.2 Mbps when there was lots of activity.
Nest Cam Image quality setting
Video and Image Quality
The Nest Cam app is great, but what does video look like? I did an in-depth comparison of Nest Cam to the Foscam C1 in the Foscam C1 review, so rather than repeat it all here again I’ll have you go take a look at that review for the lowdown on image and video quality, especially concerning night vision. I did add a daytime video for Nest Cam though so we’ll compare the Foscam C1 to the Nest Cam here.
Nest Cam motion indoor day
Foscam C1 motion indoor day
Both daylight videos look very good, you see the little stutter in the Foscam C1 video. You can also see that the Nest Cam has the wider field of view. Colors are nice, motion is very fluid and you could easily do a snapshot of the “burglar’s” face there if you needed to. Can we say the same for night vision? Check out the Foscam C1 review to see.
Closing Thoughts
You don’t get a free lunch with Nest Cam. Cost of entry is high and if you want any sort of video history you’re going to be paying more on an ongoing basis.. Nest Cam also doesn’t integrate into NAS surveillance systems, although it does integrate with other Nest products. Those negative points aside, you can tell a lot of time and effort has been put into the Nest app. It has some great features that I haven’t seen in any of the systems we’ve looked at. The Enhance feature is astounding, the caveat being you’d probably need it more with recorded history, where it isn’t available.
So the big question, Foscam C1 or Nest Cam? Well, if you are tinkerer who just wants to “mess around” with an IP camera, don’t mind putting your own solutions together and don’t want to spend a lot of cash, go with the C1. If you want something that just works, along with an app that works really well AND you have money burning a hole in your pocket, go with the Nest Cam. Nest Cam is a very good product and you won’t be disappointed with the purchase.
