Introduction

Designing and installing a home network isn’t something that all of us get to do. But when you gotta, it’s helpful to learn from others who have already been through the process.
SNB reader Frank Drenckhahn learned from our Diary of a new Home Network, Homegrown Networks and Building a Home Network From Scratch articles and then wrote to share his experience with designing and installing a network in a new concrete block home in Costa Rica.
Frank’s challenge was to design and install video, data and telephone networks in his new two floor 2700 square foot home. As is common in tropical climates, the home is built of concrete block, rebar, and poured concrete. The preliminary plan from the architect included provision for a small LAN along with telephone and cable TV wiring. But the plans included separate panels for each service in three different locations.
After looking over the plans, Frank decided to change course and use a single Structured Wiring (SW) panel that included phone, cable and LAN. The number one reason for the change was to ease connecting the three services to each room of the house via one conduit, then distributing phone, data and cable as needed to wall boxes around each room.
The second reason was for Internet connection flexibility. Both cable and DSL were available in Frank’s neighborhood, so he wanted to keep his options open. In the end he opted for DSL. But any future switchover will be very easy since feeds for cable and telephone are right in the SW panel.
The last reason was to allow for a powered cable TV splitter for eight room locations. The SW panel’s AC outlet made installation easy.
After examining offerings from various SW vendors, Frank settled on a 36″ Eaton panel. What really sold Frank on the Eaton SW system were the shelves and modules that were available. They made for a very neatly organized installation.

Eaton structured wiring enclosures
Since the plans were already accepted and Frank did not want to pay for any “extras”, which always cost way more than they should, he made a deal with his construction company. The builder would install all the boxes and conduit and Frank, his wife and 7 year old daughter would do the rest.
Frank supplied the contractor with the 36” Eaton SW panel, 3/4" conduit, 3/4" connectors, deep 4”X4” junction boxes and double gang to single gang faceplate adapters. He also ordered all the cable and connectors.
The Plan
Working with concrete and conduit is much less forgiving than with wood frame and drywall construction. While it might be relatively easy to move a box from a wrong location in a concrete block wall, moving the conduit that goes with it isn’t. So good drawings and planning are very important.
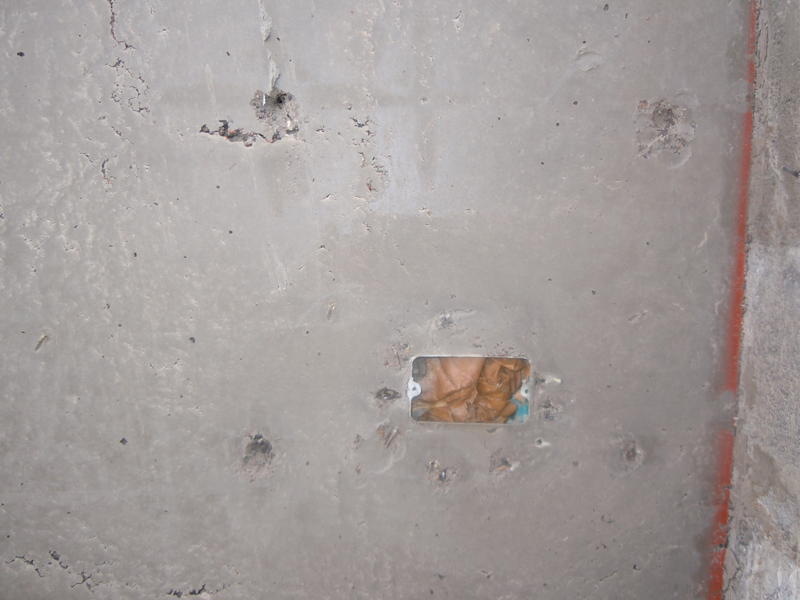
Frank made detailed drawings like the one shown below to exactly locate the main panel and all of the deep 4”X4” junction boxes. Note that all boxes were 4" X 4" ("double gang") to allow plenty of room for extra cable that you’ll need to get connectors away from the wall so that you can crimp them. The single gang wall plates were mounted with the aid of double gang to single gang adapter plates.
Conduit plans were also made and designed to that each run had a maximum of two 90 degree bends to ease the cable pulling chore and minimize cable stretch.

Eaton structured wiring enclosures
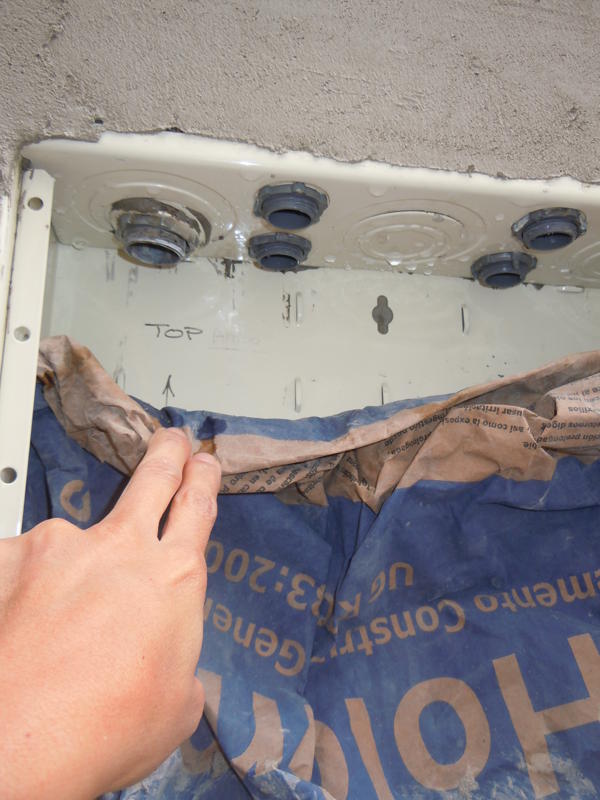
The main structured wiring panel was installed in the Utility room of the house. All CAT5e for network and telephone along with RG6 cable for Cable TV and OTA antenna were pulled in by Frank, his wife and daughter, with the help of cable pulling lubricant. Frank then terminated all the cables and connected everything up.
The finished panel with everything installed is shown in the photo below.

Finished Structured Wiring Panel
You can also check the gallery for construction and other photos.
Structured wiring (SW) panel area prepped for pour.
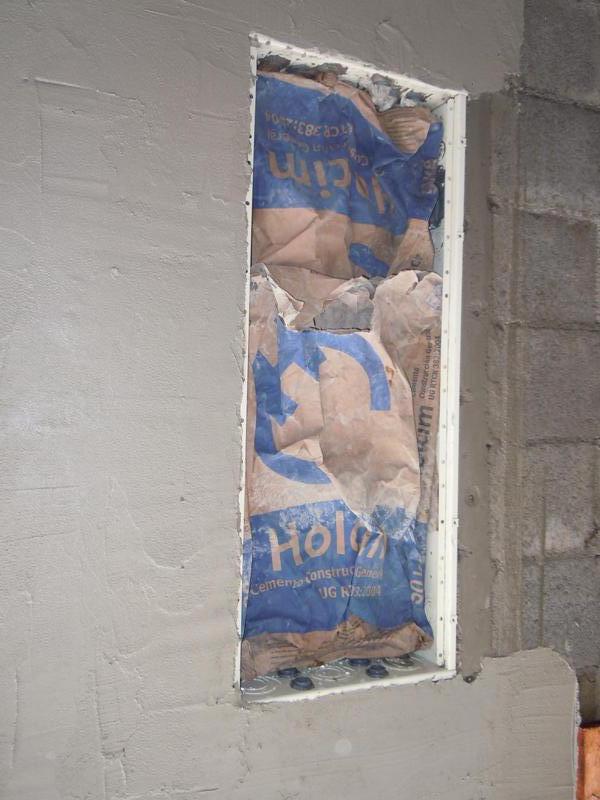
SW enclosure installed
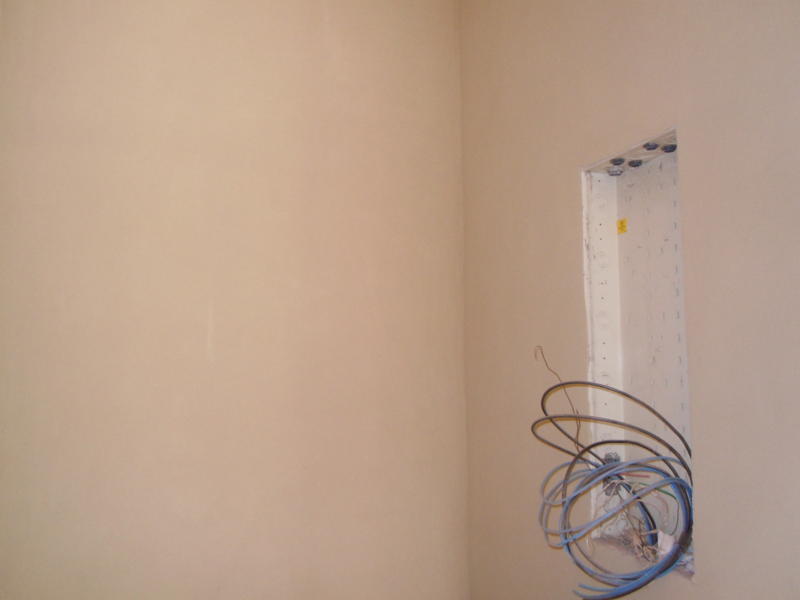
One run of cables pulled into the SW panel.
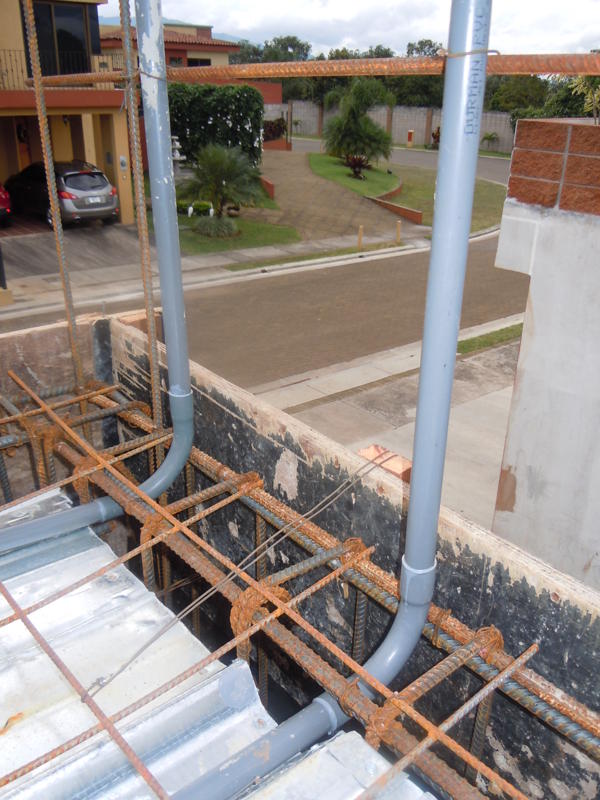
Some of the conduit before concrete pour
First floor Conduit
Conduit for the second floor
Roughed-in AP box

AP installed near ceiling
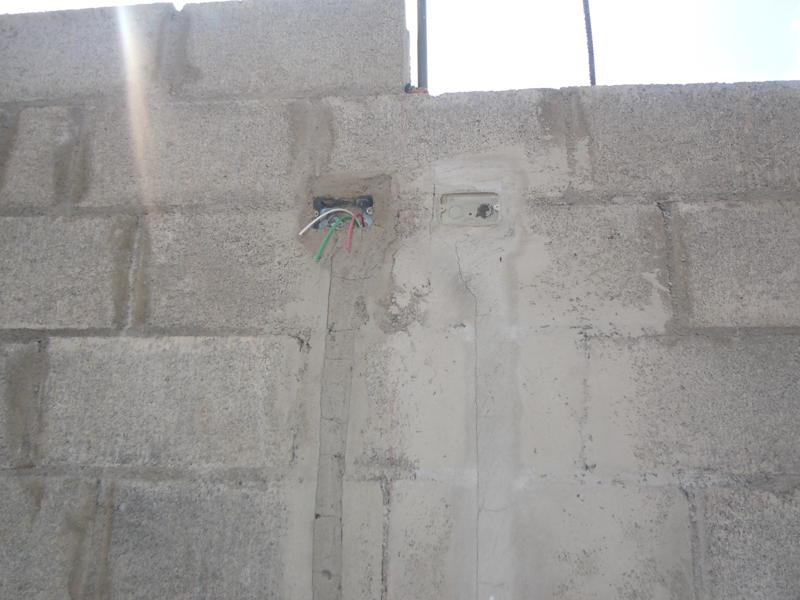
It may look like a single gang box in the wall. But look closely and you’ll see the double gang box outline that’s converted to a single gang mount via an adapter plate.
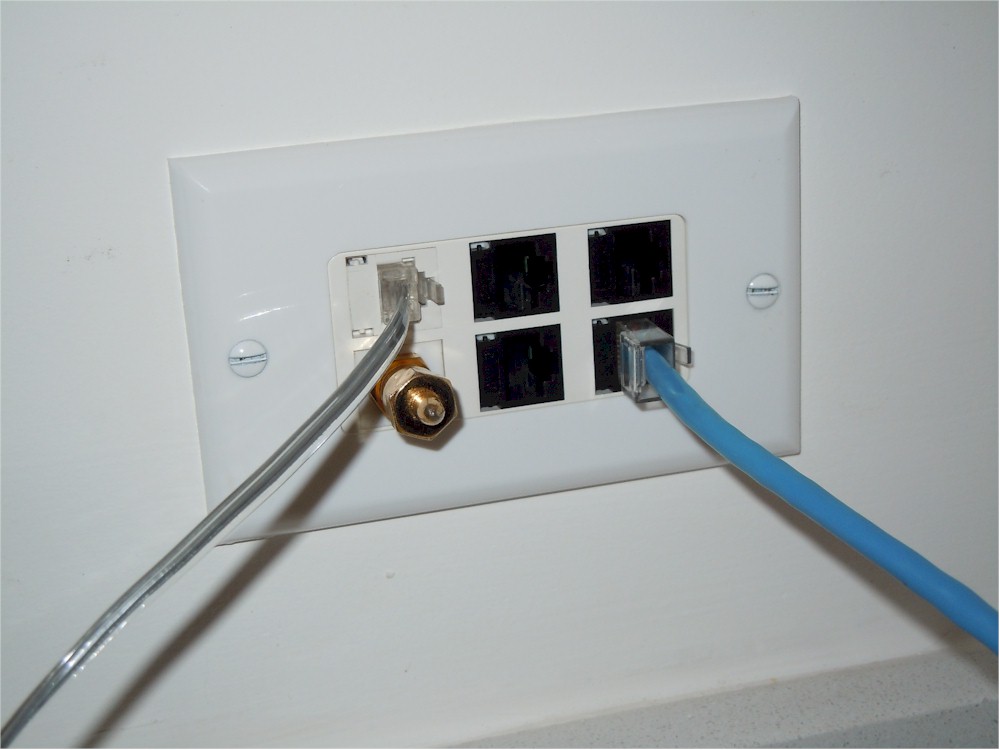
Typical single gang wall plate with connectors installed
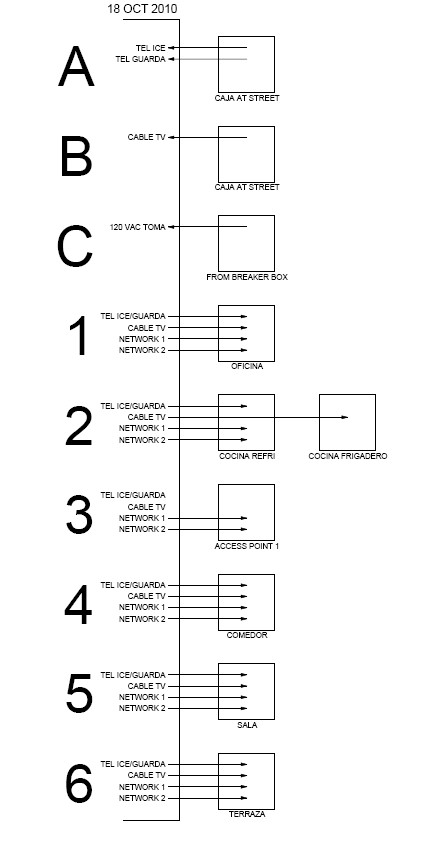
First floor cable plan. Each number represents a main conduit feed
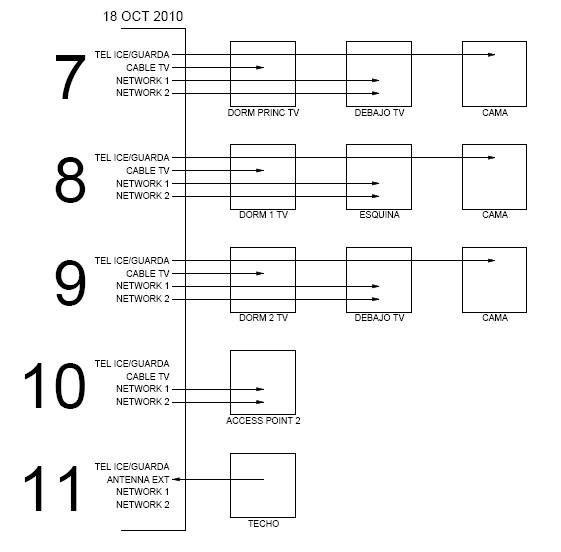
Second floor cable plan
Detailed wiring plan for living room
Tools
Here is a list of the tools used to do the installation with comments by Frank.
- Eaton Structured Wiring Panels, Modules and Shelves – A good selection of SW components. http://www.structured-wiring.net/eestrwiring/SW/index.htm
- Fluke Networks MicroMapper MT-8200-49A Network Testing Device – A must have. At a glance instant correct RJ45 cable wiring confirmation.
- Thomas & Betts IT-1000 Combination Snap-N-Seal Installation and Cable Preparation Tool – Pays for itself in time saved. Prepares cable and compresses connector onto shield and cable.
- Impact-style punch-down tool with 110 blade – Makes reliable connections quickly. Stuff the connector with the correct wires and punch down.
- Mini diagonal cutting pliers – For trimming the CAT5e conductor ends after stuffing the wires in the small RJ45 insert which keeps all eight wires in order.
- RJ45 Connector Crimping tool – Get one of good quality.
- RadioShack phone line tester – Instantly gives you correct wiring confirmation for two phone lines. We used “line 1” for basic phone service and line two for the private gated community phone.
- 3m Wire Pulling Lubricant Gel – Great stuff. We could not have pulled in some runs without this lubricant. Be generous in its application and you will not stretch the CAT5e or 6 cable conductors when pulling the cables through the conduit runs. Very important if you want to maintain the cable characteristics for high-speed transmission.
- Brady BMP 21 Label Printer – Makes professional self-laminating labels for cables and more.
Parts
Here is a list of the parts selected with more commentary.
- Skywalker RJ45 CAT6 connectors – I like the two part connector. The insert makes it very easy to keep the wires in order when stuffing the RJ45 assembly before crimping with the RJ45 crimp tool.
- Skywalker RJ45 CAT6 Keystone Jacks – No problems encountered. They are well made and hold the conductors securely in place.
- Skywalker 6 pin Telephone Keystone Jacks – Gives you the option of three phone lines.
- Channel Master 2 part “Decora” Keystone Wall plates – Allows you to get the wall plate straight when the junction box is skewed. Most of the junction boxes in my house were not straight.
- RG6 Snap-N-Seal Coax connectors – High quality “F” type connectors. They make a solid shield connection which is important for a noise free TV picture.
- Deep 4’x4” junction boxes – Used throughout for SW to facilitate stuffing the cables and terminated keystone jack plates back into the wall without cable kinking and worked out perfectly. All deep 4”x4” boxes used double gang to single gang adapter plates.
- Nexxt Solutions CAT5e cable – Used for both data and phone runs. Data cabling had a blue jacket while phone cables were tan for easy identification. Frank also made all his patch cables, since he had plenty of wire and connectors.
All components except SW panel and Ethernet cable were ordered via the Web and sent to Costa Rica. Believe it or not, it wound up cheaper getting the Eaton SW modules, tools, testers and all other components sent from the States vs. ordering locally!
Components
Network components used include:
- D-LINK DSL-500B ADSL Modem/Router
- D-LINK DGS 1024D Gigabit Switch
- D-LINK DAP-2553 Wireless Access Points (One for each floor)
- TRIPP-LITE INTERNET T350 UPS to power the units in the SW panel
Connected to the gigabit Ethernet network are three desktop PC’s, two wireless access points, NAS, Home Theater, DVD players, LED TV’s, gaming consoles, Printers, IP phones and IP video cameras. A laptop and netbook connect to the wireless LAN
Lessons Learned
You might have noticed that Frank used CAT5e cable but CAT6 connectors. He explained that he initially planned to use CAT6 cable throughout the house and ordered plenty of CAT6 RJ45 plugs and jacks for the installation. Once the conduits were in place, he decided to buy some CAT6 for a test pull and found that CAT6 had a thicker diameter and was more ridged (because of a spine to keep the pairs separated) than CAT5e.
Since some of the conduit runs needed to include four CAT6 and two RG6 cables, he felt that there just was not enough breathing room for all of that in a 3/4″ conduit. He also didn’t want to stretch and risk ruining the characteristics of the Ethernet cable when pulling them in.
So Frank dropped back to using CAT5e cabling, which had a smaller diameter and was more flexible. Although the CAT6 RJ45 Jacks and CAT6 RJ45 connectors were made for 23 awg conductors, they also made solid connection to the 24 awg wire found in the CAT5e cable he used.
Frank is very happy with how the network installation turned out. But if he were to do it over, he would use 1” conduit for all home runs to the main SW panel to allow more space for cables and ease of installation. Even using CAT5e instead of CAT6 cables, pulling four CAT5e cables and two RG6 cables through 3/4" conduit would have been impossible without stretching the cables if he hadn’t used cable lubricant.
Other lessons learned:
- Plan and draw out every detail of your SW installation well ahead of the construction stage. A drawing is worth two thousand words, especially when you do not speak Spanish very well and have to frequently be away from construction because of work.
- When designing a SW system for a house built of concrete block, rebar and poured concrete, make sure that all junction boxes are in the correct place first since having to move them is difficult( to put it mildly). Get it right the first time!
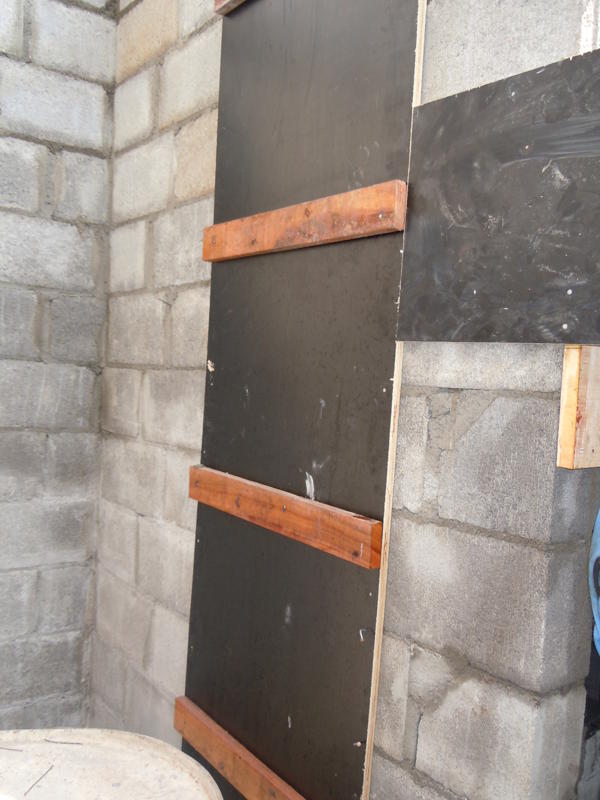
- The Eaton Structured Wiring panel used was made to be mounted between studs and not embedded in concrete. The thickness of the material used is rather thin compared to standard breaker panels that are made to be embedded into concrete.
Once concrete was poured, the back of the panel warped causing a 1/2" bow. So the shelves used in the panel had to have 1/2" of material lopped off in a machine shop so they would fit properly again in the panel. Next time, I would attach a piece of 3/4" plywood to the back of the panel before pouring concrete next time to prevent warping. - As noted above, I would use 1" conduit for all conduit runs from the main SW panel to each house location. I’d then use 3/4" and 1/2" conduit from there to other parts of the room.
- Each conduit run should have no more than two 90 degree bends in order to make pulling cables through easier without stretching the conductors.
- Ensure that all conduit connectors are plugged with something after installation and during the rest of construction to keep foreign objects, like dirt or concrete chips, from falling in and causing problems during cable pull.
We hope you learned something from Frank’s story. If you have another interesting DIY network story to tell, let me know. Please use the link below to post comments on Frank’s story in the Forums. My thanks for Frank for sharing his!