Introduction
| At a Glance | |
|---|---|
| Product | unRAID Server OS 4.2 |
| Summary | Lightweight Slackware NAS distro that runs from a USB flash drive and sports a unique style of RAID on any Linux supported hardware. |
| Pros | • Runs on anything supported by the 2.6.22.5 Linux kernel • Painless installation • Polished web-interface |
| Cons | • Only runs SMB/CIFS • Pricey if you want to run more than three drives |
Lime Technology’s unRAID Server OS offers a lightweight package for a quick NAS setup with an innovative software RAID driver. Unlike traditional RAID modes, unRAID doesn’t do any striping or mirroring. So you don’t get the performance benefits of striping or the redundancy of mirroring.
Instead, unRAID stores parity data on one disk in the array. This configuration allows a single drive failure to be rebuilt, and allows you to add another drive of any size or speed (it must be smaller than the parity drive) to the array at anytime.
unRAID is built on Slackware 11, one of the oldest and most mature Linux distros out there, running a fairly recent 2.6.22.5 kernel. unRAID comes in three flavors:
- unRAID Server Basic (Free) – supports up to three drives but lacks user level permissions.
- unRAID Server Plus ($69) – supports up to 6 drives and user level permissions.
- unRAID Server Pro ($119) – supports up to 12 drives and user level permissions.
Features
unRAID, as it comes from the factory, supports only one network protocol, SMB. A far-cry from the half-dozen or so offered by other open source projects such as FreeNAS. What’s interesting about unRAID is the innovative unRAID pseudo-RAID driver that is built off the standard Linux RAID5 driver.
The driver essentially retains the parity functions of RAID 5 without implementing striping. This allows you to use any size, speed or type of drives (as long as they’re the same size or smaller than the parity drive) since files aren’t split between drives. Each disk is accessed individually while the parity data is stored on a single drive in the array.
The unRAID driver is released under the GPL, and although the source can’t be downloaded directly from Lime-Technology’s site, it’s in the unRAID server distribution and you can incorporate it into any other RAID arrays not built around their specialized server.
unRAID supports the usual gamut of user level permissions, allowing you to create accounts and access rights on a user level basis.
Installation
unRAID requires a USB flash drive 128Mb or larger which needs to be a bootable Linux system. In Windows, download and install syslinux, a tool for creating a bootable Linux file system on a USB flash drive. From a command prompt, run the following:
C:\syslinux.exe g:
Where "g:" is the drive letter corresponding to your USB drive.
Name the USB flash drive "UNRAID", and copy over the unRAID OS.
Set your computer to boot from USB (usually found in the BIOS’ hard drive boot priority menu), insert the flash drive and reboot.
Note that the BIOS on older systems might not have the option to boot from USB.
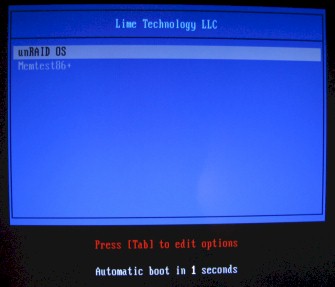
The bootloader page allows you to boot either unRAID or the very handy Memtest86+ memory diagnostic tool (a must have for system admins and system builders).
Figure 1: unRAID Bootloader
Configuration
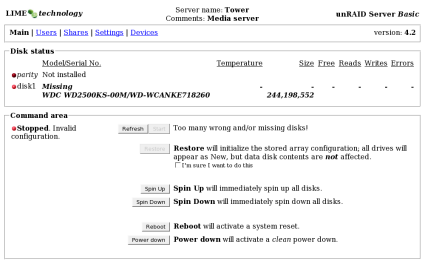
Once booted, the unRAID server configuration is accessable from your web browser. Point your browser at the IP address of the unRAID machine and you’ll be greeted by the configuration page.
Figure 2: Main Configuration Page
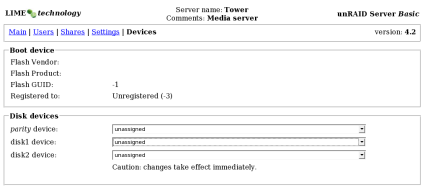
From here, you can add your disks from the drop-downs under "Devices". In the basic server package, you’re only allowed three disks, one of which must be used for parity information.
Figure 3: Device Configuration Page
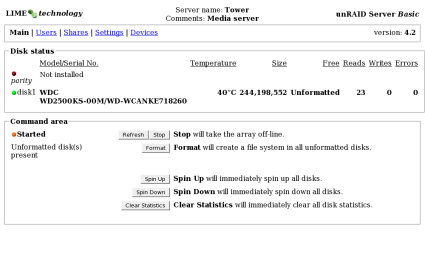
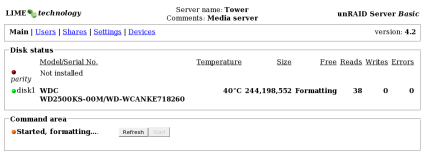
Returning to the main screen will show your newly added disks. Format the drives by simply clicking the "Format" button in the Command Area.
Figure 4: Formatting the Drives
Figure 5: Formatting in Process
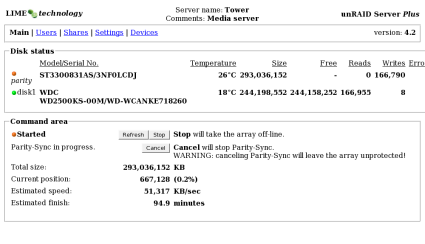
unRAID will happily run without a parity drive, leaving you the option to add one later. However, as with all RAID arrays that use parity, it takes time to build the parity drive once installed in an array. This was a little over 90 minutes for a 300 GB parity drive for me.
Figure 6: Building the Parity Drive
Configuration – more
The Plus and Pro versions allow you to set user level permissions on the "Users" tab. However, enabling user share management requires stopping the entire array.
Figure 7: Enabling User Shares
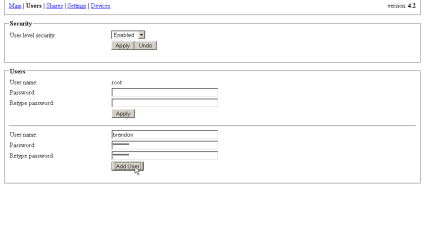
Once enabled, you can add users on the "Users" page.
Figure 8: Adding a User
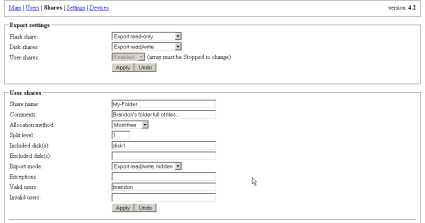
With new users added, you can set up shares that are accessable to certain users. unRAID has a rather cryptic but innovative list of options and attributes for creating new shares.
Figure 9: Adding a Share
Most of the options weren’t self explanatory enough to set up at first glance but fortunately Lime-Technology has a pretty good manual page. Here’s the basic run down:
Share Name
- The folder name that will be created on the included disk. This field can only contain alpha-numerics, dashes and periods. (This burned me for a while when I tried to create a share called "Brandon’s Files", with no error messages to speak of.)
Comments
- Optional comments associated with the share.
Allocation Method
- This is another confusing option at first glance. This essentially decides on which disk your newly created share will reside. "Most-free" places the share on the disk with the most free space (as one might expect). "High-water" places the share on the disk with the least free space that still below a certain "High-water" level.
Split Level
- Split level refers to the folder depth in the hierarchy that can be allocated to another included disk. I imagine that this cropped up as problem during development. Since there’s no striping going on with the unRAID driver, once the current disk fills up you’re out of luck unless you have a system for allocating files to other drives in the array.
Included Disks
- Pretty self-explanatory; the disks that are associated with this particular share.
Excluded Disks
- The disks that are not to be associated with this particular share.
Export Mode and Exceptions
- unRAID manages permissions through a clever combination of "Export mode" and "Exceptions". If a share is exported read/write for Bob and Alice is listed as an exception, Alice will have read-only permissions on the share. Similarly, if the share is exported read-only and Alice is listed as an exception, she will have read/write permissions. Both users must be listed as valid users to access the share in any way.
Valid Users
- Users that will be able to access the share in some way.
Invalid Users
- Users that will not be able to access the share in any way.
Performance
| unRAID System Specs | |
|---|---|
| Motherboard | Asus M2NPV-VM |
| Processor | AMD Athlon 64 X2 3800+ |
| Memory | 2 GB |
| Hard Drives | Western Digital WD2500KS 250Gb (SATA) Segate Barracuda 7200.8 ST3300831AS 300Gb (SATA) |
Table 1: unRAID System Specs
Test Setup
- All tests were run from an AMD Opteron 165 running Windows XP SP2
- unRAID was tested with and without a parity drive installed
- All tests followed our standard iozone-based test procedure
With such a light package of protocols and options, one would expect unRAID and the underlying Slackware system to be lightning fast and indeed it is. unRAID really upholds the old mantra, "do one thing and do it well."
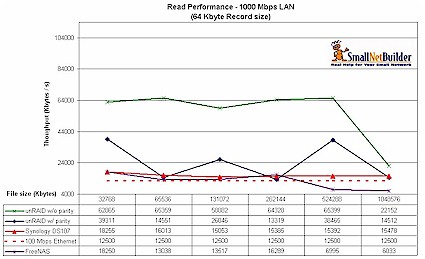
On a gigabit Ethernet connection, read performance without a parity drive blazes past the Synology DS107 [reviewed] and FreeNAS DIY system [reviewed] that I previously tested using the same iozone test machine described in the Test Setup notes above. While these single-drive NASes are not intended to be directly comparable to the unRAID system, they provide some basis for comparison using the same benchmarking tool.
One would think that the the parity drive wouldn’t be heavily utilized during reads. But, surprisingly, unRAID takes a considerable performance hit with a parity drive installed. It basically drops back down into the realm of the Synology.
Figure 10: Read Performance
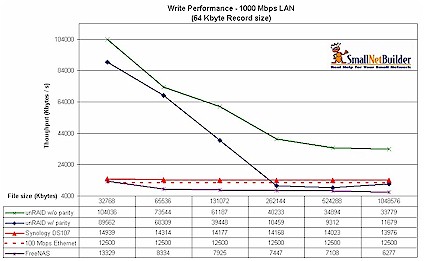
Write performance shows the typical declining performance with larger filesize characteristic seen in our other NAS tests. The unRAID system handily beats both the Synology and FreeNAS systems at filesizes up to 128 MB. But for 256 MB and higher filesizes, parity-enabled performance drops below the Synology, but still beats the FreeNAS system.
Figure 11: Write Performance
Conclusion
For anyone looking for a fast, basic, lightweight NAS on a primarily Windows based network, you’d be hard-pressed to find a better solution than unRAID. I found the "Exception" permission management system especially handy for media shares where I generally want to give everyone read-only access and only give myself read/write permission.
For SOHO’s, I agree with Tim; RAID is all about uptime. RAID is no substitute for a good backup schedule. In this vein, unRAID offers a unique solution which keeps the parity and disk rebuild functions of RAID, but doesn’t stripe data which leaves you the freedom to add disks to the array at anytime or even take disks out of the array anytime.
Personally, I found the offering of protocols and features, or rather the lack of protocols and features, a bit limiting. Linux savvy users might be better served administering their own server as unRAID really consists of just Samba, FUSE, and a nice little web administration interface (which SWAT could be substituted for) built on Slackware 11. Depending on your Linux know-how, you have to decide if the $69 price tag for the "Plus" version is worth it.

