![]() This article is sponsored by QNAP.
This article is sponsored by QNAP.

Introduction
QNAP is big on Virtualization. So big in fact, that it is the only NAS vendor to make it easy to run multiple Virtual Machines (VMs) on a single NAS and centrally manage them via a user-friendly interface. QNAP’s Virtualization Station supports a wide range of Windows, Linux and UNIX-based VMs, including pre-configured virtual appliances from Bitnami and VMware. Virtualization Station provides access to remote desktops on each VM, takes VM snapshots and even connects USB devices to VMs.
One very useful thing this capability enables is enhancing the security of your network by adding a virtual Unified Threat Management (UTM) appliance, specifically Sophos’ free UTM Home Edition.
Sophos’ hardware requirements for the UTM are an Intel compatible 1.5 GHz CPU, 1 GB RAM and 20 GB of hard disk space. A QNAP TS-453 Pro [reviewed] with a quad-core Intel Celeron 2.0 GHz CPU, 8 GB of RAM and four Intel 10/100/1000 Ethernet ports is plenty powerful for this application.
It’s worth noting the Intel Baytrail processor used in the TS-453 Pro and other QNAP NASes provides higher performance with lower power consumption and more memory than competitor’s products.

Competitive comparison
The TS-453 Pro was configured so the UTM VM had two CPU
cores, 2 GB RAM, 80 GB disk
space and two Ethernet interfaces. Two of the NAS Ethernet ports are used for the UTM WAN and LAN connections. One of the TS-453 Pro’s Ethernet
interfaces is the UTM’s WAN interface, the other will be the UTM’s LAN interface.
The UTM would normally replace your current router. You can continue to use your current router’s wireless portion by converting it to an access point.
Creating The VM
To set up the VM, you’ll need to access the Network Settings, Create VM and Virtual Machine
edit Virtualization
Station menus. Start by downloading the software here.

UTM ISO file download
You then configure the VM, Start it and let it install.

VM configuration for UTM
Once the VM installation completes, log into the Sophos UTM web GUI and follow the UTM setup wizard.

UTM install wizard summary
Since you’ll want to access both the virtual UTM and normal NAS features, you’ll need to make multiple connections between the NAS and your network as shown in the diagram below. Since the virtual UTM is now acting as your LAN’s router, it assigns all IP addresses, including those for normal NAS functions. In our configuration, the UTM admin interface is located at https://192.168.2.100:4444.

Connecting the NAS/UTM
- Ethernet 1 = NAS interface: Assign the NAS a static IP address in the 192.168.2.0/24 subnet or allow it to get it an address via DHCP from the UTM. You access NAS administration here, including Virtualization Station
- Ethernet 2 = VM interface: Assign each VM a static IP address in the 192.168.2.0/24 subnet or allow them to get their IP address via DHCP from the UTM. This connection is needed only if you have other VMs running on the NAS.
- Ethernet 3 = UTM WAN Interface: The UTM WAN interface will get a public IP address from your ISP via DHCP. If you have a static public IP, you can configure that IP in the UTM’s web menu.
- Ethernet 4 = UTM LAN Interface = 192.168.2.100. The UTM’s admin interface is located at https://192.168.2.100:4444. The UTM’s DHCP server will assign IP addresses to the NAS on Ethernet 1 and VMs on Ethernet 2.
The whole process is shown in the gallery below.
http://download.astaro.com/UTM/v9/software_appliance/iso/
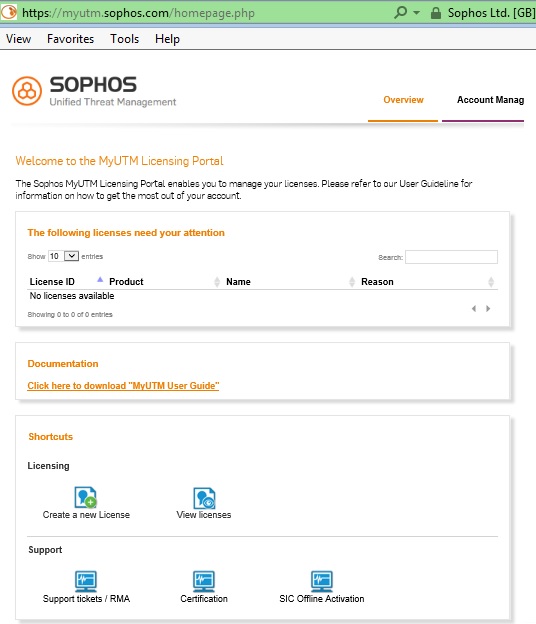
Setup a free Sophos account and download a free license.
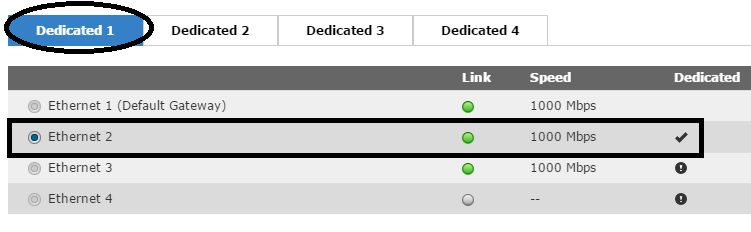
This is the TS-453 Pro’s Ethernet 2 interface previously configured for VM use.
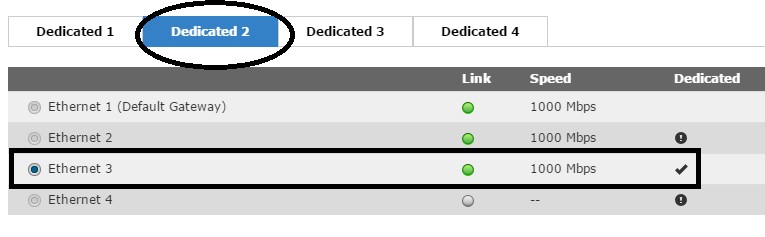
The Ethernet 3 interface is used as the UTM’s WAN interface.
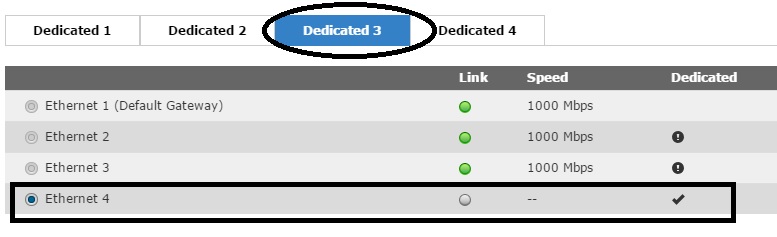
The Ethernet 4 interface is used as the UTM’s LAN interface.
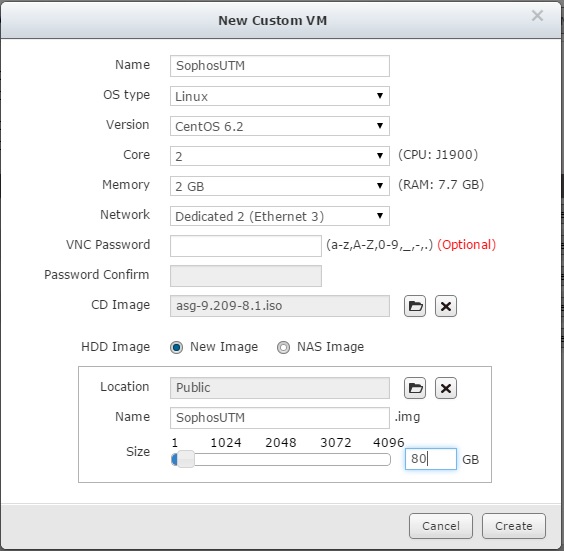
CPU, RAM, and Disk resources are configured for the UTM VM. The Ethernet 3 interface is the UTM VM’s WAN interface.
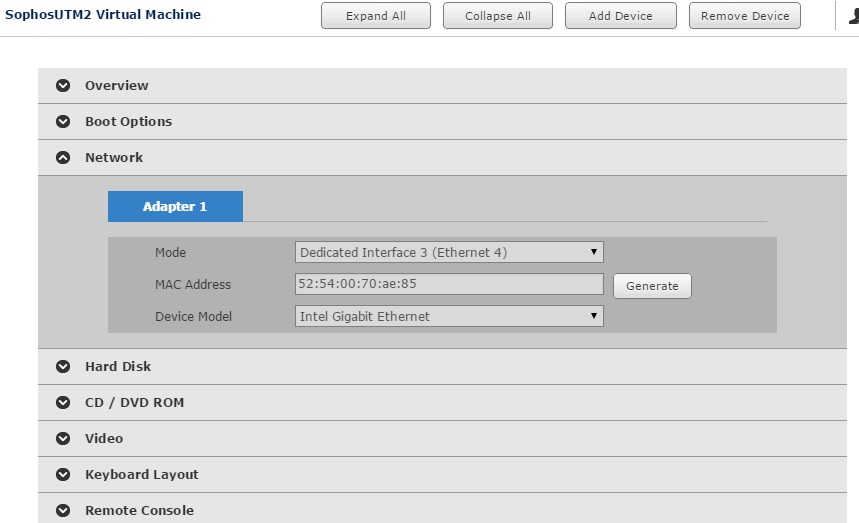
The Ethernet 4 interface is added as the UTM VM’s LAN interface.
Start up your new VM!
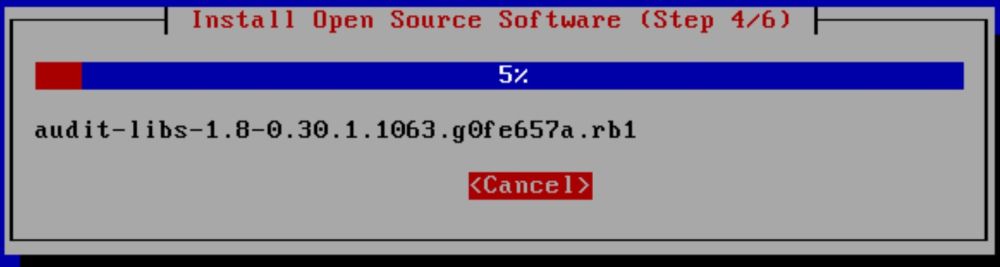
One of many automatic Linux installation screens.
Log into the UTM VM at https://192.168.2.100:4444 to access the UTM’s menus.
At first login, choose which UTM options to enable.
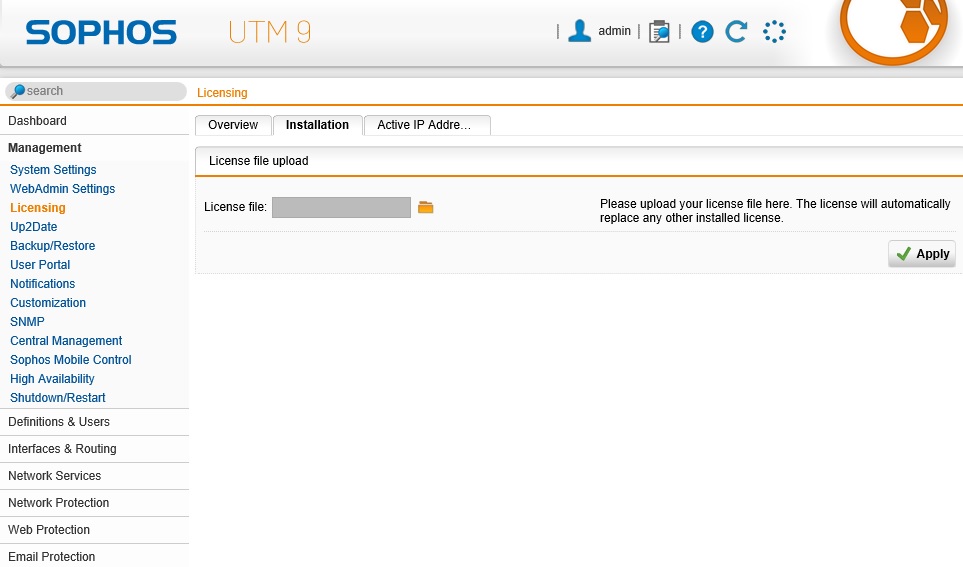
Load the free license file for continued UTM functionality.
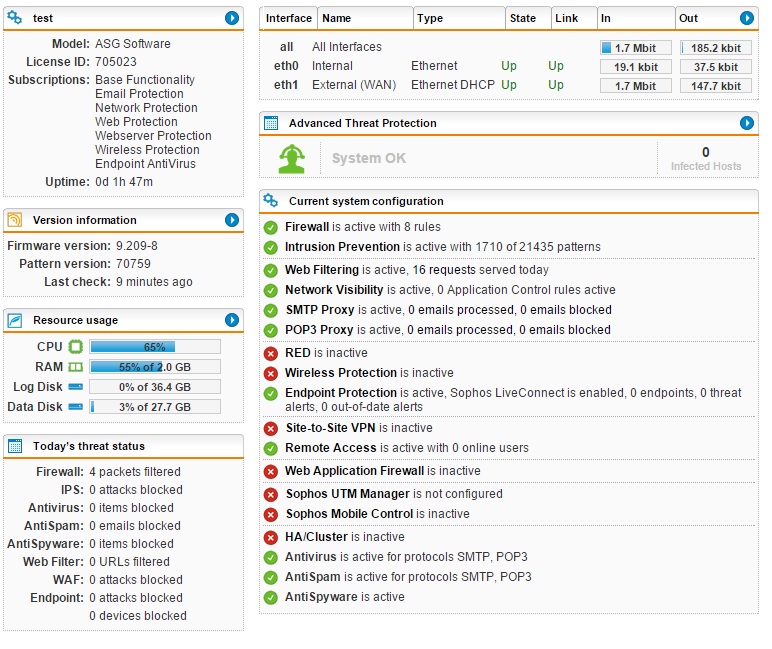
This is a screenshot of the UTM dashboard showing features enabled and disabled.
In Use
With the UTM as the main network router there seemed to be a slight lag when initially loading a website. But subsequent loads of the same site came up without delay.
Throughput measurements using two Windows PCs and TotuSoft’s LAN Speed Test with a file size of 100 MB are summarized in Table 1. IPsec tunnel throughput was measured to a ZyWALL 110 router to terminate the tunnel.
| Test Description | Upload | Download |
|---|---|---|
| UTM On | 84.4 | 141.9 |
| UTM Off | 100.9 | 184.6 |
| Site to site IPsec | 29.1 | 31.3 |
Table 1: Virtual UTM throughput (Mbps)
The image gallery below shows throughput measurements, a screenshot of the IPsec tunnel and a website blocked by the UTM’s content filtering feature.
http://download.astaro.com/UTM/v9/software_appliance/iso/
Setup a free Sophos account and download a free license.
This is the TS-453 Pro’s Ethernet 2 interface previously configured for VM use.
The Ethernet 3 interface is used as the UTM’s WAN interface.
The Ethernet 4 interface is used as the UTM’s LAN interface.
CPU, RAM, and Disk resources are configured for the UTM VM. The Ethernet 3 interface is the UTM VM’s WAN interface.
The Ethernet 4 interface is added as the UTM VM’s LAN interface.
Start up your new VM!
One of many automatic Linux installation screens.
Log into the UTM VM at https://192.168.2.100:4444 to access the UTM’s menus.
At first login, choose which UTM options to enable.
Load the free license file for continued UTM functionality.
This is a screenshot of the UTM dashboard showing features enabled and disabled.
This final image gallery shows the TS-453 Pro’s CPU utilization, which peaked at 43% with simultaneous UTM traffic and a large filecopy.
http://download.astaro.com/UTM/v9/software_appliance/iso/
Setup a free Sophos account and download a free license.
This is the TS-453 Pro’s Ethernet 2 interface previously configured for VM use.
The Ethernet 3 interface is used as the UTM’s WAN interface.
The Ethernet 4 interface is used as the UTM’s LAN interface.
CPU, RAM, and Disk resources are configured for the UTM VM. The Ethernet 3 interface is the UTM VM’s WAN interface.
The Ethernet 4 interface is added as the UTM VM’s LAN interface.
Start up your new VM!
One of many automatic Linux installation screens.
Log into the UTM VM at https://192.168.2.100:4444 to access the UTM’s menus.
At first login, choose which UTM options to enable.
Load the free license file for continued UTM functionality.
This is a screenshot of the UTM dashboard showing features enabled and disabled.
Conclusion
While you can buy faster UTMs, they require purchasing a separate device and often have ongoing license subscription fees. The combination of QNAP’s Virtualization Station, quad-core TS-453 Pro and free Sophos UTM Home Edition combine to make a very viable and powerful alternative.