| At a glance | |
|---|---|
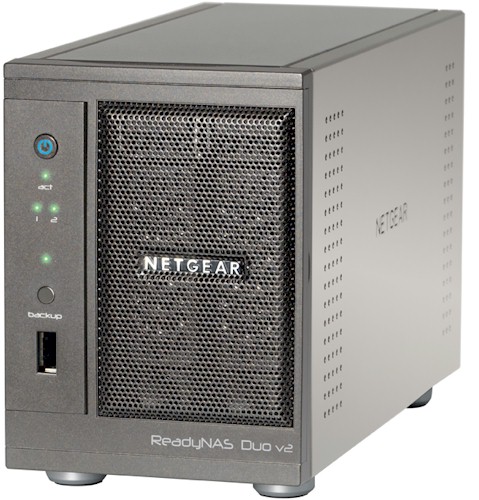
| Product | NETGEAR ReadyNAS Duo v2 (RND2000) [Website] |
| Summary | Updated version of classic entry-level ReadyNAS based on 1.6 GHz Marvell CPU w/ USB 3.0 ports |
| Pros | • Faster than Duo v1 • Quieter than Duo v1 • Cheaper than Duo v1 • Simplified admin GUI |
| Cons | • Asymmetric Read/Write performance for some benchmarks • Problematic ReadyNAS Remote |
Typical Price: $211 Buy From Amazon
Introduction
Updated 11/20/2012 – Remote and Drop feature commentary
About four years ago, I was given the opportunity to review NETGEAR’s ReadyNAS Duo. Since that time, I’ve been using it to store data, backup our computers and save our family pictures and videos.
NETGEAR revised both the Duo and its four-bay entry-level sibling, the NV+, about a year ago, but had been reluctant to submit them for retest. We finally were able to convince them that SNB readers were as interested in NETGEAR NASes as any others. So here I am with the v2 review.
The Duo v2 is physically the same as the Duo v1. It measures 3.98”W x 5.59”H x 8.66”D and weighs 4.56 lbs. without hard disks. The power connector is in the back, which connects to an external power brick, similar in size to one that might power a laptop computer.
As I mentioned in my review of the Duo v1, I like the construction quality of the Duo. It has a hinged front door with an air filter covering the disk trays that is magnetized to ensure secure closure. I also find the drive bays on both the v1 and v2 to work quite well. The v2 drive bays have the same solid feel as the v1 drive bays that click securely to the chassis when inserted.
There are power and backup buttons on the front, along with a USB 2.0 port. There are indicator lights for activity, disk status, and backup status, shown below.

ReadyNAS Duo v2 controls, indicators and ports
The back of the Duo v2 has two USB 3.0 ports, a 10/100/1000 Ethernet port and a Kensington Lock security port. Note the addition of the USB 3.0 ports on the Duo v2 as opposed to the USB 2.0 ports on the Duo v1. In terms of quantity, the number of ports on both the v1 and v2 are the same, although the layout in the rear is slightly changed on the v2.
Inside
The picture below shows the internal chassis of the v2, viewed from the left rear corner.

ReadyNAS Duo v2 internal view
The v2 has a larger 80mm fan that is software controlled. A larger fan can run slower to move as much air as a smaller fan and slower means quieter. To my ear, the Duo v2 is significantly quieter than the Duo v1, likely due to the speed and size of the fans. The status display on the v2 reports its 80mm cooling fan running at 750 RPM, while the status display on the v1 reports its 60mm cooling fan running at 2400 RPM. The photo below presents a stark contrast between the v2 (left) and v1 (right) fans.

ReadyNAS Duo v2 and v1 rear panels
Below is a shot of the Duo v2’s main board. The big difference between the v1 and v2 is the switch to a 1.6 GHz Marvell 88F6282 Kirkwood ARM processor from the custom Infrant processor used in the v1. Both the v1 and v2 have 256 MB of SDRAM, but the Duo v2 uses faster DD3 SO-DIMM.

ReadyNAS Duo v2 board
You can see other components for both the original and v2 Duo in Table 1 below.
| Component | Duo v2 | Duo v1 |
|---|---|---|
| CPU | Marvell Kirkwood 88F6282 @ 1.6 GHz | Custom Infrant |
| Ethernet | Marvell 88E1318 | Vitesse VSC8201 |
| RAM | 256 MB DDR3 | 256 MB DDR2 |
| Flash | 128 MB | 64 MB |
Table 1: Key components & comparison
Features
The ReadyNAS Duo v2 has a long list of included and add-on features. I’ve summarized the features listed on NETGEAR’s specification page below.
- RAID levels 0, 1, and JBOD
- NETGEAR Auto-Expandable X-RAID2
- Hot swap support
- Journaled file system
- Network File Services
- CIFS/SMB for Microsoft Windows
- AFP 3.2 for Macintosh OS 9 and OS X
- NFS for linux and unix
- FTP for standards based file transfer
- rSync for data replication
- HTTP/HTTPS for browser based file access
- DLNA Compatible (Certification in process)
- Disk spin-down
- Power-on schedule
- Wake-On-LAN (WOL)
- USB HDD and flash drive support
- UPS monitoring and auto shutdown
- Performance options
- Device status
- Email alerts and event logs
- Optional SSH shell access
- Add-on expandability
Backup Features
- Optional ReadyNAS Vault Cloud Backup
- Integrated Backup Manager
- Programmable backup button
- Backup to/from CIFS, AFP, rSYNC, NFS
- Backup to/from USB disks
- Bundled Memeo Backup Premium for ReadyNAS backup software (with CDP and Versioning support – 1 Windows license)
Security
- User authentication
- Windows ACL
- Encrypted network logins
- Secure Socket Layer (SSL)
- Microsoft Active Directory
In addition to the features above, ReadyNAS supports a wide array of add-ons. The current list of add-ons is below. Click here for add-on descriptions. Additional "community", i.e. not supported by NETGEAR, add-ons are available here.
- Egnyte Cloud File Server
- Enable Root SSH Access
- Neural Networks Cloud Backup
- ReadyNAS Photos II (pre-installed in 5.3.6)
- ReadyNAS Replicate
- ReadyNAS Surveillance
- Skifta
- SqueezeCenter
- Symantec Backup Exec Remote Agent for Linux and UNIX Servers
- ReadyNAS System Toolbox Add-ons
- APT
- CleaniTunesConfig
- CleanSqueezeCenter DB
- CleanTwonky
- Clean USB Storage
- EnableFanMinOverride
- NoSMBDisconnect
- ToggleCaseSensitivity
- ToggleMasterBrowser
Finally, there is a menu option on the Duo v2 for Genie Apps. The first time you access this menu on the Duo v2, you are prompted to create an account on the NETGEAR Genie Marketplace. The Genie Marketplace provides a few more apps, some of which are free; others range in price from $0.99 to $4.99. I’ve included a screenshot showing just a few of the apps below.

Genie Marketplace Apps
One of the apps available on the Genie Marketplace is ReadyNAS Replicate, an app that enables creating a full backup and subsequent incremental backups from one ReadyNAS to another ReadyNAS, either locally or remotely. This app, reviewed here awhile back, is now free.
Configuration
NETGEAR provides a simple utility called RAIDar for locating the ReadyNAS on your network. It also provides a launch point for accessing the web configuration gui.
As you can see below, the RAIDar utility has recognized my older Duo v1 as well as the Duo v2. Note, I gave both devices static IP addresses on my LAN, which makes it easier to consistently access and find them.

RAIDar
NETGEAR refers to the firmware on ReadyNAS devices as RAIDiator. The menus on the Duo v2 with RAIDiator 5.3.6 are completely revamped from the Duo v1 menus with RAIDiator 4.1.10. Below are two screen shots highlighting the differences. The first is from the original Duo showing a rather basic looking menu structure.

RAIDiator 4 main menu screen
The next screenshot is the dashboard from the new Duo v2 displaying a more graphical and visually appealing interface.

RAIDiator 5 main menu screen
As you can see, the newer interface in the Duo v2 is far more interesting to the eye than the v1’s. Another addition to the Duo v2 is multi-language support. In addition to English, the Duo v2’s menus can be displayed in Russian, Chinese, French, German, Japanese, Swedish, and Portuguese.
I find reviewing the configuration options of a device provides a useful overview of what it can do. Below is a chart listing menus and options on the Duo v2. More configuration options are available within each of the Duo v2’s option tabs.

Menus and submenus
NETGEAR has software and hardware manuals for the Duo v2 available online and quickly accessible by clicking the question mark icon on the top right of the gui. I found the Duo v2 manuals relatively easy to follow. For example, I was a bit lost on how to configure RAID options, but the manual’s section on how to change from X-RAID2 to Flex-RAID set me straight.
RAID
RAID options on the Duo v2 include X-RAID2 and Flex-RAID (RAID0, RAID1, or JBOD). X-RAID2 is NETGEAR’s latest version of its X-RAID technology that allows for capacity expansion and RAID level migration without having to erase and reformat drives. X-RAID2 is a nice solution that allows you to deploy a Duo v2 with a single drive and later add a second drive for redundancy, without losing data.
The default RAID setting for the Duo v2 is X-RAID2. To use Flex-RAID, the device has to be factory reset. It’s best to do this on initial setup, as factory resetting the Duo v2 erases all data.
It took me a couple times to get to the RAID options menu, shown below. You need to have RAIDar running during the factory reset, and watch for it to prompt you to click Setup. According to the manual, “During the factory reboot process, you have a 10-minute window to choose a RAID configuration,” which I missed the first time I tried this process.

RAID selection
Once you’ve chosen the desired volume mode, the reset completes and the device then syncs the drives to the default volume setting, which is X-RAID2. It took my system about 20 minutes to complete the factory reset process, during which I received the screen below when I tried to log in.

RAID sync message
Once the factory reset completes, the Duo v2 presents a wizard that allows you to set the time zone, enter an email address for automatic notifications, configure the device host name, and change the admin password. It also allows you to register the device with NETGEAR for support. If you’ve reset a system with two drives, the Duo v2 will sync those drives, even if there is no data on them. The system will be accessible during that the drive sync.
Replacing disks and increasing capacity with X-RAID2 is a no-brainer. All activity can be performed while the device is running. All you do is replace one drive, wait for the system to complete the sync and copy operations, replace the second drive, again wait for the system to complete the sync and copy operations, and finally reboot the system so it can recognize the larger capacity. The system remains functional throughout the entire process, except during a brief reboot at the end.
I’ve had good experience with the original X-RAID in the Duo v1 for the past four years. I originally had two 500 GB disks in the Duo v1, which I replaced with two 1 TB disks to increase capacity. Recently, one of my 1TB disks failed, so I replaced both with 2 TB disks. Through all this disk activity, I have been able to retain all of my data without having to back it up externally and copy it back to the Duo. (I have over 10 years of family photos and videos stored on the Duo, so loss of data would be a disaster!)
Ed note: You’ve been lucky, Doug. RAID is not backup!
My test Duo v2 came with a single 1TB Seagate ST31000524AS drive. I hot installed a 1TB Seagate ST31000528AS drive to the second drive bay of the Duo v2. No configuration, power down, or reboot was required. The Duo v2 immediately began syncing the drive, yet remained fully functional during the process. According the log messages, it took about 4 hours, 15 minutes for the synchronization process to complete.
Once the sync was complete on the Duo v2 with a pair of 1TB drives, I had 1 TB of redundant capacity. Thus, a disk failure would not disable the NAS or result in loss of data. The first screen shot below shows both disks up and running.

Disk status
The second, smaller screen shot shows the system is running X-RAID2 with a redundant capacity of 913 GB.

Volume status
In Use
Basic use of the ReadyNAS Duo v2 is easy. Saving data to and from the device from Windows is a matter of mapping the drive. From Windows Explorer in Windows 7, simply click on Computer, select Map network drive, and enter \\IPaddress\media to access the default share on the Duo v2. Of course you can also just browse to a shared folder on the NAS using the Windows Network browser.
Security configuration is also straightforward. Out of the box, the Duo v2 allows access to all shares and files on the system. Users are created by name, email and password, and assigned to groups. Shares can then be configured to allow anonymous access, Read Only access, or Read/Write access to users as desired.
Other features from the Duo v1 is carried over to the Duo v2. The Duo v2 recognized my APC UPS when connected via the USB 3.0 port in the back of the device. The Duo v2 can also be configured with an email account to send notifications and status updates as desired.
One problem that carried over from the Duo v1 to the Duo v2 is the Kensington Lock Security hole recess remains too deep for my Kensington Security cable to connect to the device, as I reported in my review on the Duo v1.
Backup
The Duo v2 has extremely flexible backup capabilities—perhaps the most comprehensive of any NAS available. Any backup program that can recognize a network drive should be able to write backup files to the Duo v2. NETGEAR bundles a single-user license for Memeo Premium Backup software for backing up a Windows PC. I’ve been using Windows’ backup utility (go to Control Panel, then Backup and Restore) to automatically back up files on Windows 7 laptops to the Duo v1 for years.
I found the Duo v2 to work equally as well as the Duo v1 for backing up my Windows’ PCs. I setup a simple Windows backup job on a couple of folders on my laptop and directed Windows to write the backup to the Duo v2. I set the backup job to run immediately. I created a folder on the Duo v2, then created a backup job specifying the folders and schedule I wanted backed up to that Duo v2 folder.
As you can see in the screenshot below, Windows is performing a backup to the Duo v2 (identified as \\192.168.199.11\media\PCBackup\).

Backup status
Backup – more
Note that you don’t even have to run a backup program on your computer. The backup features on all ReadyNASes are bi-directional. So you can create a backup job on the Duo to automatically copy data from any networked share to the NAS. The file selection options aren’t as granular as you get from a backup program and the options aren’t as complex. But you can create full and incremental backups that in many cases will get the job done.
The Duo v2 also makes it easy to back up data from your MacOS computer using Apple’s Time Machine software. Simply enable the Time Machine backup feature on Duo v2 and create a password. Then use Apple’s Time Machine software to configure and start the backup.
I enabled the Time Machine feature on the Duo v2, then enabled a Time Machine backup on a Mac Book running OS X 10.5.8 (Leopard). As you can see in the screenshot, Time Machine is writing backup data from my Mac to the ReadyNAS Duo v2.

Time Machine backup
NETGEAR provides multiple options to create backups of the data on the Duo v2 itself. Those options include writing a backup to a local USB hard drive, to another network drive, or to ReadyNAS’ Vault cloud based data backup service.
The Vault service is run by Elephant Drive. This service provides cloud based storage services for PCs, Macs, and various NAS devices. You can try the Vault service free for 30 days. After that, personal storage options start at $9.95/month for 100 GB storage and go up to $169.95/month for 2 TB of storage. There are different rates for business storage options based on number of users.
I used a local USB hard drive to back up data on the Duo v2. Backups on the Duo v2 are managed via “jobs.” A Duo v2 backup job allows you to specify the backup data source and destination. Backups can then be scheduled to run automatically at various times or immediately. The screen shot below shows the log messages of a completed backup I ran from the Duo v2 to my USB hard drive connected to the Duo’s front USB port.

Backup log
The Duo v2 has a button on the front to simplify backups. Once a backup job has been created, you can configure the Duo to manually start configured backup jobs with the push of the front backup button.
Finally, backing up the ReadyNAS Duo v2 configuration is equally straightforward. You can backup your configurations for shares, services, users and groups, network, and miscellaneous settings. Configuration backups are a manually operation that takes a few seconds by choosing the configuration options to backup and then clicking the button to download the configuration to your PC.
Remote Access
The ReadyNAS Duo v1 and v2 enable remote access to your files for devices running ReadyNAS Remote software. ReadyNAS Remote is now part of the base software in version 5.3.6, as opposed to being an Add-On in previous versions.
The ReadyDROP feature, new to firmware version 5.3.6, works in conjunction with NETGEAR’s ReadyNAS Remote Access feature. NETGEAR advertises ReadyDROP as providing“unlimited, free and private cloud storage (that) automatically sync files between PC’s, Macs and mobile devices.” When NETGEAR announced this feature a few months ago, they made no bones about it having the potential to replace cloud-based file-sync services like Dropbox and SugarSync.
The value to ReadyDROP is files placed into the ReadyDROP folder on any ReadyDROP-enabled device are automatically synchronized in real time between the Duo v2 and all devices running the software, in the background, as long as the devices have Internet access.
I had problems getting ReadyNAS Remote and ReadyDROP to work with my Duo v2. I worked with NETGEAR’s tech support who had me downgrade my Duo v2 to firmware 5.3.5 and re-install the ReadyNAS Remote application. After multiple reboots and configurations, we still couldn’t get the ReadyDROP feature to function. At that point, NETGEAR tech support told me there are “on going issues” with ReadyNAS Remote and ReadyDROP on version 5.3.6.
I did get ReadyNAS Remote to work intermittently and was able to remotely access the shares on my Duo v2 from a Windows 7 PC, Mac OS X Leopard PC, and an iPhone running iOS 5. The screenshot below shows remote access to my Duo v2 shares from my Mac. I proceeded to play around with it a bit, and found the ReadyNAS Remote feature useful for remotely accessing the shared folders on the Duo v2.

ReadyNAS Remote in action
The ReadyDROP feature on the other hand, didn’t work for me. The ReadyDROP feature is supposed to create or allow creation of a ReadyDROP folder on the Duo v2, as well as the devices enabled for ReadyDROP. I was able to create a ReadyDROP folder on my Windows 7 PC, but not on the Duo v2, thus limiting the use of the feature. Hopefully, NETGEAR will sort out the issues with this feature.
Updated 11/20/2012
After the review, NETGEAR product specialists reached out to try to help with the features I encountered with ReadyNAS Remote and ReadyDROP. Long story short, we were not able to identify a reason for the initial problems. But we were able to get both working by doing a full factory reset. This has a big downside of requiring a complete reformat of the drives, so you lose all your data unless you have backed it up. So my recommendation on ReadyNAS Remote and ReadyDROP is to enable and test them before you start loading data.
You can use ReadyDROP from a Windows or MacOS computer, but there doesn’t seem to be support for this feature (at this time) on tablets or handhelds. Note, ReadyDROP is also accessible via a web portal, which allows access to the DROP folder without installing a client on your computer.
To test ReadyDROP, I copied a file to the DROP folder on my Windows PC. Once the sync completed, I was able to verify the file was saved to the Duo v2. Note, ReadyDROP files are stored in a hidden directory on the Duo v2, viewable only via the SSH add-on.
I ran an additional test where I uploaded a file to the DROP folder via the web portal and observed my Windows client detect the new file and sync it to the Windows DROP folder. I was able to verify this file was also saved to the Duo v2’s hidden directory.
A final note is that NETGEAR just released RAIDiator 5.3.7 that includes a Enhance ReadyNAS Remote & ReadyDrop support fix. This is not shown on the main NETGEAR support site, so hit the link above if you want it.
DLNA
The Duo v2 supports streaming media to DLNA-capable devices. DLNA is enabled by default on the Duo v2 and can be disabled. I like the fact that the Duo v2 DLNA feature will stream media from any folder, whereas the Duo v1 requires you specify folders for DLNA streaming. I loaded a few.mpeg videos and.jpg photos on the Duo v2 and had no problem playing them on a DLNA-capable LG TV and via a Sony PS3.
ReadyDLNA is a free app available on both iTunes and Google Play to allow Apple and Android devices to stream media from the Duo v2 as well. ReadyDLNA relies on the user name and password you create for the ReadyNAS Remote function.
Performance
A surprising change on the Duo v2 is the lack of support for jumbo frames. Both the Duo v1 and v2 have Gigabit Ethernet interfaces, but the v2 is limited to file transfers with 1500 byte frame sizes. The older v1 is configurable to support jumbo frames up to 7936 bytes.
However, jumbo frames today don’t provide the throughput boost they used to. Current generation Ethernet NICs and processor architectures ensure that bits move across the wire as speedily as possible without using jumbo frames. SmallNetBuilder stopped testing NASes with jumbo frames enabled a few years ago, when we started to find they tended to reduce, rather than increase throughput. So don’t let the v2’s lack of jumbo frame support stop you from considering it.
The Duo v2 was put through our standard NAS test process with ReadyNAS RAIDiator 5.3.6 firmware running on the Duo v2. The Benchmark summary below shows write performance on the Duo v2 is significantly lower than read performance for both RAID 0 and RAID 1 for the Windows file copy benchmark. RAID 0 measured 56 MB/s and 85 MB/s write and read, while RAID 1 was 50 MB/s and 87 MB/s.

ReadyNAS Duo v2 Benchmark Summary
When looking at the Intel NASPT File Copy results, write and read speeds are somewhat more evenly matched, but still not equal. Those benchmark results were 44 MB/s and 40 MB/s for RAID 0 write and read, while the RAID 1 benchmark produced 41 MB/s and 50 MB/s.
We also ran the Benchmark test suite with the two drives configured in X-RAID2. Table 2 compares NASPT File Copy To and From results for RAID 0, RAID 1 and X-RAID2. You can see there isn’t a significant performance difference among the different volume configurations. Obviously, the value to X-RAID2 is not performance, but the ease of disk expansion and replacement, as discussed earlier.
| Component | RAID 0 | RAID 1 | X-RAID2 |
|---|---|---|---|
| File Copy To | 44 | 41 | 42 |
| File Copy From | 40 | 49 | 50 |
Table 2: Volume mode performance comparison
There are no iSCSI results, because the Duo doesn’t support it.
We were able to measure attached backup throughput with our test drive formatted in FAT and NTFS and with USB 2.0 and 3.0 connections. The best results of 60 MB/s were obtained with a USB 3.0 connection and FAT formatted drive. Network backup using rsync came in at a respectable 29 MB/s.
For a competitive look, I used the NAS Finder to find two-bay 1.6 GHz Kirkwood-based NASes and came up with three others tested with the current benchmark process: the ZyXEL NSA325; Iomega ix2-dl and Buffalo LinkStation Pro Duo LS-WVL. I unfortunately was not able to include the original Duo in the comparison, because it was tested with an entirely different benchmarking process.
I can provide one data point for v1 and v2 comparison, however. I copied a 4.8 GB file from the same Windows 7 PC to my v1 Duo and the review sample v2, with all network conditions identical. It took 6.5 minutes to copy the file to the Duo v1 (~12 MB/s) and less than 2 minutes (~40 MB/s) to copy the file to the Duo v2!
The plot composite below shows Windows and NASPT RAID 1 file copy write and read results for the four NASes. The products shift positions in the various comparisons. But in three out of four comparisons, the ZyXEL takes the top slot. It’s interesting that four products that all use essentially the same hardware design differ so much in performance. Just shows you what a difference firmware can make!

RAID 1 performance comparison
Closing Thoughts
As an overall network storage device, I found the Duo v2 greatly improved over the Duo v1. The admin menus are improved, the internal processor is more powerful and it can handle larger internal drives and faster external drives via USB 3.0. All this makes for an easier to use and higher performance product.
The biggest negatives I found were the problems with ReadyNAS Remote and the features that depend on that service, including ReadyDROP. NETGEAR tech support acknowledged there are problems with these features and RAIDiator 5.3.6. So I hope a solution is coming soon.
I ran a quick price comparison of the four NASes compared above. Keep in mind the Buffalo comes with two 1 TB WD Green drives. So subtracting the current $160 price for two drives, that brings the Buffalo’s equivalent diskless price to $115! The bottom line from this quick comparison is that NETGEAR has priced the Duo v2 at a slight-to-large premium to products with similar hardware platforms.
| Product | Price |
|---|---|
| ZyXEL NSA325 | $150 |
| Iomega StorCenter ix2-dl | $151 |
| NETGEAR ReadyNAS Duo v2 | $185 |
| Buffalo LinkStation Pro Duo (w/ 2 TB) | $275 |
Table 3: Price comparison
To sum it up in simple terms, the Duo v2 is faster, quieter and more fully-featured than the original. But if you are looking for a bargain RAID 1 NAS, the ZyXEL NSA325 could be a better price/performance choice, as long as you are not also looking for the feature set and polish of the Duo v2.