Introduction

| At a Glance | |
|---|---|
| Product | Apple TV (MB189LLA) |
| Summary | Network Multimedia player with Wireless 802.11n support and embedded hard-drive |
| Pros | • Sophisticated interface • Impressive Music and Slide Show capabilities • Easy to use • Standalone YouTube support |
| Cons |
• Very limited video codec support • No storage expansion |
The Apple TV has been out for several months now, and I’d been reading the reviews, sitting on the fence trying to decide if I really needed one. I’ve tried out a dozen or more network multimedia players in my house and they’ve all had shortcomings. None could play all of my movies, most had annoying bugs, and very few had a user interface that looked anywhere near modern.
The Apple TV is also in a bit of a different category than other products I’ve tested since it comes with an embedded hard drive, contains a relatively powerful graphics processor, and supports the draft 802.11n wireless protocol. But there are drawbacks too, the biggest being that the unit doesn’t support many video formats.
While I was mulling this all over, the choice was made for me. Father’s day came and I found myself the proud owner of a 160GB Apple TV of my very own. In this review, I’ll check out the base features of the product, and in a follow-up article, I’ll hack it to see if I can get it a little closer to my idea of an ideal network multimedia player.
Setup
Figure 1 shows the back of the Apple TV with the various connectors labeled.

Figure 1: Back Panel
As you can see, this is a device designed for HDTV users, as there are no composite or S-Video connectors for older-style TVs. HD users can choose between component or HDMI, but neither cable is included in the box. If you need an HDMI cable, Apple sells one for $20—a pretty good deal compared to the $70 or so that a lot of big box retailers charge.
There have been some complaints that Apple TV isn’t “true HD” because it only supports video files up to 720p. But Apple evidently felt that 720p was good enough. For audio, both analog and digital optical output are supported.
The one curious connector on the back is the USB port. Apple’s official stance is that the USB port is only for “service and diagnostics”, but I don’t buy it. My guess is that some sort of USB expansion capability was dropped at the last minute, or maybe the port will be utilized in a future upgrade.
Along with a power connector, you can also see an 10/100 Ethernet port, but no 802.11 antenna connectors. The antennas are internal only. Ethernet is preferred for these devices, and in my entertainment center, Ethernet is available. So that’s what I used for my initial configuration. Figure 2 shows the main menu of the Apple TV once it has booted up.
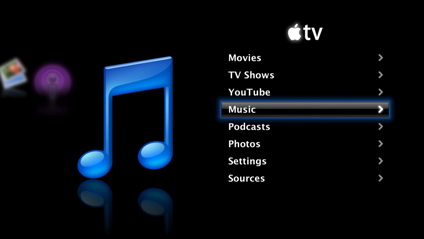
Figure 2: Main Menu
Setup – more
To set up the Apple TV, you “pair” it with a single instance of iTunes on your network. Once the pairing is complete, your media will be kept in sync between the Apple TV and this one instance of iTunes. The way it works is pretty much the same as it does for iPods and now iPhones, too. In all three cases, an entry shows up under the “Devices” submenu on iTunes as shown in Figure 3.
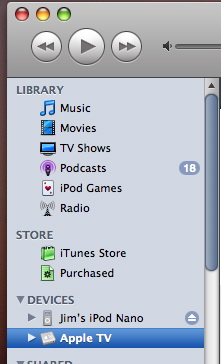
Figure 3: iTunes menu showing Apple TV device
I found it interesting that Apple is leveraging its iTunes application for these devices. Apple has an iTunes installed base of millions upon millions, and appears as if they are using iTunes to backdoor their way into being a home multimedia hub. The iTunes name seems a bit of a misnomer now, since it’s handling a lot more than music.
All management and syncing of media occurs from the device menu. Selections can be made as to which media to move over, how often to sync up, etc. Music is fairly straightforward. You pick playlists to move, or you just move everything. Apple supports music in the following formats: AAC, protected AAC from the iTunes store, MP3, Apple Lossless, AIFF, and WAV. What won’t work are your Internet Radio Stations from iTunes.
For syncing movies and podcasts, you have a few more options than under Music. You can move unplayed files, most recent files, all files, etc. The supported movie types have been a bit of a sore point for a lot of people, including myself. Apple’s format support is very limited. You won’t be able to use common movie types such as MPEG-1, MPEG-2, DivX, Xvid, etc. Instead, Apple has chosen to standardize on
H.264
and MPEG-4. If Apple has the clout to move the industry toward standardization on H.264, then I’m all for it, but as of now I and many others have a lot of video that is unplayable on the Apple TV.
That said, of the dozen or so network multimedia players I’ve tried out, none has been able to play all of my videos. Maybe it’s a losing battle to try to handle everything and do so poorly. Movies can be converted to an Apple TV supported format from iTunes, but it’s a time consuming process that inevitably degrades quality.
The syncing of photos diverges a bit for Windows users vs. Apple OS X users. Under OS X, you can choose to sync your iPhoto library and specific albums, or you can choose a directory of photos. Under Windows, users have the choice of syncing photo albums from a couple of different Adobe products, such as Elements or Album, or as under OS X, a photo directory can be chosen. Supported image formats are JPEG, BMP, GIF, TIFF and PNG. Figure 4 shows iTunes while syncing my library to the Apple TV.
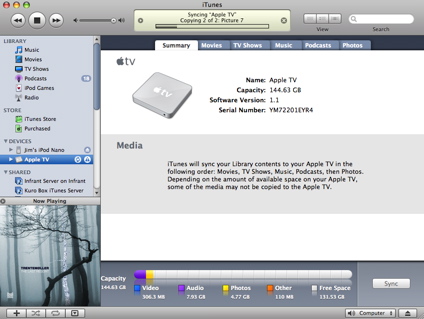
Figure 4: iTunes syncing to the Apple TV
Note the “thermometer” display on the bottom that shows how much space has been used for the various media files. When I saw this display, I realized that there’d been a bit of a mistake in getting the 160GB version. My primary OS X computer is a laptop with an 80GB drive, and since you can only sync a single system to the Apple TV, I realized that even if I synced my entire drive (not likely) I’d still have a half-empty Apple TV. Oops. (I’ll show a way to work around this limitation in a follow-up article.) My initial sync took a couple of hours, so be prepared to wait awhile to fully set up your Apple TV.
Music
Once I had everything synced, it was time to check it out. Figure 5 shows the Music submenu.
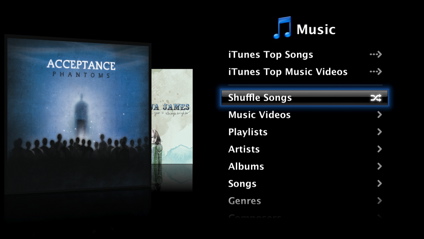
Figure 5: Music Submenu
It’s slick. If you’ve seen Apple’s Cover Flow feature, you’ll recognize the animation here. As you move through the music menus, your album art smoothly flips by in a 3D fashion as if you were thumbing through physical albums. As the animation progresses, a reflection of the cover is shown as if it were moving over a shiny surface. When the music starts, the album art is shown on-screen with a progress bar. The top two items in this menu both link to the online iTunes store, where you can view and listen to snippets, but for whatever reason, you can’t make purchases. All purchases have to be made from your linked computer.
Once annoyance I turned up while exploring the Music capabilities was the Apple TV remote. For some reason, Apple declined to support volume control from the remote. Fortunately it’s just an IR remote, so I’ll be using a universal remote to control my TV, my receiver, and my Apple TV. This remote is also the same remote that comes with most Apple computers these days. Before I figured out how to lock it out, the Apple TV remote was controlling my MacBook Pro, which made things a bit confusing. Along with your music, you can also listen to iTunes-subscribed Podcasts on the Apple TV. Figure 6 shows the Podcast menu.
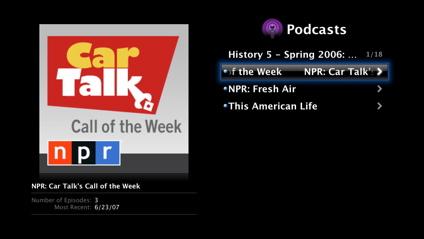
Figure 6: Podcast menu
Since syncing is bi-directional, your iTunes application will know when you’ve finished listening to a podcast on your Apple TV. The same is true for Music play counts. They’ll reflect you combined usage on the Apple TV, iPod—and, I assume, iPhone. All of your playlists from iTunes will be synced to the Apple TV as well. iTunes has powerful playlist generation features such as “all top rated songs of type Alternative not played in the last two weeks,” and these carry over to the Apple TV fine.
Photos
Figure 7 shows the photo-display menu where you can select albums or individual photos for display.

Figure 7: Photo selection menu
Like the Music menu, this menu also uses the Cover Flow animation. And if you pause on one of your photo albums, you get a mini-slideshow right in the menu as every photo is cycled through. Cool. Settings are available for specifying how long to display each picture, whether to repeat, whether to randomize photos, etc. There are also a number of very slick effects that you can specify for photo transition. Transitions for 3D flip, dissolve, fade, mosaic, and more are all available. And of course, you can select music from your library to accompany your slideshow.
These settings are nice, but a bit restrictive, since they apply to all your slideshows. When you need more control, a better option is to define the parameters for your slideshow inside of iPhoto (or Adobe under Windows, I assume). This way, you can customize the music, transitions, etc. for each specific show. Once you’ve set up a slideshow externally, it gets synced and shows up in the menu just like everything else. The slideshow capabilities of the Apple TV are far-and-away the best I’ve seen on any of the network-attached multimedia devices that I’ve worked with.
Movies
As mentioned earlier, the movie format support under Apple TV is quite limited. Usually at this point in a review, I start attempting to play movies from my library to see how well a media player does. In this case, however, my movies had been pre-screened for me by the sync process. Anything that was unsupported wasn’t transferred. An info message under iTunes listed each movie that failed to transfer, and the reason it wasn’t transferred. Note that just because a movie can be played from iTunes, doesn’t mean it will transfer and play on the Apple TV.
Figure 8 shows the Movie selection menu.
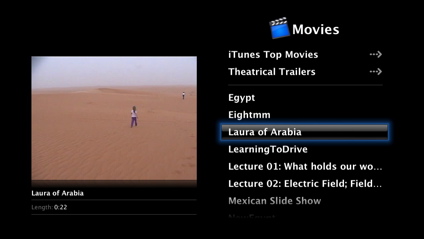
Figure 8: Movie Selection
In this screen, each movie has an automatically generated thumbnail. Pausing on a movie while moving through the menu causes the thumbnail to shrink a little, with information regarding the movie being displayed underneath. The movies that did transfer played fine.
A benefit of caching the movies on the internal hard drive was that fast-forward and fast-reverse actually worked like you’d expect. Typically on these types of products, fast-forward and fast-reverse cause the move to jump rather than scroll, since the data can’t be pulled over the network fast enough. Like the Music menu, the top two items pull from the online iTunes store.
Figure 9 shows the “Theatrical Trailer” menu where high quality movie previews can be viewed.
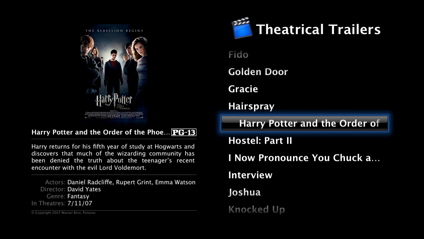
Figure 9: Theatrical Trailers
When viewing these trailers, the data is actually being pulled over the Internet, so movies take a little time to start up and can occasionally stall. There’s also a top-level menu for “TV Shows” that acts pretty much like the “Movies” menu. The content for TV Shows comes from shows purchased from the iTunes store.
I purchased a one hour show (45 minutes without commercials) and it came in at around a gigabyte, so you wouldn’t want to keep too many of these around, which raises another sore point. I’d like to keep large video files like these stowed away off my laptop, but unless you jump through some syncing hoops, you have to keep everything in the same library on the same computer as your iTunes application.
TV show quality looked pretty good. You could tell it was compressed, but it wasn’t too bad. In general though, it’s still a bit disappointing that the majority of my videos could not be played in the Apple TV. I suspect that Apple believes that the majority of video watched on the unit will come from purchases at the iTunes store.
YouTube
When the Apple TV first came out, there was speculation that it would eventually support YouTube video, and with a recent firmware update, it now does. Figure 10 shows the YouTube selection screen.
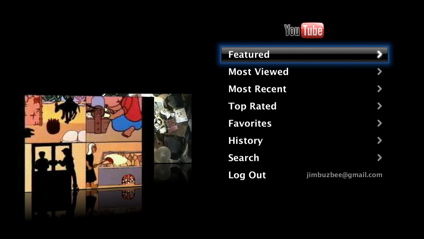
Figure 10: YouTube
Like the other menus, the YouTube main menu has Cover Flow animation. In order to work on the Apple TV, YouTube had to convert their video library to H.264 format—a step-up from their usual quality. At this time, about 10,000 of their videos have been converted, but they’re scheduled to have them all done by then end of the year.
Obviously all of the content under this menu gets streamed from the Internet, so upon selection, videos take a few seconds to start up. YouTube worked well on the Apple TV, but it wasn’t quite the same experience without being able to see other viewers’ comments, follow URLs in the description, quickly do a search, etc. Nevertheless, it’s a fun feature and a great time-waster.
Note that unlike the YouTube feature on NETGEAR’s EVA8000, you don’t need a Mac running an application to feed YouTube videos to the Apple TV. Apple’s version is completely standalone.
Streaming
Even though only one computer can be synced to the Apple TV, up to five more can supply content to it. Figure 11 shows the “Sources” menu where other instances of iTunes can be selected.
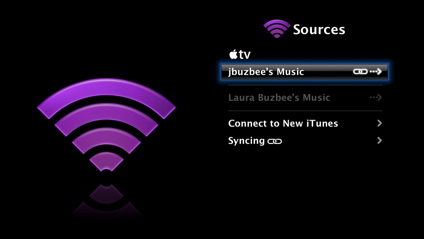
Figure 11: Sources Menu
Once a content source has been selected, it behaves exactly like a synced source. The only difference is that since the media has to travel over the network, you can expect to have some lags and perhaps an occasional stutter on large videos. The initial release of Apple TV didn’t support streaming photos, but an update to iTunes adds this capability. I had hoped that I could select one of my iTunes servers that I have running from a Network Attached Storage device on my network, but evidently Apple doesn’t support foreign servers.
Each new iTunes source you add has to enter a unique five-digit key that is used in an encrypted handshake. It’s not likely that other servers will be able to support this handshake. I had also hoped that I could “push” music to the Apple TV, much like you can with an Apple AirportExpress, but this was also not supported. You can only “pull” content using the on-screen menus.
Screen Saver
It may seem a bit strange, but I feel that the one killer feature of the Apple TV is its screen saver. Most of these products that I test have a simple screen saver—usually just a black screen with the manufacturer’s logo crudely bouncing around. This isn’t the case with the Apple TV. Several screen savers are available, but the one I’ve settled on is a photo screen saver as shown in Figure 12.

Figure 12: Photos Screen Saver
It’s about impossible to capture the behavior of the screen saver in a still-shot, but basically photos from your library (or your album art collection) slowly scroll up the screen in different 3D planes, and then every 30 seconds or so, they do a quick 3D “swirl,” ending back in their original location. A low-quality video of the screen saver in action can be found on YouTube.
I’ve had people come to my home who stop and watch the show, almost become mesmerized by it. Select your favorite music playlist, let the screen saver come on, and enjoy the show. As an example of Apple thinking of little things, if the screen saver is on as a new song starts, a little album art and title display fades in down in the left corner, stays for about five seconds, and then fades back out. The “pause” and “play” buttons on the remote also kick off the fading album art display, without interrupting the slide show.
Wireless
The Apple TV is the first device I’ve worked with that supports the draft 802.11n wireless protocol. If you have 802.11n devices on both ends of your connection the maximum theoretical speed (raw data rate) is 248 Mbps. Bit even if you only get half that speed, you’ll still be in pretty good shape for streaming video.
In my case, I’m still on the 802.11g protocol, so that’s what I checked out. Setting up for wireless was pretty easy. Figure 13 shows all the access points that the Apple TV found in range.
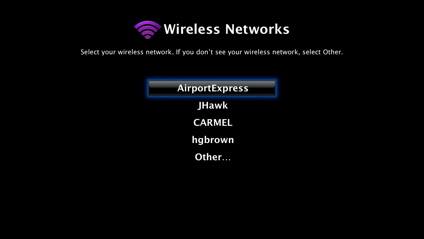
Figure 13: Wireless network selection
When I selected my access point, I was prompted for an encryption key, which I entered using a nice on-screen keyboard. A few seconds later, the network connection was established, and the Apple TV was operational just like on the wired network. I tried streaming a few files and everything worked well. The access point I was connecting to was only a few feet away, so it wasn’t much of a stress-test.
To check it out a bit further, I moved the Apple TV to the far corners of my house and tried again. In this location, I normally have a weak signal, so it wouldn’t be surprising to me to have some dropout, but in my short amount of testing, I saw no problems. However, in general, I would recommend a wired connection for streaming any kind of video.
Under The Covers
Opening the case of the Apple TV destroys the foam pad it rests on, which I wanted to avoid, but fortunately, other people out there have taken the plunge. This picture shows the main board of the Apple TV. Digging around a bit, I find that graphics are provided by a GeForce Go 7300. The product contains 256MB of RAM. The wireless chipset is from the Broadcom BCM4328M Family. RealTek provides two chips, the 8139C for Ethernet, and the ALC885 for audio.
The only real secret is the main CPU, which appears to be a non-standard Intel chip manufactured for Apple. Most accounts say it’s a Pentium M derivative. When I got shell access (more on that in my next article) I could see that it’s running at 1 GHz.
Software-wise, Apple had already specified that the Apple TV runs a stripped-down version of OS X, and my poking around verified that it is. I was also interested to see how much power this little unit would draw. My meter showed it used 14 Watts when idle and around 18 when in use.
Conclusion
I’m enjoying having the Apple TV on my network. Unlike a lot of other products I’ve tried, this one is fun to use. The user interface is well thought out, with impressive graphics and animations. All of my music, including songs I’ve purchased from the iTunes store, is playable using the complex playlists I’ve specified. The photo slide show capabilities are head-and-shoulders above anything else I’ve seen. Syncing media between my computer and the Apple TV is seamless and easy.
However, there are also downsides that limit my enthusiasm. The video codec support is weak, meaning that the majority of my current video library is unusable unless I take the time to convert it. The storage in the product can’t be expanded, and as I found out, most of mine is unusable, since the hard drive in the computer I sync with is smaller than the drive in the Apple TV.
Apple has said that they will be adding functionality to the Apple TV, and maybe some of these concerns will be addressed, but until then I’d have a hard time recommending the product if your main use is for displaying your existing video library. If you mainly want to display your photos and listen to your music while viewing an occasional video from the iTunes store or from YouTube, I think you’ll be very happy with this product.
Or, if you’re willing to void your warranty and get your hands dirty with software modifications, you can address the shortcomings in the Apple TV. In my next article, I’ll show how you can increase storage, add video codecs, and generally customize the unit to meet your needs.
