This article is sponsored by Edimax.
Have you ever used Wi-Fi at an airport, hotel, or business location where you were first presented with a web page asking for information before you could access the Internet? That web page is usually a Wi-Fi Captive Portal, which is used to manage guest Wi-Fi network access and use.
A simple means of supplying guest Wi-Fi access to your network is to set up a separate SSID and passkey for guest users. Although easy and frequently supported on Wi-Fi routers and access points, using simple guest Wi-Fi SSID leaves you with limited control over guest W-Fi users. On the other hand, a Captive Portal managing the guest SSIDs can present a web page to authenticate guest Wi-Fi users, control usage, and in some cases, collect payment for access.
One way of implementing a Captive Portal is with a dedicated wireless controller. Edimax’ APC500 AP controller is a Captive Portal appliance that can control up to 32 Edimax Pro Access Points (APs). The Edimax APC500 can not only manage Wi-Fi settings on your APs, but it also provides the ability to present a customized Captive Portal for guest Wi-Fi authentication.

Edimax APC500
Let’s look at how easy it is to set up a Captive Portal using the APC500.
Step 1
Start by creating user names and passwords, and then assigning users to groups. Each user group can be assigned a Role Type of Guest Portal User or Front Desk Manager. Guest Portal Users will be able to log in and access the Internet. Front Desk Managers don’t have full administrative access. But they can log into a “front desk” page to create and manage guest Wi-Fi user accounts and generate and print tickets for guest Wi-Fi users, if desired. In the first gallery, I’ve created a Guest Portal user name, Front Desk Manager user name and associated both user names with groups.

Create Guest Internet User
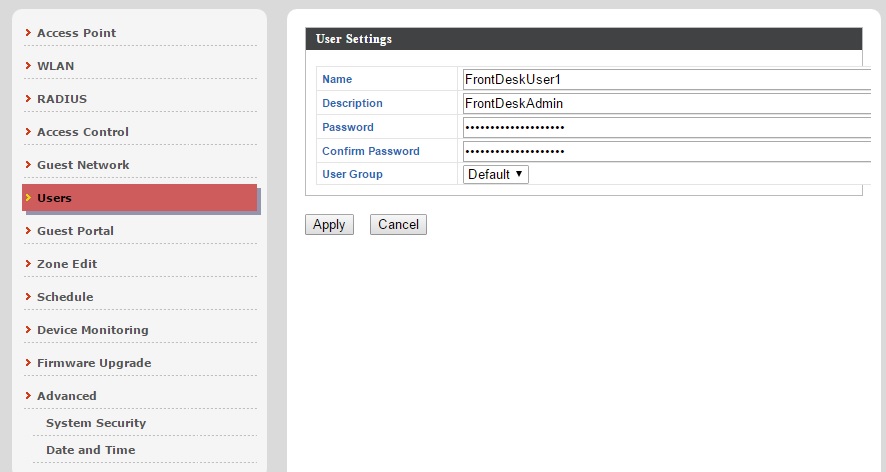
Create Front Desk Admin User
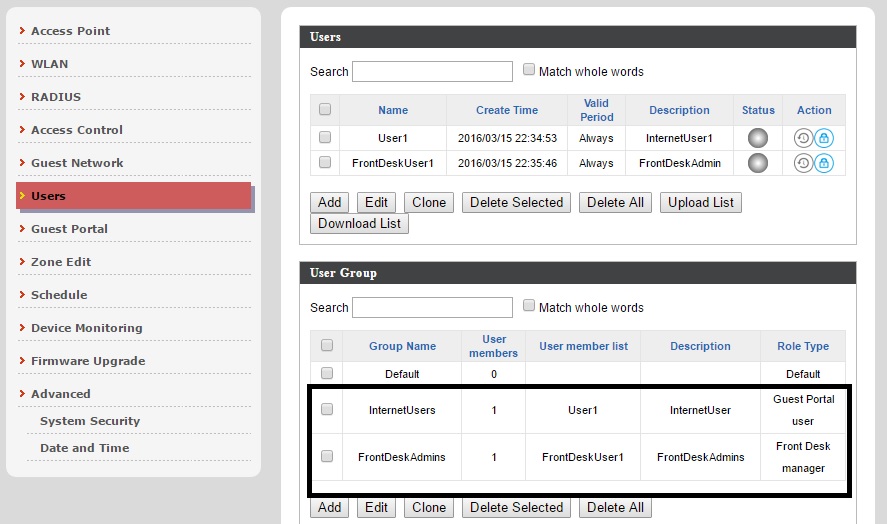
Associate Users with Groups
Step 2
Create your Guest Portal, which is the authentication page your Wi-Fi guests will see when they log in. In this page, you identify (from Step 1) which user group will be able to log into the Guest Portal and use the Internet, and which will be able to log into the Front Desk Manager to manage accounts. In the image below, you can see the settings page for the Guest Portal and the default Guest Portal login screen below it

Edimax APC500
Step 3
Now create your Guest Networks. You can specify the SSID and VLAN, control SSID broadcast, decide whether to isolate clients in the SSID from each other and balance user load. The latter actually means limiting the number of Wi-Fi guest clients per SSID ( max = 50).
Wi-Fi authentication methods (not to be confused with Guest Portal user authentication) include none, WEP, 802.1x, WPA-PSK, and WPA-EAP. WPA types supported are WPA, WPA2, and Mixed. TKIP, AES, and Mixed Encryption is supported.
Additional Wi-Fi authentication can be performed based on MAC addresses defined in the APC500’s local MAC address filter table, MAC addresses authenticated in an external RADIUS server, or passwords authenticated in an external RADIUS server.
As part of your SSID configuration, you’ll configure an Access Policy so your Guest Network directs guest Wi-Fi users to the Guest Portal. The Access Policy can also apply maximum downlink and uplink bandwidth rates (up to 50 Mbps) to the SSID. Other featurres include IP filtering to allow or deny access to up to three different subnets, and group scheduling, which allows Guest Networks to be automatically turned on and off by day of week and time of day.
To complete your configuration, associate your Guest Network with a Guest Network Group. In the third gallery, you can see the Guest Network, Access Policy, Schedule configuration and Guest Network Group configuration pages.
Create Guest Internet User
Create Front Desk Admin User
Associate Users with Groups
Step 4
With guest network configuration complete, you now apply configurations to one or more Access Points managed by the APC500. This is done simply by selecting the desired managed APs and applying the Guest Network Group from Step 3, shown below.

Apply Configs to AP
Voila! Your Captive Portal is up and running. As shown below, you can customize your Guest Portal web page with your own header image and logo, Title Message and your own Guest Network Terms of Use text.

Guest Portal Customization
With the Edimax Captive Portal in place, you’ll have far greater control over guest Wi-Fi users than you would with a simple guest Wi-Fi SSID.
To explore further, check out Edimax’ multi-step guide on how to configure the APC500 Captive Portal.
![]()